2015 BMW Z4 SDRIVE28I side lights
[x] Cancel search: side lightsPage 17 of 289

3Opening and closing front win‐
dows 434Exterior mirrors, folding in and out 525Adjust the exterior mirrors, Automatic Curb
Monitor 526Parking lights 87Low beams 87Automatic headlight con‐
trol 88
Adaptive Light Control 88
High-beam Assistant 897Turn signal 62High-beams, head‐
light flasher 89High-beam Assistant 89Roadside parking lights 89Computer 75Settings and information about
the vehicle 778Instrument cluster 169Buttons on the steering wheelChange the radio station
Select a music track
Leaf through the phone book and
through lists with stored phone
numbersNext entertainment sourceRecirculated air mode 11310Windshield wipers 63Rain sensor 6311Start/stop the engine and switch
the ignition on/off 5712Ignition lock 5713Steering wheel heating 5414Horn, the entire surface15Adjust the steering wheel 5416Cruise control 10517Buttons on the steering wheelTelephone 194VolumeActivate/deactivate the voice acti‐
vation system 2718Releasing the hood 23819Open the trunk lid 38Seite 15CockpitAt a glance15
Online Edition for Part no. 01 40 2 954 104 - II/15
Page 42 of 289

Locking
Press on the surface, arrow 2.
This corresponds to pressing the
but‐
ton.
To save battery power, ensure that the ignition
and all electronic systems and/or power con‐
sumers are switched off before locking the ve‐
hicle.
Window and convertible top operation
With the ignition in the radio ready state or be‐
yond, the windows and the convertible top can
be opened and closed when a remote control
is located inside the vehicle.
Unlocking the trunk lid separately
Press on the top half of the BMW emblem.
This corresponds to pressing the
button.
If a remote control accidentally left in the cargo
area is detected in the locked vehicle, then the
trunk lid opens again. The hazard warning sys‐
tem flashes and, depending on the vehicle
equipment, a signal sounds.
Switching on the radio ready state
Pressing the Start/Stop button switches on the
radio ready state, refer to page 58.
Do not depress the brake or the clutch; other‐
wise, the engine will start.
Starting the engine
The engine can be started or the ignition can
be switched on when a remote control is inside
the vehicle. It is not necessary to insert a re‐
mote control into the ignition lock, refer to
page 57.
Switching off the engine in cars with
Sport automatic transmission
When the engine is switched off, transmission
position P is engaged automatically unless N is
engaged and the remote control is inserted in
the ignition lock.
Driving into an automatic car wash with a
Sport automatic transmission
To make it possible for the vehicle to roll, such
as in an automatic car wash, follow the instruc‐
tions in Car washes, refer to page 257.
Malfunction
The Comfort Access functions can be distur‐
bed by local radio waves, such as by a mobile
phone in the immediate vicinity of the remote
control or when a mobile phone is being
charged in the vehicle.
If this occurs, open or close the vehicle using
the buttons on the remote control or use the
integrated key in the door lock.
To start the engine afterward, insert the re‐
mote control into the ignition switch.
Warning lights The warning light in the instrument
cluster lights up when you attempt to
start the engine: the engine cannot
be started.
The remote control is not inside the vehicle or
is malfunctioning. Take the remote control with
you inside the vehicle or have it checked. If
necessary, insert another remote control into
the ignition switch.
The warning light in the instrument
cluster lights up while the engine is
running: the remote control is no lon‐
ger inside the vehicle.Seite 40ControlsOpening and closing40
Online Edition for Part no. 01 40 2 954 104 - II/15
Page 47 of 289

Folding down the cargo area partition
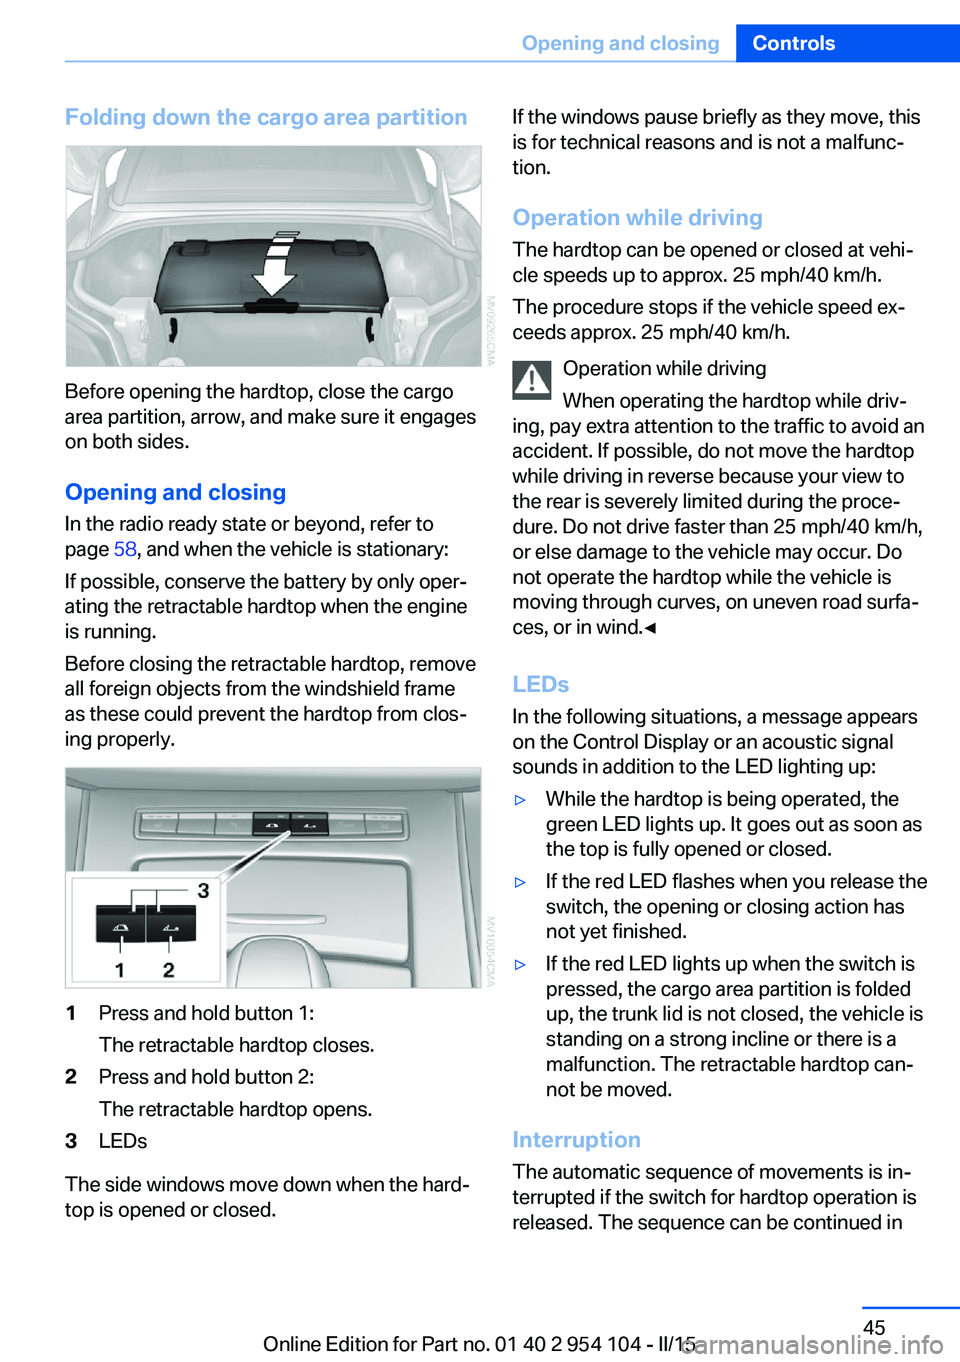
Before opening the hardtop, close the cargo
area partition, arrow, and make sure it engages
on both sides.
Opening and closing In the radio ready state or beyond, refer to
page 58, and when the vehicle is stationary:
If possible, conserve the battery by only oper‐
ating the retractable hardtop when the engine
is running.
Before closing the retractable hardtop, remove
all foreign objects from the windshield frame
as these could prevent the hardtop from clos‐
ing properly.
1Press and hold button 1:
The retractable hardtop closes.2Press and hold button 2:
The retractable hardtop opens.3LEDs
The side windows move down when the hard‐
top is opened or closed.
If the windows pause briefly as they move, this
is for technical reasons and is not a malfunc‐
tion.
Operation while driving
The hardtop can be opened or closed at vehi‐
cle speeds up to approx. 25 mph/40 km/h.
The procedure stops if the vehicle speed ex‐
ceeds approx. 25 mph/40 km/h.
Operation while driving
When operating the hardtop while driv‐
ing, pay extra attention to the traffic to avoid an
accident. If possible, do not move the hardtop
while driving in reverse because your view to
the rear is severely limited during the proce‐
dure. Do not drive faster than 25 mph/40 km/h,
or else damage to the vehicle may occur. Do
not operate the hardtop while the vehicle is
moving through curves, on uneven road surfa‐
ces, or in wind.◀
LEDs
In the following situations, a message appears
on the Control Display or an acoustic signal
sounds in addition to the LED lighting up:▷While the hardtop is being operated, the
green LED lights up. It goes out as soon as
the top is fully opened or closed.▷If the red LED flashes when you release the
switch, the opening or closing action has
not yet finished.▷If the red LED lights up when the switch is
pressed, the cargo area partition is folded
up, the trunk lid is not closed, the vehicle is
standing on a strong incline or there is a
malfunction. The retractable hardtop can‐
not be moved.
Interruption
The automatic sequence of movements is in‐
terrupted if the switch for hardtop operation is
released. The sequence can be continued in
Seite 45Opening and closingControls45
Online Edition for Part no. 01 40 2 954 104 - II/15
Page 61 of 289

Sport automatic transmissionRemote control in the ignition lock or, with
Comfort Access, inside the vehicle, refer to
page 39.1.Depress the brake pedal.2.Press the Start/Stop button.
The starter operates automatically for a certain
time, and stops automatically as soon as the
engine has started.
Engine stop Take the remote control with you
Take the remote control with you when
leaving the vehicle so that children, for exam‐
ple, cannot start the engine or release the
parking brake.◀
Set the parking brake and further secure
the vehicle as required
Set the parking brake firmly when parking; oth‐
erwise, the vehicle could roll. On steep upward
and downward inclines, further secure the ve‐
hicle, for example, by turning the steering
wheel in the direction of the curb.◀
Manual transmission
1.With the vehicle at a standstill, press the
Start/Stop button.2.Shift into first gear or reverse.3.Set the parking brake.4.Remove the remote control from the igni‐
tion lock, refer to page 57.
Sport automatic transmission
1.With the vehicle at a standstill, press the
Start/Stop button.2.Set the parking brake.3.Remove the remote control from the igni‐
tion lock, refer to page 57.Automatic Engine Start/Stop
Function
The concept The Automatic Engine Start/Stop Function
helps save fuel and lower emissions. The sys‐
tem automatically switches off the engine dur‐
ing a stop, e.g., in traffic congestion or at traffic
lights. The ignition remains switched on. The
engine starts again automatically when the
clutch is pressed.
Automatic operation
The automatic engine Start/Stop function is
operational after each engine start. It is acti‐
vated whenever you drive forward faster than
3 mph/5 km/h.
Automatic engine stop The engine is switched off automatically dur‐
ing a stop under the following conditions:▷Neutral gear is engaged and the clutch
pedal is not depressed.▷The driver's safety belt is fastened or the
driver's door is closed.
When the engine is switched off, the air vol‐
ume of the air conditioner or automatic climate
control is reduced.
Indicator light in the instrument
cluster
The indicator lamp lights up when the
Auto Start/Stop function is ready to
start the engine automatically.
The indicator lamp lights up if the re‐
quirements for an automatic engine
stop are not fulfilled.
Note The engine is not switched off automatically in
the following situations:
▷External temperature too low.Seite 59DrivingControls59
Online Edition for Part no. 01 40 2 954 104 - II/15
Page 86 of 289

6.Create the settings.7.Confirm.
The entered date is stored.
Automatic Service Request
Data regarding the maintenance status or le‐
gally mandated inspections of the vehicle are
automatically transmitted to your service cen‐
ter before a service due date.
You can check when your service center was
notified.
1."Vehicle Info"2."Vehicle status"3.Open "Options".4."Last Service Request"
Check Control
The concept The Check Control monitors vehicle functions
and alerts you to any malfunctions in the sys‐
tems monitored.
Such Check Control messages involve indica‐
tor or warning lamps in the instrument cluster
and, in some circumstances, an acoustic signal
and text messages at the bottom of the Con‐
trol Display.
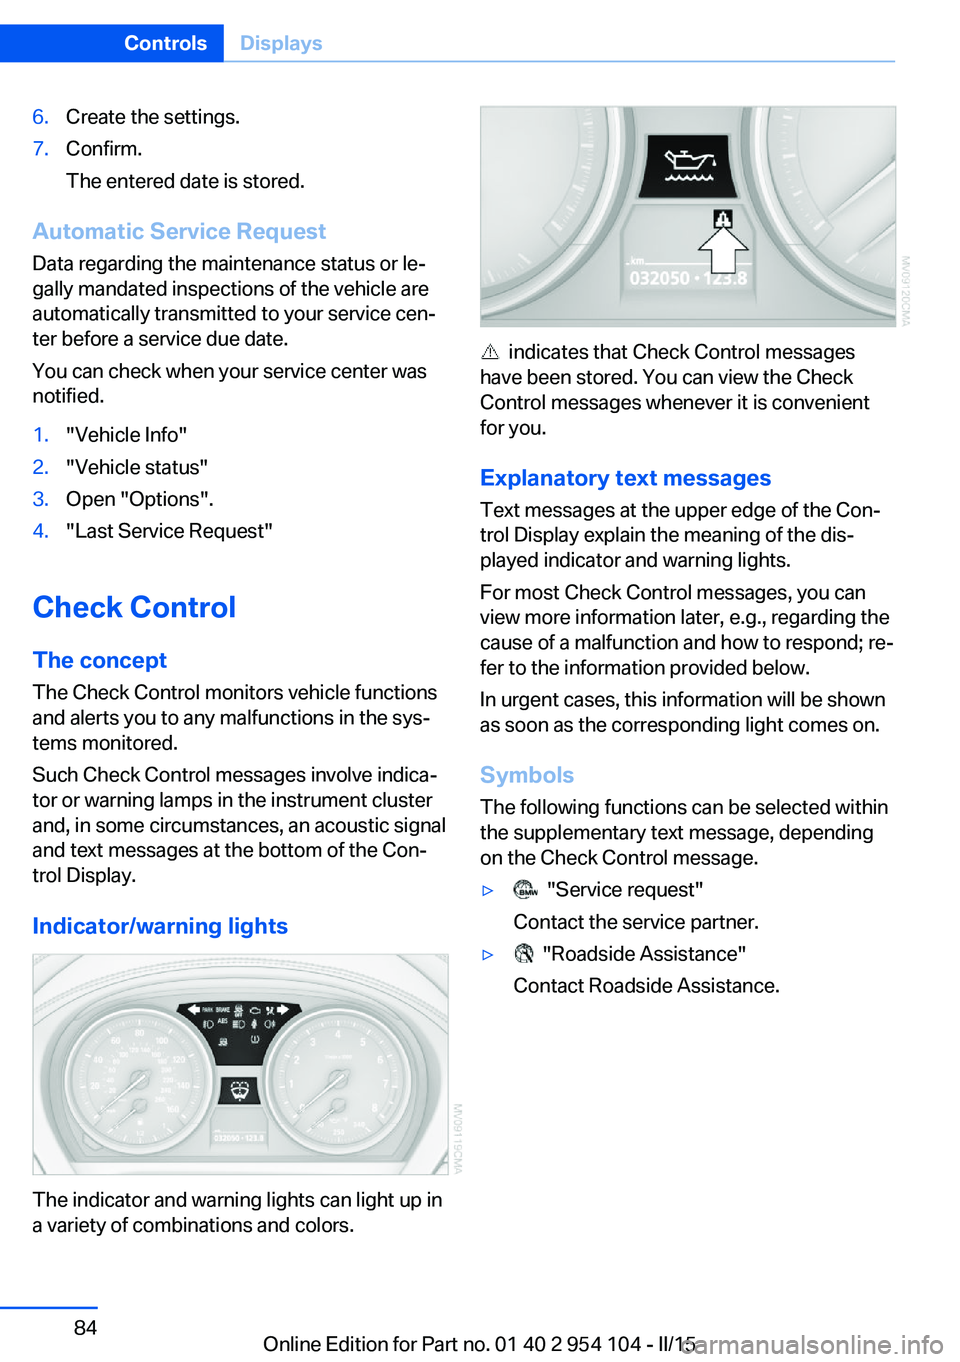
Indicator/warning lights
The indicator and warning lights can light up in
a variety of combinations and colors.
indicates that Check Control messages
have been stored. You can view the Check
Control messages whenever it is convenient
for you.
Explanatory text messages Text messages at the upper edge of the Con‐
trol Display explain the meaning of the dis‐
played indicator and warning lights.
For most Check Control messages, you can
view more information later, e.g., regarding the
cause of a malfunction and how to respond; re‐
fer to the information provided below.
In urgent cases, this information will be shown
as soon as the corresponding light comes on.
Symbols The following functions can be selected within
the supplementary text message, depending
on the Check Control message.
▷ "Service request"
Contact the service partner.▷ "Roadside Assistance"
Contact Roadside Assistance.Seite 84ControlsDisplays84
Online Edition for Part no. 01 40 2 954 104 - II/15
Page 89 of 289

LampsVehicle equipment
This chapter describes all series equipment as
well as country-specific and special equipment
offered for this model series. Therefore, it also
describes equipment that may not be found in
your vehicle, for instance due to the selected
special equipment or the country version. This
also applies to safety-related functions and
systems.
When using the features and systems descri‐
bed here, adhere to local regulations.
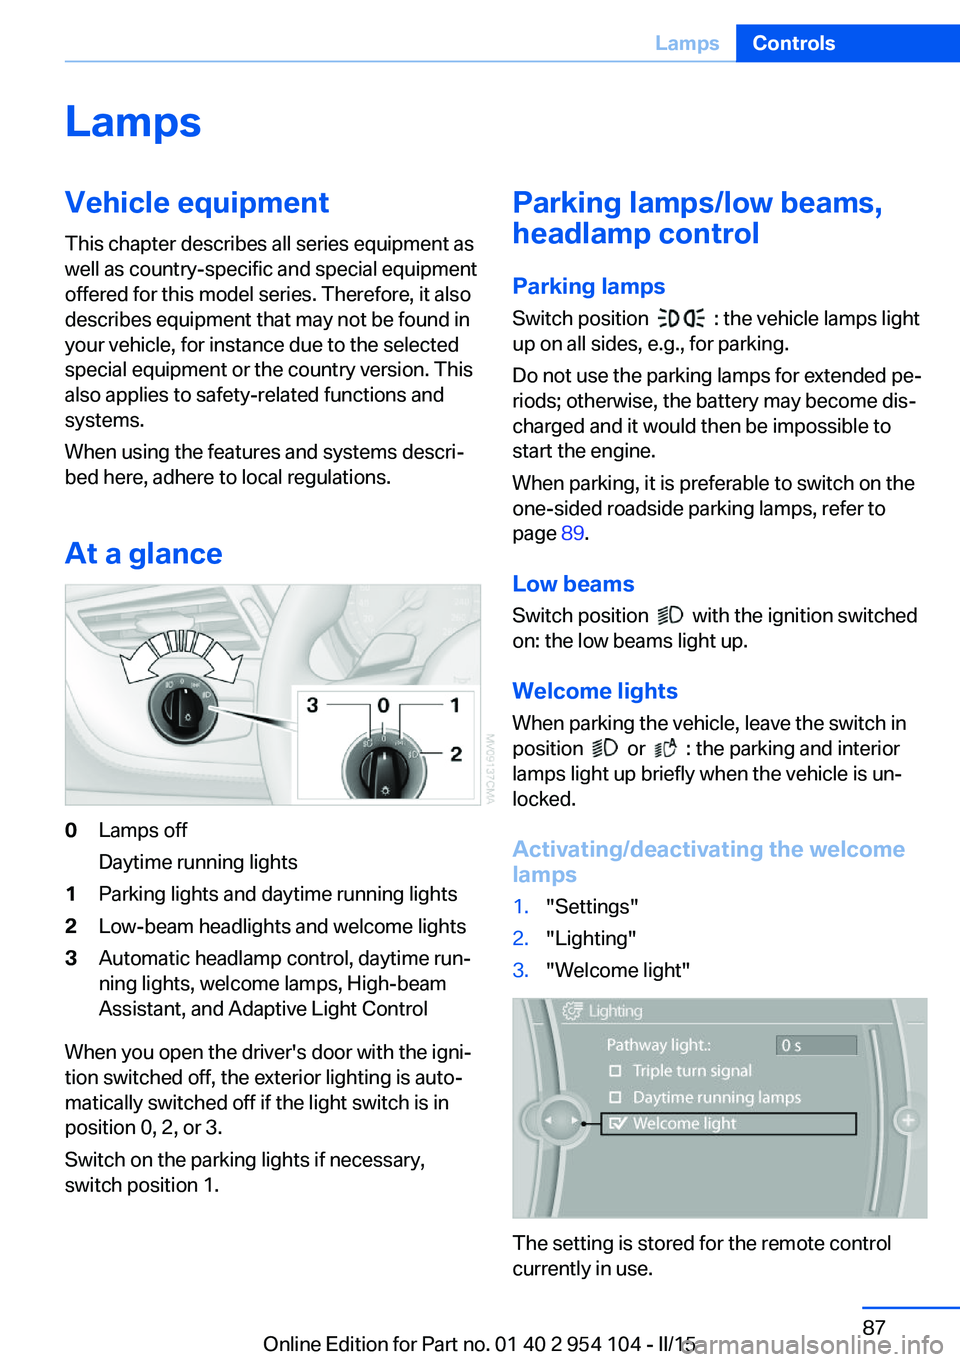
At a glance0Lamps off
Daytime running lights1Parking lights and daytime running lights2Low-beam headlights and welcome lights3Automatic headlamp control, daytime run‐
ning lights, welcome lamps, High-beam
Assistant, and Adaptive Light Control
When you open the driver's door with the igni‐
tion switched off, the exterior lighting is auto‐
matically switched off if the light switch is in
position 0, 2, or 3.
Switch on the parking lights if necessary,
switch position 1.
Parking lamps/low beams,
headlamp control
Parking lamps Switch position
: the vehicle lamps light
up on all sides, e.g., for parking.
Do not use the parking lamps for extended pe‐
riods; otherwise, the battery may become dis‐
charged and it would then be impossible to
start the engine.
When parking, it is preferable to switch on the
one-sided roadside parking lamps, refer to
page 89.
Low beams Switch position
with the ignition switched
on: the low beams light up.
Welcome lights When parking the vehicle, leave the switch in
position
or : the parking and interior
lamps light up briefly when the vehicle is un‐
locked.
Activating/deactivating the welcome
lamps
1."Settings"2."Lighting"3."Welcome light"
The setting is stored for the remote control
currently in use.
Seite 87LampsControls87
Online Edition for Part no. 01 40 2 954 104 - II/15
Page 91 of 289

To avoid blinding oncoming traffic, the Adap‐
tive Light Control does not swivel to the driv‐
er's side when the vehicle is at a standstill.
Malfunction The warning lamp lights up. A mes‐
sage appears on the Control Display.
Adaptive Light Control is malfunc‐
tioning or has failed. Have the system checked
as soon as possible.
High-beams/roadside
parking lights1High-beams2Headlamp flasher3Roadside parking lamps
Left and right roadside parking lamps
There is an additional option of switching on
the lamps on the side of the car facing the road
when parked.
Switching on After parking the vehicle, press the lever up or
down beyond the pressure point for a longer
period, arrow 3.
The roadside parking lights drain the battery.
Therefore, do not leave them on for unduly
long periods of time; otherwise, the battery
might not have enough power to start the en‐
gine.
Switching off
Press the lever in the opposite direction to the
pressure point, arrow 3.
High-beam Assistant The concept
When the lights are switched on, this system
automatically switches the high-beams on and
off. The procedure is controlled by a sensor on
the front of the interior rearview mirror. The as‐
sistant ensures that the high-beams are
switched on whenever the traffic situation al‐
lows. The driver can intervene at any time and
switch the high-beams on and off as usual.
Activating the High-beam Assistant1.Turn the light switch to position.2.With the low beams switched on, briefly
push the turn indicator lever in the direc‐
tion of the high-beam.
The indicator lamp in the instrument
cluster lights up.
When the lights are switched on, the
high-beams are switched on and off automati‐
cally.
The system responds to light from oncoming
traffic and traffic driving ahead of you, and to
adequate illumination, e.g., in towns and cities.
Switching the high-beams on and off
manually
▷High-beams on, arrow 1.Seite 89LampsControls89
Online Edition for Part no. 01 40 2 954 104 - II/15
Page 93 of 289

3.Push button 1 up or down to select the de‐
sired brightness level.4.Press button 2.
The display again shows the external tem‐
perature and the time.
Interior lights
The interior lamps, footwell lamps, entry
lamps, cargo area lamp, and courtesy lamps
are controlled automatically.
The LEDs for the courtesy lamps are set in the
door handles and illuminate the ground in front
of the doors.
To avoid draining the battery, all lights inside
the car are switched off about 8 minutes after
the ignition is switched off, Start/Stop button,
refer to page 57.
Switching interior lights on/off
manually
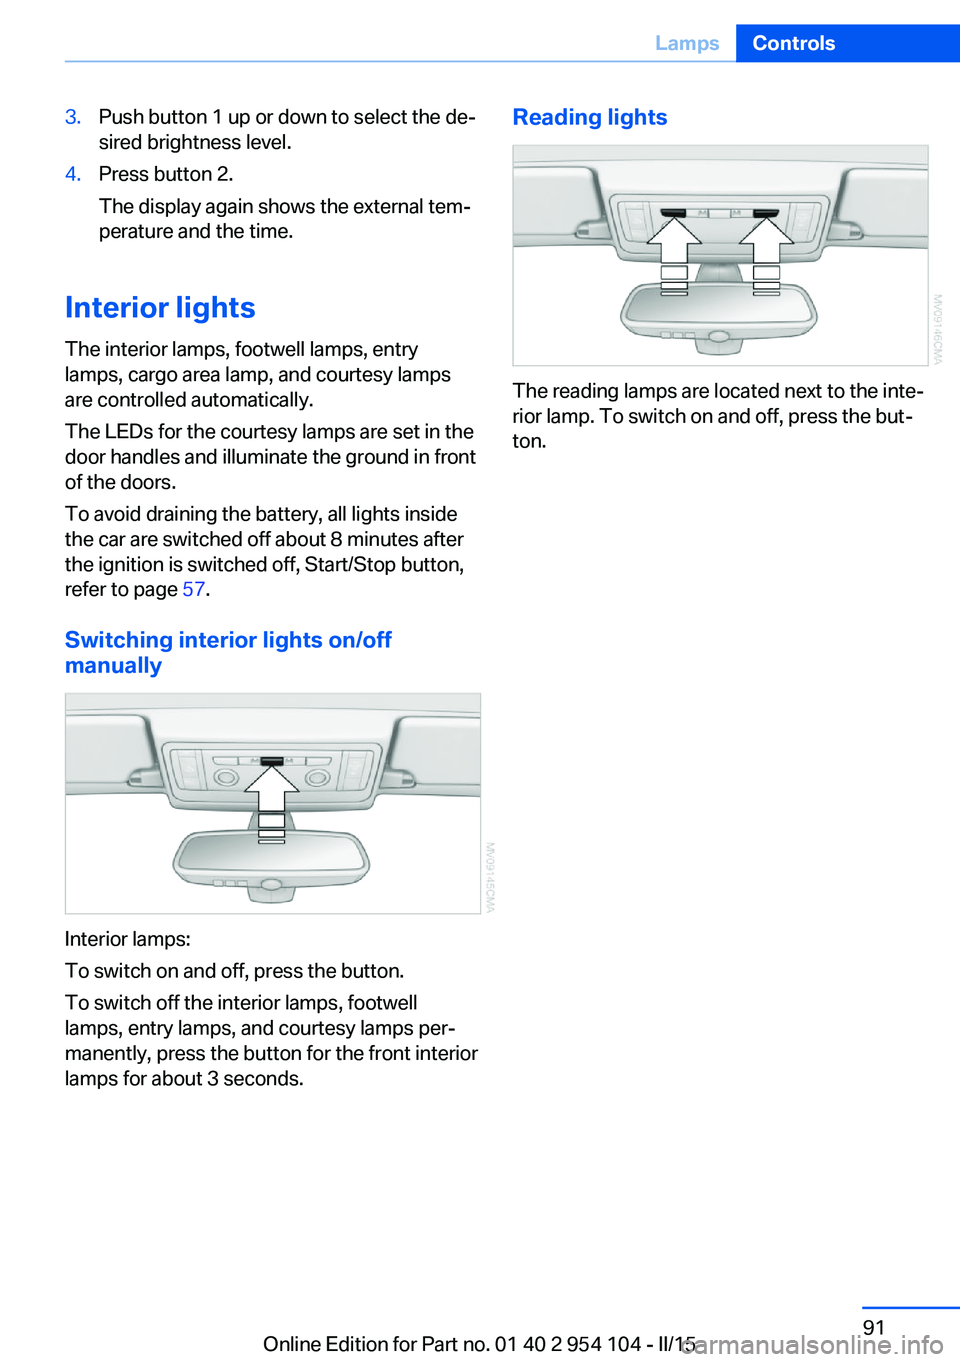
Interior lamps:
To switch on and off, press the button.
To switch off the interior lamps, footwell
lamps, entry lamps, and courtesy lamps per‐
manently, press the button for the front interior
lamps for about 3 seconds.
Reading lights
The reading lamps are located next to the inte‐
rior lamp. To switch on and off, press the but‐
ton.
Seite 91LampsControls91
Online Edition for Part no. 01 40 2 954 104 - II/15