2015 BMW 750LI SEDAN warning
[x] Cancel search: warningPage 199 of 314
Display
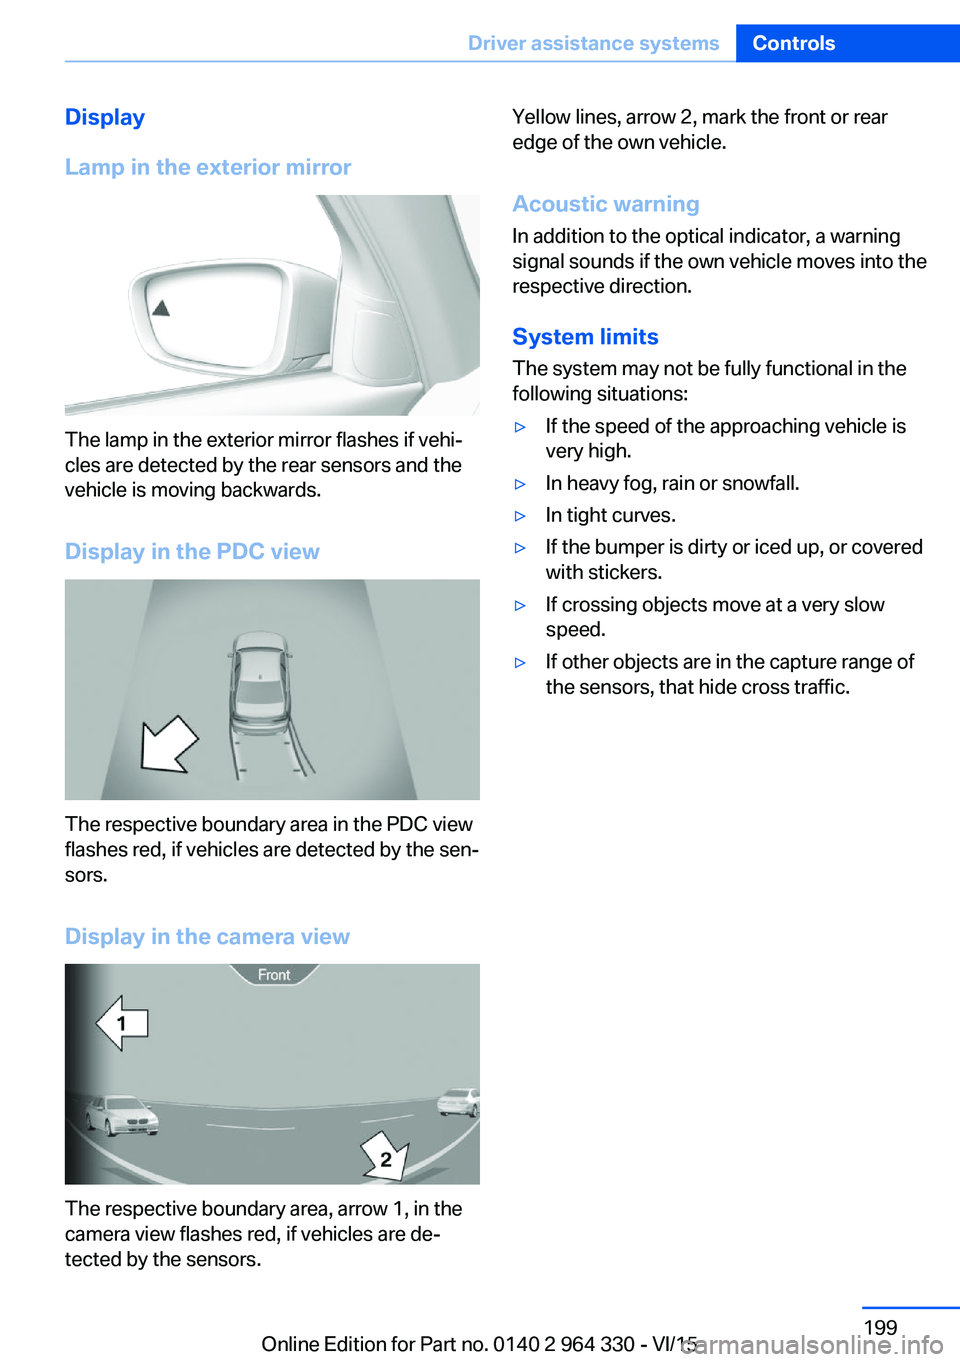
Lamp in the exterior mirror
The lamp in the exterior mirror flashes if vehi‐
cles are detected by the rear sensors and the
vehicle is moving backwards.
Display in the PDC view
The respective boundary area in the PDC view
flashes red, if vehicles are detected by the sen‐
sors.
Display in the camera view
The respective boundary area, arrow 1, in the
camera view flashes red, if vehicles are de‐
tected by the sensors.
Yellow lines, arrow 2, mark the front or rear
edge of the own vehicle.
Acoustic warning
In addition to the optical indicator, a warning
signal sounds if the own vehicle moves into the
respective direction.
System limits
The system may not be fully functional in the
following situations:▷If the speed of the approaching vehicle is
very high.▷In heavy fog, rain or snowfall.▷In tight curves.▷If the bumper is dirty or iced up, or covered
with stickers.▷If crossing objects move at a very slow
speed.▷If other objects are in the capture range of
the sensors, that hide cross traffic.Seite 199Driver assistance systemsControls199
Online Edition for Part no. 0140 2 964 330 - VI/15
Page 200 of 314
Driving comfortVehicle features and options
This chapter describes all standard, country-
specific and optional features offered with the
series. It also describes features that are not
necessarily available in your car, e. g., due to
the selected options or country versions. This
also applies to safety-related functions and
systems. The respectively applicable country
provisions must be observed when using the
respective features and systems.
Air suspension The conceptAir suspension ensures best possible driving
comfort under all load conditions. Due to a var‐
iable adjustment of the front and rear axles, the
damping is adjusted to the vehicle condition.
General information In the case of an uneven road surface, the ve‐
hicle level can be elevated to increase ground
clearance.▷Normal level, for normal road surface.▷Raised level, when the road surface is poor.
In the SPORT driving mode, refer to page 110,
or at higher speeds, the vehicle lowers itself.
Information WARNING
With lowering the vehicle, body parts can
be jammed. There is risk of injuries. When low‐
ering the vehicle, make sure that the areas of
movement under the vehicle and under the
wheel housing are free.◀
Overview
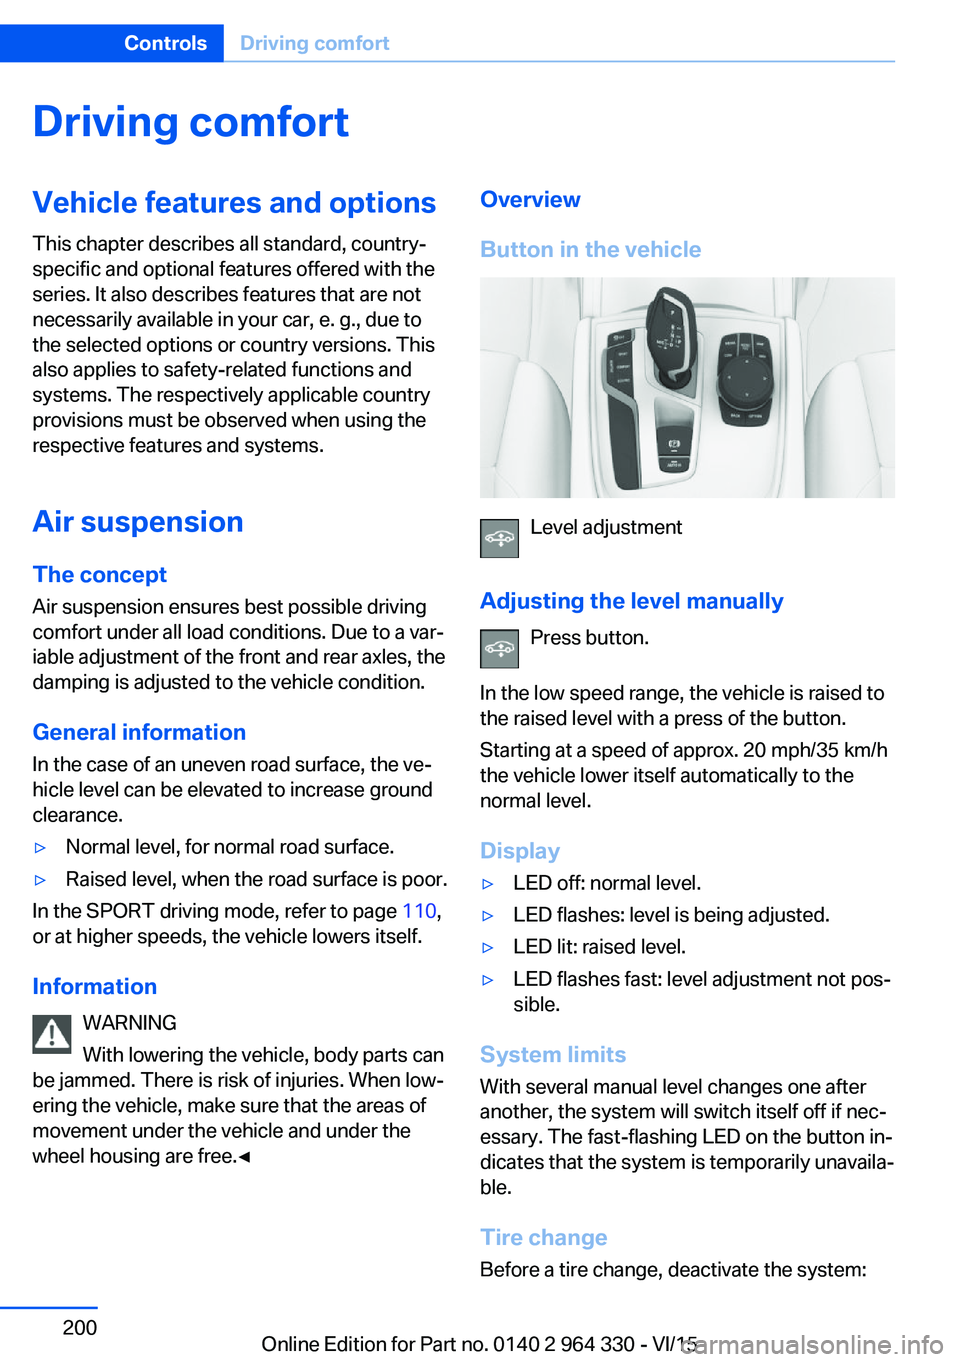
Button in the vehicle
Level adjustment
Adjusting the level manually Press button.
In the low speed range, the vehicle is raised to
the raised level with a press of the button.
Starting at a speed of approx. 20 mph/35 km/h
the vehicle lower itself automatically to the
normal level.
Display
▷LED off: normal level.▷LED flashes: level is being adjusted.▷LED lit: raised level.▷LED flashes fast: level adjustment not pos‐
sible.
System limits
With several manual level changes one after
another, the system will switch itself off if nec‐
essary. The fast-flashing LED on the button in‐
dicates that the system is temporarily unavaila‐
ble.
Tire change Before a tire change, deactivate the system:
Seite 200ControlsDriving comfort200
Online Edition for Part no. 0140 2 964 330 - VI/15
Page 210 of 314
tion. Do not switch on parked-car heating in
enclosed areas.◀
WARNING
During parked-car heating operation,
high temperatures can occur underneath the
body, e.g. caused by the exhaust gas system. If
combustible materials, such as leaves or grass,
come in contact with hot parts of the exhaust
gas system, these materials can ignite. There
is risk of fire. Make sure that no combustible
materials can come in contact with hot vehicle
parts during parked-car heating operation.◀
At external temperatures below 32 ℉/0 ℃, wa‐
ter vapor occurs that emerges from below the
vehicle.
Functional requirements▷The vehicle is in the idle or operating readi‐
ness state.▷Battery is sufficiently charged.▷Parked-car heating: the fuel tank is filled to
above the reserve range.
Open the vents to allow air to flow out.
Switching on/off directly
There are different ways to switch the system
on or off.
It switches of automatically after some time.
The system continues to run for some time af‐
ter being switched off.
Via the automatic climate controlbutton
When the vehicle is in standby state, parked-
car ventilation can be switched on or off via the
automatic climate control buttons.
Press any button except:
▷Rear window defroster.▷Left side of Air volume button.▷Seat heating.▷Seat ventilation.▷SYNC program.
Via the iDrive
Parked-car ventilation can be switched on or
off via iDrive.
1."My Vehicle"2."Vehicle settings"3."Climate functions"4."Comfort ventilation" or "Comfort heating/
ventilation"5."Activate now"
symbol on the automatic climate control
signals to switched on system.
Via BMW display key Parked-car ventilation and parked-car heating
can be switched on or off via the BMW display
key.
Switching on directly
1.Switch on the display of the BMW display
key.2."Climate control setting"3. , Tap symbol.4."Activate now"5."Start"
Switching off directly
1.Switch on the display of the BMW display
key.2."Climate control setting"3. , Tap symbol.4."Stop"
Departure time
Different departure times can be adjusted to
ensure a comfortable interior temperature in
the vehicle at the time of departure.
▷One-time departure time: the time can be
set.Seite 210ControlsClimate control210
Online Edition for Part no. 0140 2 964 330 - VI/15
Page 215 of 314
Interior equipmentVehicle features and optionsThis chapter describes all standard, country-
specific and optional features offered with the
series. It also describes features that are not
necessarily available in your car, e. g., due to
the selected options or country versions. This
also applies to safety-related functions and
systems. The respectively applicable country
provisions must be observed when using the
respective features and systems.
Universal Integrated Remote Control
The concept The universal garage door opener can operate
up to 3 functions of remote-controlled sys‐
tems such as garage door drives or lighting
systems. The universal garage door opener re‐
places up to 3 different hand-held transmitters.
To operate the remote control, the buttons on
the interior rearview mirror must be program‐
med with the desired functions. The hand-held
transmitter for the particular system is required
in order to program the remote control.
Before selling the vehicle, delete the stored
functions for the sake of security.
Information WARNING
Body parts can be jammed when operat‐
ing remote-controlled systems, e.g. the garage
door, using the universal garage door opener.
There is risk of injuries or risk of property dam‐
age. Make sure that the area of movement of
the respective system is clear during program‐
ming and operation. Also follow the safety in‐
structions of the hand-held transmitter.◀Compatibility
If this symbol is printed on the packag‐
ing or in the instructions of the system
to be controlled, the system is gener‐
ally compatible with the universal garage door opener.
If you have any questions, please contact:▷A dealer’s service center or another quali‐
fied service center or repair shop.▷www.homelink.com on the Internet.
HomeLink is a registered trademark of Gentex
Corporation.
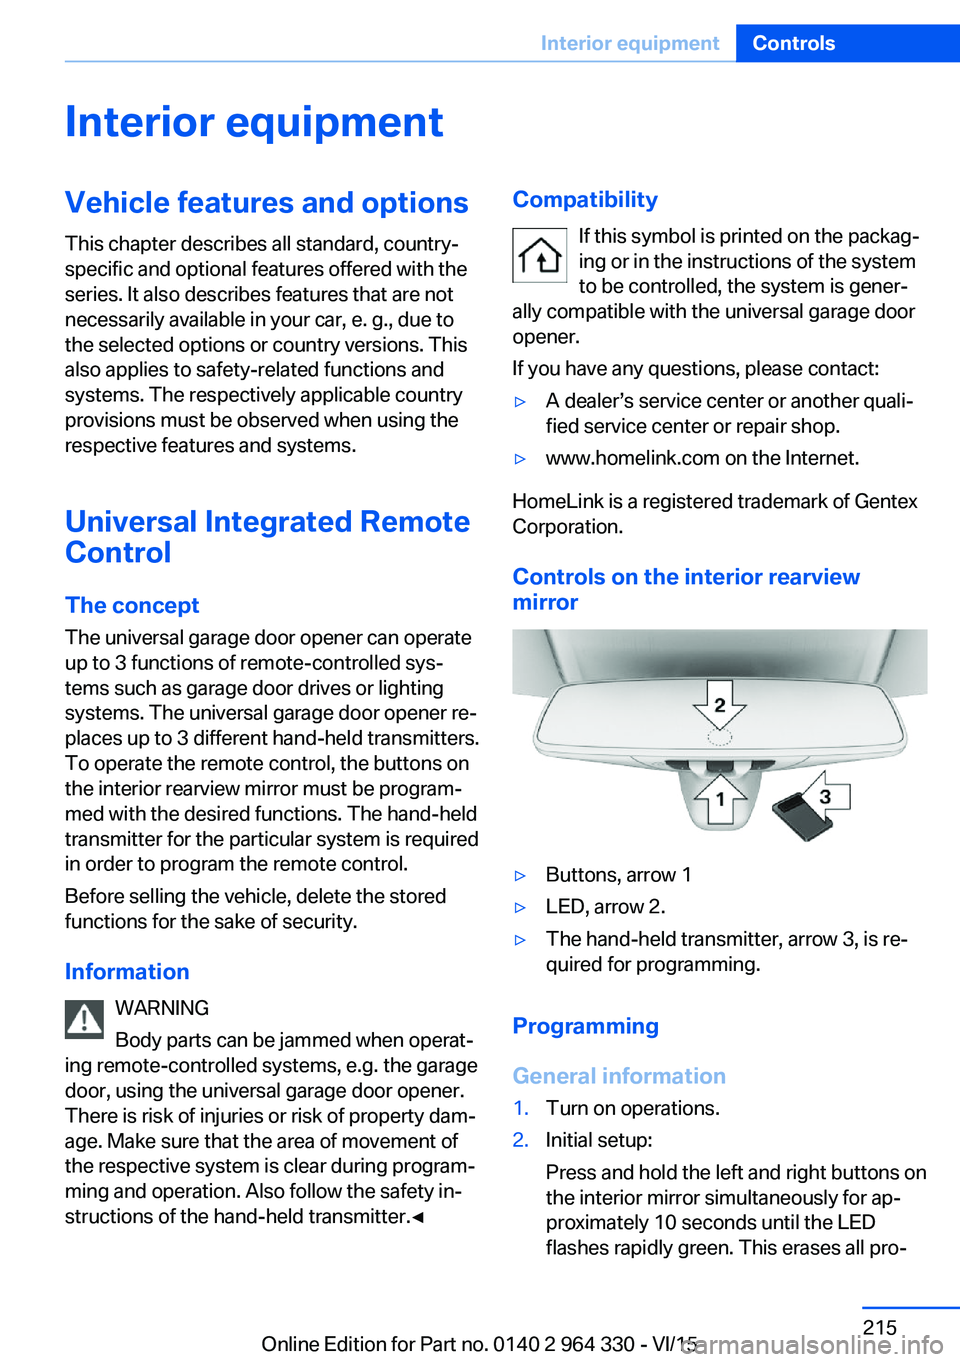
Controls on the interior rearview
mirror
▷Buttons, arrow 1▷LED, arrow 2.▷The hand-held transmitter, arrow 3, is re‐
quired for programming.
Programming
General information
1.Turn on operations.2.Initial setup:
Press and hold the left and right buttons on
the interior mirror simultaneously for ap‐
proximately 10 seconds until the LED
flashes rapidly green. This erases all pro‐Seite 215Interior equipmentControls215
Online Edition for Part no. 0140 2 964 330 - VI/15
Page 217 of 314
4.Likewise, press and hold the button of the
desired function on the hand-held trans‐
mitter.5.Release both buttons as soon as the inte‐
rior mirror LED flashes more rapidly or
lights up continuously. The LED flashing
more rapidly or being continuously light up
indicates that the button on the interior
mirror has been programmed. The system
can then be controlled by the button on the
interior rearview mirror.
If the LED does not flash faster after at
least 60 seconds, change the distance and
repeat the step. Several more attempts at
different distances may be necessary. Wait
at least 15 seconds between attempts.
Canada: if programming with the hand-
held transmitter was interrupted, hold
down the interior rearview mirror button
and repeatedly press and release the
hand-held transmitter button for 2 sec‐
onds.
Controls
WARNING
Body parts can be jammed when operat‐
ing remote-controlled systems, e.g. the garage
door, using the universal garage door opener. There is risk of injuries or risk of property dam‐
age. Make sure that the area of movement of
the respective system is clear during program‐
ming and operation. Also follow the safety in‐
structions of the hand-held transmitter.◀
The system, such as the garage door, can be
operated using the button on the interior mirror
while the drive or operating readiness is
switched on. To do this, hold down the button
within receiving range of the system until the
function is activated. The interior rearview mir‐
ror LED stays lit while the wireless signal is be‐
ing transmitted.
Deleting stored functions
Press and hold the left and right button on the
interior mirror simultaneously for approxi‐ mately 10 seconds until the LED flashes rap‐
idly green. All stored functions are deleted.
The functions cannot be deleted individually.
Sun visor Glare shield
Fold the sun visor down or up.
Glare shield from the side
Folding out1.Fold the sun visor down.2.Unhook it from the holder and swing it to
the side.3.Move it back to the desired position.
Folding up
Proceed in the reverse order to close the sun
visor.
Vanity mirror A vanity mirror is located in the sun visor be‐
hind a cover. When the cover is opened, the
mirror lighting switches on.
Ashtray
Front
Opening
1.Push the cover forward until it engages be‐
hind the cup holders. Push the cover for‐Seite 217Interior equipmentControls217
Online Edition for Part no. 0140 2 964 330 - VI/15
Page 218 of 314
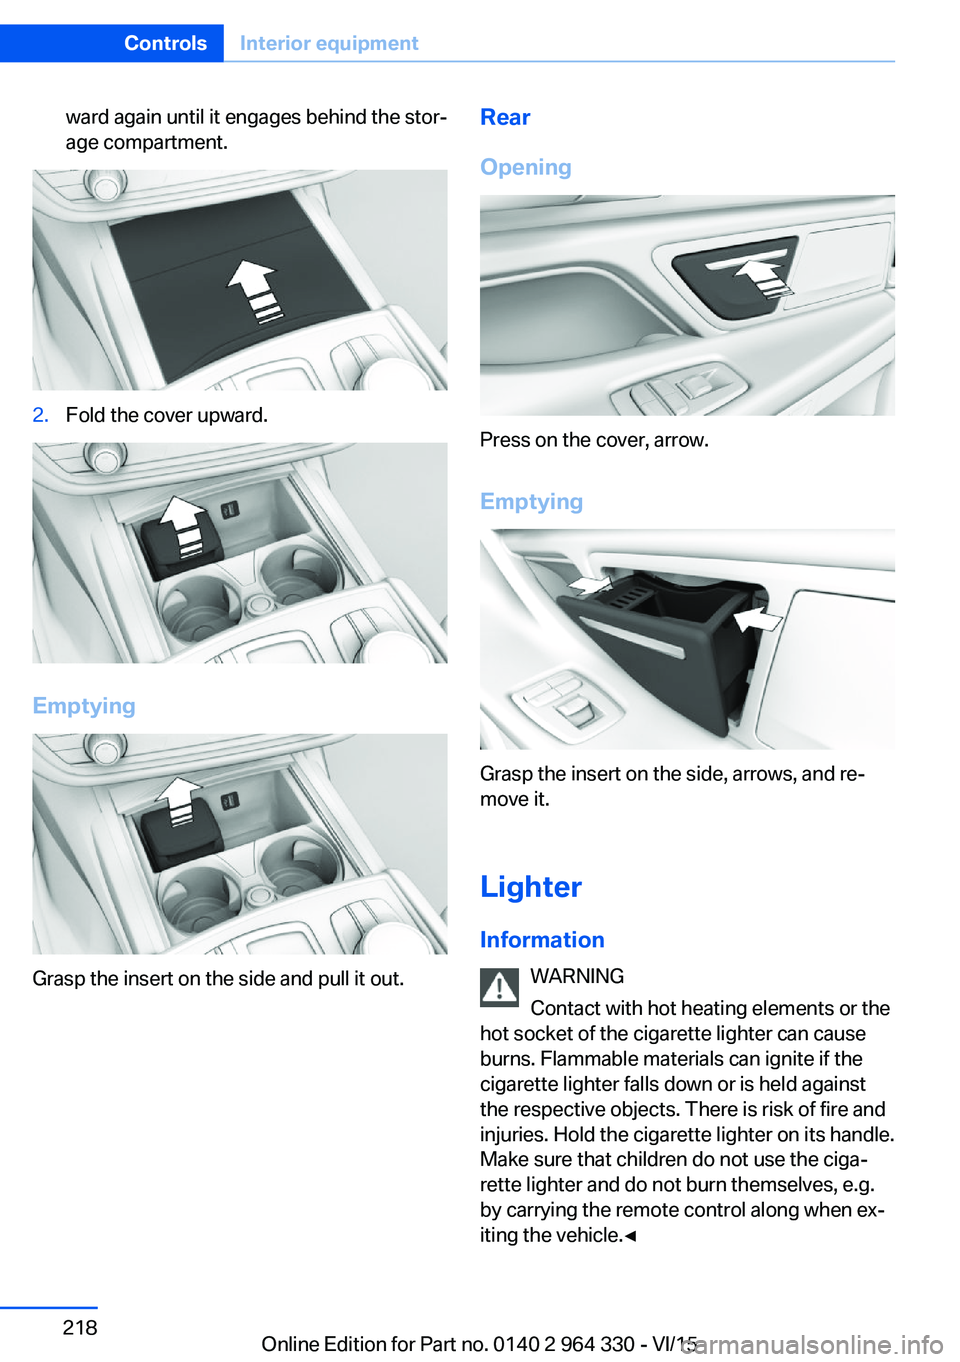
ward again until it engages behind the stor‐
age compartment.2.Fold the cover upward.
Emptying
Grasp the insert on the side and pull it out.
Rear
Opening
Press on the cover, arrow.
Emptying
Grasp the insert on the side, arrows, and re‐
move it.
Lighter Information WARNING
Contact with hot heating elements or the
hot socket of the cigarette lighter can cause
burns. Flammable materials can ignite if the
cigarette lighter falls down or is held against
the respective objects. There is risk of fire and
injuries. Hold the cigarette lighter on its handle.
Make sure that children do not use the ciga‐
rette lighter and do not burn themselves, e.g.
by carrying the remote control along when ex‐
iting the vehicle.◀
Seite 218ControlsInterior equipment218
Online Edition for Part no. 0140 2 964 330 - VI/15
Page 223 of 314
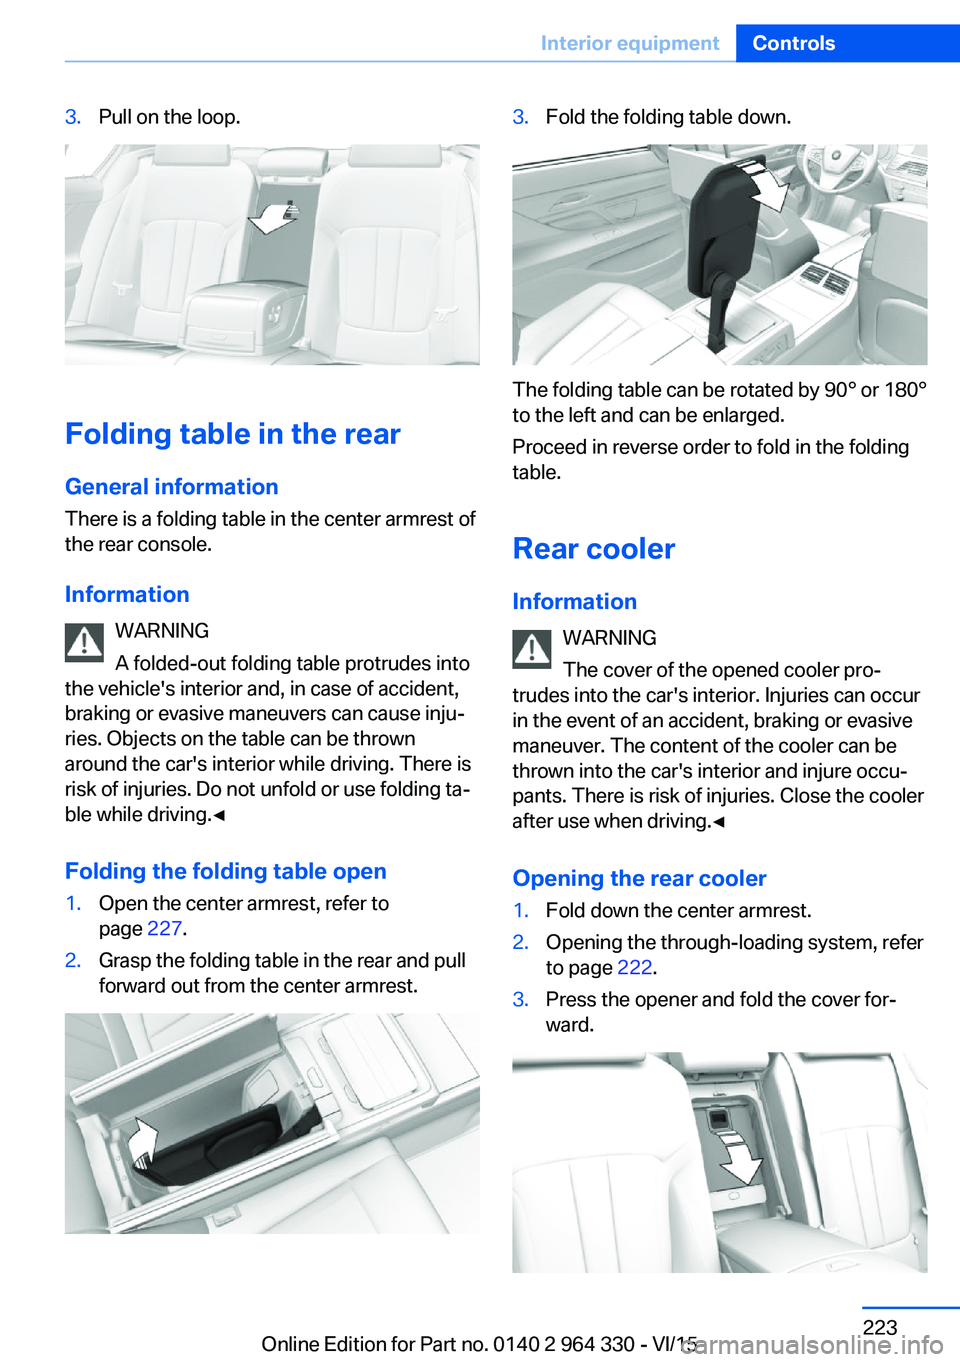
3.Pull on the loop.
Folding table in the rearGeneral information
There is a folding table in the center armrest of
the rear console.
Information WARNING
A folded-out folding table protrudes into
the vehicle's interior and, in case of accident,
braking or evasive maneuvers can cause inju‐
ries. Objects on the table can be thrown
around the car's interior while driving. There is
risk of injuries. Do not unfold or use folding ta‐
ble while driving.◀
Folding the folding table open
1.Open the center armrest, refer to
page 227.2.Grasp the folding table in the rear and pull
forward out from the center armrest.3.Fold the folding table down.
The folding table can be rotated by 90° or 180°
to the left and can be enlarged.
Proceed in reverse order to fold in the folding
table.
Rear cooler Information WARNING
The cover of the opened cooler pro‐
trudes into the car's interior. Injuries can occur
in the event of an accident, braking or evasive
maneuver. The content of the cooler can be
thrown into the car's interior and injure occu‐
pants. There is risk of injuries. Close the cooler
after use when driving.◀
Opening the rear cooler
1.Fold down the center armrest.2.Opening the through-loading system, refer
to page 222.3.Press the opener and fold the cover for‐
ward.Seite 223Interior equipmentControls223
Online Edition for Part no. 0140 2 964 330 - VI/15
Page 225 of 314
Storage compartmentsVehicle features and optionsThis chapter describes all standard, country-
specific and optional features offered with the
series. It also describes features that are not
necessarily available in your car, e. g., due to
the selected options or country versions. This
also applies to safety-related functions and
systems. The respectively applicable country
provisions must be observed when using the
respective features and systems.
Information WARNING
Loose objects in the car's interior can be
thrown into the car's interior while driving, e.g.
in the event of an accident or during braking
and evasive maneuvers. There is risk of inju‐
ries. Secure loose objects in the car's inte‐
rior.◀
CAUTION
Anti-slip pads such as anti-slip mats can
damage the dashboard. There is risk of prop‐
erty damage. Do not use anti-slip pads.◀
Storage compartments The following storage compartments are avail‐
able in the vehicle interior:▷Glove compartment on the front passenger
side, refer to page 225.▷Glove compartment on the driver's side,
refer to page 226.▷Compartments in the doors, refer to
page 226.▷Storage compartment on the center con‐
sole, refer to page 226.▷Center armrest, refer to page 227.▷Storage compartment in the rear, refer to
page 227.▷Storage compartment in the rear center
console, refer to page 226.▷Pockets on the backrests of the front
seats.
Glove compartment
Front passenger side
Information WARNING
Folded open, the glove compartment
protrudes in the car's interior. Objects in the glove compartment can be thrown into the
car's interior while driving, e.g. in the event of
an accident or during braking and evasive ma‐
neuvers. There is risk of injuries. Always close
the glove compartment immediately after us‐ ing it.◀
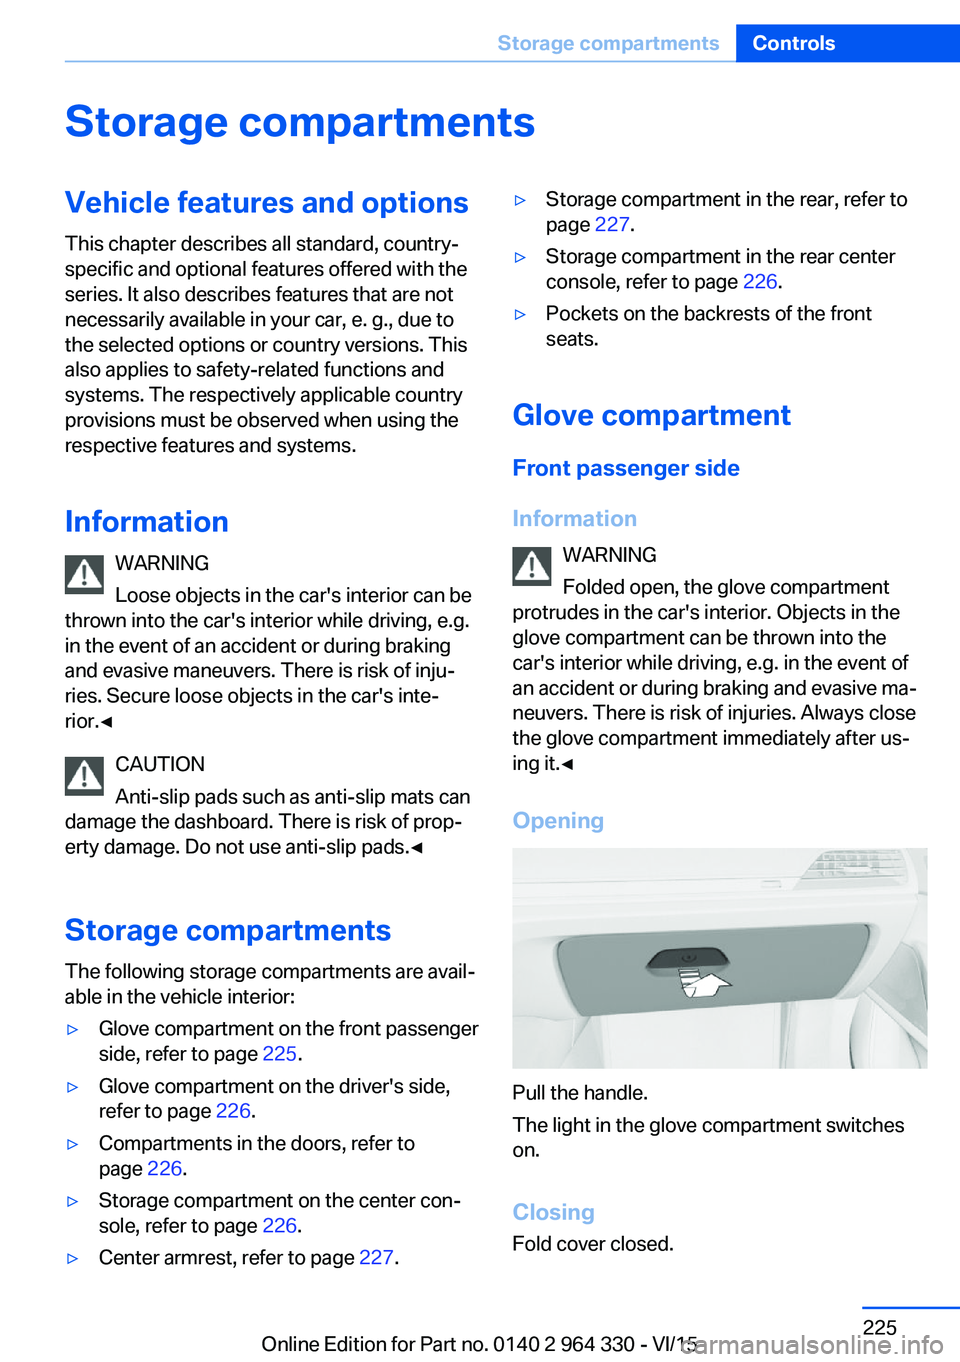
Opening
Pull the handle.
The light in the glove compartment switches
on.
ClosingFold cover closed.
Seite 225Storage compartmentsControls225
Online Edition for Part no. 0140 2 964 330 - VI/15