2015 AUDI TT ROADSTER brake
[x] Cancel search: brakePage 91 of 244
Phase 1:
p rogramming th e overh ead keypad
1. Make sure yo ur vehicle is wit hin ope rating
range of the remote contro lled garage
door opener .
2. Set the parking brake
q A in General in
formation on page 88 .
3. Tur n the ignition on . Do not sta rt the en
g ine!
4. P ress and hold the two o utside Home Link
b uttons
(D and @for app rox ima tely 20
seconds until indicator light @
q fig . 97
begins to flash. Then release both but
tons . Do not hold the buttons for longer
than 30 seconds.
.,. This procedure only needs to be performed
once . It erases the factory-set defau lt codes
and does not have to be repeated to pro
gram add it ional remote controls .
S. Pr ess and hold t he Home link button (D ,
® or@ unt il the indicato r ligh t@
starts flashing
slowly . Release the bu tton.
.,. The system will remain in programming
mode for 5 minutes . Co to the front of the
vehicle and proceed with phase 2 .
Phase 2:
programming the bumper mounted trans
mitter
6. Hold the original remote control at a dis
tance between 0 -6 in . (0 -15 cm) from the
bumper below the appropriate head light
for your vehicle
q fig . 98 (use th e sho rtest
d istance possible) .
7. A im t he remote con trol jus t be low the
driver side head ligh t.
8 . Pr ess and hold the activa tion button on
the remote cont ro l.
.,. May be different in Canada.
If so, press and
re -press (cycle) the act ivat ion button on your
remote control every two seconds.
9 . The emergency flashers will flash
three
time s
(after about 15 -60 seconds) when
the prog ramm ing is successful. Release
the butto n on the re m ote control.
.,. To program more devi ces, repeat steps 4 to
9.
Homelink 89
10. Press and ho ld the t rained Home link b ut
ton and observe t he indicator light @
qfig. 97.
.,. If the ind icator light is solid/contin uous,
programm ing is comp lete and your device
should activate w hen you press and release
t he t ra ined Homel ink button .
.,. If the ind icator light blinks rapidly fo r 2 sec
onds and is t hen a so lid/continuous light,
p roceed w it h phase 3 to progr am a roll ing
code device.
Phase 3: rolling code programming
.,. A second pe rson o n a ladde r who can safely
reach th e garage door opene r motor is rec
ommended .
11. Loc ate t he "lea rn" bu tton on t he g arage
doo r opener motor ( re fer to the operating
inst ruct ions for the opener, as t he loca
t ion of t his button may va ry by man ufac
turer) .
12 . Press and release the learn b utton on the
garage door opener motor .
.,. Note : once the b utton is p ressed, there are
30 seconds in w hich to initiate the next
step.
13 . On t he Home link keypad ins ide t he ve hi
cl e, firmly press and hold t he Home link
bu tton prev iously progr ammed in phases
1 and 2 fo r two seconds and release . R e
peat this seque nce
twice.
.,. Some vehicles may require the press/ho ld/
re lease sequence up to three t imes to com
plete t he trai ning process .
.,. Homelink should now activate your rolling
code equipped device .
If the S minute time limit is exceeded , the
emergency flashers will flash one time to in
dicate that the p rocess has been te rm ina ted .
In this case, repeat steps 4 t hrough 9.
If the emergency flashers do not flash
three
times (afte r about lS -60 seconds) , program
ming was not successful. In this case, repeat
steps 4 through 9 .
Remote contro l units for garage door openers
in Canada are set to stop transmitting radio
fr eque ncy signa ls afte r two seconds . This t ime
Ill-
Page 98 of 244
96 Driving Safel y
Pedal area
Pedals
The pedals must al ways be free to move and
must n ever be interfered with by a floor mat
or any other object.
Make sure that all pedals move freely without
interference and that nothing prevents them
from returning to the ir original positions .
Only use floor mats that leave the peda l area
free and can be secured with floor mat fasten
ers .
If a brake circuit fails, increased brake peda l
travel is required to bring the vehicle to a full
stop.
A WARNING
Pedals that cannot move freely ca n cause
loss of vehicle control and increase the r isk
of serious injury.
- Never place any objects in the driver 's
footwell. An object could get into the
peda l area and interfere w it h pedal func
ti on. In case of s udden braki ng or an ac
cident, you would not be ab le to bra ke or
accelera te!
- Alw ays make su re th at noth ing c an f all
or move into the dr iver's footwe ll.
Floor mats on the driver side
Always use floor mats that can be securely
at tached to the floor mat fasteners and do
no t interfere with the free movement of the
pedals.
.,. Make su re tha t the floor mats are properly
sec ured and cannot move and inte rfere w ith
the pedals ~.&_ .
Use only floor mats that leave t he pedal a rea
unobstr ucted and that a re firmly secured so
that they cannot s lip out of posi tion. Yo u can
obtain suitable floor mats from your author
ized A udi Dealer.
Fl oor mat f asteners a re i nstalled in you r A udi . Floor mats used in yo
ur vehicle must be at
tached to these fasteners . Properly securing
t h e floor mats will prevent them from sliding
into positions that could interfere with the
pedals or impair safe operat ion of your vehicle
i n other ways.
A WARNING ,-
Pedals tha t ca nnot move free ly can result
i n a loss of vehicle control and inc rease the
r isk of ser ious perso na l inju ry.
- Always make sure that floor mats are
p roperly secu red.
- Never p lace or install floor mats o r other
f loor cove rings in th e vehicle that cannot
be pro pe rly secured in p la ce to prevent
them from slipping and interfer ing wi th
the peda ls o r th e ab ility to cont ro l t he
vehi cle.
- Never p lace or ins tall floor mats or othe r
floor coverings on top o f al ready instal
led floo r mats . Additiona l floor mats and
other coverings will red uce the size of
the peda l area and interfere w ith the
pedals.
- Always properly reinsta ll and secure floor
mats that have been taken out for clean
ing.
- Always make sure that objects cannot
fall into the dr iver footwell while the ve
h icle is moving . Objects can become
trapped under the brake pedal and acce l
erator pedal causing a loss of vehicle
control.
Stowing luggage
Loading the luggage compartment
All luggage and o ther objects mus t be prop
erly stowed and secured in the luggage com
partment.
L oose items in the lugg age compa rtment c an
shift s udden ly, changing vehicle handling
characteristics. Loose items can a lso increase
the risk of serious persona l injury in a sudden
vehicle maneuver or in a co llision.
Page 143 of 244
Intelligent technology Notice about data
recorded by vehicle
control modules
Your vehicle is not equipped with an Event Da
ta Recorder (EDR), installed by some manu
facturers for the express purpose of capturing
data for retrieval after an accident or crash
event. EDR's are sometimes called "crash re
corders".
Some state laws restrict the retr ieval or down
loading of data stored by EDR's that were in
stalled in a vehicle for the express purpose of
retrieving data after an accident or crash
event without the owner's consent.
Although your vehicle is not equipped with an
EDR, it is equipped with a number of electron
ic control modules for various vehicle systems
such as, for examp le, engine function, emis
sion control, as well as for the airbags and
safety belts.
These electronic control modules also record
vehicle-related data during norma l vehicle op
eration for diagnostic and repair purposes.
The recording capacity of the electronic con
trol modules is limited to data (no sound is re
corded) and only a small amount of data is ac
tually recorded over a very limited period of
time and stored when a system fault or other
condition is sensed by a control unit. Some of
the data then stored may relate to vehicle
speed, direction, braking as we ll as restraint
system use and performance in the event of a
crash or other condition. Stored data can only be read and downloaded with special equip
ment.
Electronic Stabilization
Control (ESC)
Description
ESC helps to improve road holding and vehicle
dynamics to help reduce the probability of
skidding and loss of veh icle control. It works
only when the engine is running. ESC detects
Intelligent technology 141
certain difficult driving situations, including
when the vehicle is beginning to spin (yaw)
out of control and helps you to get the veh icle
back under control by se lectively braking the
wheels, and/or reducing engine power and
providing steering ass istance to help hold the
vehicle on the driver's intended course. The in
dicator light
B.J in the instrument cluster
blinks when ESC is taking action to help you
control the vehicle.
ESC has limitations .
It is important to remem
ber that ESC cannot overcome the laws of
physics.
It will not always be able to help out
under all conditions you may come up against.
For example, ESC may not always be able to
help you master situations where there is a
sudden change in the coefficient of friction of
the road surface. When there is a section of dry road that is suddenly covered with water,
slush or snow, ESC cannot perform the same
way it would on the dry surface. If the vehicle
hydroplanes (rides on a cushion of water in
stead of the road surface), ESC will not be
able to help you steer the vehicle because con
tact with the pavement has been interrupted
and the vehicle cannot be braked or steered .
During fast cornering, particularly on winding
roads, ESC cannot always deal as effectively
with difficu lt driving situations as at lower
speeds.
Always adjust your speed and driving style to
road, traffic §&and weather conditions. ESC
cannot override the vehicle's physical limits,
increase the available traction, or keep a vehi
cle on the road if road departure is a result of
driver inattention. Instead, ESC improves the
poss ibility of keeping the vehicle under con
trol and on the road dur ing extreme maneu
vers by usin g the driver's steering inputs to
help keep the vehicle going in the intended di
rection. If you are traveling at a speed that
causes you to run off the road before ESC can
provide any assistance, you may not experi
ence the benefits of ESC.
ESC includes and/or works together with the
anti- lock brake system (ABS), brake assist sys -
tem and anti-slip regu lation (ASR). ESC is
Ill>
•
•
Page 144 of 244
142 Intelligent technology
switched on all the time. In certain situations
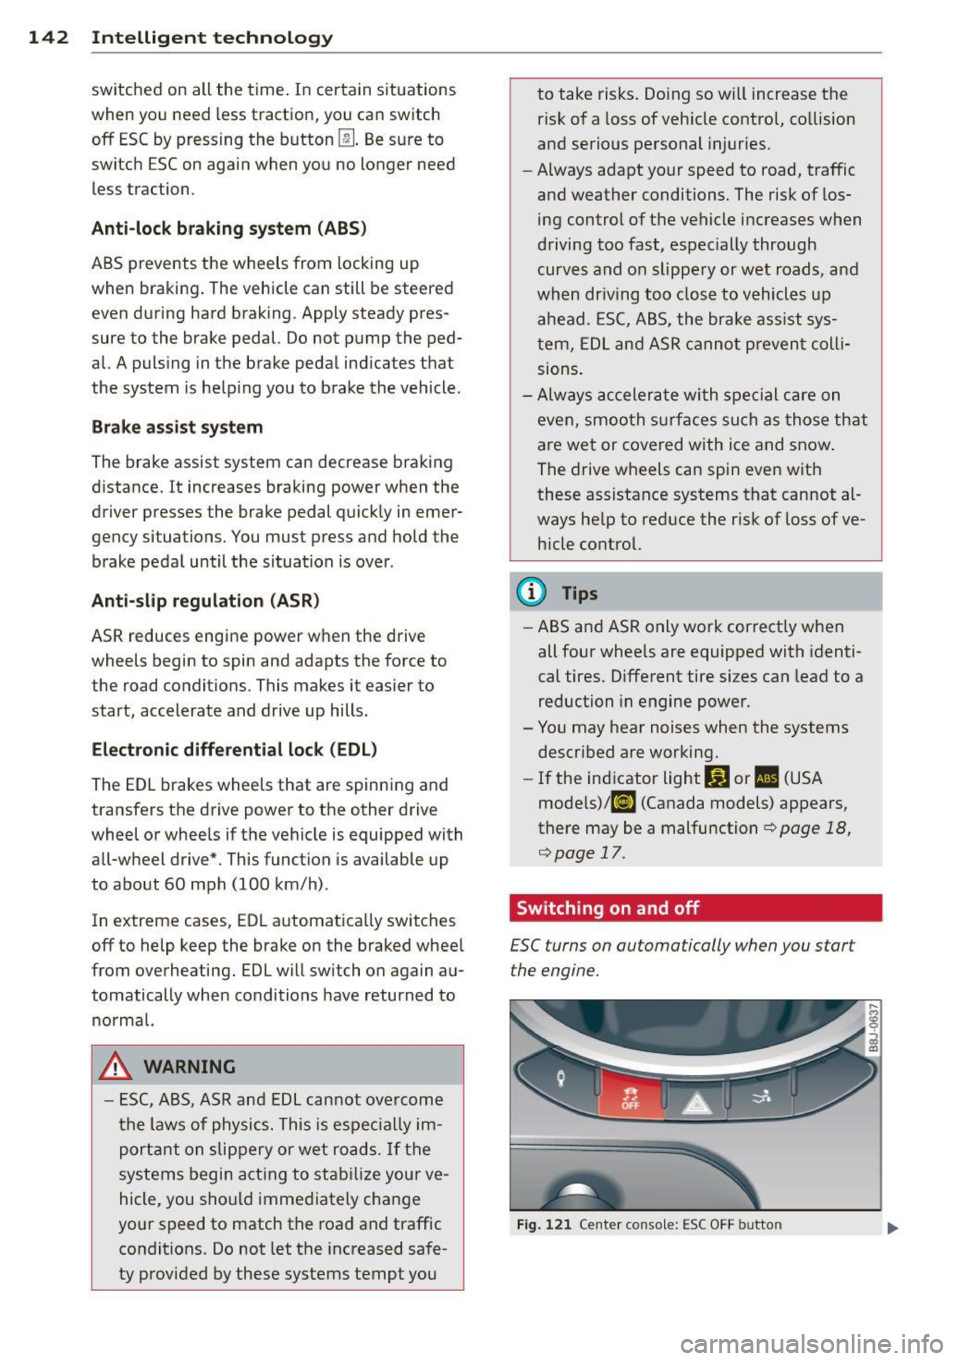
when you need less traction, you can switch
off ESC by pressing the button
l!l . Be sure to
switch ESC on again when you no longer need
less traction.
Anti -toc k brak ing system (ABS)
ABS prevents the wheels from lock ing up
when braking . The vehicle can still be steered
even during hard brak ing . Apply steady pres
sure to the brake pedal. Do not pump the ped
al. A puls ing in the brake pedal ind icates that
the system is he lp ing you to brake the vehicle .
Brake assist sy stem
The brake assist system can decrease braking
d istance. It increases braking power when the
driver presse s the brake pedal quickly in emer
gency si tuations. You must press and hold the
brake peda l until the situation is over .
Anti-slip regulation (ASR)
ASR reduces engine power when the drive
wheels begin to spin and adapts the force to the road conditions . This makes it easier to
start, accelerate and drive up hills.
E lectronic differential lock (EDL )
The ED L brakes wheels that are spinning and
transfers the drive power to the other drive
wheel or whee ls if the vehicle is equipped with
all-wheel drive*. This function is available up
to about 60 mph (100 km/h) .
In extreme cases, EDL a utomatica lly switches
off to help keep the brake on the braked whee l
from overheating. EDL will switch on aga in au
tomatically when conditions have returned to normal.
A WARNING
- ESC, ABS, ASR and ED L can not ove rcome
t h e laws of phy sics. This is espe cial ly im
por tant on slip pery or wet ro ads .
If th e
sys tems begin a ct in g to stab ilize your ve
hicle, you shou ld imme diately change
yo ur speed to match the road and traffic
condit ions. Do not let the inc reased safe
ty provided by these systems tempt you to take risks. Do
ing so w ill increase the
risk of a loss of veh icle control, co llision
and serious pe rsonal injuries .
- Always adapt your speed to road, traffic
and weather conditions. The risk of los
ing control of t he vehicle increases when
driving too fast, espec ially through
curves and on slippe ry or wet roads, and
wh en dr iv ing too clos e to vehicl es u p
ahead. ESC, A BS, the brake ass ist sys
tem, ED L and ASR cannot p reven t coll i
si ons .
- Always acceler ate wi th sp ecial c are on
even, smoo th s urfaces such as those th at
are wet or covered with ice and snow .
The drive wheels can spin even with
these assistance systems that cannot al ways he lp to reduce the risk of loss of ve
h icle co ntrol.
(D Tips
- ABS an d ASR only wo rk correct ly when
all four whee ls are equipped with identi
cal tires . D ifferent tire si zes can lead to a
reduction in engine powe r.
- Yo u may hear noises when the systems
descr ibed are working.
- If the ind icator light Ii) or II (USA
mode ls)/ Ei] (Canada models) appears,
there may be a malfunction
¢ page 18,
¢ page 17.
Switching on and off
£SC turns on automatically when you start
the engine.
Fig . 12 1 Ce nte r conso le: ESC OFF b utto n
Page 146 of 244

144 Intelligent technology
-Never push the ve hicle or app ly force to
the rea r spo ile r - i t co uld be damaged .
- To prevent damage to the rear spoiler do
not lean o r place a nyth ing o n it.
- Only ope rate the rear spoi ler manually
when the rear lid is closed and t he rear
spo ile r moving parts are not blocked.
Otherwise, damage could occur.
C lean the spoi le r compartment every 2 to
3 months . The spoiler compartment must
always be free of ice, snow, leaves or other
debris.
Braking
General information
What affects braking efficiency?
Operating conditions and d riving habit s
The brakes on today's automob iles are st ill
subject to wea r, depend ing largely on operat
i ng cond itions and dr iv ing habits
c:> & . On
ve hicles that a re e ithe r dr iven mostly in stop
and-go city traffic o r a re driven ha rd , the
b rake pads should be checked by yo ur auth or
iz ed A udi dealer more often th an specifie d in
the
Warranty & Maintenance booklet . Fail ure
to have your b ra ke pads inspected can res ult
in red uced b rake performance.
O n steep slopes, yo u sh ou ld use t he b ra ki ng
effect of the engine . This way, yo u preven t un
necessa ry wear on the brake system . If you
must use yo ur brakes, do not ho ld the bra kes
down continuously . P u mp the brakes at inter
va ls.
N oises may occur w hen braking depending on
the speed, bra king force and outside condi
tions s uch as temperature and h umidity.
Moisture or road salt
Unde r cert a in co ndi tions, for examp le, w hen
d riving through wate r or ve ry heavy rain , or
even after washing yo ur vehicle , the braking effect can be
reduced due to mois ture (or in
freez ing cond itions ice) on the brake pads. A
f ew cautio us brake applications s hou ld dry off
the brake pads or remove any ice coatings.
T he effec tiveness of the brakes can be red uce d
whe n the vehicle is d riven on a sa lt -covered
road and the b rakes are not used . Likewise,
yo u clean off acc umulated salt coat ing from
brake d iscs and pads with a few cautio us ap
plicat ions o f th e b rake
c:> & .
Corrosion
The re may be a tendency for dirt to build up
on the brake pads and corros ion to form on
t h e d iscs if the car is not driven regu larly or
o n ly for short trips w ith litt le use of the
brakes .
If the brakes are not used frequently, or if cor
ros ion has formed on the discs, it is adv isable
to clean off t he pads a nd d iscs by braking
firmly a few times from a moderately h igh
s p eed
c:> & .
Faults in the brake system
If you shou ld notice a sudden increase i n
brake pedal trave l, then one of the two brake
c ircuits may have fa iled
c:> & .
Low brake fluid level
Malfunctions ca n occ ur in the bra ke system if
t h e b rake fluid level is too low. The brake flu id
level is monitored electronica lly.
Brake booster
T he br ake boos ter inc reases the pressure tha t
yo u genera te with the b ra ke peda l. It works
o nl y when t he engine is runnin g
.c:> .&
Brake lining wear status
Br ake lining wear may be che cked by visual in
spe ct io n of th e condition o f the br ake pa ds
t h ro ugh the open ing s in the wheel. If neces
sa ry, the w heel may be removed fo r thi s i n
spect ion
c:> page 208, What should I be
aware of when changing a tire?.
Page 147 of 244

A WARNING
-You should perform brak ing maneuvers
for the purpose of cleaning the brake
system only if road cond it ions permit .
Other road users must not be put at r isk -
yo u may cause an acc ident!
- Before descending a steep grade, reduce
speed and shift transm iss ion into a lowe r
gear or lowe r driving range. Do not ride
the brakes or hold the pedal down too
long or too often . This cou ld cause the
brakes to get hot and diminish braking
efficiency.
- Do not "ride the b rakes" by resting your
foot on the pedal when yo u do not intend
to brake . Th is may cause the brakes to
overheat, premature wear and increased
stopp ing distance.
- Under certain climat ic and operating
condit ions such as passing throug h wa
ter, driving in heavy rai n or after wash ing
the vehicle, the effect iveness of the
brakes can be reduced. In winter, ice can
accumulate on the brake pads, lini ngs,
discs and d rums. Carefully apply brakes
f or a test . B rakes wi ll dry and ice coat
ings wi ll be cleaned
off after a few ca re
ful brake applications.
- Driv ing for an ex tended pe riod of time on
salt -covered roa ds without using your
brakes can also affect braking efficiency.
Clean
off accumulated salt coating from
brake discs and pads with a few cautious
brake applicat ions.
- If you damage the front spoiler, or if you install a different spoiler, be sure the air
flow to the front brakes is not obstruct
ed . Otherwise the brake system could
overheat reducing the eff ectiveness of
the ent ire brake system.
- Failure of one bra ke c ircuit will impair
the brak ing capability resulting in an in
cr eased stopp ing distan ce. Avoid dr iv ing
the ve hicle and have it towed to the near
est Aud i dea le r or q ualified workshop .
- Never le t the vehicle ro ll to a stop w ith
the engine shu t off.
Int ellig ent technolog y 145
-If the brake booster is not working, the
brake peda l must be pressed considera
bly harder to make up for the lack of
booster assistance.
Electro-mechanical
power assist
The ele ctro-mechanical power assist helps
the driver when steering .
The degree of power assist is electronically
matched to veh icle speed.
The powe r steering system assists the driver
so that he can steer the vehicle with reduced
physical effort.
Power steer ing will not work if the engine is
off . As a result, the steering wheel will be hard
to turn .
A WARNING
If the system develops a problem, you
must seek qualified professiona l assis
tance.
(D Note
-
If there is an electronic malfunction, ser
votronic
will still function like a conven
tiona l powe r steering system, providing a
constant steering support force tha t is no
l onger proportionate to the vehicle speed.
This is most noticeable when t urning the
steering wheel at low speeds (for example
when parking), - more effort w ill be re
quired than usual.
- Be aware of the different than usual
steering response and adjust your steer
ing force accordingly.
- Have the problem checked and set right
by an authori zed Aud i dea ler as soon as
possible.
- If a steering malfunction occurs, th is is
signa led w ith the
ls4 or .• indicator
lights and a warn ing tone, see. •
•
Page 151 of 244
Driving and
environment
The first 1
1000
miles
(11500 km) and
afterwards
New engine
The engine needs to be run-in during the first
1,000 miles (1 ,500 km) .
For the first 600 mile s (1,000
kilometre s):
.,. Do not use full throttle .
.,. Do not drive at engine speeds that are more
than 2/3 of the max imimum permitted
RPM .
.,. Avoid high engine speeds.
From 600 to 1,000 miles (1 ,000 to
1,500 kilometres):
.. Speeds can gradually be increased to the
maximum pe rm iss ib le road or eng ine speed .
During and after break-in period
.. Do not rev the engine up to high speeds
when it is cold . T hi s applies whether the
transmission is in N (Neutral) o r in gear.
After the break- in period
.. Do not exceed max imum eng ine speed un
der any circumstances .
.. Upshift into the next hig her gear
before
reaching the red area at the end of the tach
ometer scale
<::;> page 10.
During the first few hours of driving, the en
g ine 's inter na l friction is higher than later
when all the moving pa rts have been broken
i n. How well this break-in p rocess is done de
pends to a considerable ex tent on the way t he
ve hicl e is driven d uring the first 1,000 miles
(1, 500 kilome tres) .
(D Note
Extremely high engine speeds a re auto
mat ic al ly reduced. However, t hese RPM-
Driving and environment 149
limits were programmed for an eng ine
well run-in, not a new eng ine.
@ For the sake of the environment
Do not d rive wi th unnecessar ily h igh en
gine speeds -upshifting ear ly saves f uel,
r educes noise and protects the environ
ment.
New tires
If your vehicle is running on new tires, drive
particularly carefu l for the first 350 miles
(500 ki lometres) after fitting .
A WARNING
-New tires tend to be s lippery and must a l-
so be "b roken-in". Be s ure to remembe r
this dur ing t he firs t 35 0 m iles (500 kilo
me tres) . Brake gent ly . Avo id following
closely behind other vehicles or other sit uations that m ight require sudden, hard
b raking.
New brake pads
Remember that new brake pads do not have a
full brak ing effect during the first 250 miles
(400 kilometres) after they are installed.
New brake pads have to be "burnished in" be
fore they have optima l grab¢ .&..
D uring the break-in period, yo u should avoid
putting seve re loads on the brakes . Severe
l oads include, for example, su dden hard brak
ing, in particular at very h igh speeds or, for
example, on mou nta in passes.
A WARNING
Until t hey develop the maximum "bite" fo r
best stopping power, the s urfaces on new
b rake pads requ ire some "brea king- in" dur
in g the initial 10 0 to 150 miles (15 0 to
20 0 kilome tres) of normal c ity dr iv ing. Yo u
can compensate for this by press ing the
b rake peda l more f irm ly . This applies
whenever new pads are installed.
•
•
Page 152 of 244

150 Driving and en vironm ent
Avoid damaging the
vehicle
When you are driving on poor roads, or over
curbs, steep ramps, etc ., make certain that
low-lying parts such as spoilers and exhaust
system parts do not bottom out and get dam
aged.
This is especially true for vehicles with low
slung chassis (sports chassis) and fully loaded
vehicles .
Driving through water
on roads
Note the following to avoid vehicle damage
when driving through water, for example on
flooded roads:
- T he water must not be any highe r tha n the
bottom of the vehi cle body.
- Do no t drive faster than wa lking speed.
_& WARNING
After d riving through water, m ud, slush,
etc., the brakes may be slow to take effect
because o f wet brake ro tors and pads . Dry
the brakes fi rst by braking carefully to re
store the full braking effect.
(]) Note
Vehicle components such as the engine,
transmiss ion, suspension or electrical sys
tem can be severely damaged by driving
through water.
- Check the depth o f the water before driv
ing through it.
- Do not stop the veh icle, dr ive in reverse
or switch the engine
off when driving
through water.
- Keep in mind that oncoming vehicles may c reate waves that raise the water
l evel and make it too deep for your vehi
cle to drive through safely.
- Avoid driving thro ugh salt water because
it can ca use corrosion.
-
Catalytic converter
It is very important that your emission con
trol system (catalytic converter) is function
ing properly to ensure that your vehicle is run
ning in an environmentally sound manner.
.. Always use lead-free gasoline¢ page 160,
Fuel supply .
.. Never run the tank down all the way to emp
ty.
.. Never put too much moto r o il in yo ur eng ine
¢ page 169, Adding engine oil ~-
.. Never try to push- or tow-st art you r vehicle.
The catalytic co nverter is an efficient "clean
u p" dev ice built into the exhaust system of
t h e vehi cle. The cata lytic conve rter bu rns
many of the pollutan ts in the exha ust gas be
f ore they are re leased into the atmosphere.
T he exclusive use of unleaded fuel is critically
impor tant for the life of the catalyt ic convert
er and prope r funct ion ing of the engi ne.
A WARNING
- Do not park or operate the vehicle in
areas where the hot exha ust system may
come in contact with dry g rass, brush,
fue l spill or other material wh ich can
cause a fire.
- Do not app ly additiona l undercoating or
r u stproofing on or near the exhaust
manifold, exhaust pipes, catalytic con
verter or heat sh ields. Dur ing driv ing, the
substance used fo r undercoating could
overheat and cause a fire.
(D Note
- Be aware that just one tank filling with
leaded fuel will already ser iously de-
grade the performance of the catalytic
converte r.
- Do not exceed the correct engi ne oil level
¢page 169.
-Do not drive until the fuel tank becomes
completely empty . The engine co uld mis-
fire. Unburned fuel could also get into ..,.