2015 AUDI TT ROADSTER door lock
[x] Cancel search: door lockPage 41 of 244

When will the anti theft ala rm system be
triggered?
When the vehicle is locked , the alarm system
monitors and protects the following parts of
the vehicle:
- engine compartment
- luggage compartment
- doo rs
- ignition
When the system is activated, the alarm will
be triggered if one of the doors, the engine
hood or the rear lid are opened, or if the ign i
tion is turned on.
The anti-theft alarm system will also go off
when the battery is disconnected.
You can a lso trigger the alarm by pressing the
PANIC button on your remote-control key.
This will alert other people in case of emer
gency. Press the
PANIC button again to turn
off the alarm .
How is the anti-theft alarm switched off
when triggered?
The alarm system is switched off when you
unlock the vehicle using the remote-control key or when the ignition is sw itched on . The
a larm will also switch itse lf off when it comes
to the end of its cycle.
Emergency flasher
The emergency flasher will blink briefly when
the doors, engine hood and rear lid are prop
erly closed.
If the emergency flashers do not blink, check
the doors, engine hood and rear lid to make
sure they are properly closed. If you close a
door, the hood or the rear lid with the ant i
theft alarm switched on, the emergency flash
ers will blink only after you have closed the
door or lid.
(1) Tips
For the anti-theft alarm system to func
tion properly, make sure all vehicle doors
and windows are closed before leaving the
vehicle.
Opening and closing 39
Power windows
Controls
The driver can operate all windows .
Fig. 35 Driver's door: power w indow switches
If the respective switch is pushed or pulled
the window w il l open or clos e. The power win
dow switches have a two-position function :
Opening the windows
.,. Press the switch and hold it down until the
w indow has reached the desired position .
.,. Press the switch
briefly to open the window
automatically. By briefly pressing the switch
again, the downward travel of the window
can be stopped in any position<=-> .&_.
Closing the windows
.,. Pull the sw itch and hold it unti l the window
has reached the desired position .
.,. Pull the switch
briefly to close the window
automatically. By briefly press ing the switch
aga in, the upward travel of the window can
be stopped in any position
~ .&_ .
Switch @<=->fig .
35 operates the window in
the driver's door.
Switch @ operates the window in the front
passenger 's door.
&_ WARNING
- Do not leave children unattended in the
vehicle, especially with access to vehicle
keys . Unsupervised use of the keys can
result in start ing of the engine and use
of vehicle systems such as power win
dows, etc. wh ich could result in serious
injury.
Page 42 of 244
40 Opening and closing
-Remember -you can still open or close
the power windows for about ten mi
nutes after the ignition is switched off.
Only when either of the front doors are
opened are the power windows sw itched
off.
- Be careful when closing the windows.
Check to see that no one is in the way, or
serious injury could result!
- Always remove the ignition key whenever
you leave your vehicle .
- If you lock your vehicle from the outside,
no one, especially children, should re
ma in in the vehicle.
- Do not stick anything on the w indows or
the windsh ield that may interfere with
the driver's field of vision.
(D Tips
-When the doors are opened, the w in
dows are automat ically lowered 10 mm .
- The windows can still be opened and
closed for about ten m inutes after the
ignition has been turned off. The power
windows are not shut off until one of the
fron t doors is opened.
Convenience close/open feature
You can close or open the windows from out
side when you lock or unlock your car with the
key.
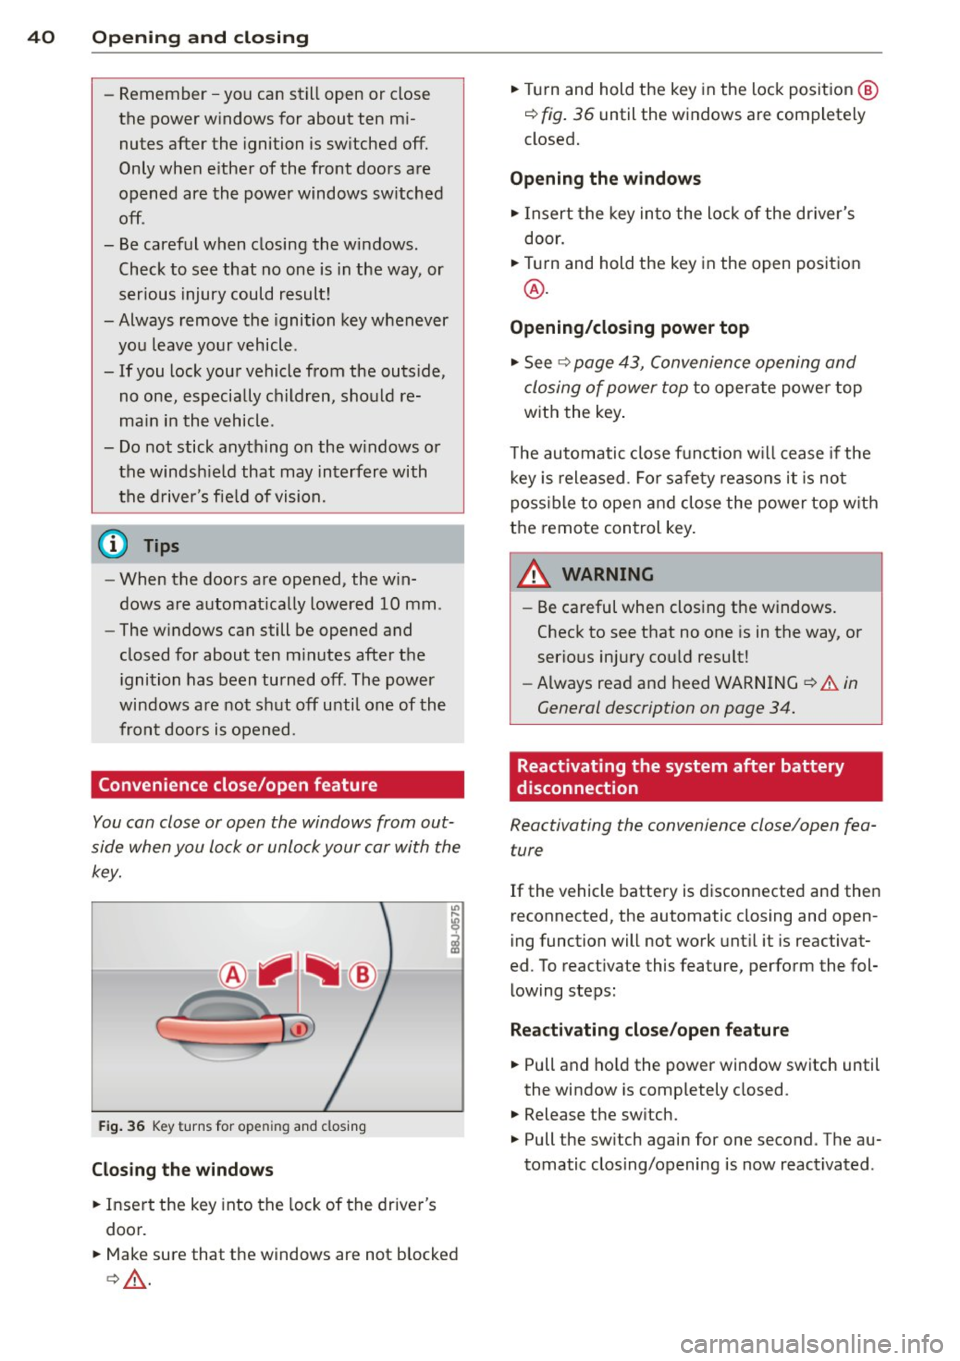
F ig. 36 Key turns for open ing and closing
Closing the windows
• Insert the key into the lock of the driver's
door.
• Make sure that the windows are not blocked
c> & .
• Tu rn and hold the key in the lock position @
¢ fig. 36 until the windows are completely
closed.
Opening the windows
• Insert the key into the lock of the driver's
door.
• Turn and hold the key in the open position
@.
Opening/closing power top
• See c> page 43, Convenience opening and
closing of power top
to operate power top
with the key.
T he automatic close funct io n w ill cease if the
key is released. Fo r sa fety reasons it is not
poss ible to open and close the power top w ith
the remote control key.
A WARNING
-
- Be careful when clos ing the windows.
Check to see that no one is in the way, or
serious injury cou ld resu lt!
- Always read and heed WARNING
~.&. in
General description on page
34.
Reactivating the system after battery
disconnection
Reactivating the convenience close/open fea
ture
If the vehicle battery is disconnected and then
reconnected, the automatic closing and open
ing function will not work until it is reactivat
ed. To react ivate this feature, perform the fol
lowing steps:
Reactivating close/open feature
• Pull and hold the power window switch until
the window is completely closed.
• Release the sw itch.
• Pull the sw itch again for one second . The au
tomatic clos ing/opening is now reactivated .
Page 44 of 244
42 Convertible top
Opening the Convertible Top Manually
Applies to vehicles: with manua l convertible top
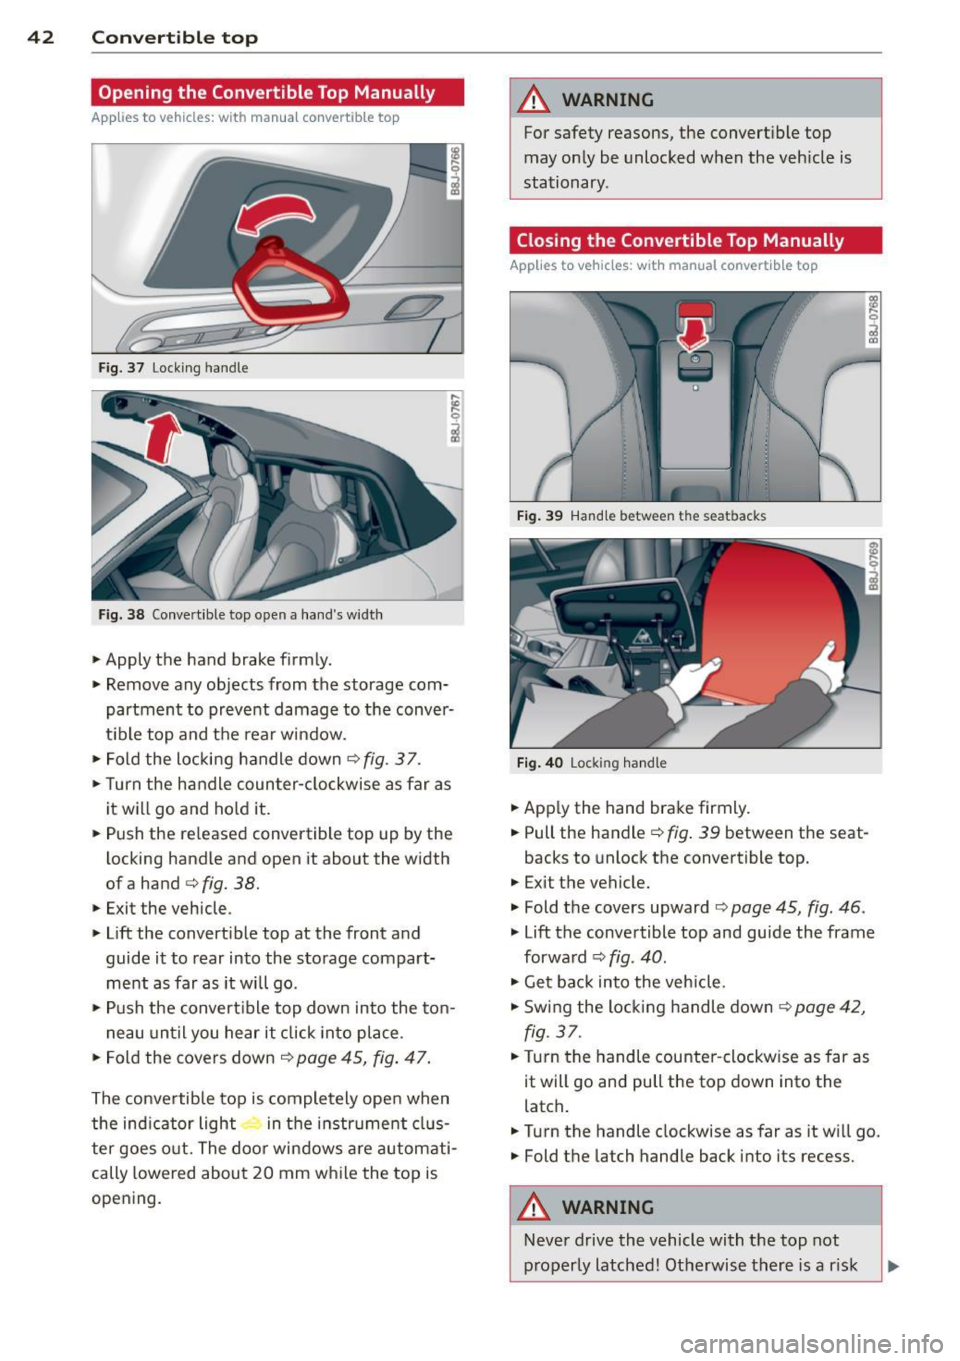
Fig. 37 Lock ing handle
Fig. 38 Convert ible top open a hand 's widt h
• Apply the hand brake f irmly.
• Remove any objects from the storage com
partment to prevent damage to the conver
t ib le top and the rear window.
• Fold the locking handle down
¢ fig . 3 7.
• Turn the handle coun ter-clockwise as far as
it w ill go and hold it.
• Push the released convertible top up by the
locking handle and open it about the width
ofa hand
¢ fig. 38.
• Exit the vehicle .
• Lift the convert ible top at the front and
guide it to rear into the storage compart
ment as far as it will go .
• Push the convert ible top down into the ton -
n eau until you hear it click into place .
• Fo ld the covers down ¢
page 45, fig. 47.
The conve rtib le top is comple tely ope n when
the ind icator light in t he i nstr ument clus
ter goes o ut. The door windows a re automati
cally lowered about 20 mm w hile the top is
opening .
A WARNING
-~
For safety reasons, the convert ible top
may on ly be unlocked when the veh icle is
stationary .
Closing the Convertible Top Manually
Applies to vehicles: with manual convertib le top
F ig . 39 Hand le betwee n the sea tbacks
Fig. 4 0 Locking hand le
• App ly the hand brake firmly.
• Pull the handle¢
fig. 39 between the seat-
backs to unlock the convertible top.
• Exit the vehicle.
• Fold the covers upward ¢
page 45, fig. 46 .
• Lift the convertible top and guide the frame
forwa rd ¢
fig. 40.
• Get bac k into the vehicle.
• Swing the locking handle down <=?
page 42,
fig. 37.
• Turn the handle counter -clockw ise as far as
it will go and pull the top down into the
latch .
• Turn the handle clockwise as far as it wi ll go.
• Fold the la tch handle back into its recess.
A WARNING
-
-
Neve r drive the vehicle with the top not
p roperly latched! Otherwise there is a r isk
Page 45 of 244
that the top will be opened by the wind.
Th is can result in injuries and damage to
the vehicle.
@ Tips
The indicator light for the convertible top goes out as soon as it is correctly latched .
Opening and Closing the Convertible
Top Automatically
App lies to vehicles: with power convertible top
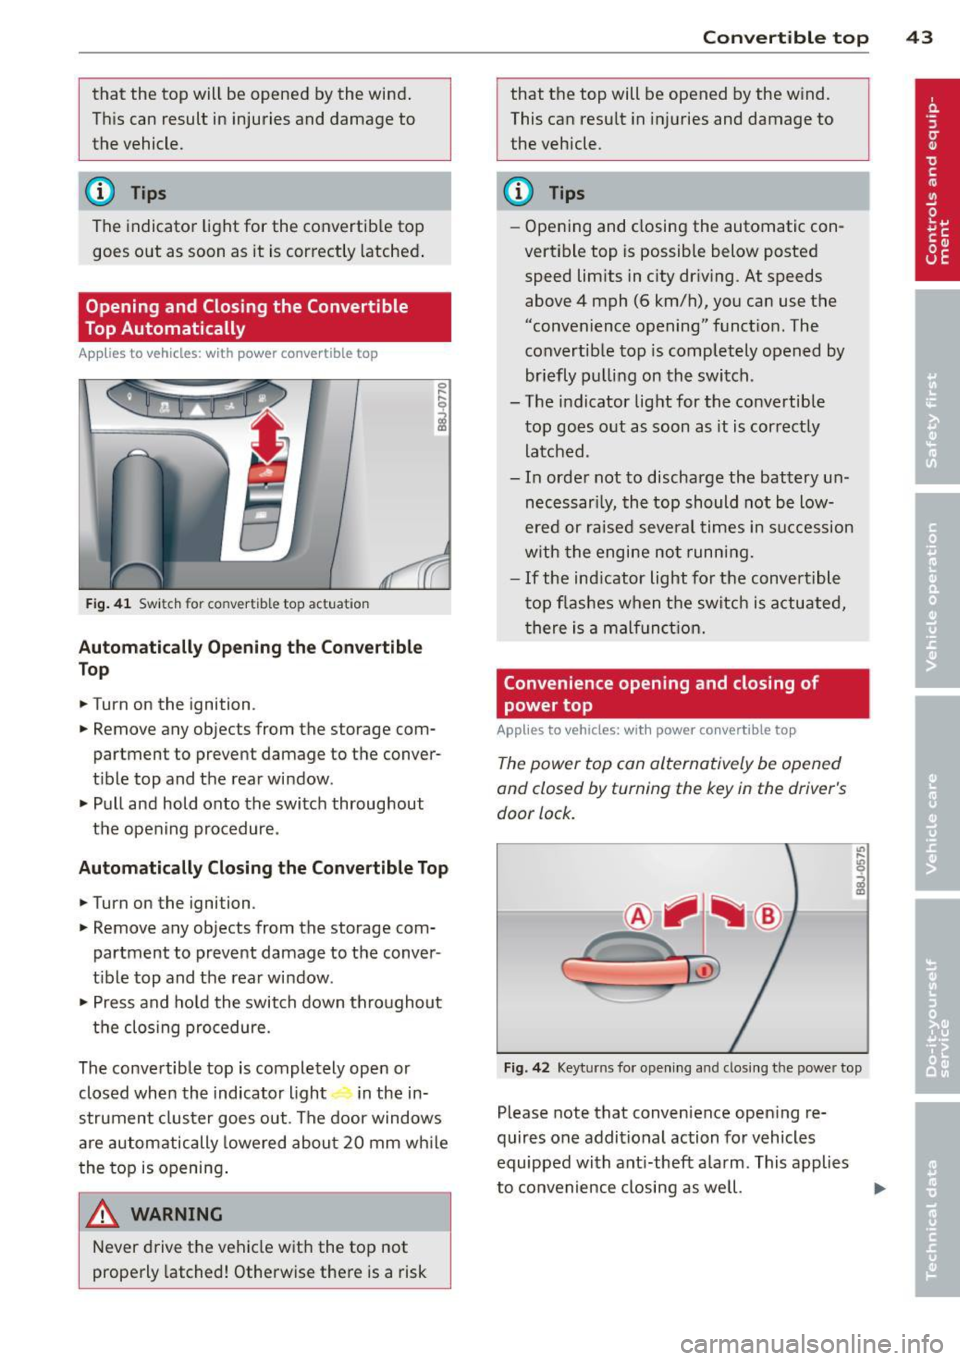
Fig . 41 Switch for convertible top actuation
Au tomaticall y Op ening th e Convertible
Top
.. Turn on the ignition .
.. Remove any objects from the storage com
partment to prevent damage to the
conver
tible top and the rear window.
.. Pull and hold onto the switch throughout
the opening procedure.
Automatic ally C losing th e Con vertible T op
.. Turn on the ignition .
.. Remove any objects from the storage com
partment to prevent damage to the
conver
t ible top and the rear window .
.. Press and hold the switch down throughout
the closing procedure.
The convertible top is completely open or
closed when the indicator light in the in-
strument cluster goes out . The door windows
are automatically lowered about 20 mm wh ile
the top is opening .
& WARNING
Never drive the vehicle with the top not
properly latched! Otherwise there is a risk
-
Con vert ible top 4 3
that the top will be opened by the wind.
This can result in in juries and damage to
the vehicle.
(D Tips
- Opening and closing the automatic con
vertible top is possible below posted speed lim its in city driv ing. At speeds
above 4 mph (6 km/h), you can use the
"convenience opening" funct ion. The
convertible top is completely opened by
br iefly pulling on the switch .
- The indicator light for the co nvertible
top goes o ut as soon as it is correctly
latched.
- In order not to discharge the battery un
necessar ily, the top should not be low
ered or raised several times in succession
w ith the engine not running.
- If the ind icator light for the convertible
t op flashes when the switch is actuated,
there is a malf unct ion.
Convenience opening and closing of
power top
Applies to vehicles: with power co nvertible top
The power top can alternatively be opened
and closed by turning the key in the driver's
door lock.
c
F ig. 42 Keyt urns for ope ning and closing th e power top
Please note that convenience open ing re
quires one additional action for vehicles
equipped with ant i-theft alarm . This applies
to convenience closing as we ll.
Page 46 of 244
44 Convertible top
Convenience opening
.,. Press the unlock but ton m on the remote
control key to unlock the vehicle.
.,. Turn the key in the driver door
once to posi
tion @~
fig. 42.
.,. Within two seconds turn the key a second
t ime and hold it in t his position until the
power top has completely retracted.
Convenience clos ing
.,. Turn the key in the dr iver door once to posi
tion @
~fig. 42.
.,. Within two seconds turn the key a second
time and hold it in this position until the
power top has completely closed .
Opening or clos ing motion stops
immediately
as soon as you re lease the key. For safety rea
sons, it is not possible to activate the
conven
ience feature with the remote control.
A WARNING
When opening and closing the powe r top
make sure to keep yourself a nd others
clear of all moving parts. Risk of injury!
Wind Deflector
The wind deflector reduces turbulence in the
passenger compartment and makes driving
more comfortable.
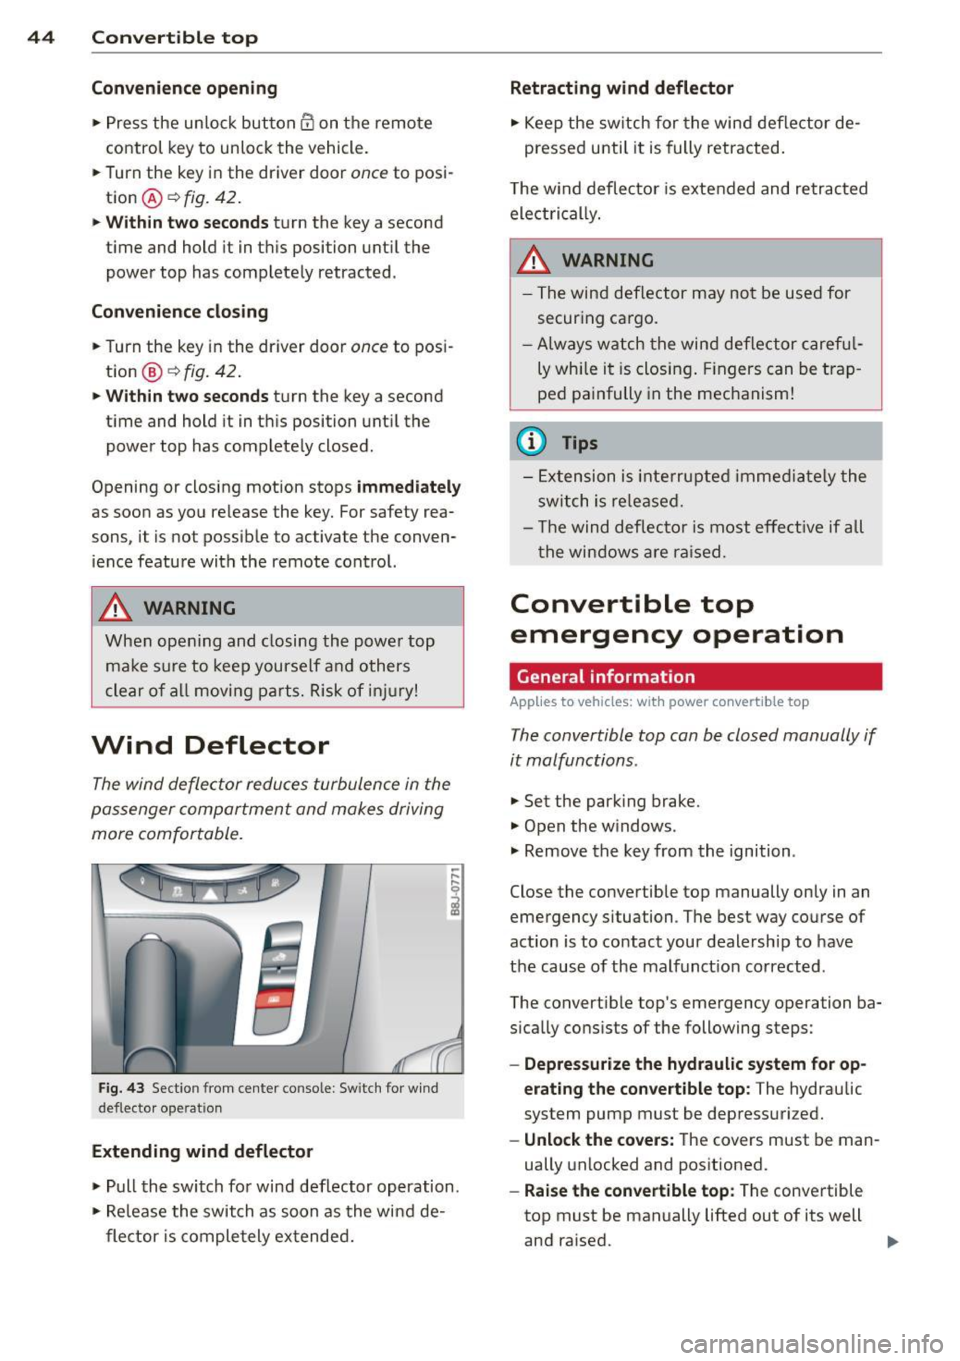
F ig. 43 Section from center console: Sw itch for w ind
deflecto r operation
Extending wind deflector
.. ,... ,... 0
i
.,. Pull the switch for wind deflector operation.
.,. Re lease the switch as soon as the wind de-
flector is completely extended.
Retracting wind deflector
.,. Keep the switch for the wind deflector de
pressed unti l it is fully retracted .
T he w ind deflector is extended and retracted
electrical ly .
A WARNING
- The wind deflector may not be used for
secur ing ca rgo.
-Al ways watch the wind deflector careful
ly while it is closing. Fingers can be trap
ped painfully in the mechanism!
(D Tips
-Extension is interrupted immediately the
switch is released.
- Th e wind deflector is most effective if all
th e windows are raised.
Convertible top
emergency operation
General information
Applies to vehicles: with power convertible top
-
The convertible top con be closed manually if
it malfunctions.
.,. Set the park ing brake.
.,. Open the w indows.
.,. Remove the key from the ignition .
Close the convertible top manually only in an
emergency situation. The best way course of
action is to contact your dealership to have
the cause of the malfunct ion corrected.
The convert ible top's emergency operation ba
s ically consists of the following steps:
- Oepressurize the hydraulic system for op
erating the convertible top :
The hydraulic
system pump must be depressurized.
- Unlock the covers: The covers must be man
ually unlocked and positioned .
-Raise the convertible top: The convertible
top must be manually lifted out of its well
and ra ised. ..,.
Page 51 of 244

light sensor checked as soon as possible at a
dealership.
Adaptive light *
The benefit of adaptive l ight is that the curve
and the edge of the road are better i llum inat
ed . The adaptive light is contro lled automati
cally, depending on vehicle speed and steering
wheel angle.
When driving a round bends, the head lights
are contro lled according to steering wheel an
g le . So that there is no black area ahead of the
ve hic le, the two main beams pivot at different
angles. The system works above a speed of
about 6 mph (10 km/h).
Com ing home /le avi ng home function *
The function is swit ched on when the switch is
in the AUTO* position and the function is
shown as active in the driver information sys
tem.
The
coming hom e function illuminates the
area around the vehicle when the ign ition is
switched off and the driver's door is ope ned.
The length of time the lights remain on can be
set in the menu display
( Illumination > Exte
rior lights > coming home ).
The leavi ng home function i lluminates the
area around the vehicle when unlocking it.
A WARNING
- Never use dayt ime running l ights to see
where you are going. They are not bright
enough and w ill not let you see far
enough ahead for safety, especially at
dusk or when it is dar k. Always switch on
the low beams at dusk or when i t is dar k.
- Automatic headlights a re only intended
to assist the dr iver. They do not re lieve
t he driver of his responsibi lity to check
t he headlights and to turn them on man
ually according to the current light and
visibility conditions. For example, fog
and rain cannot be detected by the light
sensors. So a lways switch on the head
lights under these weather cond itions
and when driving in the dark
jO .
Clear vis ion 49
- Crashes can happen when you cannot see
the road ahead and when you cannot be
seen by other motorists.
- Always turn on the headlights so that
youcanseeahe adandsothatothe ~
can see your car from the back .
- Please observe legal regulat ions w hen
using the ligh ting systems des cribed.
(D Tips
- T he light sensor for head light control is
located in the rear view mirror mount.
Do not apply any stickers to t he wind
shield in th is area to preven t malfunc
tions or fa ilures.
- Some exter io r l ighting funct ions can be
adjusted in t he driver i nformat ion sys
t em
~page 24.
- I f you remove the igni tion from t he igni
t ion lock while the headligh ts are s till
on, a buzzer wi ll sound as long as the
driver's door is o pen to remind yo u to
t u rn off the lights.
- Always observe the specific local regula
tions for your area as to when to use your
lights.
- With automatic headlights, the high
beam f unction is also available, but w ith
one restrict ion: If you have not sw itched
the high beams back to low beams dur
ing automatic headlight operation (for
example, after d riving throug h a tunnel),
only the low beams come on the next
t ime au tomati c headlights a re swi tched
on. To use the high beams , you firs t have
t o pull the hig h beam lever back and
then push the lever fo rward again .
- In coo l or damp weather, the inside of
the headlights, turn signals an d tail
lights can fog over due to the tempera
t u re difference between the inside and
outside. They w ill clear shortly after
switching them on. This does not affect
the se rv ice life of the lighting.
Page 53 of 244
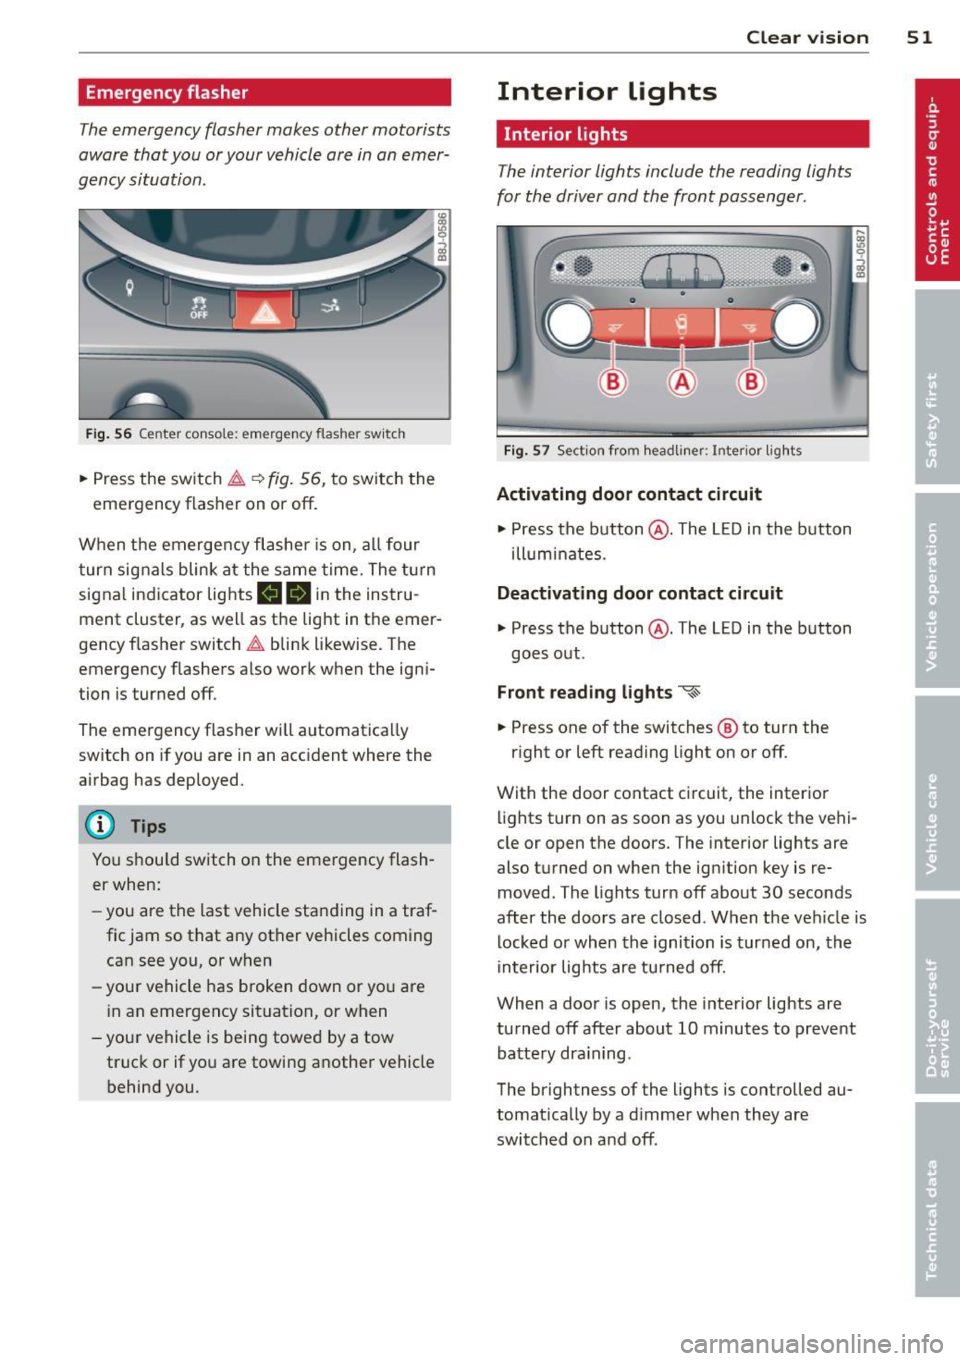
Emergency flasher
The emergency flasher makes other motorists
a w are that you or your vehicle are in an emer
gency situation.
Fi g. 56 Center console: em ergency flasher sw itch
.. Press the switch ~~ fig. 56, to switch the
emergency flasher on or off.
When the emerge ncy flashe r is on, al l four
turn signals blink at the same time. The t urn
signal indicator lights
mlll in the instru
ment cluster, as well as the light in the emer
gency f lasher switch ~ blink likewise. The
emergency flashers a lso work when the igni
tion is turned off.
The emergency flasher will automatica lly
switch on if you are in an acc ident where the
airbag has deployed.
@ Tips
You should switch on the emergency flash
er when:
- you are the last vehicle sta nding in a traf
fic jam so that any other vehicles coming can see you, or when
- your vehicle has broken down or yo u are
i n an emergency situation, or when
-you r vehicle is being towed by a tow
truck or if you are towing a nothe r vehicle
behind you. Clear vi
sion 51
Interior lights
Interior lights
The interior lights include the reading lights
for the driver and the front passenger .
Fig. 57 Section fro m headli ner: Interior light s
Activating door contact circuit
.. Press the button @. The L ED in the button
ill um inates.
Deactivating door contact circuit
.. Press the button @. The LED in the button
goes out .
Front read ing lights ~
.. Press one of the switches ® to turn the
r ight or left reading light on or off.
With the door contact ci rcuit, the inter ior
lights turn on as soon as you unlock the vehi
cle or open the doors. The interior lights are
also turned on when the ignition key is re
moved. The lights turn off about 30 seconds
after the doors are closed . When the veh icle is
locked or when the ignition is turned on, the
in terior lig hts are tu rned off.
When a door is open, the inte rior lights are
tu rned off after about 10 minutes to preve nt
batte ry dra in ing.
The brightness of the lights is controlled au
tomat ica lly by a d immer when they are
switched on and off .
Page 77 of 244
(D Note
On ly after the vehi cle has come to com
plete stop, should you f irm ly set the park
ing brake and either move the selector lev
er into "P".
Parking
P ar kin g
"' Stop the vehicle using the brake pedal.
"' Set the parking brake firmly .
"' Switch
off the eng ine .
"' Move the se lector lever into the P pos ition
i=> & .
"'When on incl ines or declines, turn the steer
ing wheel so that the vehicle w ill roll into
the curb if it begins to move .
A WARNING
This is how you can reduce the risk of in
jury when leaving your veh icle.
- Never park the vehicle where it can come
in contact with dry grass, spilled f uel or
any other flammable mater ials.
- Never allow anyone -especially small
children -to remain in the vehicle when
it is locked . Locked doors make it more
difficult for rescuers to access the pas
senger compartment in the event of an
eme rgency. Danger to life!
- Never leave ch ild ren unsupervised in the
vehicle . Children co uld re lease the park
ing brake. The vehicle co uld start to roll
away and cause an accident.
- No matter what the season is, the tem
perature in a par ked vehicle can reach
dange ro us levels.
Starting on hills
App lies to vehicles : wit h hill hold assist
Hill hold ass ist makes it easier to start on
hill s.
-
The system is act ivated when the brake pedal
i s depressed for a few second s.
On the ro ad 75
After releasing the brake pedal, the b rake
power is held for a
brief moment to p revent
the ve hicle from rolling back when starting . At
th is time, you can easi ly beg in to move your
vehicle.
A WARNING
- If you did not begin moving immed iate ly
after releasing the brake pedal, under
certain ci rc u mstances, the vehicle would
beg in to rol l backwa rd. Dep ress the
bra ke peda l immedi ate ly o r engage the
hand brake .
- Should the e ngine sta ll, dep ress the
brake peda l immedi ate ly or engage the
hand brake .
- I n order to prevent the vehicle from roll
i n g back unintentionally when s tarting in
stop -and -go traffic, keep the brake pedal
depressed for a few seconds before driv
ing off.
(D Tips
You can find o ut if yo ur vehicle is eq uipped
with "Hill hold assist" at an authorized
A udi dealership.
Speed warning system
Overv iew
The speed warning system helps you to keep
your driving speed below a set speed limit.
The speed warning system warns the driver if
he exceeds a previous ly stored max imum
speed . A warning tone will sound as soon as
the ve hicle speed exceeds the set speed by
about 3 mph (3 km/h). At the same time, a
warning symbo l appea rs in the disp lay.
The speed warning system has two warning
thre sholds that function independently of
each other and that have somewhat different
purposes:
Speed warning 1
You can use speed warning 1 to set the maxi mum speed while you are driving . This setting
will remai n in effect until yo u tur n
off the .,..