Page 41 of 288

Opening th e windows
"' Press the sw itch to the fir st sto p and hold i t
until the window reaches the desi red posi
tion .
"' Press the switch briefly to the
se cond stop
to automatic ally open the window .
Clos ing th e windows
"' Pull the swi tch to t he fir st sto p and hold it
until the window reaches the desi red posi
tion .
"' Pull the switch briefly to the
sec on d s top to
automatica lly close the window .
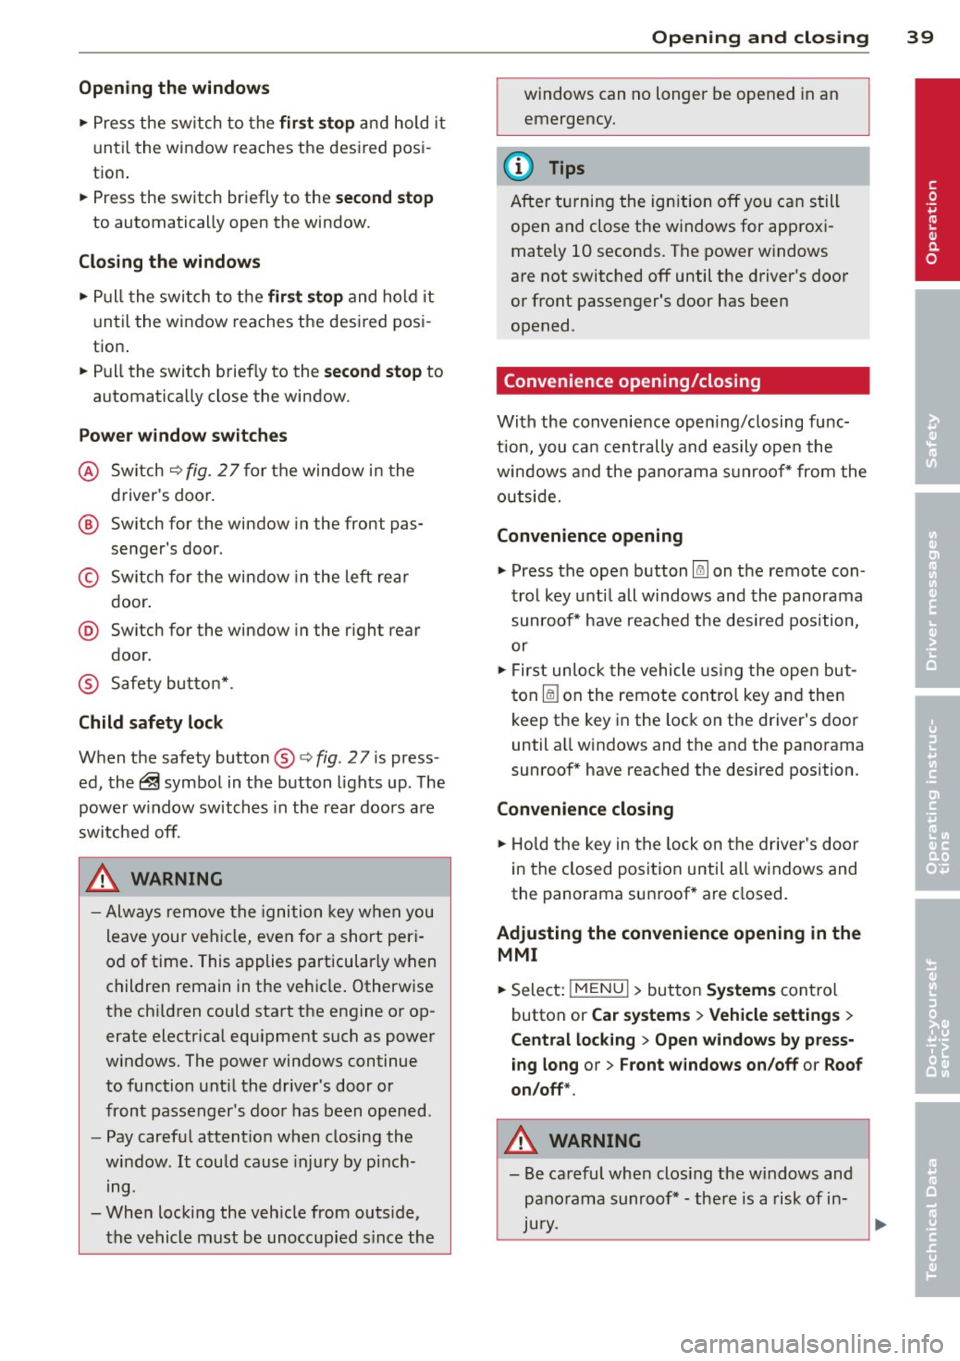
Pow er wi nd ow switch es
@ Sw itch c::> fig. 2 7 f or the window in the
driver's door.
@ Sw itch for the window in the fron t pas
senger 's door .
© Switch for the window in the left rear
door.
@ Sw itch for the window in the r ight re ar
door.
® Safety bu tton* .
Child safe ty lock
When the safety button® c::> fig. 2 7 is press
ed, the~ symbol in the button lights up . The
power w indow switches in the rear doors are
switched off.
A WARNING
- Always remove the ignition key when you
leave your vehicle, even for a short peri
od of time . This applies particularly when
children remain in the vehicle . Otherwise
the chi ldren could start the engine or op
erate electrical equ ipment such as power
windows. The power windows continue
to function unt il the driver 's door or
front passenger's door has been opened .
- Pay carefu l attent ion when closing the
window . It could cause injury by pinch
ing.
- When locking the veh icle from outs ide,
the vehicle must be unoccupied s ince the
Opening and clo sin g 39
windows can no longer be opened in an
emergency.
(D Tips
After turning the ignition off you can s till
open and close the windows for approxi mately 10 seconds. The power windows
are not switched off until the driver's door
or front passenger's door has been
opened .
Convenience opening/closing
With the convenience open ing/closing func
tion, you can centrally and eas ily ope n the
windows and the pano rama sunroof* from the
o utside.
Convenienc e opening
"' Press the open button~ on the remote con
trol key u ntil all w indows and the panorama
sunroof* have reached the desired position,
or
"' First unlock the vehicle using the open but
ton
Im on the remote cont ro l key and then
keep the key in the lock on the driver's door
until a ll windows and the and the panorama
sunroof* have reached the desired position .
Conven ience closing
"' Hold the key in the lock on the drive r's door
i n the closed position unt il a ll windows and
the panorama sunroof * are closed.
Adjusting the convenience opening in the
MMI
"' Select: !MENU I > button System s contro l
button or
Car s ystems > Vehicle settings >
C entral locking > Open windows b y press
ing long
or > F ront windo ws on /off or Roof
on /off *.
A WARNING
- Be careful when clos ing the windows and
panorama sunroof* - the re is a risk of in-
Jury.
li1'-
•
Page 42 of 288

40 Opening and clo sing
- For security reasons, the windows can
only be opened with the remote control
key at a maximum distance of 2 meters
from the vehicle .
- Pay attention when using the lock cylin
der to close the windows and the panora
ma sunroof* so that no one is pinched.
Clos ing stops when the key is moved into
the starting pos ition.
Correcting power window malfunctions
After disconnecting the vehicle battery, the
one-touch up and down feature must be acti
vated again .
.. Pull the power window sw itch until the w in
dow is comp lete ly raised.
.,. Release the switch and pull it again for at
least one seco nd.
Panorama sunroof
Description
Applies to vehicles: with pa norama sunroo f
Fig. 28 Section of the head liner: panorama s unroo f
butto n
The button has two stages. In the second
stage, the roof automatically runs to the end
position (open/closed) when the button is op
e rated b riefly. The movement can be stopped
by pressing the button .
@ Tilting and sliding
.. To tilt the sunroof complete ly, press the
switch brief ly to the second leve l.
.. To close the roof complete ly, pull the button
down briefly to the second lev el or slide the button forward br
iefly to the second level
¢ .&_ .
.. To select an intermediate pos it ion, press/
pull the sw itch in the first leve l until the de
sired position is reached.
® Op ening and closing
.. To open the sunroof completely, slide the
button bac k to just before the second level.
.. To close the roof completely, p ush the but
ton forward briefly to the second level or
pull the button down briefly to the second
level ¢.&_ .
.,. To se lect an in termediate pos it ion, press/
pull the sw itch forwa rd/back in the fi rst lev
el unt il the desired po sit ion is reached .
A wind deflector integrated in the panorama
s u nroof adapts automatically to the sunroof
pos ition. This reduces wind noise to a mini
mum i n all panorama sunroof pos itions.
You can still operate the pa no rama s unroof
for about 10 minutes aft er th e ignition is
switched off . T he swi tch is deactivated once
t h e dr iver's o r fron t passenger's door is
opened.
Sun shade
T he sun shade can be opened and closed man
u ally, depending on the position of the panor
ama sunroof. The sun s hade can be opened
part ia lly.
_& WARNING
=
B e carefu l when closing t he pano rama sun -
r oof -otherw ise serio us in ju ry co uld resu lt!
A lways take the ign ition key wit h you when
l eaving the vehicle.
(D Note
A lways close t he panor ama s unroo f whe n
l eav ing your ve hicle . Sudde n rain can cause
d amage to the interio r equipment of your
vehicle, particularly the e lectronic equip-
ment .
ll>
Page 43 of 288
@ Tips
-Information regarding convenience
opening/closing
¢ page 39 .
-The panorama sunroof can only be
opened when the temperat ure is warmer
than -4°F (-20 °C).
Panorama sunroof emergency closing
Applies to vehicles: with pa norama sun roof
If the panorama sun roof detects resistance or
an object in its path while closing, the sunroof
w ill open aga in automatically . If the s unroof
fa ils to close after remov ing the object and af
ter trying to close a se cond time, you can pe r
form an eme rgency closing.
"' Within five seconds after the s unroof opens
automatica lly, pull the sw itch until the roof
cl oses.
If you let go of the switch early, the panorama
sunroof w ill open again .
Opening and clo sin g 41
•
Page 44 of 288

42 Lights an d Vi sion
Lights and Vision
Exterior lighting
Switching lights on and off
Fig . 29 Instrument pane l: l ig ht switc h
Light swit ch -'tj.-
The headlights only work when the ignition is
switched on. While start ing the engine or
when switching off the ignition, the head
lights will go off and only the side marker
lights will be on .
If the system is not operating properly, a
warning symbol in the driver information dis
play is displayed
¢ page 25.
Turn the switch¢ fig. 29 to the corresponding
position . When the lights are switched on, the
respective symbol turns on.
0 -lights off. In some countries, the day time
running lights* are turned on and off together
with the ignition.
- USA model s: T he daytime running lights
wi ll come on automatically when the igni
tion is on and the light switch¢
fig. 29 is in
the
O position or the AUTO position (only in
daylight conditions) . The
Daytime runn ing
li ghts function can be turned on and off in
the MM I ¢
page 44, ¢ .&. .
- Canad a models: The daytime running lights
will come on automa tically when the igni
t ion is on and the light switch¢
fig. 29 is in
the
O posit ion , the :oo: pos ition or the AUTO
posit ion (only in daylight conditions) ¢,& .
AUTO* -Automatic headligh ts swi tch on and
off depend ing on brightness, for example in
tw il ight, during rain or in tunnels . In vehicles with integrated day time runn
ing lights *, ei
t h er the daytime running lights or the head
lights wi ll turn on automat ically, depending
on the amount of light (may vary depending
on the country).
: oo : -Parking lights
iD -Low beam head lights
T he following w ill happen in these light
switch pos itions when you lock the veh icle:
- iD -Low beam: the entire exterior lights
sw itch off
- AUTO*: the Coming home* function is
turned on ¢
page 44
Fog lights* / rear fog light (s)
Press the corresponding button¢ fig. 29:
}0 -Fog lights*. When the fog lights are
swi tched on, the
}0 symbol in the button illu
minates.
0$ -Rear fog light(s) When the rear fog lights
are switched on, the
Ot symbo l in the b utton
illuminates.
All-weather lights*
apples to vehicles with LED headlights .
Press the
¢ fig. 29 button.
'i'!io -All-weather lights (this button rep laces
the fog light button
}0.)
In veh icles with all-wea ther lights , the front
l igh ts are adj usted automati cally so that yo u
are less like ly to see glare from your own
headlights, for example when driving on a wet
road.
Headlight range control system
T he headlight range adjus ts automatically
when there is a c hange in vehicle load and
during b raking and accelera ting so that the
headlig hts do not ca use g lare for oncom ing
traffic .
Audi adaptive light *
The ad aptive light only functions when the
li gh t switch is in the AU TO posit ion. You can
IJ,-
Page 45 of 288

deactivate adaptive light in the MMI
¢ pag e 44.
When swi tched on, adapt ive light adjusts to
curves depend ing on the vehicle speed and
steering whee l ang le . This provides b etter
lighting through the curve. The system oper
ates in a speed range from approx imately 6
mph (10 km/h) to 68 mph (110 km/h) .
Static corner ing light * (vehicles with adaptive
light) -the cornering light switch es on auto
mat ica lly when the steer ing whee l is turned at
a certa in angle at speeds up to approximately
44 mph (70 km/h) and when the tu rn signal is
activated at speeds up to approximately 25
mph (40 km/h) . The area to the s ide of the ve
h icle is illuminated bette r when turning .
Speed dependent ligh t dis tributi on* -The
speed dependent light distribution adapts the
light in towns and on h ighways o r express
ways . Inte rsect io ns can also be illuminated on
veh icles w ith a navigation system* .
Highway light function*
(Vehicles wi th adap tive light or LED head
lights) -T his function adapts the light ing for
h ighway driving based on vehicle speed .
A WARNING
-Automatic headlights* are only intended
to assist the dr iver. They do not relieve
the driver of responsib ility to check the
headlights and to turn them on ma nually
according to the current light and visibili
ty conditions . For examp le, fog cannot
be detected by the light sensors. So al
ways switch on the low beam under
these weather conditions and when driv
ing in the dark
io .
-Crashes can happen when you cannot see
the road a head and when you cannot be
seen by other motorists . Always turn on
the headlights so that you can see ahead
and so that others can see your car from beh ind.
- Please obse rve lega l regulations when
using the light ing systems descr ibed . Ligh
ts and Visi on 4 3
(D Note
The rear fog lights shou ld only be turned
on in accordance with traffic regu lations,
to prevent glare for traffic behind your ve
hicle.
{!) Tips
- The light sensor for the automatic head
lights* is in the rearview mirror mount.
Therefore , do not place any stickers in
this area o n the windshield .
- Some funct ions of the exterior lighting
can be adjusted
c:> page 44.
- If you turn off the ignition while the ex
terior lights are on and open the door,
you will hear a warning to ne.
- In some countries, the tail lights do not
switch on when the daytime runn ing
lamps switch on.
- In cool or damp weather, the inside of
the headlights, turn signals and tail
lights can fog over due to the tempera
t u re difference between the inside a nd
outside. They w ill clear shortly after
switching them on . This does no t affect
the serv ice life of the lighting.
- In the event of a light senso r malfu nc
ti on, the dr iver is notified in the instru
ment cl uste r display ¢
page 25.
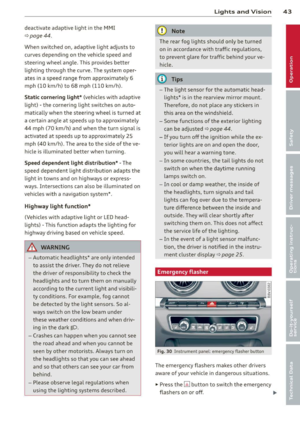
Emergency flasher
Fig. 30 Ins trume nt panel : emer gency flash er butt on
The emergency flashers makes other dr ivers
aware of your veh icle in dangerous situat ions .
.,. Press the~ but ton to swi tch the emergency
flashe rs on or off.
Ill-
Page 46 of 288

44 Lights and Vision
You can indicate a lane change or a turn when
the emergency flashers are switched on by us
i ng the turn signa l lever. The emergency f lash
ers stop temporarily.
The eme rgency f lashers also work when the
ignition is tu rned off .
(D Tips
You shou ld tu rn on the emergen cy fl ashe rs
when:
- you are the last vehicle st anding in a tr af
fic jam so that any o ther veh icles coming
ca n see you, or when
- you r vehicle has broken down or yo u are
i n an emergency si tua tion, or when
- you r vehicle is bei ng towe d by a tow
tru ck or if yo u are towi ng anothe r vehicle
b ehin d you.
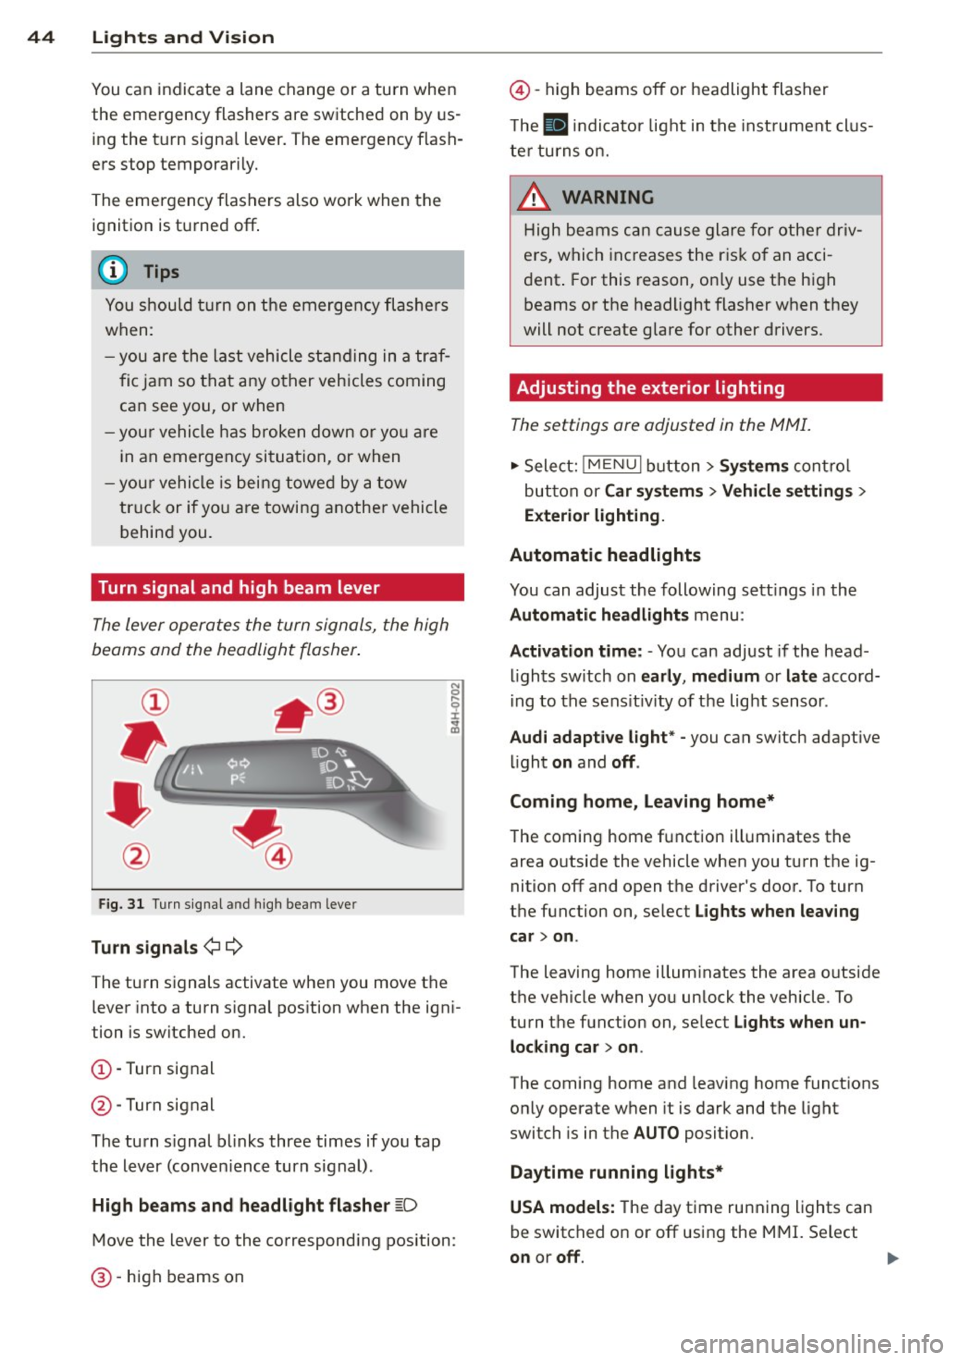
Turn signal and high beam lever
The lever operates the turn signals, the high
beams and the headlight flasher .
Fig. 31 Turn s ig na l an d high beam leve r
Turn signals ¢¢
The turn signals activate when you move the lever into a turn s ignal pos ition when the ign i
tion is switched on.
(D -Turn signal
@-Turn signal
The turn s ignal b links three times if you tap
the lever (conven ience turn s ignal).
High beam s and headlight flasher
~D
M ove the lever to the correspond ing position:
@ -high beams on
@-high beams off or headlight flasher
T he
II in di cator light in t he inst rument cl us
te r tu rns on.
A WARNING
H igh be ams ca n cause glare for othe r driv
e rs, which inc reases the r is k of an acci
dent . For this reason, on ly use the h igh
beams or the headlight flasher when they
will not create g lare for other drivers.
· Adjusting the exterior lighting
The settings ore adjusted in the MMI.
.,. Select: iME NUI button> Systems control
bu tton or Car system s > Vehicle settings >
Exterior lighting.
Automatic headlights
You can adjust the following sett ings in the
Automatic headlights menu:
Activation time: - You can adjust if the head
ligh ts sw itch on early, medium or late accord
i ng to the sens it iv ity of the light sensor .
Audi adapt ive light * -you can switch adaptive
li ght on and off.
Coming home, Leaving home*
T he coming home f unction ill uminates the
area o utside the vehicle when you turn t he ig
nition off and open the driver's door. To turn
the function on, se lect Lights when leaving
car > on .
The leaving home illum inates the area outside
the vehicle when yo u unlock the vehicle . To
turn the function on, se lect Lights when un
locking car > on .
The coming home and leaving home functions
only operate when it is dark and the light
switch is in the AUTO position.
Daytim e running lights*
USA models: The day time running lights can
be switched on or off using the MMI. Se lect
on or off.
1111>
Page 47 of 288

Canada models: The function cannot be
turned
off. It is activated automatical ly each
time the ignition is switched on .
Interior lighting
Front and rear interior light ing f ront
Fig. 32 Fr ont headliner : inter io r lighting controls (ex
ample)
Fig. 33 Rear headliner: LED read ing lights~ (example)
-N 0 0
i
Depending on equipment, the interior lighting
may differ from the illustration .
~ Reading lights*
To turn a reading light on or off, press the~
button .
§J Interior lights (manual)
Press the El button to switch the interior
lights on or
off.
§] Interior lights (automatic)
To have the interior lights controlled automat
ically, press the§] button .
When the§] button is activated (the LED
turns on), the interior lights turn on automat i
cally when the vehicle is un locked, a door
opens or the ignition key is removed. The inte
rior lights turn
off several seconds after your
close the doors, when you lock the vehicle or
Lights and Vision 45
when you turn the ignit ion on. When a door is
open, the light turns
off after a few minutes.
Interior lighting
T here are other interior lighting functions
that are available. Individual functions can be
adjusted in the MMI. Select:
IMENUI button>
Systems control button or Car systems > Ve
hicle settings> Interior lighting.
Instrument illumination
The brightness of the instrument cluster and
the center console con be adjusted.
Fig. 34 Instrument illuminat ion
Requirement: The light must be switched on .
.. Press the knob to release it.
.. Turn the knob toward"-" or"+" to reduce or
increase the brightness.
.. Press the knob again to return it to its origi
nal position .
(!} Tips
The needles and gauges in the instrument
cluster illuminate when the headlights are
off and the ignition is switched one. Theil
lumination reduces automatically and
eventually turns
off as brightness outside
decreases. This function reminds the driver
to turn the headlights on at the appropri
ate time.
Page 48 of 288

46 Lights and Vi sion
Vision
Sun visors
(..___ __ _.)
Fig . 35 Left side: su n visor
The sun visors can be moved out of their
brackets and turned toward the doors
(D .
The mirror l ight switches on when the cover
over the vanity mirror* @opens.
Windshield wipers
Switching windshield wipers on
Fig. 36 Windsh ie ld wipe r lever : operati ng the front
was her system
Requirement : The ignition must be turned on.
Move the windshield wiper lever to the corre
spond ing position:
@ -Front wipers off
(D -Interval mode. To increase/decrease the
wiper intervals , move the switch @ to the
left/right. In vehicles with a light/rain sen
sor*, the wipers turn on when it is raining,
when the vehicle is stationary and the lever is
tapped in the ® position, or once the vehicle
speed exceeds approximate ly 2 mph (4 km/h) .
The higher the sensitivity of the rain sensor is
set (sw itch @ to the right), the earlier the windshield wipers react to moisture on the
windshield.
@ -Slow w iping
@ -Fast wip ing
@ -Single wipe . If you ho ld the lever in this
position longer, the wipers switch from slow
wiping to fast wiping .
® -Clean the windshield. To elim inate water
droplets, the windshield wiper performs one
afterwipe after several seconds in tempera
tures above 39 °F (4 °() . You can switch th is
function off by moving the lever to pos it ion ®
within 10 seconds after the afterwipe . The af
terwipe function is reactivated the next time
you sw itch the ignition on.
_& WARNING
- The rain sensor is only intended to assist
the driver. The driver is still responsib le
for manually switching the wipers on ac
cording to the visibility conditions .
- The windshield may not be treated with
water-repelling windshield coating
agents. Unfavorable conditions, such as
wetness, darkness or low sun, can result in increased glare. Wiper blade chatter is
also possible .
- Properly functioning windshield wiper
blades are requ ired for a clear view and
safe driving
c::> page 47, Replacing
front windshield wiper blades .
(D Note
-In case of frost, make sure the w ind
shield wiper blades are not frozen to the
w indshield . Switching on the windshield
w ipers when the blades are frozen to the
windshield can damage the wiper blades.
- Pr ior to using a car wash, the w indshield
w iper system must be sw itched off ( lever
in posit ion 0). This prevents unintention
al swi tchi ng on and damage to the wind-
shield wiper system. ..,_