2015 Alfa Romeo Giulietta radio
[x] Cancel search: radioPage 11 of 288

AIR VENTS
❒Climate control system ....................... 22
LEFT STALK
❒External lights
INSTRUMENT PANEL
❒Control panel and on-board
instruments ......................................... 94
❒Warning lights ..................................... 99
RIGHT STALK
❒Window cleaning ................................ 39
UConnect Radio/UConnect Radio
Nav (for versions/markets, where
provided)
PASSENGER SIDE AIRBAG
❒Operation ...........................................140
GLOVE COMPARTMENT
❒Opening .............................................. 46
HEATER/CLIMATE CONTROL
SYSTEM
❒Climate comfort .................................. 23
❒Manual climate control system ............ 24
❒Automatic dual-zone climate control
system................................................ 28
CONTROL BUTTONS
❒Door locking ....................................... 45
❒Fog lights ............................................ 44
❒Rear fog lights .................................... 44
❒iTPMS system (for versions/markets
whereprovided).................................. 72
STEERING WHEEL
❒Adjustment ......................................... 19
❒Driver side front airbag ........................140
126
7111089
3A0K0661
7
CRUISE CONTROL LEVER (for
versions/markets, where provided)
❒Operation ........................................... 40
Page 13 of 288

GETTING TO KNOW YOUR CAR
In-depth knowledge of your new car
starts here.
The booklet that you are reading simply
and directly explains how it is made
and how it works.
That’s why we advise you to read it
seated comfortably on board, so that
you can see what is described here for
yourself.SYMBOLS ...................................... 10
ALFA ROMEO CODE SYSTEM ....... 10
THE KEYS....................................... 11
ALARM ........................................... 14
IGNITION DEVICE ........................... 15
SEATS ............................................ 17
HEAD RESTRAINTS ........................ 18
STEERING WHEEL ......................... 19
REAR VIEW MIRRORS .................... 20
CLIMATE CONTROL ....................... 22
CLIMATIC COMFORT ..................... 23
MANUAL CLIMATE CONTROL........ 24
AUTOMATIC DUAL ZONE
CLIMATE CONTROL ....................... 28
EXTERNAL LIGHTS......................... 35
WINDOW CLEANING ...................... 38
CRUISE CONTROL ......................... 40
ROOF LIGHTS ................................ 42
CONTROLS .................................... 44
INTERIOR FITTINGS ....................... 46
ELECTRIC SUN ROOF .................... 49
DOORS ........................................... 51
ELECTRIC WINDOWS .................... 53
LUGGAGE COMPARTMENT ........... 56
BONNET ......................................... 59
ROOF RACK/SKI RACK .................. 60
HEADLIGHTS.................................. 61ESC SYSTEM ................................. 62
“ALFA DNA” SYSTEM (CAR
DYNAMIC CONTROL SYSTEM) ...... 66
START&STOP SYSTEM .................. 69
ITPMS (INDIRECT TYRE
PRESSURE MONITORING
SYSTEM) ........................................ 72
EOBD SYSTEM (EUROPEAN ON
BOARD DIAGNOSIS) ...................... 74
DUAL PINION ACTIVE STEERING... 74
WIRING FOR RADIO SYSTEM ........ 75
ACCESSORIES PURCHASED BY
THE OWNER .................................. 76
PARKING SENSORS....................... 77
REFUELLING THE CAR .................. 80
PROTECTING THE
ENVIRONMENT .............................. 81
9
Page 19 of 288

SWITCHING OFF THE
ALARM
Press the
button. The following
operations are performed (excluding
some markets):
❒the direction indicators flash briefly
twice;
❒there are two brief acoustic signals;
❒unlocking of the doors.
IMPORTANT The alarm does not switch
off when the central opening is
activated using the metal insert in the
key.
VOLUMETRIC/ANTI-LIFT
PROTECTION
To guarantee the correct operation of
the protection, close the side windows
and any sun roof completely (for
versions/markets, where provided).
To disable the function, press button A
fig. 10 before activating the alarm.
When the function is disabled, this is
indicated by the LED on the button
flashing for several seconds.
Any disabling of the volumetric/anti-lift
protection must be repeated each
time the instrument panel is switched
off.DISABLING THE ALARM
To completely deactivate the alarm (e.g.
during a lengthy period of car
inactivity), close the doors by turning
the metal insert of the key with remote
control in the door lock.
IMPORTANT If the batteries of the key
with the remote control run out or
the system fails, the alarm can
be switched off by placing the key in
the ignition switch and then turning it to
MAR-ON.
IGNITION DEVICE
The key can be turned to three different
positions fig. 11:
❒STOP: engine off, key can be
removed, steering column locked.
Some electrical devices (e.g. car
radio, central door locking system,
alarm, etc.) are enabled;
❒MAR: driving position. All electrical
devices are enabled;
❒AVV: engine start-up.
The ignition switch is fitted with a safety
system that requires the ignition key
to be turned back to STOP if the engine
does not start, before the starting
operation can be repeated.
2) 3)
10A0K0548
11A0K0362
15
Page 79 of 288

WARNING
56) It is absolutely forbidden to carry
out any after-market operation
involving steering system or
steering column modifications
(e.g. installation of anti-theft
device) that could adversely affect
performance and safety,
invalidate the warranty and also
result in non-compliance of the
car with type-approval
requirements.
WIRING FOR RADIO
SYSTEM
(for versions/markets, where provided)
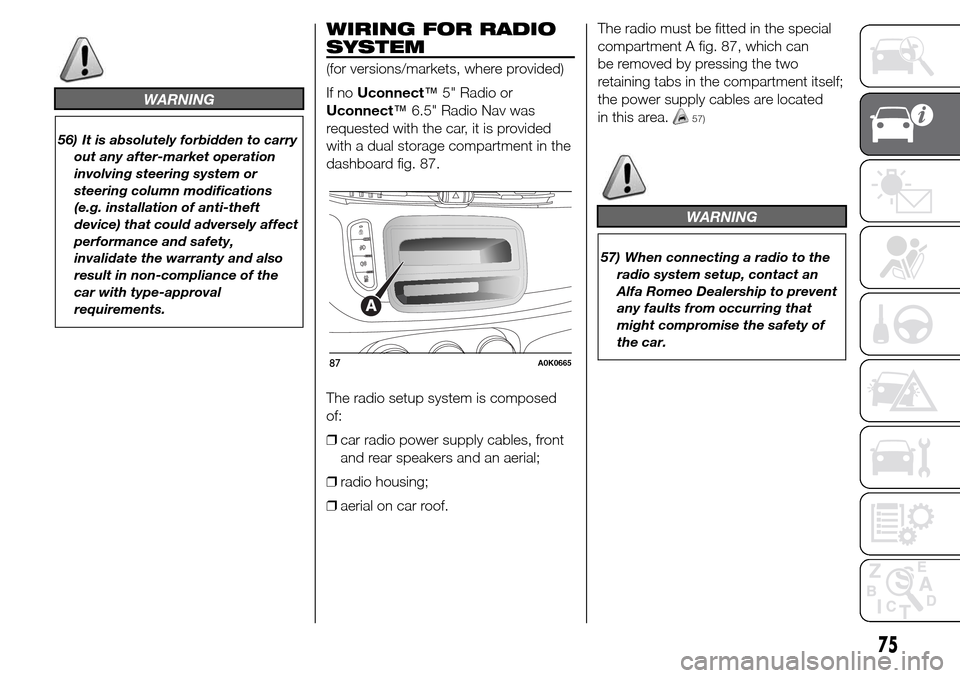
If noUconnect™5" Radio or
Uconnect™6.5" Radio Nav was
requested with the car, it is provided
with a dual storage compartment in the
dashboard fig. 87.
The radio setup system is composed
of:
❒car radio power supply cables, front
and rear speakers and an aerial;
❒radio housing;
❒aerial on car roof.The radio must be fitted in the special
compartment A fig. 87, which can
be removed by pressing the two
retaining tabs in the compartment itself;
the power supply cables are located
in this area.
57)
WARNING
57) When connecting a radio to the
radio system setup, contact an
Alfa Romeo Dealership to prevent
any faults from occurring that
might compromise the safety of
the car.
87A0K0665
75
Page 80 of 288

ACCESSORIES
PURCHASED BY THE
OWNER
If after purchasing the car, you decide
to install electrical accessories that
require a permanent electric supply
(radio, satellite anti-theft system, etc.) or
accessories that in any case burden
the electric supply, contact an Alfa
Romeo Dealership, whose qualified
personnel, besides suggesting the
most suitable devices from
Lineaccessori Alfa Romeo, will also
check whether the car's electrical
system is able to withstand the load
required, or whether it needs to be
integrated with a more powerful battery.
58)
INSTALLING ELECTRICAL
ELECTRONIC DEVICES
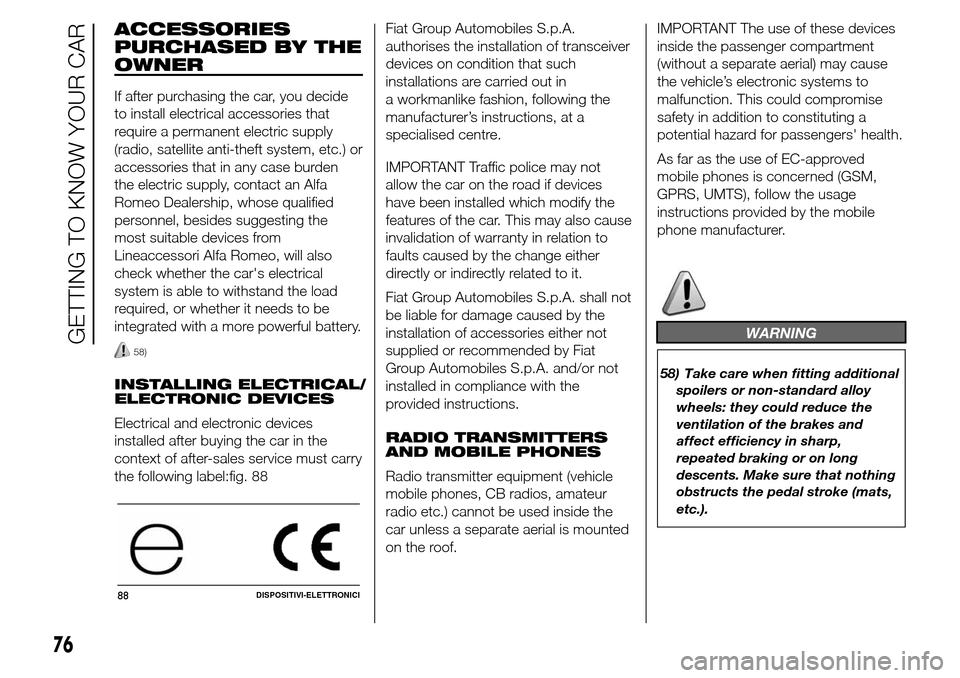
Electrical and electronic devices
installed after buying the car in the
context of after-sales service must carry
the following label:fig. 88Fiat Group Automobiles S.p.A.
authorises the installation of transceiver
devices on condition that such
installations are carried out in
a workmanlike fashion, following the
manufacturer’s instructions, at a
specialised centre.
IMPORTANT Traffic police may not
allow the car on the road if devices
have been installed which modify the
features of the car. This may also cause
invalidation of warranty in relation to
faults caused by the change either
directly or indirectly related to it.
Fiat Group Automobiles S.p.A. shall not
be liable for damage caused by the
installation of accessories either not
supplied or recommended by Fiat
Group Automobiles S.p.A. and/or not
installed in compliance with the
provided instructions.
RADIO TRANSMITTERS
AND MOBILE PHONES
Radio transmitter equipment (vehicle
mobile phones, CB radios, amateur
radio etc.) cannot be used inside the
car unless a separate aerial is mounted
on the roof.IMPORTANT The use of these devices
inside the passenger compartment
(without a separate aerial) may cause
the vehicle’s electronic systems to
malfunction. This could compromise
safety in addition to constituting a
potential hazard for passengers' health.
As far as the use of EC-approved
mobile phones is concerned (GSM,
GPRS, UMTS), follow the usage
instructions provided by the mobile
phone manufacturer.
WARNING
58) Take care when fitting additional
spoilers or non-standard alloy
wheels: they could reduce the
ventilation of the brakes and
affect efficiency in sharp,
repeated braking or on long
descents. Make sure that nothing
obstructs the pedal stroke (mats,
etc.).
88DISPOSITIVI-ELETTRONICI
76
GETTING TO KNOW YOUR CAR
/
Page 90 of 288

SET/: press briefly to access the
menu and/or go to next screen or
confirm the selection. Hold down to go
back to the standard screen.
: to scroll down through the
displayed menu and the related options
or to decrease the value displayed.
IMPORTANT The
and
buttons activate different
functions according to the following
situations:
❒within the menu, they allow you to
scroll up and down through the
options;
❒during settings operations, they
increase or decrease values.
SETUP MENU
The menu comprises a series of
options which can be selected using
the
andbuttons to access
the different selection and setting
(Setup) operations indicated below.
Some options have a submenu. The
menu can be activated by briefly
pressing the SET/
button.
The menu comprises the following
options:
❒MENU
❒LIGHTING❒SPEED BEEP
❒LIGHT SENSOR (for versions/
markets where provided)
❒RAIN SENSOR (for versions/markets,
where provided)
❒TRIP B ACTIVATION/DATA
❒SET TIME
❒SET DATE
❒FIRST PAGE (for versions/markets
where provided)
❒AUTOCLOSE
❒MEASUREMENT UNIT
❒LANGUAGE
❒BUZZER VOLUME
❒SEAT BELT BEEP/BUZZ
❒SERVICE
❒AIRBAG/PASSENGER BAG
❒DAYTIME RUNNING LIGHTS
❒ADAPTIVE LIGHTS (for versions/
markets, where provided)
❒COURTESY LIGHTS
❒MENU EXIT
NoteOn cars equipped with radio
navigator systems (for versions/
markets, where provided), some menu
items are shown on the navigator
display.Selecting an option from
the main menu without a
submenu:
❒press the SET/
button briefly to
select the main menu setting you
wish to change;
❒press buttons
or(with
single presses) to select the new
setting;
❒press the SET/
button briefly to
save the new setting and go back to
the previous main menu option.
Selecting an option from
the main menu with a
submenu:
❒briefly press the SET/
button to
display the first submenu option;
❒press buttons
or(with
single presses) to scroll through all
the submenu options;
❒briefly press the SET/
button to
select the displayed submenu option
and to open the relevant settings
menu;
❒press buttons
or(with
single presses) to select the new
setting for this submenu option;
❒press the SET/
button briefly to
save the new setting and go back to
the previous submenu option.
86
KNOWING THE INSTRUMENT PANEL
Page 91 of 288

MENU ITEMS
IMPORTANT WithUconnect™5"
radio system (for versions/markets
where provided), orUconnect™6.5"
Radio Nav system (for versions/
markets, where provided), some Menu
items are displayed and managed
through the system and not through the
instrument panel (refer to the dedicated
supplements).
Menu
This item allows you to access the
Setup Menu.
Press the
orbutton to
select the various Menu options. Hold
down the SET/
button to return
to the standard screen.
Lighting (Car interior
lighting adjustment)
(only with side lights on)
This function is used to set the
brightness of the instrument panel,
Uconnect™system controls (for
versions/markets where provided) and
automatic climate control system
controls (for versions/markets where
provided) to 8 levels.
Proceed as follows to adjust the light
intensity:❒press button SET/
briefly. The
level set previously flashes on the
display;
❒press button
orto set
the required brightness level;
❒briefly press the SET/
button to
go back to the menu screen or hold
the button down to go back to the
standard screen without saving.
NoteOn versions with reconfigurable
multifunction display, adjustment can
be made both with lights off ("Daytime"
mode brightness level) and with lights
on ("Nighttime" mode brightness level).
Speed Beep (Speed
limit)
With this function it is possible to set
the car speed limit (km/h or mph); when
this limit is exceeded the driver is
alerted.
To set the desired speed limit, proceed
as follows:
❒briefly press the SET/
button: the
display will show the wording "Speed
Beep";
❒press button
orto select
speed limit activation ("On") or
deactivation ("Off");❒if the function is on, press
or
to select the desired speed
limit and then press SET/
to
confirm.
IMPORTANT Setting is possible
between 30 and 200 km/h, or 20 and
125 mph, according to the previously
set unit. See the "Unit of Measurement"
paragraph described below. The
setting will increase/decrease by five
units each time button
/is
pressed. Hold down the
/
button to automatically
increase/decrease the setting rapidly.
Complete the adjustment with single
presses of the button when you
approach the desired value.
Briefly press the SET/
button to go
back to the menu screen or hold the
button down to go back to the
standard screen without saving.
To cancel the setting, proceed as
follows:
❒briefly press the SET/
button,
"On" will flash in the display;
❒press button
, "Off" will flash on
the display;
❒briefly press the SET/
button to
go back to the menu screen or hold
the button down to go back to the
standard screen without saving.
87
Page 216 of 288

149) When performing any
operation on the battery or near it,
always protect your eyes with
special goggles.
IMPORTANT
36) Incorrect assembly of electrical
and electronic accessories may
cause severe damage to your car.
Go to an Alfa Romeo Dealership
if you want to install accessories
(e.g. anti-theft, radio phone, etc.):
they will suggest the most
suitable devices and advise you
whether a higher capacity battery
needs to be installed.
IMPORTANT
5) Batteries contain substances
which are very dangerous for the
environment. For battery
replacement, contact an Alfa
Romeo Dealership.
WHEELS AND TYRES
Before embarking on a long trip, and
every two weeks, check the tyre
inflation pressure. Check the tyres when
cold.
150) 151) 152) 153)
It is normal for the pressure to increase
when the car is used; for the correct
tyre inflation pressure, see “Wheels” in
the “Technical specifications” chapter.
Incorrect pressure causes abnormal
tyre wear fig. 189:
A normal pressure: tread evenly worn;
B low pressure: tread particularly worn
at the edges;
C high pressure: tread particularly
worn in the centre.The tyres must be replaced when the
tread is less than 1.6 mm thick. In
any case, follow the laws in force in the
country you are in.
IMPORTANT
INFORMATION
Take the following precautions to
prevent damage to the tyres:
❒avoid violent impact against the kerb,
potholes or obstacles as well as
driving for extended periods on
uneven road surfaces;
❒periodically check that the tyres have
no cuts in the side walls, abnormal
swelling or irregular tread wear;
❒avoid travelling with the car
overloaded. If a tyre is punctured,
stop immediately and change it;
❒tyres age even if they are not used a
great deal. Cracks in the tread and
on the side walls are a sign of ageing.
Have the tyres checked by
specialised personnel if they have
been fitted for longer than 6 years;
❒in case of replacement, always fit
new tyres, avoiding those of dubious
origin;
❒if a tyre is changed, also change the
inflation valve.
189A0K0531
212
SERVICING AND MAINTENANCE