2015 Alfa Romeo Giulietta u connect
[x] Cancel search: u connectPage 166 of 288

STORING THE CAR
If the car is to be left inactive for longer
than a month, the following precautions
should be noted:
❒park the car in covered, dry and if
possible well-ventilated premises and
slightly open the windows;
❒check that the handbrake is not
engaged;
❒disconnect the negative battery
terminal and check the battery
charge. Repeat this check once
every three months during storage;
❒if the battery is not disconnected
from the electrical system, checks its
state of charge every thirty days;
❒clean and protect the painted parts
using protective wax;
❒clean and protect the shiny metal
parts using special compounds
available commercially;
❒sprinkle talcum powder on the
windscreen and rear window wiper
rubber blades and lift them off the
glasses;
❒slightly open the windows;❒cover the car with a cloth or
perforated plastic sheet. Do not use
compact plastic sheets which do
not allow humidity to evaporate from
the surface of the car.
❒inflate tyres to +0.5 bar above the
standard prescribed pressure and
check it periodically;
❒do not drain the engine cooling
system;
❒Any time the car is left inactive for
two weeks or more, operate the
air conditioning system with engine
idling for at least 5 minutes, setting
external air and with fan at maximum
speed. This operation will ensure a
suitable lubrication to minimise
possibility of damage to the
compressor when the system is
operated again.
IMPORTANT After turning the ignition
key to STOP, wait at least 1 minute
before disconnecting the electrical
supply to the battery.
162
STARTING AND DRIVING
Page 168 of 288

STARTING THE
ENGINE
Contact the Alfa Romeo Dealership
immediately if the warning light
stays on constantly on the
instrument panel.
JUMP STARTING
If the battery is flat, start the engine
using an auxiliary battery with the same
capacity or a little higher than the flat
one.
24) 25)112)
Proceed as follows to start the car:
❒connect the positive terminal (+) fig.
138 of the auxiliary battery only to
the point indicated on the car battery
(writing OK) and nowhere else;
❒with a second lead, connect the
negative terminal(−)oftheauxiliary
battery to an earthing point
on
the engine or the gearbox/
transmission of the car to be started;
❒start the engine; when the engine has
been started, remove the leads
reversing the order above.
For versions with Start&Stop system, in
case of starting by auxiliary battery,
refer to the paragraph “Start&Stop
system” in the chapter “Getting to know
your car”.If after a few attempts the engine does
not start, contact the Alfa Romeo
Dealership.
BUMP STARTING
Never jump start the engine by pushing,
towing or coasting downhill.
IMPORTANT
24) Do not connect the negative
terminals of the two batteries
directly! If the auxiliary battery is
installed on another car, prevent
accidental contact between
metallic parts of the two cars.
25) Never use a fast battery charger
to start the engine as this could
damage the electronic systems
and the ignition and engine fuel
supply control units.
WARNING
112) This procedure must be
performed by qualified personnel
as incorrect actions may cause
high-intensity electrical discharge.
Furthermore, battery fluid is
poisonous and corrosive: avoid
contact with skin and eyes. Keep
naked flames away from the
battery. No smoking. Do not cause
sparks.
138A0K0247
164
IN AN EMERGENCY
Page 174 of 288

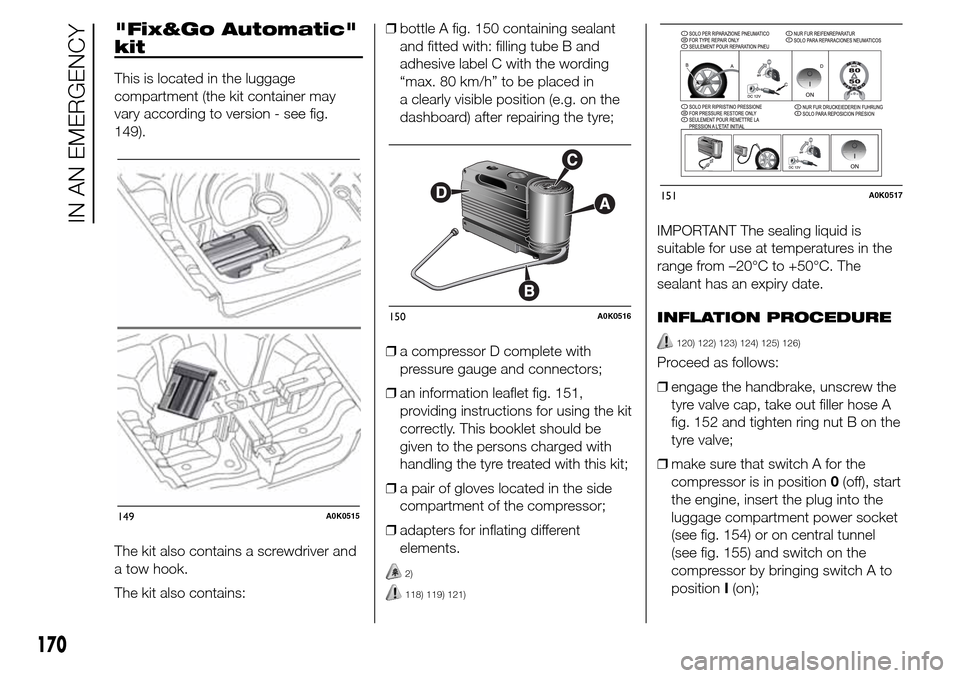
"Fix&Go Automatic"
kit
This is located in the luggage
compartment (the kit container may
vary according to version - see fig.
149).
The kit also contains a screwdriver and
a tow hook.
The kit also contains:❒bottle A fig. 150 containing sealant
and fitted with: filling tube B and
adhesive label C with the wording
“max. 80 km/h” to be placed in
a clearly visible position (e.g. on the
dashboard) after repairing the tyre;
❒a compressor D complete with
pressure gauge and connectors;
❒an information leaflet fig. 151,
providing instructions for using the kit
correctly. This booklet should be
given to the persons charged with
handling the tyre treated with this kit;
❒a pair of gloves located in the side
compartment of the compressor;
❒adapters for inflating different
elements.
2)
118) 119) 121)
IMPORTANT The sealing liquid is
suitable for use at temperatures in the
range from –20°C to +50°C. The
sealant has an expiry date.
INFLATION PROCEDURE
120) 122) 123) 124) 125) 126)
Proceed as follows:
❒engage the handbrake, unscrew the
tyre valve cap, take out filler hose A
fig. 152 and tighten ring nut B on the
tyre valve;
❒make sure that switch A for the
compressor is in position0(off), start
the engine, insert the plug into the
luggage compartment power socket
(see fig. 154) or on central tunnel
(see fig. 155) and switch on the
compressor by bringing switch A to
positionI(on);
149A0K0515
150A0K0516
151A0K0517
170
IN AN EMERGENCY
Page 175 of 288

❒inflate the tyre to the pressure
indicated in the “Wheels” paragraph
in the “Technical data” chapter. In
order to obtain a more precise
reading, check the pressure value on
pressure gauge B fig. 153 with the
compressor off;
❒if after five minutes it is still impossible
to reach at least 1.8 bar, disengage
the compressor from the valve and
power socket, then move the car
forwards by approx. ten metres
in order to distribute the sealing fluid
inside the tyre evenly, then repeat
the inflation operation;
❒if you still cannot obtain a pressure of
at least 1.8 bar within 5 minutes from
the compressor switching on, do
not drive off and contact an Alfa
Romeo Dealership;❒after having driven for about 10
minutes, stop and recheck the tyre
pressure; remember to engage
the handbrake;
❒if a pressure value of at least 1.8 bar
is detected, restore the correct
pressure (with the engine running and
the handbrake engaged), resume
driving and drive with great care to an
Alfa Romeo Dealership.
CHECKING AND
RESTORING TYRE
PRESSURE
The compressor can also be used to
check and, if necessary, adjust the tyre
pressure.
Release quick coupling A fig. 157 and
connect it directly to the valve of the
tyre to be inflated.
152A0K0518
153A0K0519
154A0K0520
155A0K0128
156A0K0521
171
Page 176 of 288

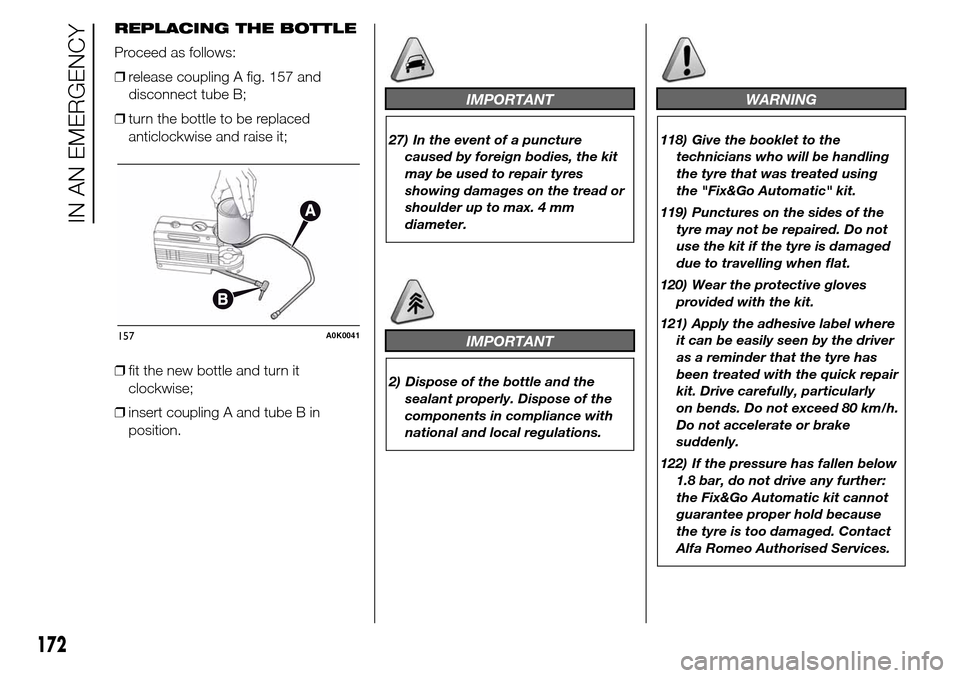
REPLACING THE BOTTLE
Proceed as follows:
❒release coupling A fig. 157 and
disconnect tube B;
❒turn the bottle to be replaced
anticlockwise and raise it;
❒fit the new bottle and turn it
clockwise;
❒insert coupling A and tube B in
position.
IMPORTANT
27) In the event of a puncture
caused by foreign bodies, the kit
may be used to repair tyres
showing damages on the tread or
shoulder up to max. 4 mm
diameter.
IMPORTANT
2) Dispose of the bottle and the
sealant properly. Dispose of the
components in compliance with
national and local regulations.
WARNING
118) Give the booklet to the
technicians who will be handling
the tyre that was treated using
the "Fix&Go Automatic" kit.
119) Punctures on the sides of the
tyre may not be repaired. Do not
use the kit if the tyre is damaged
due to travelling when flat.
120) Wear the protective gloves
provided with the kit.
121) Apply the adhesive label where
it can be easily seen by the driver
as a reminder that the tyre has
been treated with the quick repair
kit. Drive carefully, particularly
on bends. Do not exceed 80 km/h.
Do not accelerate or brake
suddenly.
122) If the pressure has fallen below
1.8 bar, do not drive any further:
the Fix&Go Automatic kit cannot
guarantee proper hold because
the tyre is too damaged. Contact
Alfa Romeo Authorised Services.
157A0K0041
172
IN AN EMERGENCY
Page 181 of 288

REPLACING
EXTERIOR BULBS
FRONT LIGHT CLUSTERS
These contain the bulbs for the side
lights/daytime running lights (DRL),
dipped beams, main beams and
direction indicators. The bulbs are
arranged as follows fig. 158:
ASide lights/daytime running lights and
main beam headlights
BDipped beam headlights
CDirection indicators
SIDE LIGHTS/DAYTIME
RUNNING LIGHTS (DRL)
These are LEDs. For the replacement,
contact an Alfa Romeo Dealership.MAIN BEAM HEADLIGHTS
To change the bulb, proceed as
follows:
❒remove cover A fig. 158;
❒remove the connector A fig. 159 and
then open the tabs B pulling
outwards;
❒remove the bulb C and replace it;
❒refit the new lamp, making sure that it
is locked correctly, secure the tabs B
again and reconnect the connector
A;
❒then refit the cover A fig. 158.DIPPED BEAM
HEADLIGHTS
To change the bulb, proceed as follows:
❒remove cover B fig. 158;
❒remove the connector A fig. 160,
press the tab B forward and then
release by pushing it towards inside
the car;
❒remove the bulb C and replace it;
❒refit the new lamp, making sure that it
is locked correctly, secure the tab B
again and reconnect the connector
A;
❒then refit the cover B fig. 158.
158A0K0631159A0K0632160A0K0633
177
Page 182 of 288

DIRECTION INDICATORS
Front
To change the bulb, proceed as follows:
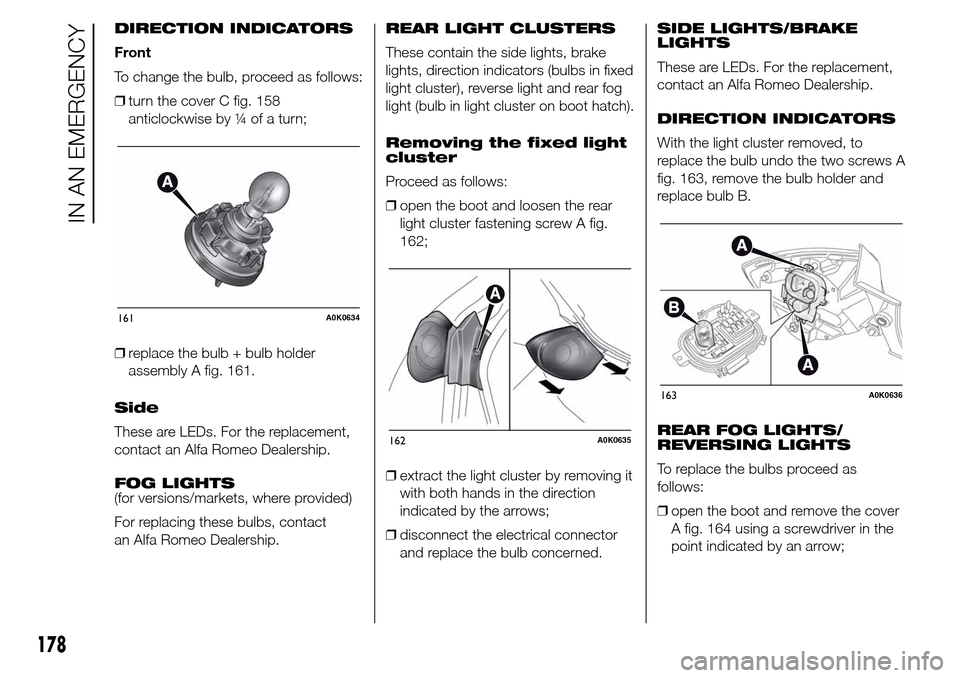
❒turn the cover C fig. 158
anticlockwise by ¼ of a turn;
❒replace the bulb + bulb holder
assembly A fig. 161.
Side
These are LEDs. For the replacement,
contact an Alfa Romeo Dealership.
FOG LIGHTS
(for versions/markets, where provided)
For replacing these bulbs, contact
an Alfa Romeo Dealership.REAR LIGHT CLUSTERS
These contain the side lights, brake
lights, direction indicators (bulbs in fixed
light cluster), reverse light and rear fog
light (bulb in light cluster on boot hatch).
Removing the fixed light
cluster
Proceed as follows:
❒open the boot and loosen the rear
light cluster fastening screw A fig.
162;
❒extract the light cluster by removing it
with both hands in the direction
indicated by the arrows;
❒disconnect the electrical connector
and replace the bulb concerned.SIDE LIGHTS/BRAKE
LIGHTS
These are LEDs. For the replacement,
contact an Alfa Romeo Dealership.
DIRECTION INDICATORS
With the light cluster removed, to
replace the bulb undo the two screws A
fig. 163, remove the bulb holder and
replace bulb B.
REAR FOG LIGHTS/
REVERSING LIGHTS
To replace the bulbs proceed as
follows:
❒open the boot and remove the cover
A fig. 164 using a screwdriver in the
point indicated by an arrow;
161A0K0634
162A0K0635
163A0K0636
178
IN AN EMERGENCY
Page 183 of 288

❒remove the connector A fig. 165 and
extract the bulb holder assembly by
operating on the retaining tab B
and then by loosening the screw C;
❒remove the bulb by pushing it slightly
and turning it anticlockwise (D =
reverse light bulb;E=rearfoglight
bulb);
❒refit the bulb holder assembly
positioning it correctly, fasten screw
C and then fix it by means of the
retaining tab B. Reconnect connector
A then refit cover A fig. 164.
IMPORTANT Protect the tip of the
screwdriver with a cloth to prevent
scratching when removing the cover A.3
rdBRAKE LIGHTS
These are LED lights and are located
on the spoiler integrated with the
tailgate. For the replacement, contact
an Alfa Romeo Dealership.NUMBER PLATE LIGHTS
To replace the bulbs proceed as
follows:
❒remove the number plate light units A
fig. 166;
❒turn the bulb holder B fig. 167
anticlockwise, extract the bulb C and
replace it.
164A0K0637
165A0K0638
166A0K0639
167A0K0640
179