Page 218 of 545
Continued
217
uuAudio System Basic Operation uOn Demand Multi-Use Display
TM
Features
You can preset the settings of four categories
(Phone , Climate , Audio ) from Shortcuts .
■
Shortcuts
1Shortcuts
The preset memory is cleared when it is disconnected
from the power source, such as when the battery is
disconnected or goes dead.
Shortcuts Icon
Page 219 of 545

uuAudio System Basic Operation uOn Demand Multi-Use Display
TM
218Features
■Phone
You can preset five speed dial entries, and make a call from one of the preset
numbers, or call history when the phone is paired and connected to the vehicle‘s
Bluetooth ® HandsFreeLink ® (HFL) system.
2 Phone Setup P. 286
To preset a speed dial:
1.Select Shortcuts .
2. Select Phone .
3. Select Speed Dial .
4. Select Edit or No Entry .
u If you select No Entry, go to step 6.
5. Select Add.
u Five presets appear. Select a No Entry
preset or an existing preset.
u The screen changes to a list of previously
stored speed dial entries.
6. Select a number you want to store as a
shortcut.
To make a call from a speed dial entry:
1. Select Shortcuts .
2. Select Phone .
3. Select Speed Dial .
4. Select a preset number.
u Dialing starts automatically.
1Phone
Dial icon
You can make a call using the keyboard on the On
Demand Multi-Use Display
TM to input numbers.
2 To make a call using a phone number
P. 302
Page 220 of 545
Continued
219
uuAudio System Basic Operation uOn Demand Multi-Use Display
TM
Features
To delete a speed dial:
1. Select Shortcuts .
2. Select Phone .
3. Select Speed Dial .
4. Select Edit.
5. Select Delete .
6. Select the preset number with the phone number you want to delete.
To make a call from call history:
1.Select Shortcuts .
2. Select Phone.
3. Select Call History .
4. Select a phone number.
u Dialing starts automatically.■Climate2 Shortcuts P. 205
1Phone
The call history displays the last six dialed, received, or
missed calls.
Page 221 of 545
uuAudio System Basic Operation uOn Demand Multi-Use Display
TM
220Features
■Audio
You can store up to six radio stations when playing AM, FM, or SiriusXM ® Radio.
To preset a station or song:
1. Tune to a radio station.
2 Playing AM/FM Radio P. 228
2 Playing SiriusXM ® Radio P. 232
2.Select Shortcuts .
3. Select Audio .
4. Select Edit or No Entry .
u If you select No Entry, go to step 6.
5. Select Add.
6. Select the preset icon you want to store the
station or song to.
To play a preset station or song:
1. Select Shortcuts .
2. Select Audio .
3. Select a preset icon.
To delete a preset station or song:
1. Select Shortcuts .
2. Select Audio .
3. Select Edit.
4. Select Delete.
5. Select the preset icon with the radio station
or a song you want to delete.
1Audio
You can also preset a station or song by pressing and
holding the preset icon you want to store that station
or song after step 3.
Page 222 of 545

221
uuAudio System Basic Operation uOn Demand Multi-Use Display
TM
Features
1. Select More, then Sound Settings.
2. Use
(+
, (-
or other icons to adjust the
setting.
1. Select More, then Screen Settings .
2. Use
(+
, (-
or other icons to adjust the
setting.
■
Adjusting the Sound
1 Adjusting the Sound
Select Off, Low , Mid or High for the SVC setting.
2 Adjusting the Sound P. 226
Instead of using
( +, (- or icons, you can also touch
the point where your desired setting is.
■
Changing the Screen Settings
1 Changing the Screen Settings
The following are adjustable screen settings:•Sync Display Brightness
Selects whether the screen brightness synchronizes
with the instruments panel brightness.•Brightness•Contrast•Black Level•Display
Changes between the daytime or nighttime
modes.•Beep
Mutes a beep that sounds every time you touch the
screen.•Keyboard
Changes the on-screen keyboard from the
alphabetical order to the qwerty type.•Vibration
Turns on and off the vibration when you touch the
screen.•Fade Timer
Sets the screen black out timing.
Instead of using
( +, (- or icons, you can also touch
the point where your desired setting is.
Page 223 of 545
222
uuAudio System Basic Operation uAudio/Information Screen
Features
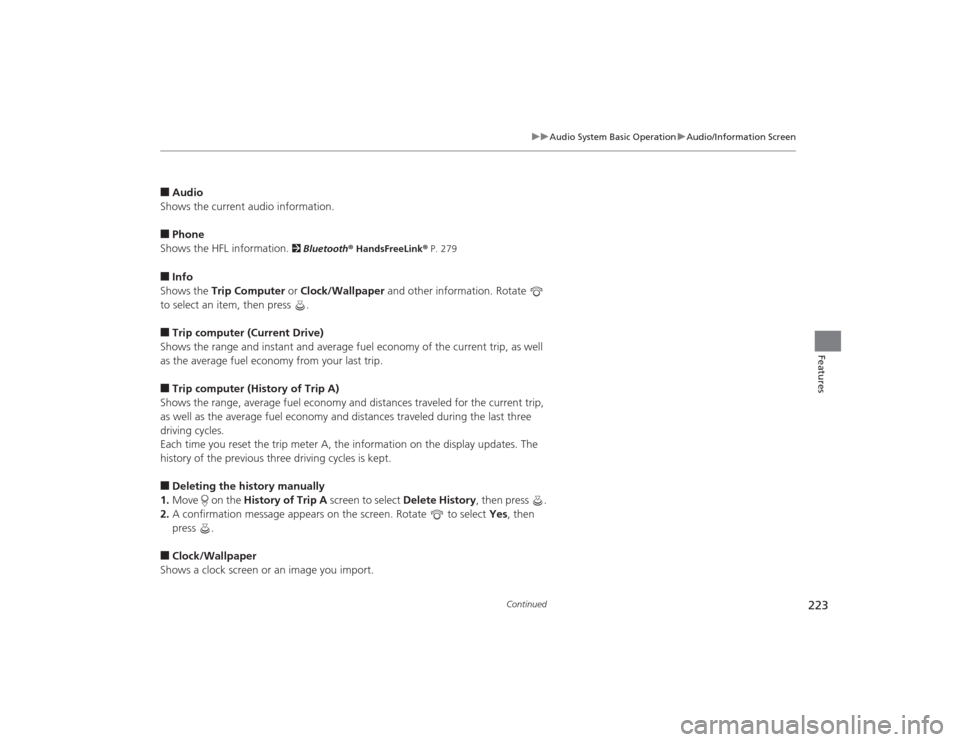
Audio/Information ScreenDisplays the audio status and wallpaper. From this screen, you can go to various
setup options.
Press the PHONE, INFO and AUDIO buttons to go to the corresponding display.■
Switching the Display
Audio
Info
Phone
AUDIO Button
PHONE Button INFO Button
Page 224 of 545

223
uuAudio System Basic Operation uAudio/Information Screen
Continued
Features
■Audio
Shows the current audio information.■Phone
Shows the HFL information.
2 Bluetooth ® HandsFreeLink ® P. 279
■Info
Shows the Trip Computer or Clock/Wallpaper and other information. Rotate
to select an item, then press .■Trip computer (Current Drive)
Shows the range and instant and average fuel economy of the current trip, as well
as the average fuel economy from your last trip.■Trip computer (History of Trip A)
Shows the range, average fuel economy and distances traveled for the current trip,
as well as the average fuel economy and distances traveled during the last three
driving cycles.
Each time you reset the trip meter A, the information on the display updates. The
history of the previous three driving cycles is kept.■Deleting the history manually
1. Move on the History of Trip A screen to select Delete History , then press .
2. A confirmation message appears on the screen. Rotate to select Yes, then
press .■Clock/Wallpaper
Shows a clock screen or an image you import.
Page 225 of 545

uuAudio System Basic Operation uAudio/Information Screen
224Features
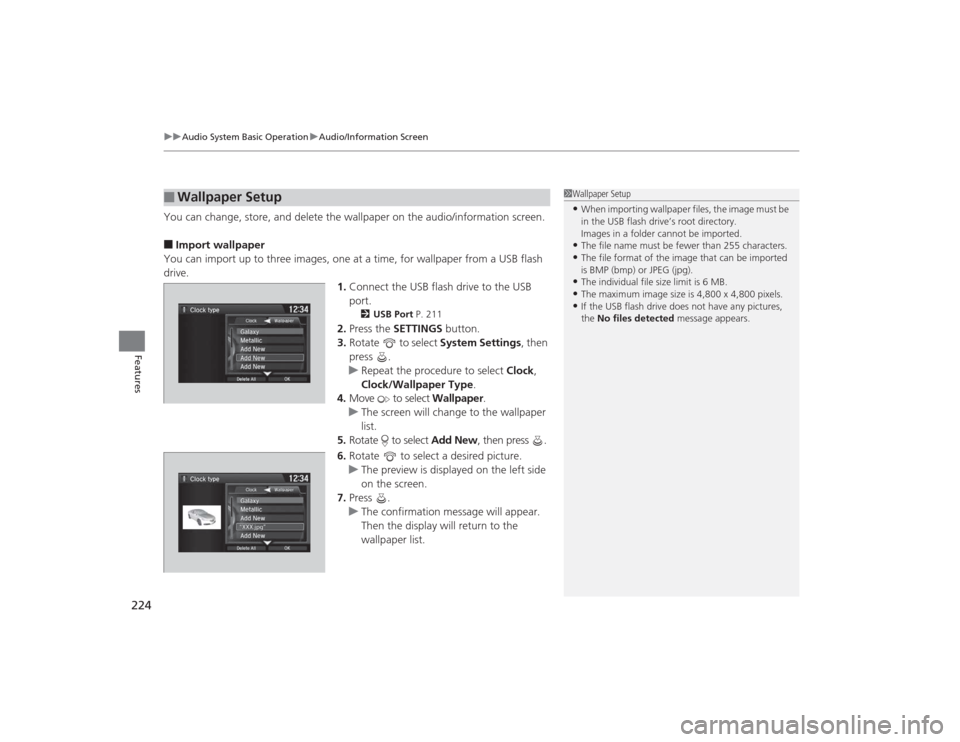
You can change, store, and delete the wallpaper on the audio/information screen.■Import wallpaper
You can import up to three images, one at a time, for wallpaper from a USB flash
drive. 1.Connect the USB flash drive to the USB
port.
2 USB Port P. 211
2.Press the SETTINGS button.
3. Rotate to select System Settings, then
press .
u Repeat the procedure to select Clock,
Clock/Wallpaper Type .
4. Move to select Wallpaper.
u The screen will change to the wallpaper
list.
5. Rotate to select Add New, then press .
6. Rotate to select a desired picture.
u The preview is displayed on the left side
on the screen.
7. Press .
u The confirmation message will appear.
Then the display will return to the
wallpaper list.
■
Wallpaper Setup
1Wallpaper Setup•When importing wallpaper files, the image must be
in the USB flash drive’s root directory.
Images in a folder cannot be imported.•The file name must be fewer than 255 characters.•The file format of the image that can be imported
is BMP (bmp) or JPEG (jpg).•The individual file size limit is 6 MB.•The maximum image size is 4,800 x 4,800 pixels.•If the USB flash drive does not have any pictures,
the No files detected message appears.