Page 202 of 545

Continued
201
uuClimate Control System uUsing Automatic Climate Control
Controls
■Changing the interior temperature setting
1.Select the driver’s or passenger’s side
temperature control.
2. Change the temperature setting from the
following:
Temperature bar : Select a point where your
desired temperature setting is.
Farther to the left is for a lower, and to the
right for a higher setting.
3 /4 : To raise or lower the temperature
setting one degree at a time.
While you select and hold 3 /4 , the
temperature decreases or increases.
MAX COOL ON/OFF : To rapidly cool down
the interior. u The AUTO indicator goes off. The setting
returns to the previously selected value
when you select it again.
MAX HEAT ON/OFF: To rapidly warm up the
interior. u The AUTO indicator goes off. The setting
returns to the previously selected value
when you select it again.
1Using Automatic Climate Control
When you set the temperature to the lower or upper
limit, Lo or Hi is displayed.
If you select the MAX COOL ON/OFF or MAX HEAT
ON/OFF during Auto Idle Stop, the engine restarts
automatically.Models with Auto Idle Stop
The side you selected.
Temperature Bar
Page 210 of 545

209
Features
This chapter describes how to operate technology features.
Audio SystemAbout Your Audio System ................ 210
USB Port .......................................... 211
Auxiliary Input Jack .......................... 212
Audio System Theft Protection ......... 213
Audio Remote Controls .................... 214
Audio System Basic Operation ........ 215
On Demand Multi-Use Display
TM....... 216
Audio/Information Screen ................ 222
Adjusting the Sound ........................ 226
Display Setup ................................... 227
Playing AM/FM Radio ....................... 228
Playing SiriusXM ® Radio ................... 232 Playing a CD .................................... 235
Playing an iPod ................................ 238
Playing Internet Radio ...................... 242
Playing a USB Flash Drive ................. 245
Playing
Bluetooth ® Audio................. 248
Audio Error Messages CD Player ......................................... 250
iPod/USB Flash Drive ........................ 251
Pandora ®......................................... 252
Aha
TM Radio ..................................... 254
General Information on the Audio SystemSiriusXM ® Radio Service ................... 255
Recommended CDs ......................... 256
Compatible iPod, iPhone, and USB Flash
Drives ................................................. 258Customized Features ........................ 259
Defaulting All the Settings ............... 276
HomeLink ® Universal Transceiver ... 277
Bluetooth ® HandsFreeLink ®
Using HFL ........................................ 279
HFL Menus ...................................... 281
Compass
*.......................................... 313
* Not available on all models
Page 211 of 545

210Features
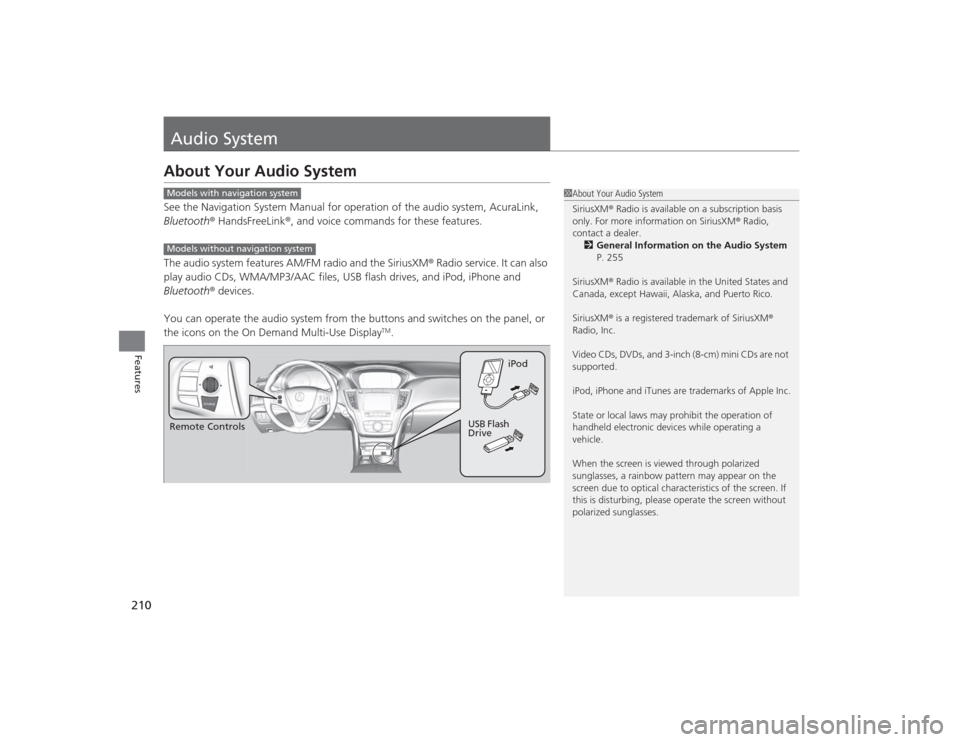
Audio SystemAbout Your Audio SystemSee the Navigation System Manual for operation of the audio system, AcuraLink,
Bluetooth® HandsFreeLink ®, and voice commands for these features.
The audio system features AM/FM radio and the SiriusXM ® Radio service. It can also
play audio CDs, WMA/MP3/AAC files, USB flash drives, and iPod, iPhone and
Bluetooth ® devices.
You can operate the audio system from the buttons and switches on the panel, or
the icons on the On Demand Multi-Use Display
TM.
1 About Your Audio System
SiriusXM ® Radio is available on a subscription basis
only. For more information on SiriusXM ® Radio,
contact a dealer.
2 General Information on the Audio System
P. 255
SiriusXM ® Radio is available in the United States and
Canada, except Hawaii, Alaska, and Puerto Rico.
SiriusXM ® is a registered trademark of SiriusXM ®
Radio, Inc.
Video CDs, DVDs, and 3-inch (8-cm) mini CDs are not
supported.
iPod, iPhone and iTunes are trademarks of Apple Inc.
State or local laws may prohibit the operation of
handheld electronic devices while operating a
vehicle.
When the screen is viewed through polarized
sunglasses, a rainbow pattern may appear on the
screen due to optical character istics of the screen. If
this is disturbing, please operate the screen without
polarized sunglasses.
Models with navigation systemModels without navigation systemRemote Controls iPod
USB Flash
Drive
Page 212 of 545
211
uuAudio System uUSB Port
Features
USB Port
Install the iPod dock connector or the USB
flash drive to the USB port.
1USB Port•Do not leave the iPod or USB flash drive in the
vehicle. Direct sunlight and high temperatures may
damage it.•Do not connect the iPod or USB flash drive using a
hub.•Do not use a device such as a card reader or hard
disk drive, as the device or your files may be
damaged.•We recommend your data backed up before using
the device in your vehicle.•Displayed messages may vary depending on the
device model and software version.
If the audio system does not recognize the iPod, try
reconnecting it a few times or reboot the device. To
reboot, follow the manufacturer’s instructions
provided with the iPod or visit www.apple.com/ipod.
Page 213 of 545
212
uuAudio System uAuxiliary Input Jack
Features
Auxiliary Input Jack
Use the jack to connect standard audio
devices.
1. Open the AUX cover.
2. Connect a standard audio device to the
input jack using a 1/8 inch (3.5 mm) stereo
miniplug.
u The audio system automatically switches
to the AUX mode.
1Auxiliary Input Jack
You can return to the AUX mode by selecting
Change Source on the Audio menu screen or
Audio Source on the On Demand Multi-Use
Display
TM.
Page 214 of 545
213
uuAudio System uAudio System Theft Protection
Features
Audio System Theft ProtectionThe audio system is disabled when it is disconnected from the power source, such as
when the battery is disconnected or goes dead. In certain conditions, the system
may display Enter code. If this occurs, reactivate the audio system.■Reactivating the audio system
1. Set the power mode to ON.
2. Turn on the audio system.
3. Press and hold the audio system power button for more than two seconds.
u The audio system is reactivated when the audio control unit establishes a
connection with the vehicle control unit. If the control unit fails to recognize
the audio unit, you must go to a dealer and have the audio unit checked.
Page 216 of 545

215Features
Audio System Basic OperationTo use the audio system, the power mode must be in ACCESSORY or ON.Use the interface dial or MENU button to
access some audio functions.
Press to switch between the normal and
extended display for some functions.
Interface dial: Rotate left or right to scroll
through the available choices. Press to set
your selection. Move right, left, up or down to
select a secondary menu.
MENU button: Press to select any mode. The
available mode includes Change Source,
Station List , Save Preset , Radio Text,
Music Search , and play modes. Play modes
can be also selected from Scan, Random/
Repeat , and so on.
BACK button: Press to go back to the
previous display.
(Day/Night) button: Press to change
the audio/information screen brightness.
Press once and make an adjustment
using the interface dial. u Each time you press , the mode
switches between the daytime mode,
nighttime mode and off mode.
1Audio System Basic Operation
These indications are used to show how to operate
the interface dial.
Rotate to select.
Press to enter.
Move , , or to select a secondary menu.
Audio Menu Items
2 Station List P. 230
2 Save Preset P. 229, 234
2 Radio Text P. 231
2 Music Search P. 236, 240, 246
2 Scan P. 237, 247
2 Random/Repeat P. 237, 241, 247
When you unlock the doors with your remote, the
driver’s ID ( Driver 1 or Driver 2) is detected, and the
audio system settings and preset memory are turned
to the respective mode au tomatically when you set
the power mode to ON.
Interface Dial
MENU Button
BACK Button
Button
Page 217 of 545
216
uuAudio System Basic Operation uOn Demand Multi-Use Display
TM
Features
On Demand Multi-Use Display
TM
Use the On Demand Multi-Use Display
TM to operate the audio system.
Select Audio Source , then select an icon on the source list to switch the audio
source.
Select More to display the menu items.
■
Selecting an Audio Source
1On Demand Multi-Use Display
TM
Icons that appear on the screen vary by the source
selected.
Select to go back to the previous screen.
Use the / / / icons to turn the page.
X
■
Displaying the Menu Items
Select Audio Source .
Source List Icons
Select More.
Menu Items