2015.5 VAUXHALL MOVANO_B wheel
[x] Cancel search: wheelPage 127 of 215

Driving and operating125
Traction function to TC operation.
Control indicator Ø extinguishes in
the instrument cluster.
TC is reactivated by pressing the Ø
button again. Control indicator Ø
extinguishes.
TC is also reactivated the next time
the ignition is switched on.
Fault If the system detects a fault, control
indicator b 3 81 illuminates together
with A 3 80 in the instrument cluster
and a corresponding message
appears in the Driver Information
Centre 3 84.
The Traction control system (TC) is not operational. Have the cause of the
fault remedied by a workshop.
Vehicle messages 3 85.
Electronic stability
program
The Electronic Stability Program
(ESP® Plus
) improves driving stability
when necessary, regardless of thetype of road surface or tyre grip. It also
prevents the drive wheels from
spinning.
As soon as the vehicle starts to
swerve (understeer/oversteer),
engine output is reduced and the
wheels are braked individually. This
considerably improves the driving
stability of the vehicle on slippery road
surfaces.
ESP® Plus
is operational as soon as
the ignition is switched on and control
indicator b extinguishes in the
instrument cluster. A corresponding
message also appears in the Driver
Information Centre 3 84.
When ESP® Plus
comes into action b
flashes.9 Warning
Do not let this special safety
feature tempt you into taking risks
when driving.
Adapt speed to the road
conditions.
Control indicator b 3 81.
Trailer stability assist (TSA) 3 136.
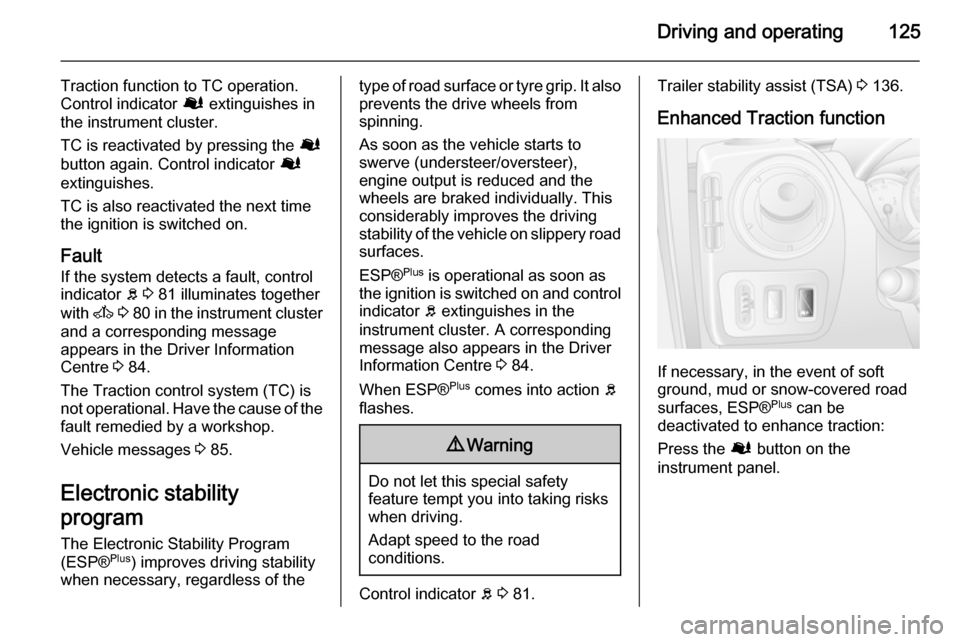
Enhanced Traction function
If necessary, in the event of soft
ground, mud or snow-covered road
surfaces, ESP® Plus
can be
deactivated to enhance traction:
Press the Ø button on the
instrument panel.
Page 138 of 215

136Driving and operating
The pitch of the audible warning will
change if a turn signal light on the
trailer or the towing vehicle fails.
Trailer stability assist
If the system detects snaking
movements, engine power is reduced
and the vehicle/trailer combination is
selectively braked until the snaking ceases. While the system is working,keep steering wheel as still as
possible.
Trailer stability assist (TSA) is a
function of the Electronic stability
program (ESP) 3 125.Auxiliary features
Power take-off
Activation
To activate the power take-off, with
the vehicle stationary and the engine
idling:
■ Set the gearshift lever to neutral (vehicles with manual transmissionautomated: selector lever in
position N).
■ Depress the clutch pedal.
■ Press switch on the instrument panel; LED in switch illuminatesafter approx. 2 seconds.
■ Release the clutch pedal.
The engine idle speed increases to
1,200 rpm.Caution
During operation of the power
take-off, never move the selector
lever out of neutral (vehicles with
manual transmission automated:
selector lever in position N), to
avoid damage to the transmission.
If a gear change becomes
necessary, i.e. to adjust the driving
speed, the power take-off must always be deactivated first.
Deactivation
To deactivate the power take-off:
■ Depress the clutch pedal.
■ Press switch on the instrument panel; LED in switch extinguishes
after approx. 2 seconds.
■ Release the clutch pedal.
Page 140 of 215

138Vehicle careVehicle careGeneral Information...................138
Vehicle checks ........................... 139
Bulb replacement .......................147
Electrical system ........................155
Vehicle tools .............................. 158
Wheels and tyres .......................159
Jump starting ............................. 171
Towing ....................................... 174
Appearance care .......................175General Information
Accessories and vehicle
modifications
We recommend the use of genuine parts and accessories and factory
approved parts specific for your
vehicle type. We cannot assess or
guarantee reliability of other products
- even if they have a regulatory or
otherwise granted approval.
Do not make any modifications to the electrical system, e.g. changes of
electronic control units (chip tuning).Caution
When transporting the vehicle on
a train or on a recovery vehicle, the
mud flaps might be damaged.
Vehicle storage
Storage for a long period of time
If the vehicle is to be stored for several months:
■ Wash and wax the vehicle.
■ Have the wax in the engine compartment and underbody
checked.
■ Clean and preserve rubber seals.
■ Change engine oil.
■ Drain washer fluid reservoir.
■ Check coolant antifreeze and corrosion protection.
■ Adjust tyre pressure to the value specified for full load.
■ Park vehicle in a dry, well ventilated
place. Engage first or reverse gear.
Prevent the vehicle from rolling.
■ Do not apply parking brake.
Page 144 of 215

142Vehicle careEngine coolantThe coolant provides freeze
protection down to approx. -28 °C.Caution
Only use approved antifreeze.
Coolant level
Caution
Too low a coolant level can cause engine damage.
If the cooling system is cold, the
coolant level should be just above the
MINI mark.Top up if the level is low.9Warning
Allow the engine to cool before
opening the cap. Carefully open
the cap, relieving the pressure
slowly.
Top up with antifreeze.If no antifreeze
is available, use clean tap water or
distilled water.Install the cap
tightly.Have the antifreeze
concentration checked and have the
cause of the coolant loss remedied by a workshop.
If a substantial amount of coolant is
required, it will be necessary to bleed
any trapped air from the cooling
system.Seek the assistance of a
workshop.
Power steering fluidCaution
Extremely small amounts of
contamination can cause steering
system damage and cause it to not work properly. Do not allow
contaminates to contact the fluid
side of the reservoir cap or from
entering the reservoir.
The fluid level normally does not need
to be checked. If an unusual noise is
heard during steering or if the power
steering reacts conspicuously, seek
the assistance of a workshop.
Depending on vehicle, the power
steering fluid reservoir may be
located in the engine compartment
(Type A) or below the front wheel
arch, behind a trim panel (Type B).
Page 160 of 215

158Vehicle careVehicle toolsTools
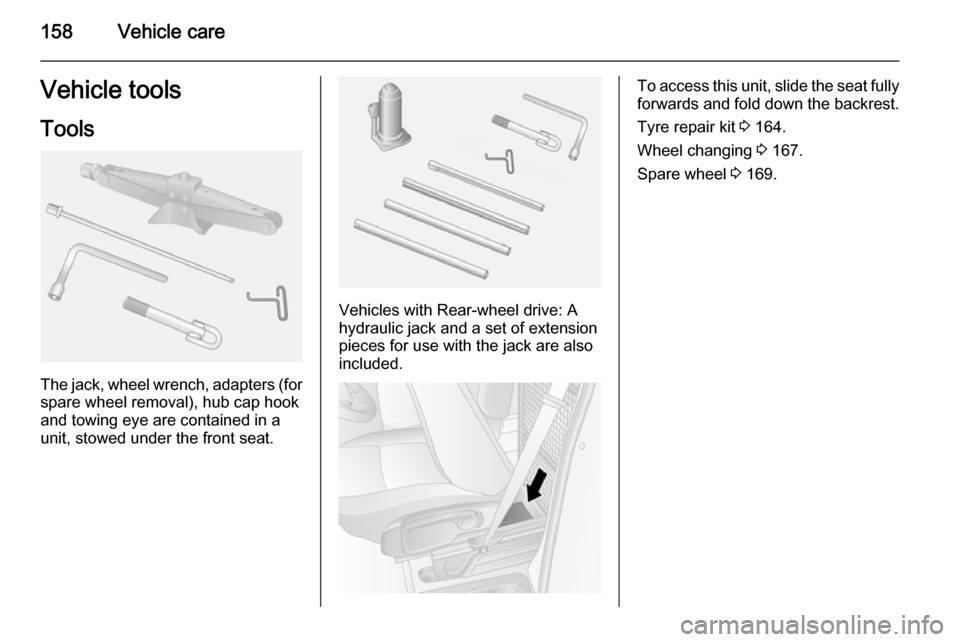
The jack, wheel wrench, adapters (for
spare wheel removal), hub cap hook
and towing eye are contained in a
unit, stowed under the front seat.
Vehicles with Rear-wheel drive: A hydraulic jack and a set of extension
pieces for use with the jack are also
included.
To access this unit, slide the seat fully forwards and fold down the backrest.
Tyre repair kit 3 164.
Wheel changing 3 167.
Spare wheel 3 169.
Page 161 of 215

Vehicle care159Wheels and tyresTyre condition, wheel condition
Drive over edges slowly and at right
angles if possible. Driving over sharp
edges can cause tyre and wheel
damage. Do not trap tyres on the kerb
when parking.
Regularly check the wheels for
damage. Seek the assistance of a
workshop in the event of damage or
unusual wear.
We recommend not swapping the
front wheels with the rear wheels and vice versa, as this can affect vehicle
stability. Always use less worn tyres
on the rear axle.
Tyres Factory-fitted tyres are matched to
the chassis and offer optimum driving comfort and safety.Winter tyres
Winter tyres improve driving safety attemperatures below 7 °C and should
therefore be fitted on all wheels.
In accordance with country-specific
regulations, affix the maximum speed
sticker in the driver's field of view.
Tyre designations E.g. 215/65 R 16 C 109 R215=Tyre width, mm65=Cross-section ratio (tyre height
to tyre width), %R=Belt type: RadialRF=Type: RunFlat16=Wheel diameter, inchesC=Cargo or commercial use88=Load index e.g. 109 is
equivalent to approx. 1030 kgR=Speed code letter
Speed code letter:
Q=up to 100 mphS=up to 112 mphT=up to 118 mphH=up to 130 mphV=up to 150 mphW=up to 168 mph
Directional tyres
Fit directional tyres such that they rollin the direction of travel. The rolling
direction is indicated by a symbol
(e.g. an arrow) on the sidewall.
Tyre pressure
Check the pressure of cold tyres at
least every 14 days and before any
long journey. Do not forget the spare
wheel. This also applies to vehicles
with tyre pressure monitoring system.
Tyre pressures 3 201. Always inflate
tyres to the pressures shown on the
label on the driver's door frame.
The tyre pressure data refers to cold
tyres. It applies to summer and winter tyres.
Always inflate the spare tyre to the
pressure specified for full load.
Incorrect tyre pressures will impair
safety, vehicle handling, comfort and
fuel economy and will increase tyre
wear.
Page 162 of 215

160Vehicle care
Tyre pressures differ depending onvarious options. For the correct tyre
pressure value, follow the procedure
below:
1. Identify the engine identifier code.
Engine data 3 185.
2. Identify the respective tyre.
The tyre pressure tables show all possible tyre combinations 3 201.
For the tyres approved for your
vehicle, refer to the EEC Certificate of
Conformity provided with your vehicle or other national registration
documents.
The driver is responsible for correct
adjustment of tyre pressure.9 Warning
If the pressure is too low, this can
result in considerable tyre warm-
up and internal damage, leading to tread separation and even to tyre
blow-out at high speeds.
Rear-wheel drive, with twin rear
wheels When inflating the outer tyre, the
inflation tube should be passed
between the two wheels.
Tyre pressure monitoring
system
The Tyre Pressure Monitoring
System (TPMS) uses radio and
sensor technology to check tyre
pressure levels.Caution
Tyre pressure monitoring system
warns only about low tyre pressure
condition and does not replace
regular tyre maintenance by the
driver.
All wheels must be equipped with pressure sensors and the tyres must
have the prescribed pressure.
Notice
In countries where the tyre pressure
monitoring system is legally
required, the use of wheels without
pressure sensors will invalidate the
vehicle type approval.
The TPMS sensors monitor the air
pressure in the tyres and transmit tyre pressure readings to a receiver
located in the vehicle.
Tyre pressures in display The current tyre pressures can be
shown in the Driver Information
Centre 3 84.
Page 163 of 215

Vehicle care161
With the vehicle stationary, press
button on end of wiper lever
repeatedly until the tyre pressure
menu is displayed.
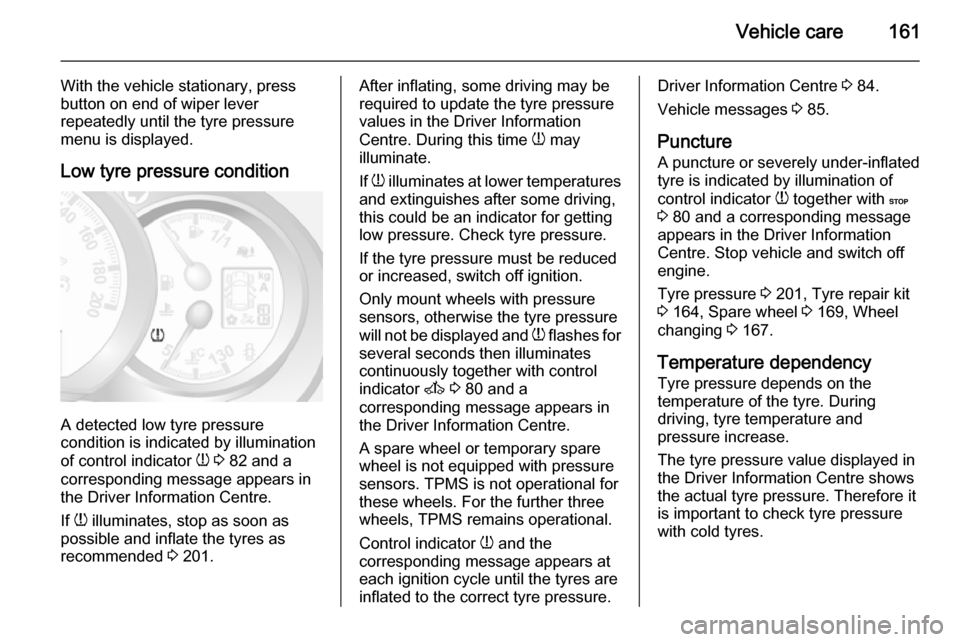
Low tyre pressure condition
A detected low tyre pressure
condition is indicated by illumination
of control indicator w 3 82 and a
corresponding message appears in
the Driver Information Centre.
If w illuminates, stop as soon as
possible and inflate the tyres as
recommended 3 201.
After inflating, some driving may be
required to update the tyre pressure
values in the Driver Information
Centre. During this time w may
illuminate.
If w illuminates at lower temperatures
and extinguishes after some driving,
this could be an indicator for getting low pressure. Check tyre pressure.
If the tyre pressure must be reduced
or increased, switch off ignition.
Only mount wheels with pressure
sensors, otherwise the tyre pressure
will not be displayed and w flashes for
several seconds then illuminates continuously together with control
indicator A 3 80 and a
corresponding message appears in
the Driver Information Centre.
A spare wheel or temporary spare
wheel is not equipped with pressure
sensors. TPMS is not operational for these wheels. For the further three
wheels, TPMS remains operational.
Control indicator w and the
corresponding message appears at
each ignition cycle until the tyres are
inflated to the correct tyre pressure.Driver Information Centre 3 84.
Vehicle messages 3 85.
Puncture
A puncture or severely under-inflated
tyre is indicated by illumination of
control indicator w together with C
3 80 and a corresponding message
appears in the Driver Information
Centre. Stop vehicle and switch off
engine.
Tyre pressure 3 201, Tyre repair kit
3 164, Spare wheel 3 169, Wheel
changing 3 167.
Temperature dependency Tyre pressure depends on the
temperature of the tyre. During
driving, tyre temperature and
pressure increase.
The tyre pressure value displayed in
the Driver Information Centre shows
the actual tyre pressure. Therefore it
is important to check tyre pressure
with cold tyres.