2015.5 VAUXHALL MOVANO_B lights
[x] Cancel search: lightsPage 154 of 215

152Vehicle care
7. Push bulb into socket slightly,rotate anti-clockwise, remove andrenew bulb.
Turn signal light ( 1)
Tail and brake light ( 2)
Reverse light ( 3)
Rear fog light, may be on one side
only ( 4)
8. Replace bulb holder in lamp assembly.
9. Replace the three screws on the rear of the lamp assembly.
10. Reattach wiring connector to lamp
assembly.
11. Replace lamp assembly from the outer side into original position,
ensuring that it is seated correctly.
12. Replace the two nuts onto the locating pins on the rear of the
lamp assembly.
13. Install the upper and lower trim panels to the rear pillar.Side turn signal lights
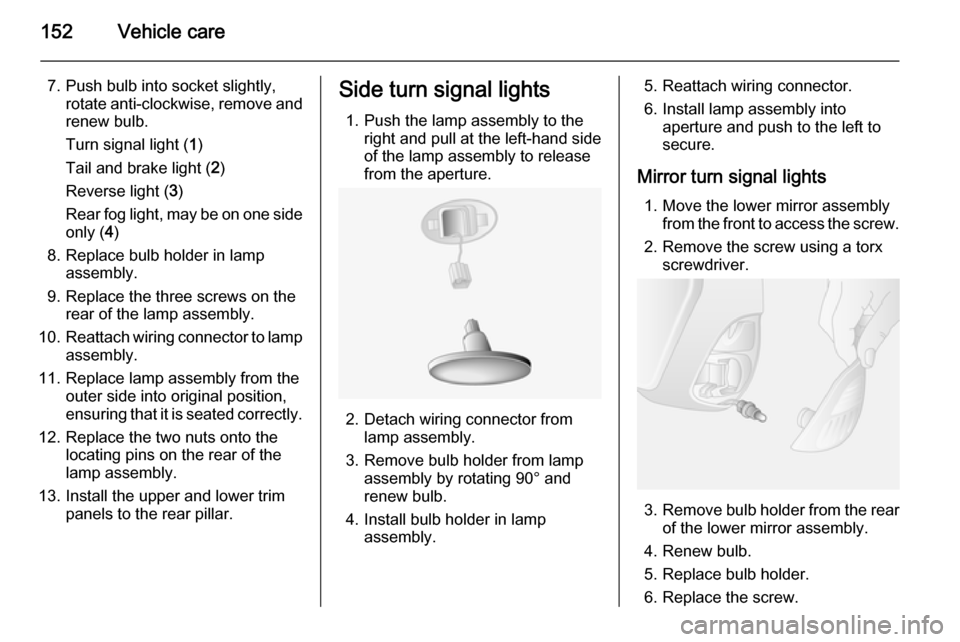
1. Push the lamp assembly to the right and pull at the left-hand sideof the lamp assembly to release
from the aperture.
2. Detach wiring connector from lamp assembly.
3. Remove bulb holder from lamp assembly by rotating 90° and
renew bulb.
4. Install bulb holder in lamp assembly.
5. Reattach wiring connector.
6. Install lamp assembly into aperture and push to the left to
secure.
Mirror turn signal lights 1. Move the lower mirror assembly from the front to access the screw.
2. Remove the screw using a torx screwdriver.
3. Remove bulb holder from the rear
of the lower mirror assembly.
4. Renew bulb.
5. Replace bulb holder.
6. Replace the screw.
Page 156 of 215

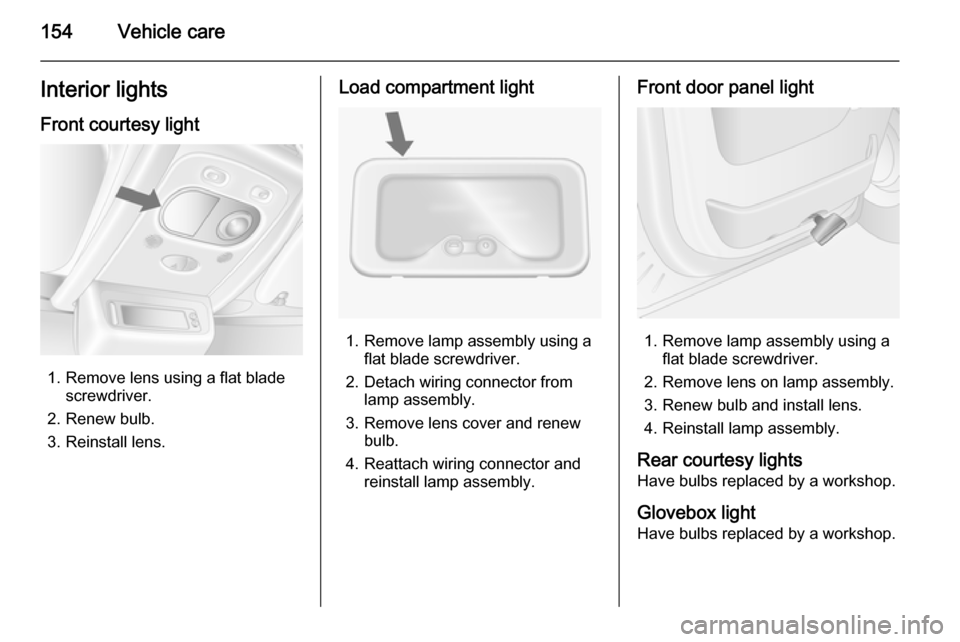
154Vehicle careInterior lightsFront courtesy light
1. Remove lens using a flat blade screwdriver.
2. Renew bulb.
3. Reinstall lens.
Load compartment light
1. Remove lamp assembly using a flat blade screwdriver.
2. Detach wiring connector from lamp assembly.
3. Remove lens cover and renew bulb.
4. Reattach wiring connector and reinstall lamp assembly.
Front door panel light
1. Remove lamp assembly using aflat blade screwdriver.
2. Remove lens on lamp assembly.
3. Renew bulb and install lens. 4. Reinstall lamp assembly.
Rear courtesy lights
Have bulbs replaced by a workshop.
Glovebox light
Have bulbs replaced by a workshop.
Page 158 of 215

156Vehicle care
Fuse extractor
To help in replacing fuses, a fuse
extractor is located in the instrument
panel fuse box.
Place the fuse extractor on the
various types of fuse from the top or
side, and withdraw fuse.
Engine compartment fusebox
Located below the coolant expansion tank.
Some circuits may be protected by
several fuses.
Due to restricted accessibility, have
fuses replaced by a workshop.SymbolCircuitSRight side lightsTLeft side lightsWRight low beamaLeft low beam>Front fog lightLLeft high beamNRight high beamuABSKWindscreen wipernHeating and ventilation
system, air conditioningVHeated windscreen
Page 159 of 215

Vehicle care157Instrument panel fuse box
Located behind the trim panel on the
left-hand side of the instrument panel. Pull upper part of trim panel to
remove.
Do not store any objects behind this
panel.
Some circuits may be protected by
several fuses.
SymbolCircuitZInfotainment system, seat
heating, vehicle display
screen, audio connections,
alarm?Power outletÌCigarette lightereInstrument panelUCentral lockingOTurn signals, rear fog lights,
body control moduleDIAGDiagnostic connectoruABS, Electronic stability
programdInterior lights, brake lightsZBody control moduleSTOPBrake lightIBody control module, power windows, heating and venti‐
lation system, air condi‐
tioningSymbolCircuitmLeft heated rear windownRight heated rear windowRWindscreen washerMElectronic immobiliserUHeated seatsFBLCornering lightlHands-free connection&TachographPTOPower take-offjHornÍPreheating, diesel fuel filterxClimate control fanADPAdditional adaptations,Power windows, body
control module
Page 175 of 215

Vehicle care173
Jump starting procedure
Depending on model, the jump start
terminal may be located at the left-
hand or right-hand side of the engine
compartment.
Lead connection order:
1. Connect the red lead to the positive terminal of the booster
battery.
2. Connect the other end of the red lead to the jump start terminal of
the vehicle with the discharged
vehicle battery.
3. Connect the black lead to the negative terminal of the boosterbattery.
4. Connect the other end of the black
lead to a vehicle grounding point,
such as the engine block or an
engine mounting bolt. Connect as
far away from the discharged
vehicle battery as possible,
however at least 60 cm.
Route the leads so that they cannot
catch on rotating parts in the engine
compartment.
To start the engine: 1. Start the engine of the vehicle providing the jump start.
2. After 5 minutes, start the other engine. Start attempts should be
made for no longer than
15 seconds at an interval of
1 minute.
3. Allow both engines to idle for approx. 3 minutes with the leads
connected.
4. Switch on electrical consumers (e.g. headlights, heated rear
window) of the vehicle receiving
the jump start.
5. Reverse above sequence exactly when removing leads.
Page 176 of 215

174Vehicle careTowing
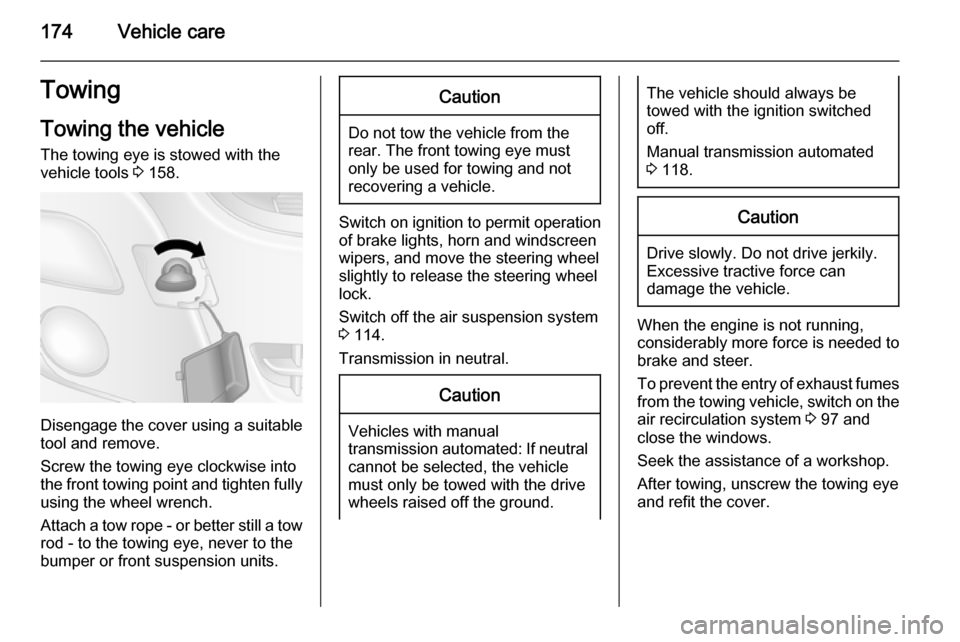
Towing the vehicle The towing eye is stowed with the
vehicle tools 3 158.
Disengage the cover using a suitable
tool and remove.
Screw the towing eye clockwise into
the front towing point and tighten fully using the wheel wrench.
Attach a tow rope - or better still a tow
rod - to the towing eye, never to the
bumper or front suspension units.
Caution
Do not tow the vehicle from the
rear. The front towing eye must
only be used for towing and not
recovering a vehicle.
Switch on ignition to permit operation
of brake lights, horn and windscreen
wipers, and move the steering wheel
slightly to release the steering wheel
lock.
Switch off the air suspension system 3 114.
Transmission in neutral.
Caution
Vehicles with manual
transmission automated: If neutral cannot be selected, the vehiclemust only be towed with the drive
wheels raised off the ground.
The vehicle should always be
towed with the ignition switched
off.
Manual transmission automated
3 118.Caution
Drive slowly. Do not drive jerkily.
Excessive tractive force can
damage the vehicle.
When the engine is not running,
considerably more force is needed to
brake and steer.
To prevent the entry of exhaust fumes
from the towing vehicle, switch on the air recirculation system 3 97 and
close the windows.
Seek the assistance of a workshop.
After towing, unscrew the towing eye
and refit the cover.
Page 178 of 215

176Vehicle care
Do not clean the engine compartmentwith a steam-jet or high-pressure jet
cleaner.
Thoroughly rinse and leather-off the
vehicle. Rinse leather frequently. Use
separate leathers for painted and
glass surfaces: remnants of wax on
the windows will impair vision.
Exterior lights Headlight and other light covers aremade of plastic. Do not use any
abrasive or caustic agents, do not use
an ice scraper, and do not clean them dry.
Polishing and waxing
Wax the vehicle regularly (at the
latest when water no longer beads).
Otherwise, the paintwork will dry out.
Polishing is necessary only if the paint
has become dull or if solid deposits
have become attached to it.
Paintwork polish with silicone forms a protective film, making waxing
unnecessary.Unpainted plastic body parts must not
be treated with wax or polishing
agents.
Matt filmed body parts or decor tapes must not be polished, to avoid
gleaming. Do not use hot wax
programmes in automatic car washes if the vehicle is equipped with theseparts.
Matt painted decor parts, e.g. mirror housing cover, must not be polished.
Otherwise these parts would become
agleam or the colour would be
dissolved.
Windows and windscreen wiper blades Use a soft lint-free cloth or chamoisleather together with window cleaner
and insect remover.
When cleaning the rear window from
inside, always wipe in parallel to the
heating element to prevent damage.
For mechanical removal of ice, use a
sharp-edged ice scraper. Press the
scraper firmly against the glass so
that no dirt can get under it and
scratch the glass.Clean smearing wiper blades with a
soft cloth and window cleaner.
Wheels and tyres Do not use high-pressure jet
cleaners.
Clean rims with a pH-neutral wheel
cleaner.
Rims are painted and can be treated
with the same agents as the body.
Paintwork damage
Rectify minor paintwork damage with
a touch-up pen before rust forms.
Have more extensive damage or rust areas repaired by a workshop.
Underbody Some areas of the vehicle underbody
have a PVC undercoating while other critical areas have a durable
protective wax coating.
After the underbody is washed, check
the underbody and have it waxed if
necessary.
Page 209 of 215

207
Cleaning the vehicle...................175
Climate control ............................. 14
Climate control systems ...............96
Clock ............................................ 72
Control indicators.......................... 77
Control of the vehicle .................108
Controls ........................................ 69
Convex shape .............................. 30
Coolant ....................................... 142
Coolant and antifreeze ...............179
Coolant heater ............................ 102
Cornering light ......................91, 150
Coupling ball bar ........................135
Cruise control ...................... 84, 126
Cupholders .................................. 62
D Danger, Warnings and Cautions ...3
Dashboard .................................... 10
Daytime running lights .................90
Declaration of conformity ............203
Demisting and defrosting ..............14
Diesel fuel ................................... 132
Diesel fuel filter .......................... 146
Diesel fuel system bleeding .......146
Diesel particle filter ....................116
Door locks..................................... 19
Door open .................................... 84
Doors ............................................ 24
DPF (diesel particle filter) ...........116Driver assistance systems ..........126
Driver Information Centre .............84
Driving characteristics and towing tips .............................. 134
Driving economically................... 108
Driving hints ................................ 108
E ECO mode .................................. 108
Electric adjustment ......................31
Electrical system......................... 155
Electronic climate control system 98
Electronic driving programmes ..120
Electronic Stability Program .....
.................................. 81, 125, 136
Electronic Stability Program off ...82
Emergency exit ............................. 35
End-of-life vehicle recovery .......139
Engine compartment fuse box ...156
Engine coolant ........................... 142
Engine coolant temperature ........82
Engine coolant temperature gauge ....................................... 75
Engine data ............................... 185
Engine exhaust .......................... 116
Engine identification ...........182, 183
Engine oil ................... 140, 179, 184
Engine oil additives ....................179
Engine oil level monitor ................76
Engine oil pressure ......................82Engine oil viscosity grades .........179
Enhanced Traction function 124, 125
Event data recorders ..................203
Exhaust gases ............................ 116
Exit lighting .................................. 95
Exterior care .............................. 175
Exterior light ................................. 83
Exterior lighting ......................12, 89
Exterior mirrors ............................. 30
F
Fault ........................................... 121
Fire extinguisher ..........................66
First aid ......................................... 66
First aid kit ................................... 66
Fixed air vents ........................... 107
Fog light ....................................... 84
Fog lights .............................. 92, 150
Folding mirrors ............................. 31
Front airbag system .....................50
Front fog lights ........................ 89, 92
Front seats.................................... 37
Front storage ............................... 62
Front turn signal lights ...............150
Fuel consumption - CO 2-
Emissions ............................... 134
Fuel for diesel engines ..............132
Fuel gauge ................................... 75 Fuse box ............................. 156, 157
Fuses ......................................... 155