2015.5 VAUXHALL ADAM reset
[x] Cancel search: resetPage 22 of 233

20Keys, doors and windowsKeys, doors and
windowsKeys, locks ................................... 20
Doors ........................................... 25
Vehicle security ............................ 26
Exterior mirrors ............................ 28
Interior mirrors ............................. 29
Windows ...................................... 29
Roof ............................................. 31Keys, locks
Keys Replacement keys
The key number is specified in the
Car Pass or on a detachable tag.
The key number must be quoted
when ordering replacement keys as it
is a component of the immobiliser
system.
Locks 3 203.
The code number of the adapter for
the locking wheel bolts is specified on
a card. It must be quoted when
ordering a replacement adapter.
Wheel changing 3 191.
Lock cylinders
Designed to free-wheel if they are
forcefully rotated without the correct
key or if the correct key is not fully
inserted. To reset, turn cylinder with
the correct key until its slot is vertical,
remove key and then re-insert it. If the cylinder still free-wheels, turn the key
through 180° and repeat operation.Key with foldaway key section
Press button to extend. To fold the
key, first press the button.
Car Pass The Car Pass contains security-
related vehicle data and should
therefore be kept in a safe place.
When the vehicle is taken to a
workshop, this vehicle data is needed
in order to perform certain operations.
Page 24 of 233

22Keys, doors and windows
Extend the key and open the unit.
Replace the battery (battery type
CR 2032), paying attention to the
installation position. Close the unit
and synchronise.
Key with fixed key section
Have the battery replaced by a
workshop.
Radio remote control
synchronisation After replacing the battery, unlock the
door with the key in the driver's door
lock. The radio remote control will be
synchronised when the ignition is
switched on.
Memorised settings Whenever the key is removed from
the ignition switch, the following
settings are automatically memorised by the key:
■ lighting
■ Infotainment system presets
■ central locking system■ comfort settings
■ climate control
The saved settings are automatically
used the next time the memorised key
is inserted into the ignition switch and
turned to position 1 3 123.
A precondition is that Personalization
by driver is activated in the personal
settings of the Info-Display. This must
be set for each key used.
Vehicle personalisation 3 100.
Central locking system
Unlocks and locks doors, load
compartment and fuel filler flap.
A pull on an interior door handle
unlocks the respective door. Pulling
the handle once more opens the door.
Notice
In the event of an accident in which
airbags or belt pretensioners are
deployed, the vehicle is
automatically unlocked.Notice
Three minutes after unlocking with the remote control, the doors are
relocked automatically if no door has
been opened.
Unlocking
Press button c.
Page 82 of 233

80Instruments and controlsWarning lights, gauges
and indicators
Instrument cluster The needles of the instruments briefly
rotate to the end position when the
ignition is switched on.
Speedometer
Indicates vehicle speed.
Odometer
The bottom line displays the recorded distance in miles.
Trip odometer The top line displays the recorded
distance since the last reset.
To reset, press the SET/CLR button
on the turn signal lever for a few
seconds 3 90.
Trip odometer counts up to a distance
of 2,000 miles and then restarts at 0.
Tachometer
Displays the engine speed.
Drive in a low engine speed range for each gear as much as possible.
Caution
If the needle is in the red warning
zone, the maximum permitted
engine speed is exceeded. Engine at risk.
Page 84 of 233

82Instruments and controls
left area=engine operating
temperature not
yet reachedcentral area=normal operating
temperatureright area=temperature too
highCaution
If engine coolant temperature is
too high, stop vehicle, switch off
engine. Danger to engine. Check
coolant level.
Service display
The engine oil life system lets you
know when to change the engine oil
and filter. Based on driving
conditions, the interval at which an
engine oil and filter change will be
indicated can vary considerably.
Midlevel-Display
The remaining engine oil life duration
is displayed in percent beside the
control indicator I on the Midlevel-
Display.
Uplevel-Display
The remaining oil life duration is
displayed in percent in the Vehicle
Information Menu on the Uplevel-
Display.
To display the remaining engine oil
life duration use turn signal lever
buttons:Press the MENU button to select the
Vehicle Information Menu .
Turn the adjuster wheel to select Remaining Oil Life .
Reset Press the SET/CLR button on turn
signal lever for several seconds to
reset. The remaining engine oil life
duration page must be active. Switch
on ignition only, engine must be
switched off.
The system must be reset every time
the engine oil is changed to ensure
proper functionality. Seek the
assistance of a workshop.
Page 95 of 233

Instruments and controls93
■ trip odometer 1
■ average consumption 1
■ average speed 1
■ trip odometer 2
■ average consumption 2
■ average speed 2
■ digital speed
■ range
■ instantaneous consumption
Selection and indication can be
different between Midlevel- and
Uplevel-Display.
Two Trip computer
The information of two trip computer
can be reset separately for odometer,
average consumption and average
speed, making it possible to display
different trip information.
Trip odometer
Trip odometer displays the current
distance since a certain reset.
Trip odometer counts up to a distance
of 2,000 miles and then restarts at 0.
Reset trip odometer by pressing the
SET/CLR button for a few seconds on
the respective page.
Page 96 of 233

94Instruments and controls
Average consumption
Display of average consumption. The measurement can be reset at any
time and starts with a default value.
To reset, press the SET/CLR button
for a few seconds on the respective page.
On vehicles with LPG engines:
Average consumption is indicated for
the currently selected mode (LPG or
petrol).
Average speed
Display of average speed. The
measurement can be reset at any
time.
To reset, press the SET/CLR button
for a few seconds on the respective
page.
Digital speed
Digital display of the instantaneous
speed.
Fuel range
Range is calculated from current fuel
tank content and current
consumption. The display shows
average values.After refuelling, the range is updated
automatically after a brief delay.
When the fuel level in the tank is low,
a message appears on the display.
Y in the fuel gauge illuminates.
When the tank must be refuelled
immediately, a warning message
pops-up on the display. Y in the fuel
gauge flashes.
Y 3 89.
Fuel range LPG version
Display of approximate fuel range
available with the remaining fuel in
each respective fuel tank of petrol and
LPG fuel, along with a total range of
both fuel types together. Switch
between the mode by pressing
SET/CLR button.
Instantaneous consumption
Display of the instantaneous
consumption.
On vehicles with LPG engines:
Instantaneous consumption is
indicated for the currently selected
mode; LPG or petrol.ECO Information Menu s
Press the MENU button to select
s in the top line of the Display.
Turn the adjuster wheel to select a
submenu. Press the SET/CLR button
to confirm.
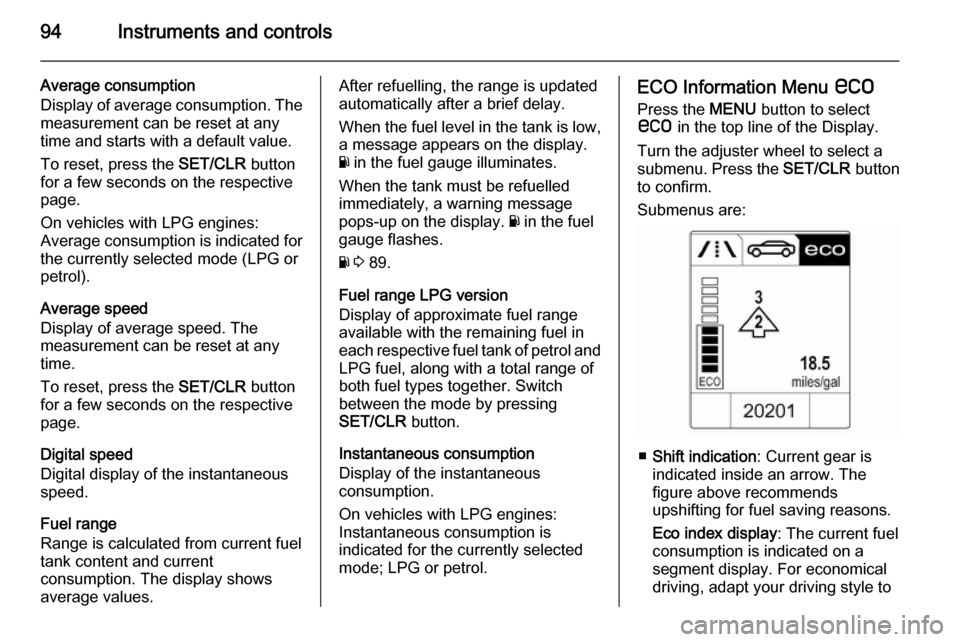
Submenus are:
■ Shift indication : Current gear is
indicated inside an arrow. The
figure above recommends
upshifting for fuel saving reasons.
Eco index display : The current fuel
consumption is indicated on a segment display. For economical
driving, adapt your driving style to
Page 104 of 233

102Instruments and controls
Auto relock doors: Activates or
deactivates the automatic relock
function after unlocking without opening the vehicle.
■ Restore factory settings :
Resets all settings to the default settings.
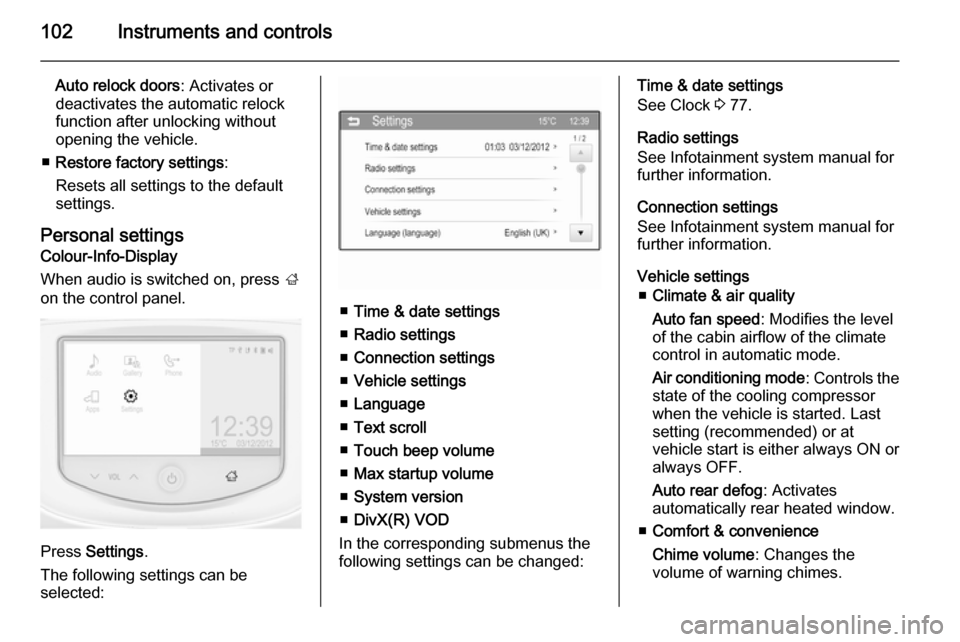
Personal settings Colour-Info-Display
When audio is switched on, press ;
on the control panel.
Press Settings .
The following settings can be
selected:
■ Time & date settings
■ Radio settings
■ Connection settings
■ Vehicle settings
■ Language
■ Text scroll
■ Touch beep volume
■ Max startup volume
■ System version
■ DivX(R) VOD
In the corresponding submenus the
following settings can be changed:
Time & date settings
See Clock 3 77.
Radio settings
See Infotainment system manual for
further information.
Connection settings
See Infotainment system manual for further information.
Vehicle settings ■ Climate & air quality
Auto fan speed : Modifies the level
of the cabin airflow of the climate
control in automatic mode.
Air conditioning mode : Controls the
state of the cooling compressor
when the vehicle is started. Last
setting (recommended) or at
vehicle start is either always ON or always OFF.
Auto rear defog : Activates
automatically rear heated window.
■ Comfort & convenience
Chime volume : Changes the
volume of warning chimes.
Page 142 of 233

140Driving and operatingSpeed limiterThe speed limiter prevents the
vehicle exceeding a preset maximum speed.
The maximum speed can be set at a
speed above 15 mph.
The driver can only accelerate up to
the preset speed. Deviations from the
limited speed may occur when driving
downhill.
The preset speed limit is displayed in
the Driver Information Centre when
the system is active.
ActivationPress button L. If cruise control has
been activated before, it is switched
off when speed limiter is activated
and the control indicator m
extinguishes.
Set speed limit
With speed limiter active, hold thumb
wheel turned to RES/+ or briefly turn
to RES/+ repeatedly until the desired
maximum speed is displayed in the
Driver Information Centre.
Alternatively accelerate to the desired speed and briefly turn thumb wheel to
SET/- : the current speed is stored as
maximum speed. Speed limit is
displayed in the Driver Information
Centre.
Change speed limit
With speed limiter active, turn thumb
wheel to RES/+ to increase or SET/-
to decrease the desired maximum
speed.
Exceeding the speed limit
In the event of an emergency, it is
possible to exceed the speed limit by
depressing the accelerator pedal
firmly beyond the point of resistance.
The limited speed will flash in the
Driver Information Centre and a
chime sounds during this period.