2015.5 Peugeot Boxer key
[x] Cancel search: keyPage 4 of 276
2
contents
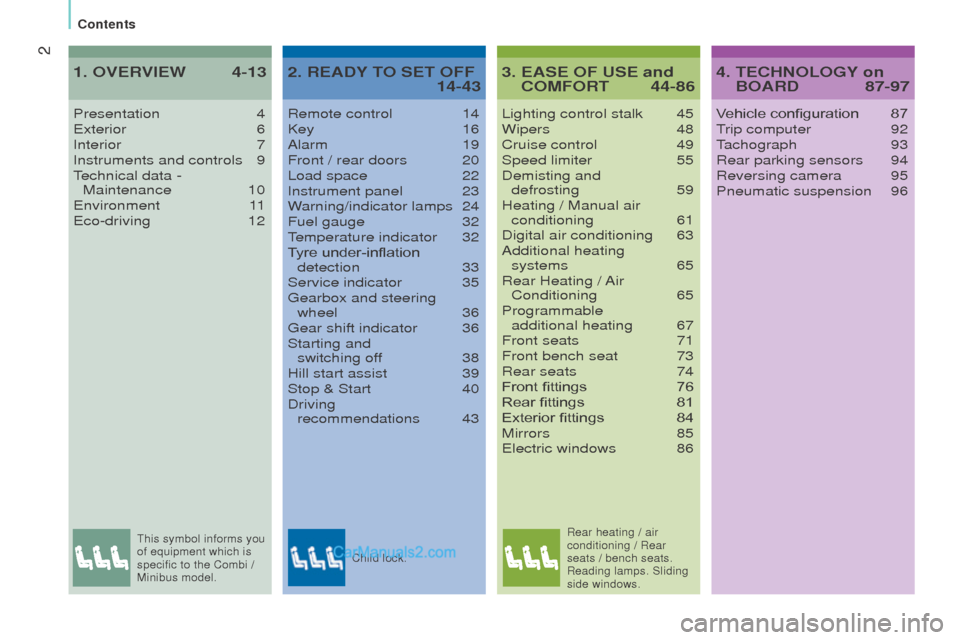
3. EASE oF uSE and coMFort 44-86
Lighting control stalk 45
Wipers 48
Cruise control 49
Speed limiter 55
Demisting and defrosting
59
Heating / Manual air conditioning
61
Digital air conditioning 63
Additional heating systems
65
Rear Heating / Air Conditioning
65
Programmable additional heating
67
Front seats 71
Front bench seat 73
Rear seats 74
Front fittings 76
Rear fittings 81
Exterior fittings 84
Mirrors 85electric windows 86
Presentation
4exterior 6
Interior 7
Instruments and controls 9technical data - Maintenance 10environment 1
1
eco-driving 12
1. oVErVIEW 4-13 4. tEcHnoLoGY on
BoArd 87-97
Vehicle configuration 87trip computer 92tachograph 93
Rear parking sensors 94
Reversing camera 95
Pneumatic suspension 96
2. rEAdY to SEt oFF 14-43
Remote control 14
Key 16
Alarm 19
Front / rear doors 20
Load space 22
Instrument panel 23
Warning/indicator lamps 24
Fuel gauge 32temperature indicator 32
Tyre under-inflation detection
33
Service indicator 35gearbox and steering
wheel 36gear shift indicator 36
Starting and switching of
f
38
Hill start assist 39
Stop & Start 40
Driving recommendations
43
this symbol informs you
of equipment which is
specific to the Combi
/
Minibus model. Child lock.Rear heating / air
conditioning / Rear
seats / bench seats.
Reading lamps. Sliding
side windows.
Page 8 of 276
6
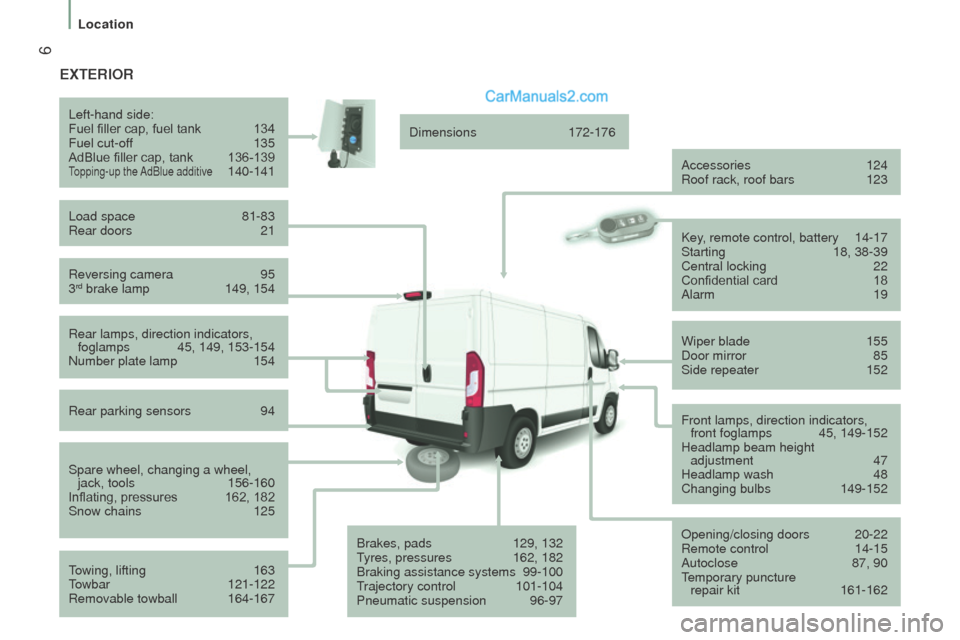
ExtErIor
Reversing camera 95
3rd brake lamp 149, 154
Left-hand side:
Fuel filler cap, fuel tank
134
Fuel cut-off 135
AdBlue filler cap, tank 136-139topping-up the AdBlue additive 140-141
Load space
81-83
Rear doors 21
Rear lamps, direction indicators, foglamps
45, 149, 153-154
Number plate lamp 154
Rear parking sensors
94
Spare wheel, changing a wheel, jack, tools
156-160
Inflating, pressures 162, 182
Snow chains 125
towing, lifting 163towbar 121-122
Removable towball 164-167 Dimensions
172-176
Accessories
124
Roof rack, roof bars 123
Brakes, pads
129, 132tyres, pressures 162, 182
Braking assistance systems 99-100trajectory control 101-104
Pneumatic suspension 96-97 Key, remote control, battery
14-17
Starting 18, 38-39
Central locking 22
Confidential card 18
Alarm 19
Wiper blade
155
Door mirror 85
Side repeater 152
Opening/closing doors
20-22
Remote control 14-15
Autoclose 87, 90temporary puncture repair kit 161-162
Front lamps, direction indicators,
front foglamps
45, 149-152
Headlamp beam height adjustment
47
Headlamp wash 48
Changing bulbs 149-152
ExtErIor
Location
Page 17 of 276
15
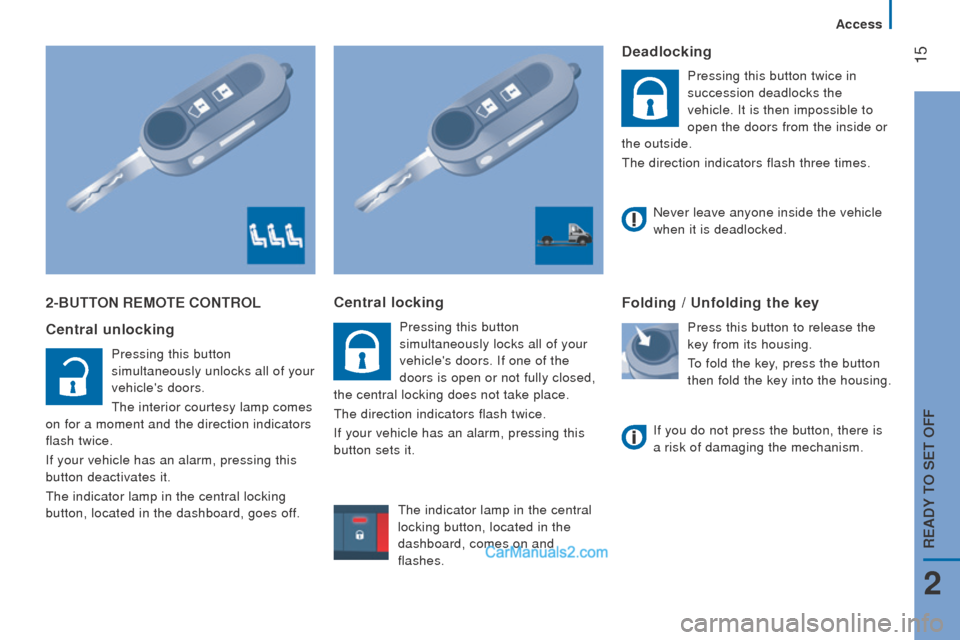
2-Button rEMotE controL
c
entral unlocking
Pressing this button
simultaneously unlocks all of your
vehicle's doors.
the interior courtesy lamp comes
on for a moment and the direction indicators
flash twice.
If your vehicle has an alarm, pressing this
button deactivates it.
the indicator lamp in the central locking
button, located in the dashboard, goes off.
central locking
Pressing this button
simultaneously locks all of your
vehicle's doors. If one of the
doors is open or not fully closed,
the central locking does not take place.
the direction indicators flash twice.
If your vehicle has an alarm, pressing this
button sets it.
deadlocking
Pressing this button twice in
succession deadlocks the
vehicle. It is then impossible to
open the doors from the inside or
the outside.
the direction indicators flash three times.
Folding / unfolding the key
Press this button to release the
key from its housing.
to fold the key, press the button
then fold the key into the housing.
Never leave anyone inside the vehicle
when it is deadlocked.
If you do not press the button, there is
a risk of damaging the mechanism.
the indicator lamp in the central
locking button, located in the
dashboard, comes on and
flashes.
2
Access
rEAdY to SEt oFF
Page 18 of 276
16
KEY
this locks and unlocks the vehicle's doors,
opens and closes the fuel filler cap, as well
as starting and stopping the engine.
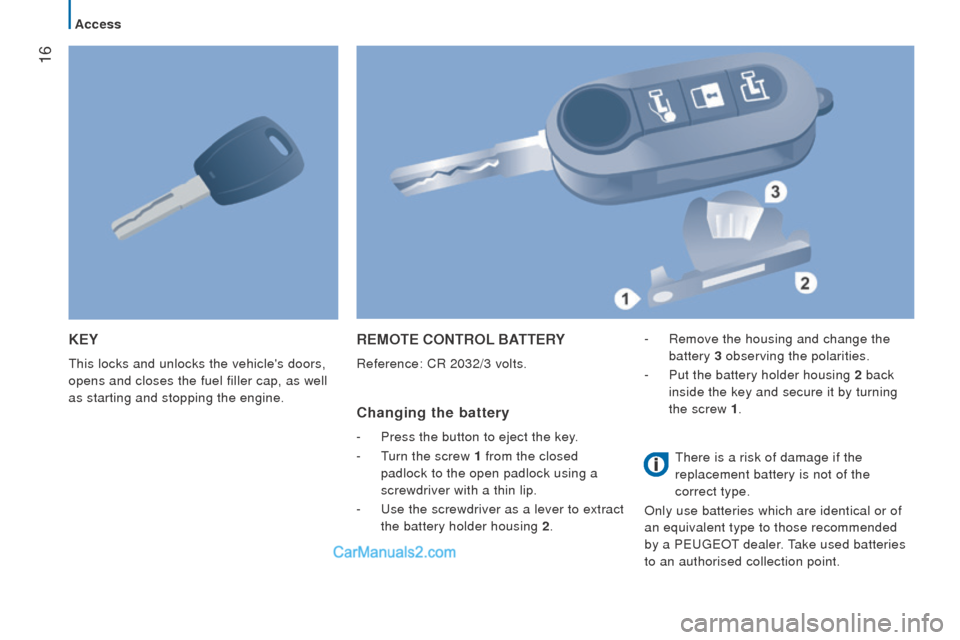
rEMotE controL BAttErY
Reference: CR 2032/3 volts.
changing the battery
- Press the button to eject the key.
-
t
urn the screw 1 from the closed
padlock to the open padlock using a
screwdriver with a thin lip.
-
u
se the screwdriver as a lever to extract
the battery holder housing 2 .-
Remove the housing and change the
battery
3 observing the polarities.
-
Put the battery holder housing 2 back
inside the key and secure it by turning
the screw 1 .
there is a risk of damage if the
replacement battery is not of the
correct type.
Only use batteries which are identical or of
an equivalent type to those recommended
by a P
eugeOt dealer. take used batteries
to an authorised collection point.
Access
Page 19 of 276
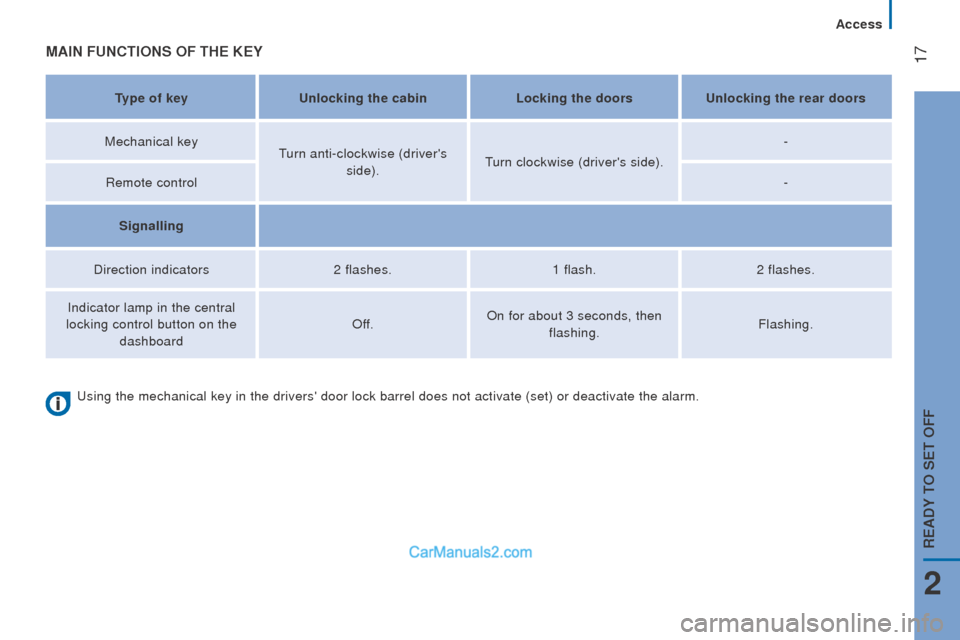
17MAIn FunctIonS oF tHE KEY
type of keyunlocking the cabinLocking the doorsunlocking the rear doors
Mechanical key
turn anti-clockwise (driver's side).turn clockwise (driver's side). -
Remote control -
Signalling
Direction indicators 2 flashes.1 flash.2 flashes.
Indicator lamp in the central
locking control button on the
dashboard Off.
On for about 3 seconds, then
flashing. Flashing.
using the mechanical key in the drivers' door lock barrel does not activa\
te (set) or deactivate the alarm.
2
Access
rEAdY to SEt oFF
Page 20 of 276

18ELEctronIc IMMoBILISEr
All of the keys contain an electronic
immobiliser device.
this device locks the engine supply system.
It is activated automatically when the key is
removed from the ignition. Operating the remote control, even when it
is in your pocket, may result in involuntary
unlocking of the doors.
the simultaneous use of other high
frequency equipment (mobile telephones,
domestic alarms…), may interfere with the
operation of the remote control temporarily.
the remote control does not operate while
the key is in the ignition, even if the ignition
is off, except for reinitialisation.
Good practice
Make a careful note of the key number. If the
keys are are lost, it will be easier for your
P
eugeOt dealer to help if you can supply
this number and the confidential card.
Do not make any modifications to the
electronic immobiliser system.
this warning lamp is switched of
f
after the ignition is switched on
and the key has been recognised,
the engine can be started.
If the key is not recognised, the engine
cannot be started.
use another key and
have the faulty key checked by a P
eugeOt
dealer. After the ignition is switched on, a dialogue
is established between the key and the
electronic immobiliser system.
conFIdEntIAL cArd
this is given to you on delivery of your
vehicle with the duplicate keys.
It contains the identification code necessary
for any work carried out by a P
eugeOt
dealer on the electronic immobiliser system.
this code is hidden by a film, which should
be removed only if necessary.
Keep your card in a safe place, never inside
the vehicle.
When undertaking a long trip or journey,
however, it is advisable to take it with you
along with your personal papers.
When purchasing a second-hand vehicle:
-
ensure that you are given the
confidential card,
-
have the keys memorised by a
P
eugeOt dealer to ensure that the
keys in your possession are the only
ones which can start the vehicle.
Driving with the doors locked may
make access to the passenger
compartment by the emergency services
more difficult in an emergency.
As a safety precaution (with children on
board), remove the key from the ignition
when leaving the vehicle, even for a short
time.
Access
Page 21 of 276
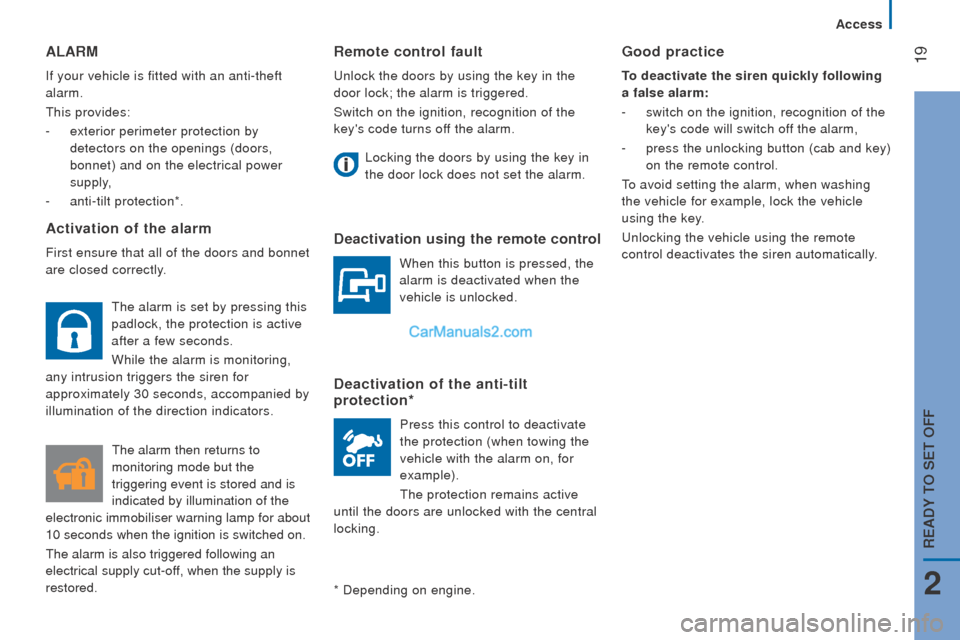
19remote control fault
unlock the doors by using the key in the
door lock; the alarm is triggered.
Switch on the ignition, recognition of the
key's code turns of
f the alarm.
Locking the doors by using the key in
the door lock does not set the alarm.
deactivation using the remote control
When this button is pressed, the
alarm is deactivated when the
vehicle is unlocked.
deactivation of the anti-tilt
protection*
Press this control to deactivate
the protection (when towing the
vehicle with the alarm on, for
example).
the protection remains active
until the doors are unlocked with the central
locking.
ALArM
If your vehicle is fitted with an anti-theft
alarm.
this provides:
-
exterior perimeter protection by
detectors on the openings (doors,
bonnet) and on the electrical power
supply,
-
anti-tilt protection*.
Activation of the alarm
First ensure that all of the doors and bonnet
are closed correctly.
*
Depending on engine.
Good practice
to deactivate the siren quickly following
a false alarm:
-
switch on the ignition, recognition of the
key's code will switch of
f the alarm,
-
press the unlocking button (cab and key)
on the remote control.
to avoid setting the alarm, when washing
the vehicle for example, lock the vehicle
using the key.
unlocking the vehicle using the remote
control deactivates the siren automatically.
the alarm is set by pressing this
padlock, the protection is active
after a few seconds.
While the alarm is monitoring,
any intrusion triggers the siren for
approximately 30 seconds, accompanied by
illumination of the direction indicators.
the alarm then returns to
monitoring mode but the
triggering event is stored and is
indicated by illumination of the
electronic immobiliser warning lamp for about
10
seconds when the ignition is switched on.
the alarm is also triggered following an
electrical supply cut-off, when the supply is
restored.
2
Access
rEAdY to SEt oFF
Page 22 of 276
20
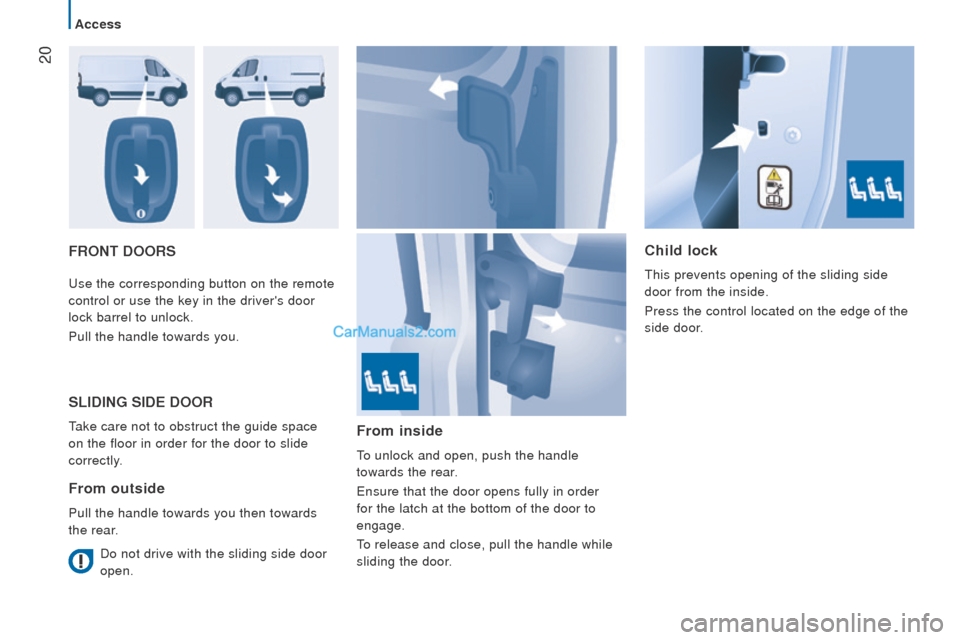
Front doorSchild lock
this prevents opening of the sliding side
door from the inside.
Press the control located on the edge of the
side door
.use the corresponding button on the remote
control or use the key in the driver's door
lock barrel to unlock.
Pull the handle towards you.
SLIdInG SIdE door
take care not to obstruct the guide space
on the floor in order for the door to slide
correctly.
From outside
Pull the handle towards you then towards
the rear.
From inside
to unlock and open, push the handle
towards the rear .
ensure that the door opens fully in order
for the latch at the bottom of the door to
engage.
to release and close, pull the handle while
sliding the door
.
Do not drive with the sliding side door
open.
Access