2015.5 Peugeot 308 stop start
[x] Cancel search: stop startPage 166 of 396
164
gear shift indicator
Depending on the driving situation and your
vehicle's equipment, the system may advise
you to skip one or more gears.
You can follow this instruction without going
through the intermediate gears.-
Y
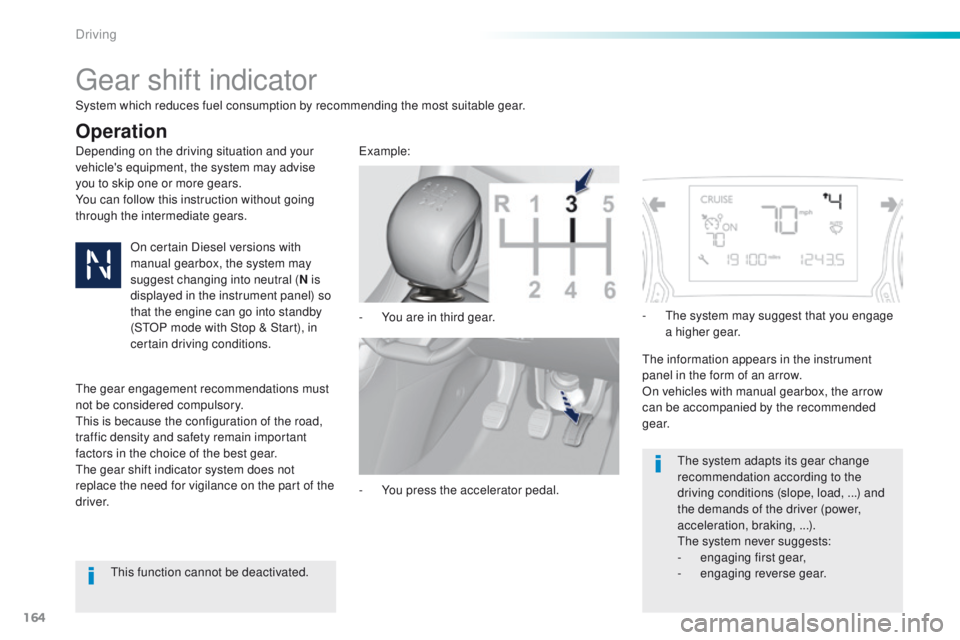
ou are in third gear.example:
-
Y
ou press the accelerator pedal.-
t
h
e system may suggest that you engage
a higher gear.
th
e information appears in the instrument
panel in the form of an arrow.
On vehicles with manual gearbox, the arrow
can be accompanied by the recommended
g e a r.
th
e system adapts its gear change
recommendation according to the
driving conditions (slope, load,
...) and
the demands of the driver (power,
acceleration, braking,
...).
th
e system never suggests:
-
e
ngaging first gear,
-
enga
ging reverse gear.
System which reduces fuel consumption by recommending the most suitable gear.
Operation
On certain Diesel versions with
manual gearbox, the system may
suggest changing into neutral (
N is
displayed in the instrument panel) so
that the engine can go into standby
(S
tO
P mode with Stop & Start), in
certain driving conditions.
the
gear engagement recommendations must
not be considered compulsory.
th
is is because the configuration of the road,
traffic density and safety remain important
factors in the choice of the best gear.
th
e gear shift indicator system does not
replace the need for vigilance on the part of the
driver.
th
is function cannot be deactivated.
Driving
Page 172 of 396
170
Stop & Start
Operation
Going into engine STOP mode
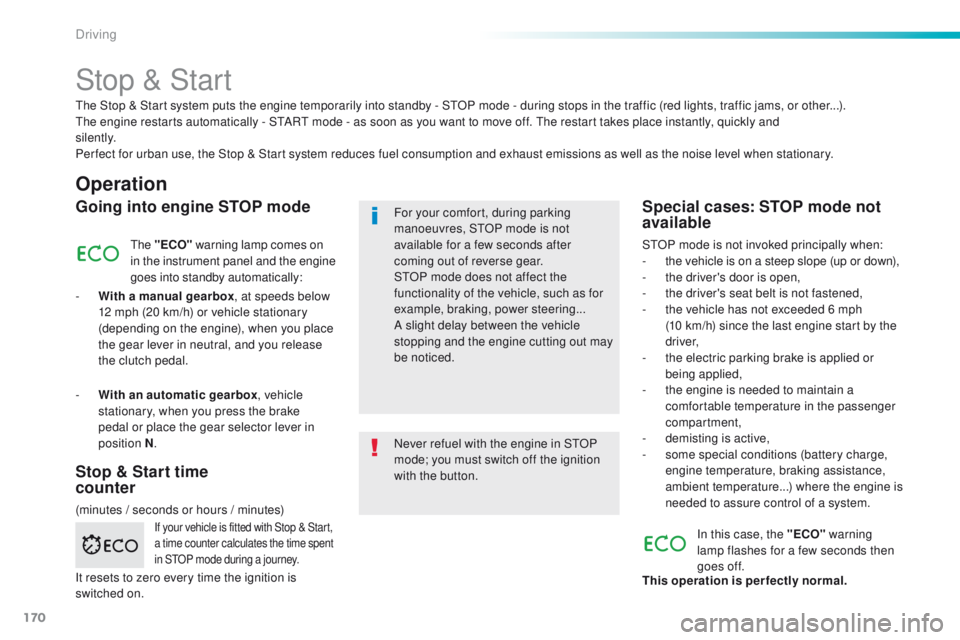
the "ECO" warning lamp comes on
in the instrument panel and the engine
goes into standby automatically:
-
W
ith a manual gearbox , at speeds below
12 mph (20 km/h) or vehicle stationary
(depending on the engine), when you place
the gear lever in neutral, and you release
the clutch pedal.
Never refuel with the engine in S
tO
P
mode; you must switch off the ignition
with the button. For your comfort, during parking
manoeuvres, S
tO
P mode is not
available for a few seconds after
coming out of reverse gear.
S
tO
P mode does not affect the
functionality of the vehicle, such as for
example, braking, power steering...
A slight delay between the vehicle
stopping and the engine cutting out may
be noticed.
Special cases: STOP mode not
available
StOP mode is not invoked principally when:
- t he vehicle is on a steep slope (up or down),
-
t
he driver's door is open,
-
t
he driver's seat belt is not fastened,
-
t
he vehicle has not exceeded 6 mph
(10
km/h) since the last engine start by the
driver,
-
t
he electric parking brake is applied or
being applied,
-
t
he engine is needed to maintain a
comfortable temperature in the passenger
compartment,
-
d
emisting is active,
-
s
ome special conditions (battery charge,
engine temperature, braking assistance,
ambient temperature...) where the engine is
needed to assure control of a system.
If your vehicle is fitted with Stop & Start,
a time counter calculates the time spent
in S
tO
P mode during a journey.In this case, the "ECO" warning
lamp flashes for a few seconds then
goes
off.
This operation is perfectly normal.
th
e Stop & Start
system puts the engine temporarily into standby - S
tO
P mode - during stops in the traffic (red lights, traffic jams, or other...).
th
e engine restarts automatically - S
tA
R
t
mode - as soon as you want to move off.
t
h
e restart takes place instantly, quickly and
silently.
Per fect for urban use, the Stop & Start system reduces fuel consumption and exhaust emissions as well as the noise level when stationary.
Stop & Start time
counter
(minutes / seconds or hours / minutes) -
W
ith an automatic gearbox
, vehicle
stationary, when you press the brake
pedal or place the gear selector lever in
position
N
.
It resets to zero every time the ignition is
switched on.
Driving
Page 174 of 396
172
Operating fault
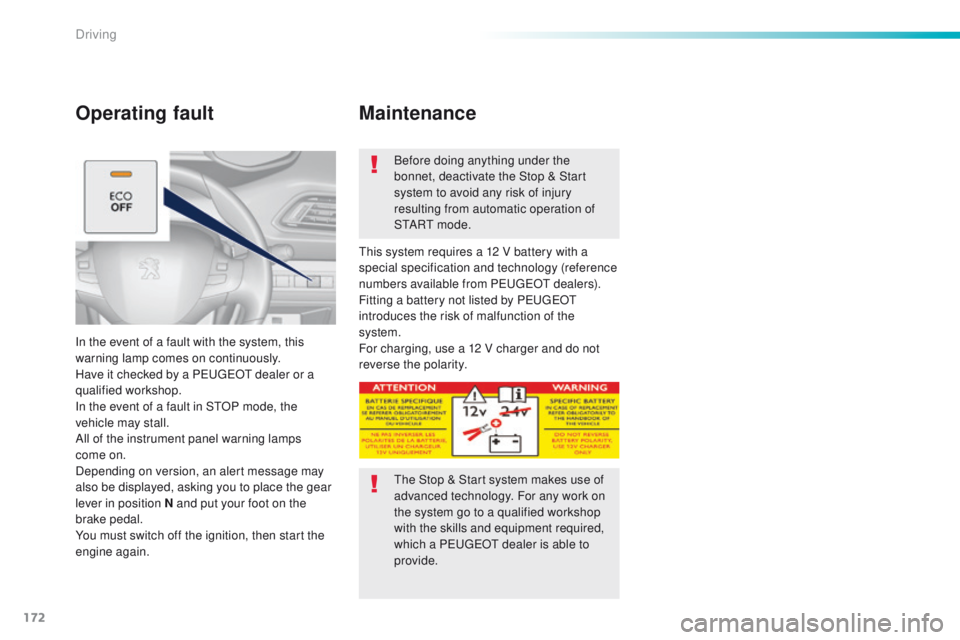
In the event of a fault with the system, this
warning lamp comes on continuously.
Have it checked by a P
e
uge
Ot
dealer or a
qualified workshop.
In the event of a fault in S
tO
P mode, the
vehicle may stall.
All of the instrument panel warning lamps
come on.
Depending on version, an alert message may
also be displayed, asking you to place the gear
lever in position N and put your foot on the
brake pedal.
You must switch off the ignition, then start the
engine again. Before doing anything under the
bonnet, deactivate the Stop & Start
system to avoid any risk of injury
resulting from automatic operation of
S
t
A R
t m
o d e .
th
is system requires a 12 V battery with a
special specification and technology (reference
numbers available from P
e
uge
Ot d
ealers).
Fitting a battery not listed by P
e
uge
Ot
introduces the risk of malfunction of the
system.
For charging, use a 12 V charger and do not
reverse the polarity.
Maintenance
the Stop & Start system makes use of
advanced technology. For any work on
the system go to a qualified workshop
with the skills and equipment required,
which a P
e
uge
Ot
dealer is able to
provide.
Driving
Page 195 of 396
193
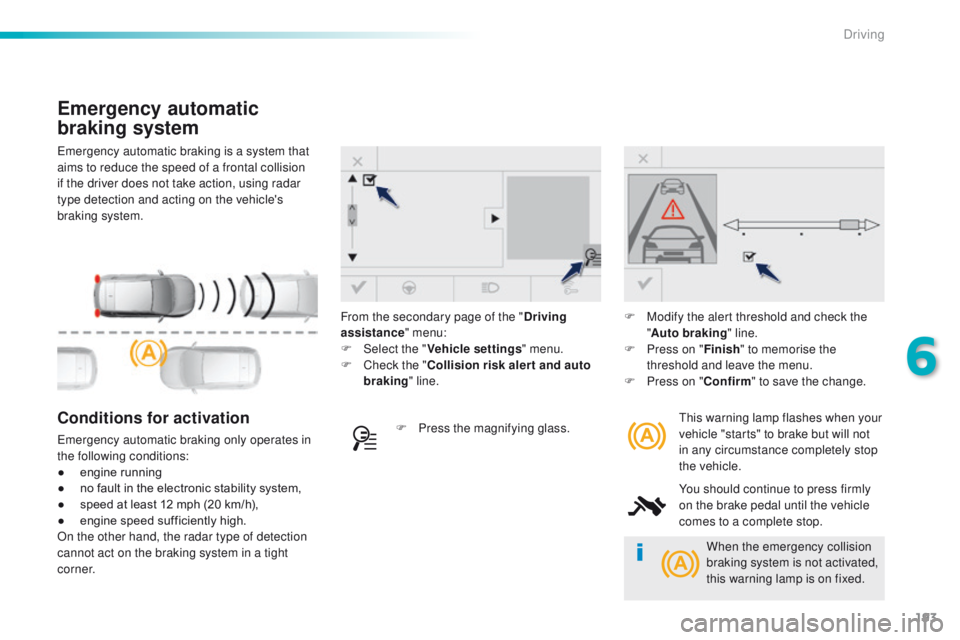
emergency automatic braking is a system that
aims to reduce the speed of a frontal collision
if the driver does not take action, using radar
type detection and acting on the vehicle's
braking system.
Emergency automatic
braking system
this warning lamp flashes when your
vehicle "starts" to brake but will not
in any circumstance completely stop
the vehicle.
You should continue to press firmly
on the brake pedal until the vehicle
comes to a complete stop.Conditions for activation
emergency automatic braking only operates in
the following conditions:
●
e
ngine running
●
n
o fault in the electronic stability system,
●
s
peed at least 12 mph (20 km/h),
●
e
ngine speed sufficiently high.
On the other hand, the radar type of detection
cannot act on the braking system in a tight
c o r n e r. F
P ress the magnifying glass.F
M
odify the alert threshold and check the
" Auto braking " line.
F
P
ress on "
Finish" to memorise the
threshold and leave the menu.
F
P
ress on "
Confirm" to save the change.
From the secondary page of the "
Driving
assistance " menu:
F
Sel
ect the "
Vehicle settings " menu.
F
C
heck the "
Collision risk alert and auto
braking " line.
When the emergency collision
braking system is not activated,
this warning lamp is on fixed.
6
Driving
Page 203 of 396
201
Park Assist
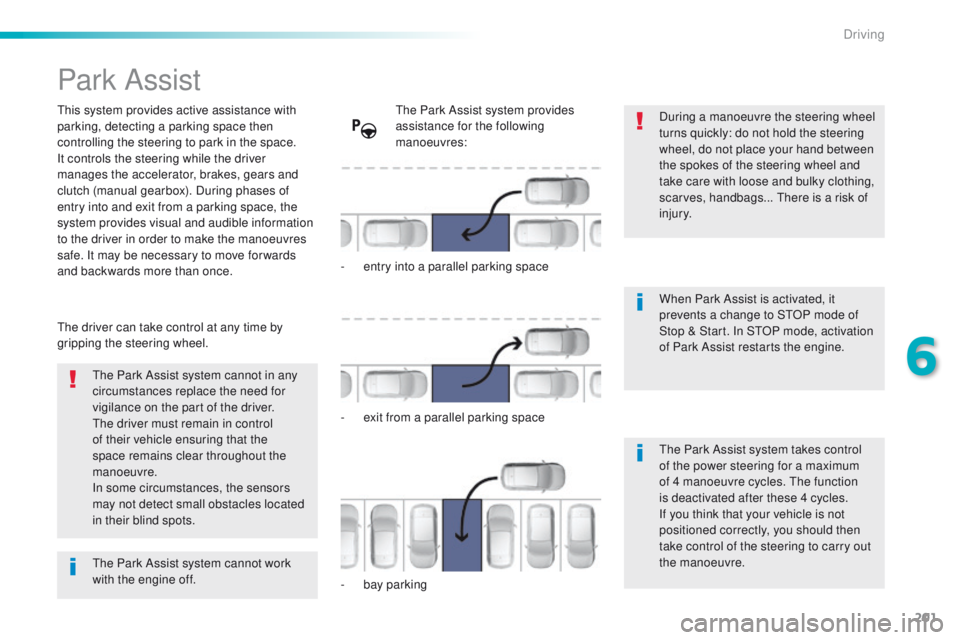
this system provides active assistance with
parking, detecting a parking space then
controlling the steering to park in the space.
It controls the steering while the driver
manages the accelerator, brakes, gears and
clutch (manual gearbox). During phases of
entry into and exit from a parking space, the
system provides visual and audible information
to the driver in order to make the manoeuvres
safe. It may be necessary to move for wards
and backwards more than once.During a manoeuvre the steering wheel
turns quickly: do not hold the steering
wheel, do not place your hand between
the spokes of the steering wheel and
take care with loose and bulky clothing,
scarves, handbags...
t
h
ere is a risk of
injury.
When Park Assist is activated, it
prevents a change to S
tO
P mode of
Stop & Start. In S
tO
P mode, activation
of Park Assist restarts the engine.
th
e Park Assist system cannot in any
circumstances replace the need for
vigilance on the part of the driver.
th
e driver must remain in control
of their vehicle ensuring that the
space remains clear throughout the
manoeuvre.
In some circumstances, the sensors
may not detect small obstacles located
in their blind spots.
th
e driver can take control at any time by
gripping the steering wheel.th e Park Assist system provides
assistance for the following
manoeuvres:
-
e
ntry into a parallel parking space
-
e
xit from a parallel parking space
-
b
ay parking
th
e Park Assist system takes control
of the power steering for a maximum
of 4 manoeuvre cycles.
t
h
e function
is deactivated after these 4 cycles.
If you think that your vehicle is not
positioned correctly, you should then
take control of the steering to carry out
the manoeuvre.
th
e Park Assist system cannot work
with the engine off.
6
Driving
Page 210 of 396
208
the system is deactivated by pressing the
control.
the
system is deactivated automatically:
-
o
n switching off the ignition,
-
i
f the engine stalls,
-
i
f no manoeuvre is started within 5 minutes
of selection of the type of manoeuvre,
-
a
fter a prolonged stop of the vehicle during
a manoeuvre,
-
i
f the road wheel anti-slip regulation (ASR)
is triggered,
-
i
f the speed of the vehicle exceeds the
stated limit,
-
w
hen the driver interrupts movement of the
steering wheel,
-
a
fter 4 manoeuvre cycles,
-
o
n opening the driver's door,
-
i
f one of the front wheels encounters an
obstacle.
th
e operation indicator lamp goes off in the
instrument panel and a message is displayed
accompanied by an audible signal.
th
e driver should then take back control of the
vehicle's steering.
Deactivation
If the system is deactivated during a
manoeuvre, the drive should reactivate it to
repeat the measurement.
th
e system is switched off automatically:
-
w
hen towing a trailer,
-
i
f the driver's door is opened,
-
i
f the speed of the vehicle is above 42 mph
(70 km/h).
to s
witch the system of for a prolonged period,
contact a P
e
uge
Ot
dealer or a qualified
workshop.
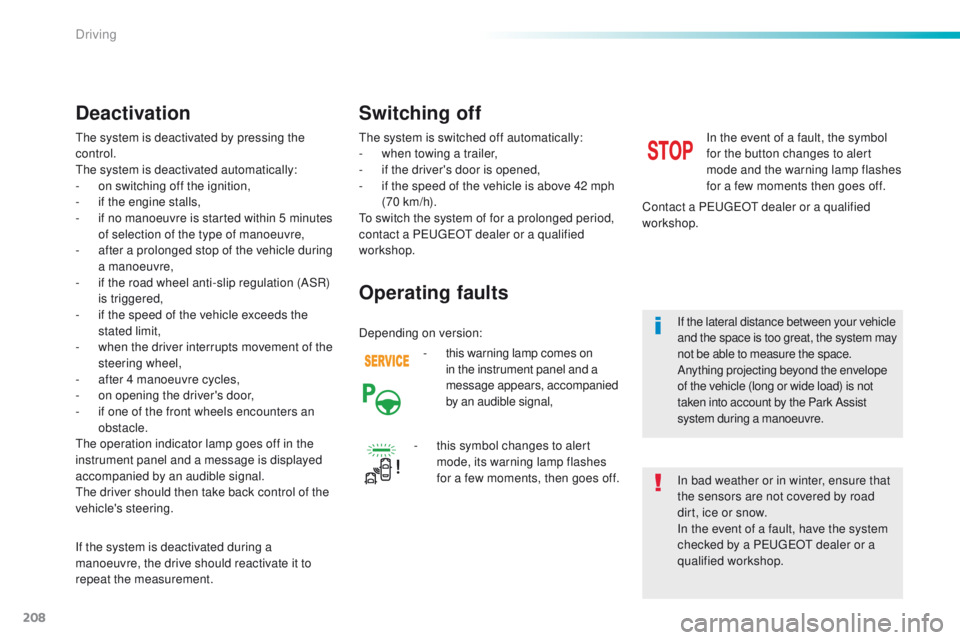
-
t
his warning lamp comes on
in the instrument panel and a
message appears, accompanied
by an audible signal,
Operating faults
In the event of a fault, the symbol
for the button changes to alert
mode and the warning lamp flashes
for a few moments then goes off.
Contact a P
e
uge
Ot
dealer or a qualified
workshop.
Switching off
In bad weather or in winter, ensure that
the sensors are not covered by road
dirt, ice or snow.
In the event of a fault, have the system
checked by a P
e
uge
Ot
dealer or a
qualified workshop.
-
t
his symbol changes to alert
mode, its warning lamp flashes
for a few moments, then goes off. If the lateral distance between your vehicle
and the space is too great, the system may
not be able to measure the space.
Anything projecting beyond the envelope
of the vehicle (long or wide load) is not
taken into account by the Park Assist
system during a manoeuvre.
Depending on version:
Driving
Page 215 of 396
213
Fuel tank
Additions of fuel must be of at least 10 litres to
be registered by the fuel gauge.
Opening the filler cap may result in an inrush of
air. t
h
is vacuum is entirely normal and results
from the sealing of the fuel system.
Opening
With Stop & Start, never refuel with the
system in StO P mode; you must switch
off the ignition with the key, or the
S
tA
R
t/
S
tO
P button if your vehicle has
Keyless
e
n
try and Starting.
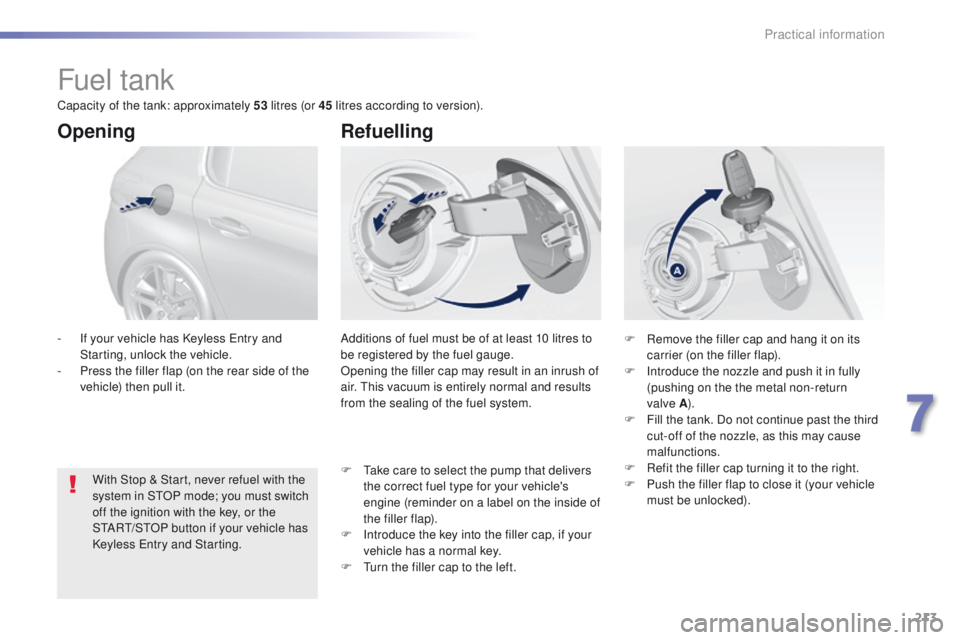
-
I
f your vehicle has Keyless e
n
try and
Starting, unlock the vehicle.
-
P
ress the filler flap (on the rear side of the
vehicle) then pull it.
Refuelling
F Remove the filler cap and hang it on its carrier (on the filler flap).
F
I
ntroduce the nozzle and push it in fully
(pushing on the the metal non-return
valve
A).
F
F
ill the tank. Do not continue past the third
cut-off of the nozzle, as this may cause
malfunctions.
F
R
efit the filler cap turning it to the right.
F
P
ush the filler flap to close it (your vehicle
must be unlocked).
F
t
a
ke care to select the pump that delivers
the correct fuel type for your vehicle's
engine (reminder on a label on the inside of
the filler flap).
F
I
ntroduce the key into the filler cap, if your
vehicle has a normal key.
F
t
u
rn the filler cap to the left.
Capacity of the tank: approximately 53
litres (or 45 litres according to version).
7
Practical information
Page 221 of 396
219
System which manages the duration of use of certain functions to conserve a sufficient level of
charge in the battery.
After the engine has stopped, you can still use functions such as the audio and telematics
system, windscreen wipers, dipped beam headlamps, courtesy lamps, etc. for a maximum
combined duration of about forty minutes.
energy economy mode
Switching to economy mode
A message then appears in the instrument
panel screen indicating that the vehicle has
switched to economy mode and the active
functions are put on standby.
If a telephone call is being made at this time, it
will be maintained for around 10 minutes with
the Bluetooth hands-free system of your audio
system.
Exiting economy mode
these functions are reactivated automatically
next time the vehicle is driven.
In order to restore the use of these functions
immediately, start the engine and let it run:
-
f
or less than ten minutes, to use the
equipment for approximately five minutes,
-
f
or more than ten minutes, to use the
equipment for up to approximately
thirty
minutes.
Let the engine run for the duration specified to
ensure that the battery charge is sufficient.
Do not repeatedly and continuously restart the
engine in order to charge the battery.
A flat battery prevents the engine from starting.
For more information on the battery, refer to the
corresponding section.
Load reduction mode
System which manages the use of certain
functions according to the level of charge
remaining in the battery.
When the vehicle is being driven, the load
reduction function temporarily deactivates
certain functions, such as the air conditioning,
the heated rear screen...
th
e deactivated functions are reactivated
automatically as soon as conditions permit.
7
Practical information