Page 72 of 396
70
Reinitialising the electric
windows
Always remove the key when leaving
the vehicle, even for a short time.
In the event of contact during operation
of the windows, you must reverse the
movement of the window. t
o d
o this,
press the switch concerned.
When operating the passenger electric
window switches, the driver must
ensure that no one is preventing correct
closing of the windows.
th
e driver must ensure that the
passengers use the electric windows
c o r r e c t l y.
Be aware of children when operating
the windows.
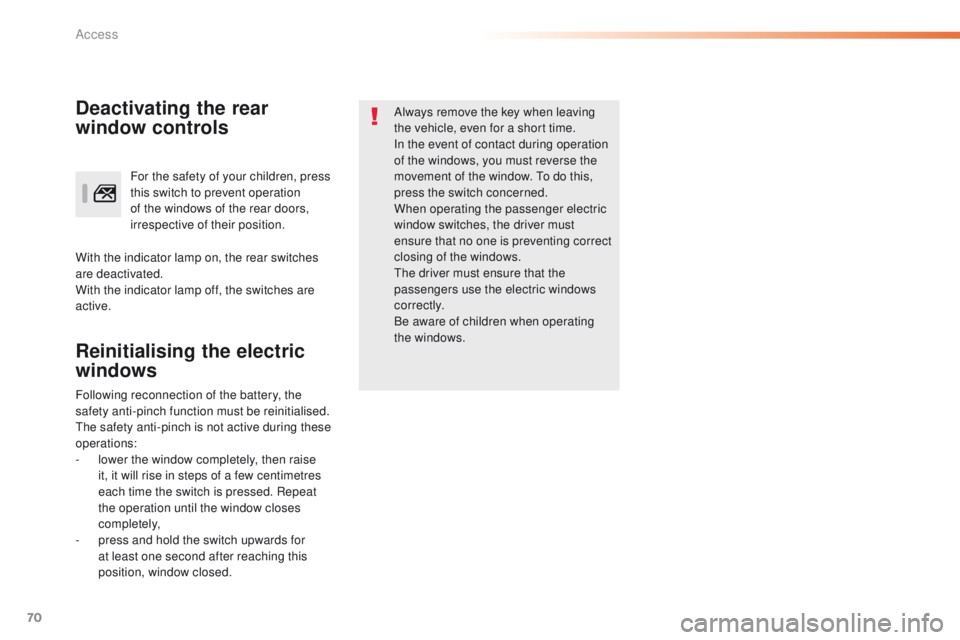
For the safety of your children, press
this switch to prevent operation
of the windows of the rear doors,
irrespective of their position.Deactivating the rear
window controls
With the indicator lamp on, the rear switches
are deactivated.
With the indicator lamp off, the switches are
active.
Following reconnection of the battery, the
safety anti-pinch function must be reinitialised.
th
e safety anti-pinch is not active during these
operations:
-
l
ower the window completely, then raise
it, it will rise in steps of a few centimetres
each time the switch is pressed. Repeat
the operation until the window closes
completely,
-
p
ress and hold the switch upwards for
at least one second after reaching this
position, window closed.
Access
Page 79 of 396
77
Rear seats (hatchback)
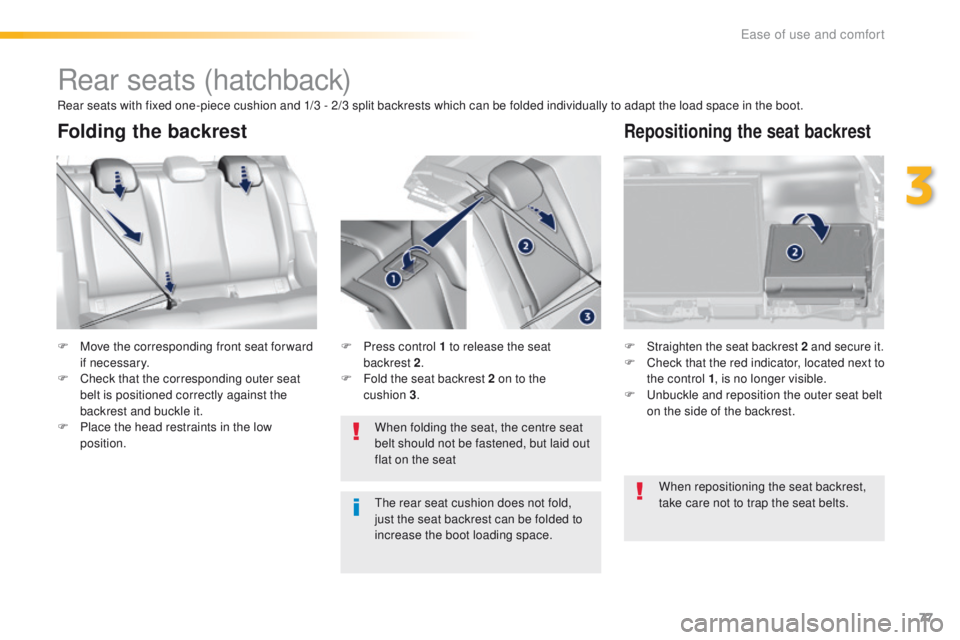
F Move the corresponding front seat for ward if necessary.
F
C
heck that the corresponding outer seat
belt is positioned correctly against the
backrest and buckle it.
F
P
lace the head restraints in the low
position. F
Straighten the seat backrest 2 and secure it.F Check that the red indicator, located next to
the control 1 , is no longer visible.
F
u
n
buckle and reposition the outer seat belt
on the side of the backrest.
When folding the seat, the centre seat
belt should not be fastened, but laid out
flat on the seat
F
P
ress control 1 to release the seat
backrest
2
.
F
F
old the seat backrest 2 on to the
cushion
3 .
Folding the backrestRepositioning the seat backrest
Rear seats with fixed one-piece cushion and 1/3 - 2/3 split backrests which can be folded individually to adapt the load space in the boot.
th
e rear seat cushion does not fold,
just the seat backrest can be folded to
increase the boot loading space. When repositioning the seat backrest,
take care not to trap the seat belts.
3
ease of use and comfort
Page 80 of 396
78
Rear seats (SW)
1/3 - 2/3 split rear seats which can be folded to vary the boot load space.
ea
ch section of the seat (1/3 or 2/3) has its own control to release the seat back from inside the
boot.
Folding the seat from the
boot
F Check that nothing is preventing the seat back from folding (seat belts, ...) and that
no object might inter fere with the seat
manoeuvre (above as well as below).
F
P
lace the head restraints in the low
position. F
P ull the control from inside the boot, the
seat backrest folds onto the cushion.
Folding the seat from the
rear
F Check that nothing is preventing the seat backrest folding and that no object might
interfere with the seat manoeuvre
(above as well as below).
F
M
ove the corresponding front seat
forwards if necessary.
F
C
heck that the seat belt is positioned
correctly on the side of the seat back.
F
P
lace the head restraints in the low
position.
ease of use and comfort
Page 89 of 396
87
Boot fittings (SW)
1. Boot lamp
2. Rear seat folding controls
3.
1
2 V accessory socket (120 W max)
4.
R
emovable storage boxes
P
ull up to unclip them.
5.
St
orage wells
w
here are stowed:
-
t
he towing eye,
-
t
he temporary puncture repair kit,
-
t
he spare wheel, depending on trim
level, an option or standard.
6.
Strap
7.
L
oad space cover
(
see corresponding section)
8.
e
ye
s for fixing a net (to restrain luggage)
(
depending on version)
F
e
x
tract the eyes one at a time then slide
them into the oblong housing.
F
W
hile pressing the button, move the eye to
the desired position.
F
O
bserve the direction of fitting (eyes in the
vertical position towards the outside of the
vehicle).
3
Ease of use and comfort
Page 91 of 396
89
To install
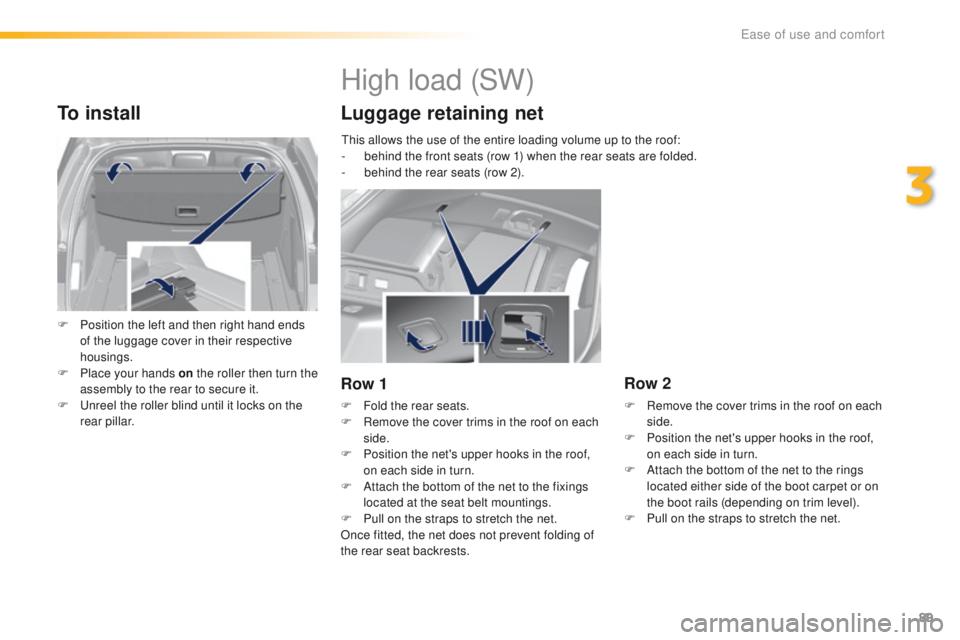
F Position the left and then right hand ends of the luggage cover in their respective
housings.
F
P
lace your hands on the roller then turn the
assembly to the rear to secure it.
F
u
n
reel the roller blind until it locks on the
rear pillar.
High load (SW)
Luggage retaining net
Row 1
F Fold the rear seats.
F R emove the cover trims in the roof on each
side.
F
P
osition the net's upper hooks in the roof,
on each side in turn.
F
A
ttach the bottom of the net to the fixings
located at the seat belt mountings.
F
P
ull on the straps to stretch the net.
Once fitted, the net does not prevent folding of
the rear seat backrests.
Row 2
F Remove the cover trims in the roof on each side.
F
P
osition the net's upper hooks in the roof,
on each side in turn.
F
A
ttach the bottom of the net to the rings
located either side of the boot carpet or on
the boot rails (depending on trim level).
F
P
ull on the straps to stretch the net.
th
is allows the use of the entire loading volume up to the roof:
-
b
ehind the front seats (row 1) when the rear seats are folded.
-
b
ehind the rear seats (row 2).
3
Ease of use and comfort
Page 93 of 396
91
In order for these systems to be fully effective, follow the operation and maintenance
guidelines below:
F t
o o
btain an even air distribution, take care not to obstruct the exterior air intake grilles
located at the base of the windscreen, the nozzles, the vents and the air outlets, as well
as the air extractor located in the boot.
F
D
o not cover the sunshine sensor, located on the dashboard; this is used for regulation
of the air conditioning system.
F
O
perate the air conditioning system for at least 5 to 10 minutes, once or twice a month
to keep it in per fect working order.
F
e
n
sure that the passenger compartment filter is in good condition and have the filter
elements replaced regularly.
W
e recommend the use of a combined passenger compartment filter. t
h
anks to its
special active additive, it contributes to the purification of the air breathed by the
occupants and the cleanliness of the passenger compartment (reduction of allergic
symptoms, bad odours and greasy deposits).
F
t
o e
nsure correct operation of the air conditioning system, you are also advised to have
it checked regularly as recommended in the warranty and maintenance record.
F
I
f the system does not produce cold air, switch it off and contact a P
e
uge
Ot
dealer or
a qualified workshop.
Recommendations for ventilation and air conditioning
If after an extended stop in sunshine,
the interior temperature is very high, first
ventilate the passenger compartment for
a few moments.
Put the air flow control at a setting high
enough to quickly change the air in the
passenger compartment.
th
e air conditioning system does not
contain chlorine and does not present
any danger to the ozone layer.
th
e condensation created by the air
conditioning results in a discharge
of water under the vehicle which is
perfectly normal.
When towing the maximum load on a steep gradient in high temperatures, switching off the
air conditioning increases the available engine power and so improves the towing ability.
Stop & Start
the heating and air conditioning
systems only work when the engine
is running. t
o m
aintain a comfortable
temperature in the passenger
compartment, you can temporarily
deactivate the Stop & Start system
(see the corresponding section).
3
ease of use and comfort
Page 95 of 396
93
Air distribution adjustment
Windscreen and side windows.
Footwells. Central and side vents.
th
e air distribution can be adapted by adding
the corresponding buttons.
Air conditioning On / Off
It enables you to:
- l ower the temperature, in summer,
-
i
ncrease the effectiveness of the demisting
in winter, above 3°C.
Switching on
F Press this button, its indicator lamp comes on.
Switching off
F Press this button again, its indicator lamp goes off.
Switching off may result in some discomfort
(humidity, misting).
th
e air conditioning is designed to
operate effectively in all seasons,
with the windows closed.
th
e air conditioning does not operate
when the air flow adjustment is set
to
off.
to o
btain cool air more quickly, you can use
interior air recirculation for a few moments.
th
en return to the intake of exterior air.
3
Ease of use and comfort
Page 98 of 396
96
Dual-zone digital air conditioning (touch screen)
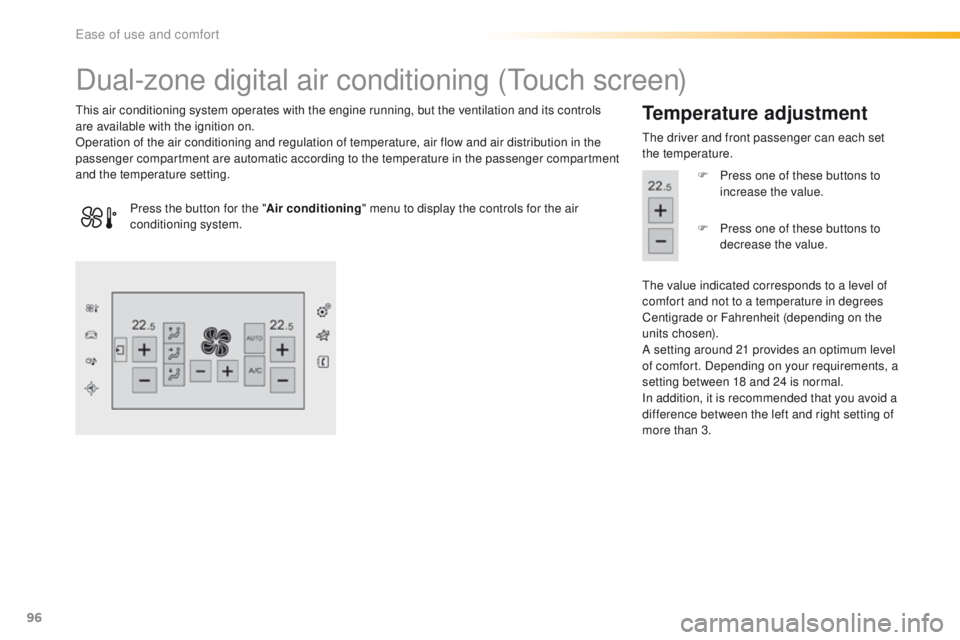
this air conditioning system operates with the engine running, but the ventilation and its controls
are available with the ignition on.
Operation of the air conditioning and regulation of temperature, air flow and air distribution in the
passenger compartment are automatic according to the temperature in the passenger compartment
and the temperature setting.Temperature adjustment
the driver and front passenger can each set
the temperature.
F
P
ress one of these buttons to
increase the value.
th
e value indicated corresponds to a level of
comfort and not to a temperature in degrees
Centigrade or Fahrenheit (depending on the
units chosen).
A setting around 21 provides an optimum level
of comfort. Depending on your requirements, a
setting between 18 and 24 is normal.
In addition, it is recommended that you avoid a
difference between the left and right setting of
more than 3.
Press the button for the "
Air conditioning" menu to display the controls for the air
conditioning system. F
P
ress one of these buttons to
decrease the value.
ease of use and comfort