Page 63 of 344
61
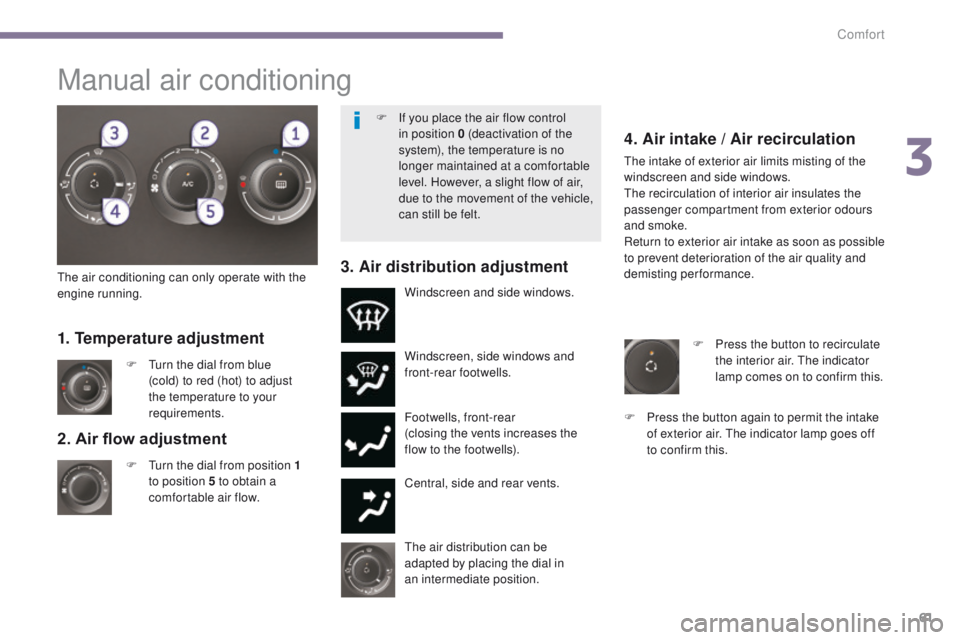
2. Air flow adjustment
F Turn the dial from position 1
to position 5 to obtain a
comfortable air flow. Windscreen, side windows and
front-rear footwells.
Footwells, front-rear
(closing the vents increases the
flow to the footwells).
Central, side and rear vents.
F
T
urn the dial from blue
(cold) to red (hot) to adjust
the temperature to your
requirements. Windscreen and side windows.
1. Temperature adjustment
The air distribution can be
adapted by placing the dial in
an
intermediate position.
The air conditioning can only operate with the
engine running.
4. Air intake / Air recirculation
The intake of exterior air limits misting of the
windscreen and side windows.
The recirculation of interior air insulates the
passenger compartment from exterior odours
and smoke.
Return to exterior air intake as soon as possible
to prevent deterioration of the air quality and
demisting performance.
3. Air distribution adjustment
F Press the button to recirculate
the interior air. The indicator
lamp comes on to confirm this.
F
P
ress the button again to permit the intake
of exterior air. The indicator lamp goes off
to confirm this.
Manual air conditioning
F If you place the air flow control in position 0 (deactivation of the
system), the temperature is no
longer maintained at a comfortable
level. However, a slight flow of air,
due to the movement of the vehicle,
can still be felt.
3
Comfort
Page 68 of 344
66
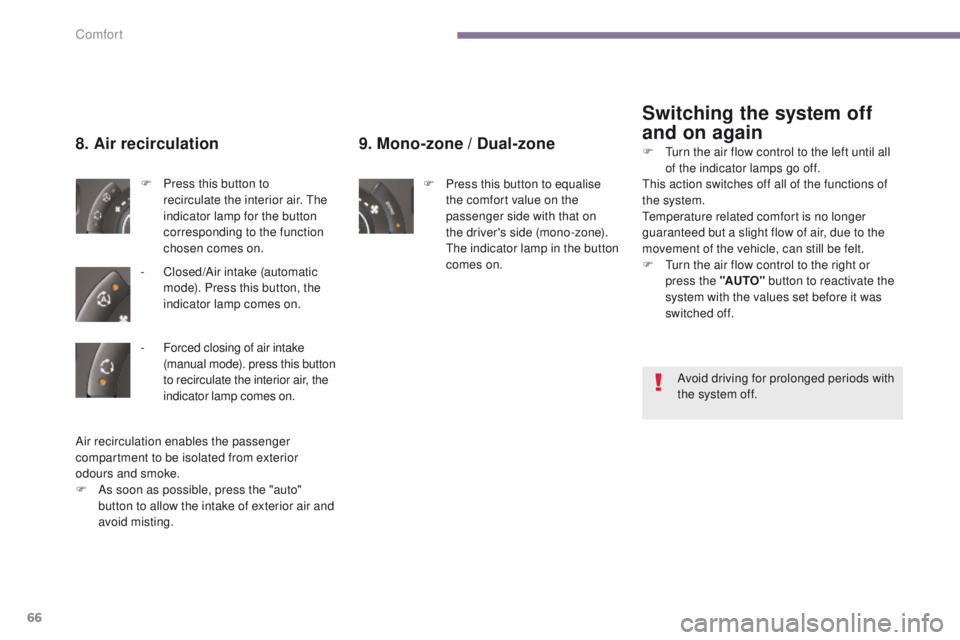
9. Mono-zone / Dual-zone
F Press this button to equalise
the comfort value on the
passenger side with that on
the driver's side (mono-zone).
The indicator lamp in the button
comes on.
8. Air recirculation
F Press this button to recirculate the interior air. The
indicator lamp for the button
corresponding to the function
chosen comes on.
-
C
losed/Air intake (automatic
mode). Press this button, the
indicator lamp comes on.
Switching the system off
and on again
Air recirculation enables the passenger
compartment to be isolated from exterior
odours and smoke.
F
A
s soon as possible, press the "auto"
button to allow the intake of exterior air and
avoid misting. Avoid driving for prolonged periods with
the system off.
F
T
urn the air flow control to the left until all
of the indicator lamps go off.
This action switches off all of the functions of
the system.
Temperature related comfort is no longer
guaranteed but a slight flow of air, due to the
movement of the vehicle, can still be felt.
F
T
urn the air flow control to the right or
press the "AUTO" button to reactivate the
system with the values set before it was
switched off.
-
F
orced closing of air intake
(manual mode). press this button
to recirculate the interior air, the
indicator lamp comes on.
Comfort
Page 77 of 344
75
Adjustment
F Adjust the mirror so that the glass is directed correctly in the "day" position.
Manual day/night model
Day
/ night position
F Pull the lever to change to the "night" anti-dazzle position.
F
P
ush the lever to change to the normal
"day" position.
Rear view mirror
Adjustable mirror providing a central rearward
view.
Equipped with an anti-dazzle system, which
darkens the mirror glass and reduces the
nuisance to the driver caused by the sun,
headlamps from other vehicles...Automatic day/night model
By means of a sensor, which measures the
light from the rear of the vehicle, this system
automatically and progressively changes
between the day and night uses.
In order to ensure optimum visibility
during your manoeuvres, the mirror
lightens automatically when reverse
gear is engaged.
3
Comfort
Page 79 of 344
77
Lighting controls
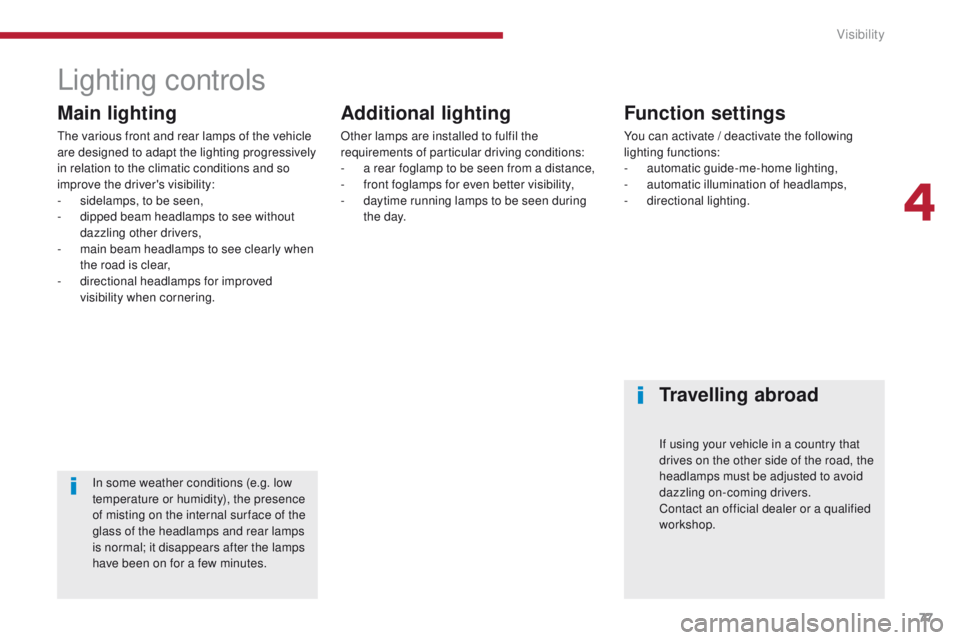
Main lighting
The various front and rear lamps of the vehicle
are designed to adapt the lighting progressively
in relation to the climatic conditions and so
improve the driver's visibility:
-
s
idelamps, to be seen,
-
d
ipped beam headlamps to see without
dazzling other drivers,
-
m
ain beam headlamps to see clearly when
the road is clear,
-
d
irectional headlamps for improved
visibility when cornering.
Additional lighting
Other lamps are installed to fulfil the
requirements of particular driving conditions:
-
a r
ear foglamp to be seen from a distance,
-
f
ront foglamps for even better visibility,
-
d
aytime running lamps to be seen during
t h e d ay.
Function settings
You can activate / deactivate the following
l ighting functions:
-
a
utomatic guide-me-home lighting,
-
a
utomatic illumination of headlamps,
-
d
irectional lighting.
Travelling abroad
If using your vehicle in a country that
drives on the other side of the road, the
headlamps must be adjusted to avoid
dazzling on-coming drivers.
Contact an official dealer or a qualified
workshop.
In some weather conditions (e.g. low
temperature or humidity), the presence
of misting on the internal sur face of the
glass of the headlamps and rear lamps
is normal; it disappears after the lamps
have been on for a few minutes.
4
Visibility
Page 80 of 344
78
Model without AUTO lighting
Model with AUTO lighting
The lighting is controlled directly by the driver
by means of the ring A and the stalk B.
B.
S
talk for switching headlamps: pull
the stalk towards you to switch the
lighting between dipped and main beam
headlamps.
In the lamps off and sidelamps modes, the
driver can switch on the main beam headlamps
temporarily ("headlamp flash") by maintaining a
pull on the stalk. Automatic illumination of
headlamps.
Lighting off (ignition off) /
Daytime running lamps (engine running).
Sidelamps.
Dipped headlamps or main beam headlamps.
Displays
Illumination of the corresponding indicator
lamp in the instrument panel confirms that the
lighting selected is on.
Manual controls
A. Main lighting mode selection ring: turn
it
to position the symbol required facing
the
mark.
Visibility
Page 81 of 344
79
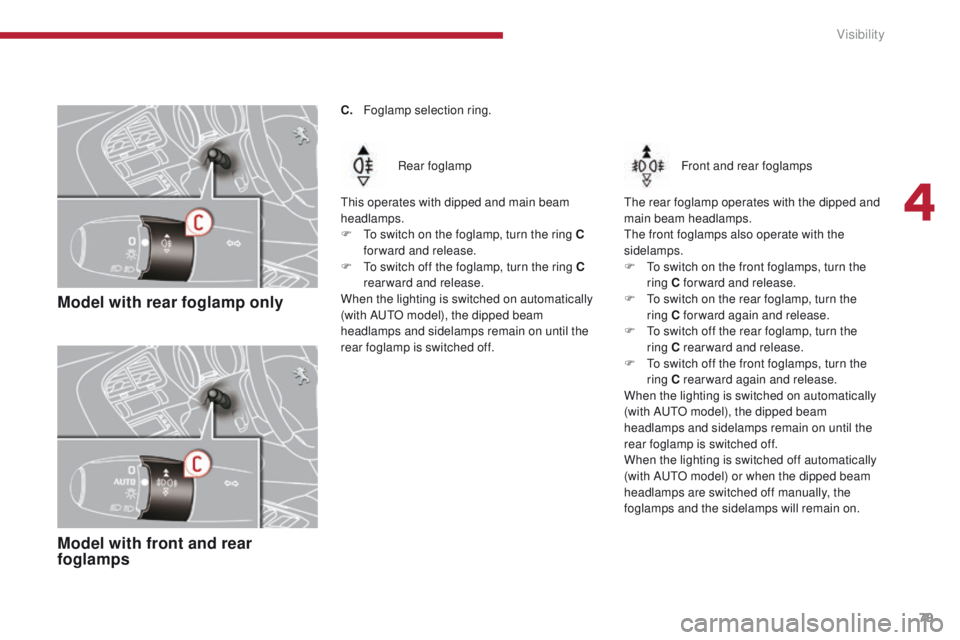
Model with rear foglamp only
Model with front and rear
foglamps
Rear foglamp
This operates with dipped and main beam
headlamps.
F
T
o switch on the foglamp, turn the ring C
forward and release.
F
T
o switch off the foglamp, turn the ring C
rearward and release.
When the lighting is switched on automatically
(with AUTO model), the dipped beam
headlamps and sidelamps remain on until the
rear foglamp is switched off. Front and rear foglamps
The rear foglamp operates with the dipped and
main beam headlamps.
The front foglamps also operate with the
sidelamps.
F
T
o switch on the front foglamps, turn the
ring C forward and release.
F
T
o switch on the rear foglamp, turn the
ring
C forward again and release.
F
T
o switch off the rear foglamp, turn the
ring
C rearward and release.
F
T
o switch off the front foglamps, turn the
ring C rearward again and release.
When the lighting is switched on automatically
(with AUTO model), the dipped beam
headlamps and sidelamps remain on until the
rear foglamp is switched off.
When the lighting is switched off automatically
(with AUTO model) or when the dipped beam
headlamps are switched off manually, the
foglamps and the sidelamps will remain on.
C.
F
oglamp selection ring.
4
Visibility
Page 82 of 344
80
Switching off the lighting when
switching off the ignition
When the ignition is switched off, all of the
lamps switch off immediately, except for the
dipped beam headlamps if automatic guide-
me-home lighting is activated.
In good or rainy weather, by both day
and night, the front foglamps and the
rear foglamps are prohibited. In these
situations, the power of their beams
may dazzle other drivers. They should
only be used in fog or falling snow.
In these weather conditions, you should
switch on the foglamps and dipped
beam headlamps manually, as the
sunshine sensor may detect sufficient
light.
Do not forget to switch off the front and
rear foglamps when they are no longer
necessary.
Switching on the lighting when
switching on the ignition
To reactivate the lighting control stalk, turn the
ring A to position "0"
- lighting off, then to the
position of your choice.
When the driver's door is opened, a temporary
audible signal warns you that the vehicle's
lighting is on.
They switch off automatically after a period
which depends on the state of charge of the
battery (entry to energy economy mode).
Visibility
Page 83 of 344
81
Manual guide-me-home
lighting
The temporary illumination of the dipped beam
headlamps after the vehicle's ignition has been
switched off makes the driver's exit easier
when the light is poor.
Switching on
F With the ignition off, "flash" the headlamps using the lighting stalk.
F
A f
urther "headlamp flash" switches the
function off.
Switching off
The manual guide-me-home lighting switches
off automatically after a set time.
Front daytime running
lamps
(light-emitting diodes)
They come on automatically when the engine
is started, when the lighting control stalk is in
position " 0" or " AUTO ".
4
Visibility