2014 YAMAHA TRICITY engine oil
[x] Cancel search: engine oilPage 6 of 84

TABLE OF CONTENTSSAFETY INFORMATION.................. 1-1
Further safe-riding points ............... 1-5
DESCRIPTION .................................. 2-1
Left view ......................................... 2-1
Right view ....................................... 2-2
Controls and instruments ............... 2-3
INSTRUMENT AND CONTROL
FUNCTIONS ...................................... 3-1
Main switch/steering lock............... 3-1
Keyhole shutter .............................. 3-2
Indicator lights and warning lights............................................ 3-2
Self-diagnosis device ..................... 3-3
Multi-function meter unit ................ 3-4
Handlebar switches ........................ 3-8
Front brake lever ............................ 3-8
Rear brake lever ............................. 3-9
Fuel tank cap .................................. 3-9
Fuel ............................................... 3-10
Catalytic converter ....................... 3-11
Seat .............................................. 3-12
Passenger footrest ....................... 3-13
Storage compartment .................. 3-13
Luggage hook............................... 3-14
Sidestand ..................................... 3-14
Ignition circuit cut-off system ....... 3-15
Auxiliary DC connector ................. 3-17 FOR YOUR SAFETY –
PRE-OPERATION CHECKS
............. 4-1
OPERATION AND IMPORTANT
RIDING POINTS ................................ 5-1
Starting the engine .......................... 5-1
Starting off ...................................... 5-2
Acceleration and deceleration ........ 5-2
Braking ............................................ 5-3
Tips for reducing fuel consumption ................................ 5-3
Engine break-in ............................... 5-3
Parking ............................................ 5-4
PERIODIC MAINTENANCE AND
ADJUSTMENT ................................... 6-1
Owner’s tool kit ............................... 6-2
Periodic maintenance chart for the
emission control system .............. 6-3
General maintenance and
lubrication chart ........................... 6-4
Removing and installing the panel ............................................ 6-8
Checking the spark plug ................. 6-8
Engine oil and oil strainer .............. 6-10
Final transmission oil..................... 6-12
Coolant.......................................... 6-13
Air filter and V-belt case air filter elements .................................... 6-14
Checking the throttle grip free play ............................................ 6-16 Valve clearance............................. 6-16
Tires .............................................. 6-17
Cast wheels .................................. 6-18
Checking the front brake lever
free play..................................... 6-19
Checking the rear brake lever free play..................................... 6-19
Checking the front and rear
brake pads ................................ 6-20
Checking the brake fluid level ...... 6-20
Changing the brake fluid .............. 6-22
Checking and lubricating the cables ........................................ 6-22
Checking and lubricating the
throttle grip and cable ............... 6-22
Lubricating the front and rear brake levers ............................... 6-23
Checking and lubricating the centerstand and sidestand........ 6-23
Checking the front fork ................. 6-24
Checking the steering................... 6-25
Checking the wheel bearings ....... 6-25
Checking the steering tie rod ....... 6-25
Checking the leaning system ....... 6-26
Battery .......................................... 6-26
Replacing the fuses ...................... 6-27
Replacing the headlight bulb ........ 6-29
Tail/brake light .............................. 6-30
Turn signal light bulb .................... 6-30
Auxiliary light ................................ 6-30
Troubleshooting............................ 6-31U2CME0E0.book Page 1 Friday, May 2, 2014 2:55 PM
Page 14 of 84
DESCRIPTION
2-1
2
EAU10411
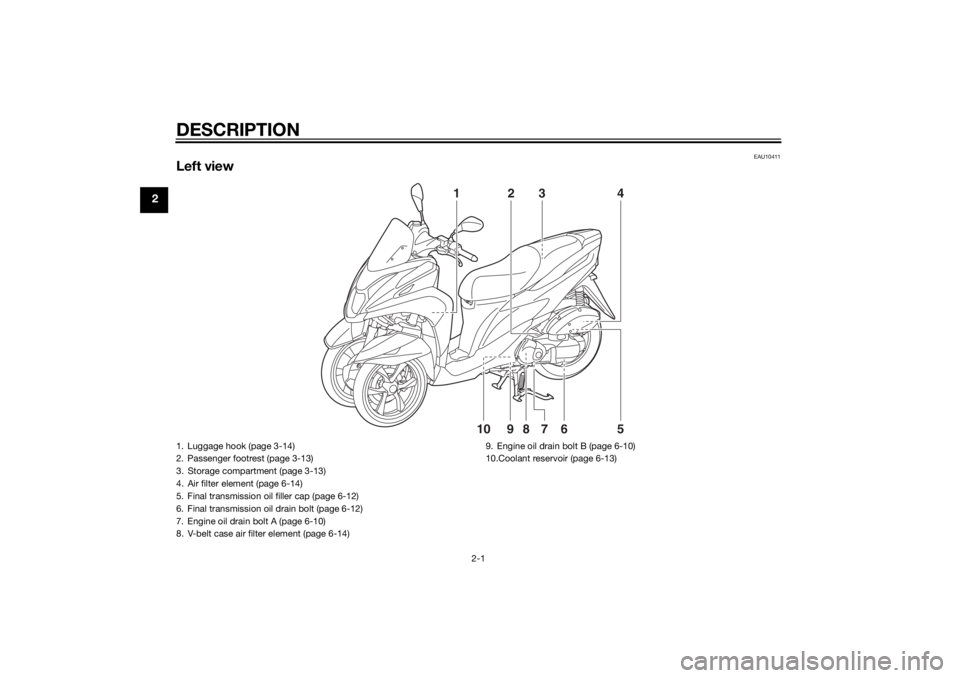
Left view
1
23 45
678910
1. Luggage hook (page 3-14)
2. Passenger footrest (page 3-13)
3. Storage compartment (page 3-13)
4. Air filter element (page 6-14)
5. Final transmission oil filler cap (page 6-12)
6. Final transmission oil drain bolt (page 6-12)
7. Engine oil drain bolt A (page 6-10)
8. V-belt case air filter element (page 6-14) 9. Engine oil drain bolt B (page 6-10)
10.Coolant reservoir (page 6-13)U2CME0E0.book Page 1 Friday, May 2, 2014 2:55 PM
Page 15 of 84

DESCRIPTION
2-2
2
EAU10421
Right view
1
3
4,5
6
2
8
7
1. Owner’s tool kit (page 6-2)
2. Passenger footrest (page 3-13)
3. Fuel tank cap (page 3-9)
4. Main fuse (page 6-27)
5. Fuse box (page 6-27)
6. Battery (page 6-26)
7. Spark plug (page 6-8)
8. Engine oil filler cap (page 6-10)
U2CME0E0.book Page 2 Friday, May 2, 2014 2:55 PM
Page 20 of 84

INSTRUMENT AND CONTROL FUNCTIONS
3-4
3
EAUU1730
Multi-function meter unit
WARNING
EWA12423
Be sure to stop the vehicle before
makin g any settin g chan ges to the
multi-function meter unit. Chan gin g settin
gs while ri din g can d istract the
operator an d increase the risk of an
acci dent.
The multi-function meter unit is
equipped with the following:
a speedometer
a fuel meter
a clock
an outside air temperature display
an odometer
two tripmeters
a fuel reserve tripmeter
an oil change tripmeter
a V-belt replacement tripmeter
an oil change indicator
a V-belt replacement indicatorTIPBe sure to turn the key to “ON” be-
fore using the “SELECT” and “RE-
SET” buttons.
For the UK only: To switch the
speedometer and odometer/trip-
meter displays between kilome-
ters and miles, press the
“SELECT” button for at least one
second.
If the coolant temperature warning
light and engine trouble warning
light remain on during the initial
display mode, have the battery
charged by a Yamaha dealer.
Speed ometer
The speedometer shows the vehicle’s
traveling speed.
1. Clock
2. “SELECT” button
3. Fuel level warning indicator “ ”
4. Fuel meter
5. Speedometer
6. “RESET” button
7. Outside air temperature display
8. Odometer/tripmeters
9. Oil change indicator “OIL CHANGE”
10.V-belt replacement indicator “V-BELT”1
234
7
5
68
9
10
1. Speedometer
1
U2CME0E0.book Page 4 Friday, May 2, 2014 2:55 PM
Page 22 of 84
INSTRUMENT AND CONTROL FUNCTIONS
3-6
3
TIPIf the outside air temperature falls
below –10 °C, a lower temperature
than –10 °C will not be displayed.
If the outside air temperature
climbs above 40 °C, a higher tem-
perature than 40 °C will not be dis-
played.
The accuracy of the temperature
reading may be affected when rid-
ing slowly [approximately under
20 km/h (12 mi/h)] or when
stopped at traffic signals, railroad
crossings, etc.Odometer an d tripmeter mo des Push the “SELECT” button to switch
the display between the odometer
mode “ODO”, the tripmeter modes
“TRIP 1” and “TRIP 2”, the oil change
tripmeter mode “OIL TRIP” and the V-
belt replacement tripmeter mode
“BELT TRIP” in the following order:
ODO
TRIP 1 TRIP 2 OIL TRIP
BELT TRIP ODO
When approximately 1.6 L (0.42 US
gal, 0.35 Imp.gal) of fuel remains in the
fuel tank, the bottom segment of the
fuel meter and fuel level warning indi-
cator will start flashing, and the display
will automatically change to the fuel re-
serve tripmeter mode “F” and start
counting the distance traveled from
that point. In this case, pushing the
“SELECT” button switches the display
between the various tripmeter and
odometer modes in the following or-
der:
F TRIP 1 TRIP 2 OIL TRIP
BELT TRIP ODO F
To reset tripmeters 1, 2, or the fuel re-
serve tripmeter, select it by pushing the
“SELECT” button, and then push the
“RESET” button for at least one sec-
ond. If you do not reset the fuel reserve tripmeter manually, it will reset itself
automatically and the display will re-
turn to the prior mode after refueling
and traveling 5 km (3 mi).
To reset the oil change tripmeter or V-
belt replacement tripmeter, select it by
pushing the “SELECT” button, and
then push the “RESET” button for
three to four seconds.
Oil chan
ge in dicator “OIL CHANGE”
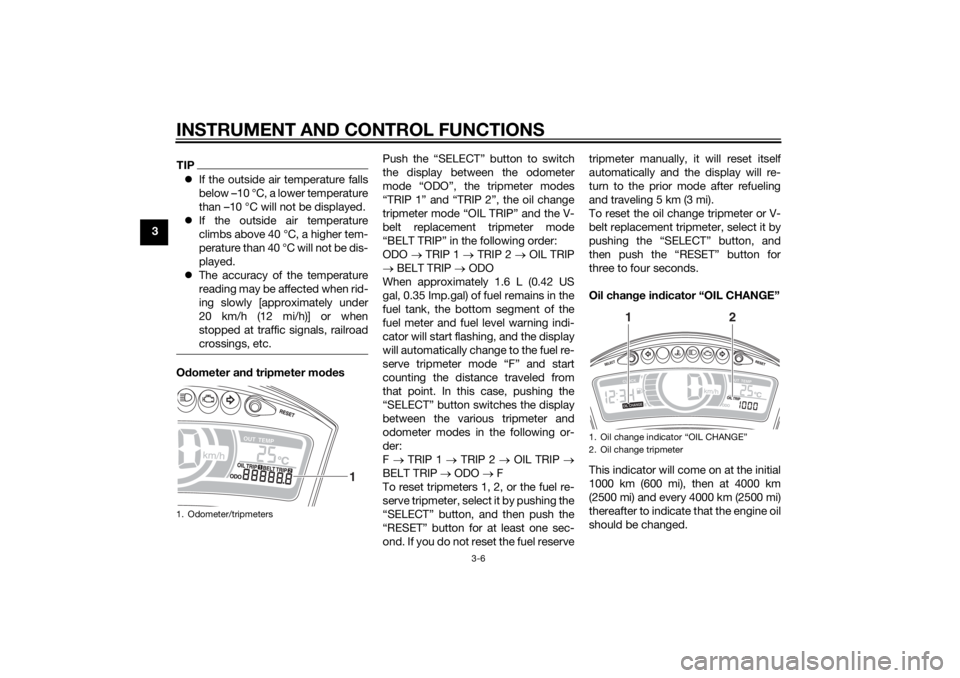
This indicator will come on at the initial
1000 km (600 mi), then at 4000 km
(2500 mi) and every 4000 km (2500 mi)
thereafter to indicate that the engine oil
should be changed.1. Odometer/tripmeters
1
1. Oil change indicator “OIL CHANGE”
2. Oil change tripmeter
1
2
U2CME0E0.book Page 6 Friday, May 2, 2014 2:55 PM
Page 23 of 84
INSTRUMENT AND CONTROL FUNCTIONS
3-7
3
After changing the engine oil, reset the
oil change indicator and the oil change
tripmeter. To reset them both, select
the oil change tripmeter, and then push
the “RESET” button for one second.
While “OIL CHANGE” is flashing, push
the “RESET” button for three seconds.
The oil change tripmeter will be reset
and the oil change indicator will go off.
If the engine oil is changed before the
oil change indicator comes on (i.e., be-
fore the periodic oil change interval has
been reached), the oil change tripmeter
must be reset for the next periodic oil
change to be indicated at the correct
time. V-
belt replacement in dicator “V-
BELT”
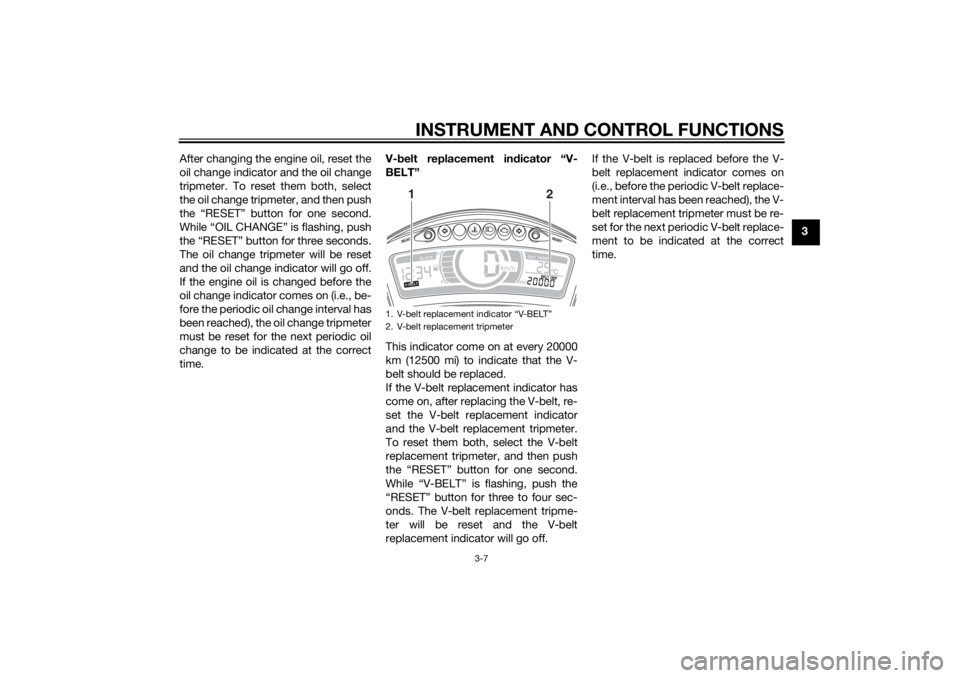
This indicator come on at every 20000
km (12500 mi) to indicate that the V-
belt should be replaced.
If the V-belt replacement indicator has
come on, after replacing the V-belt, re-
set the V-belt replacement indicator
and the V-belt replacement tripmeter.
To reset them both, select the V-belt
replacement tripmeter, and then push
the “RESET” button for one second.
While “V-BELT” is flashing, push the
“RESET” button for three to four sec-
onds. The V-belt replacement tripme-
ter will be reset and the V-belt
replacement indicator will go off. If the V-belt is replaced before the V-
belt replacement indicator comes on
(i.e., before the periodic V-belt replace-
ment interval has been reached), the V-
belt replacement tripmeter must be re-
set for the next periodic V-belt replace-
ment to be indicated at the correct
time.
1. V-belt replacement indicator “V-BELT”
2. V-belt replacement tripmeter
1
2
U2CME0E0.book Page 7 Friday, May 2, 2014 2:55 PM
Page 34 of 84
FOR YOUR SAFETY – PRE-OPERATION CHECKS
4-1
4
EAU15598
Inspect your vehicle each time you use it to make sure the vehicle is in safe operating condition. Always follow the inspection
and maintenance procedures and schedules described in the Owner’s Manual.
WARNING
EWA11152
Failure to inspect or maintain the vehicle properly increases the possibility of an acci dent or equipment damag e.
Do not operate the vehicle if you fin d any pro blem. If a pro blem cannot be corrected b y the proce dures provi ded in
this manual, have the vehicle inspecte d b y a Yamaha dealer.Before using this vehicle, check the following points:
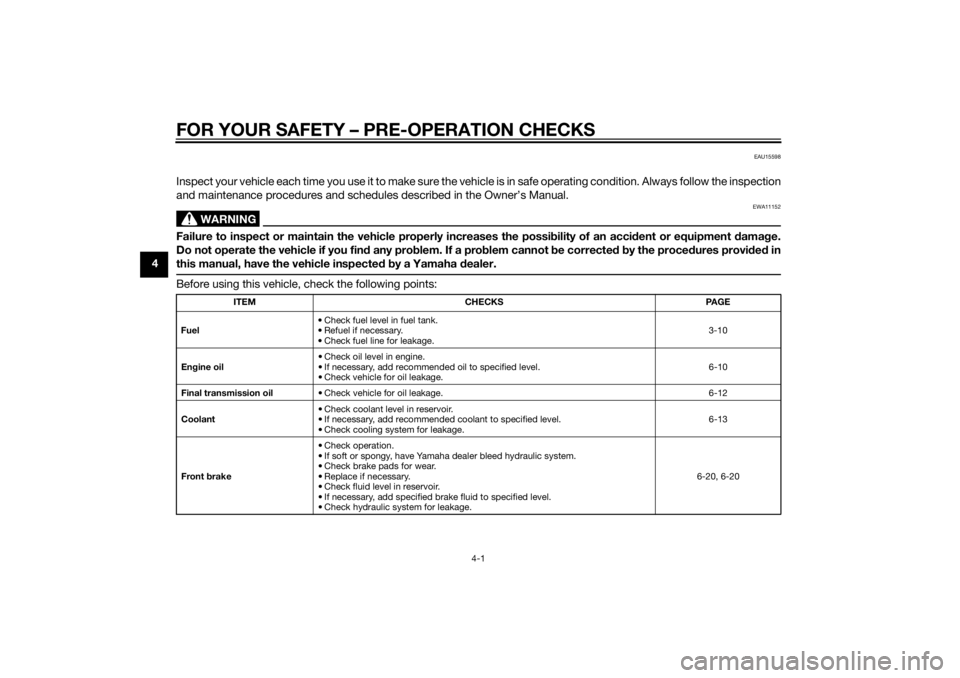
ITEM CHECKS PAGE
Fuel • Check fuel level in fuel tank.
• Refuel if necessary.
• Check fuel line for leakage. 3-10
En gine oil • Check oil level in engine.
• If necessary, add recommended oil to specified level.
• Check vehicle for oil leakage. 6-10
Final transmission oil • Check vehicle for oil leakage. 6-12
Coolant • Check coolant level in reservoir.
• If necessary, add recommended coolant to specified level.
• Check cooling system for leakage. 6-13
Front brake • Check operation.
• If soft or spongy, have Yamaha dealer bleed hydraulic system.
• Check brake pads for wear.
• Replace if necessary.
• Check fluid level in reservoir.
• If necessary, add specified brake fluid to specified level.
• Check hydraulic system for leakage. 6-20, 6-20
U2CME0E0.book Page 1 Friday, May 2, 2014 2:55 PM
Page 39 of 84
OPERATION AND IMPORTANT RIDING POINTS
5-4
5
150–500 km (90–300 mi)
Avoid prolonged operation above 1/2
throttle.
Rev the engine freely through the
gears, but do not use full throttle at any
time.
500–1000 km (300–600 mi)
Avoid prolonged operation above 3/4
throttle.
1000 km (600 mi) an
d b eyon d
Avoid prolonged full-throttle operation.
Vary the engine speed occasionally.
NOTICE: After 1000 km (600 mi) of
operation, be sure to chan ge the en-
g ine oil an d final transmission oil,
an d to clean the oil strainer.
[ECA16502]
NOTICE
ECA10271
If any en gine trou ble shoul d occur
d urin g the en gine break-in perio d,
imme diately have a Yamaha dealer
check the vehicle.
EAU17214
Parkin gWhen parking, stop the engine, and
then remove the key from the main
switch.
WARNING
EWA10312
Since the en gine an d exhaust
system can b ecome very hot,
park in a place where ped estri-
ans or chil dren are not likely to
touch them an d b e burne d.
Do not park on a slope or on soft
groun d, otherwise the vehicle
may overturn, increasin g the
risk of a fuel leak an d fire.
Do not park near grass or other
flamma ble materials which
mi ght catch fire.
U2CME0E0.book Page 4 Friday, May 2, 2014 2:55 PM