2014 VAUXHALL MOKKA USB
[x] Cancel search: USBPage 102 of 221

102Digital picture frameDigital picture frameGeneral information...................102
Usage ........................................ 102General information
Using the digital picture frame
function you can view your favourite
pictures (or photos), one at a time, on the display of the Infotainment
system.
You can download your favourite
pictures from a USB drive connected
to the USB port 3 100 of the
Infotainment system.
Up to 10 pictures can be stored in the
Infotainment system's memory.
The pictures are shown on the display in their original ratio (borders if
necessary are black) and orientation.
Important information ■ The pictures you want to download
need to be stored in the root
directory (e.g., "F:\") of the USB drive.
■ Only the first 100 pictures (sequentially sorted as stored in the
root directory of the USB drive) will
be offered for download.■ Only pictures in JPEG standard format (file extensions, e.g., .jpg
or .jpeg) are supported.
Example: "F:\myPicture.jpg",
where "F:\" is the root directory of
the USB drive.
■ The maximum supported resolution
of a picture is 12 Mega pixel.
Pictures with higher resolutions are down-scaled (resized) during
download.
Pictures with lower resolutions are
not up-scaled (not resized) during
download and centred in the middle of the display.
Usage Downloading and/or removing
pictures
Connect a USB drive with your
favourite pictures (or photos) stored
on it to the USB port 3 100 of the
Infotainment system.
Page 103 of 221
Digital picture frame103
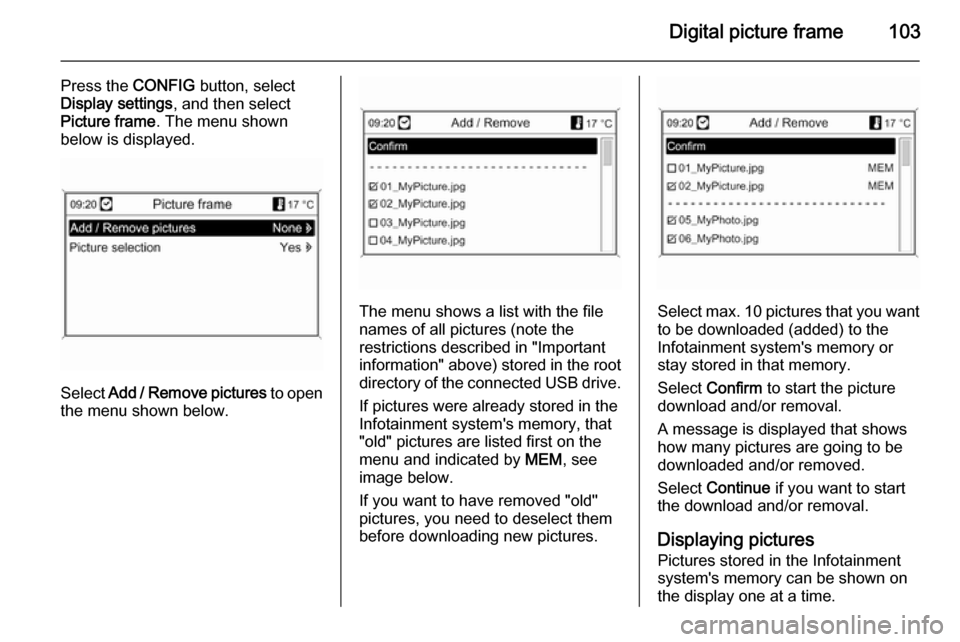
Press the CONFIG button, select
Display settings , and then select
Picture frame . The menu shown
below is displayed.
Select Add / Remove pictures to open
the menu shown below.
The menu shows a list with the file
names of all pictures (note the
restrictions described in "Important information" above) stored in the root directory of the connected USB drive.
If pictures were already stored in the
Infotainment system's memory, that
"old" pictures are listed first on the menu and indicated by MEM, see
image below.
If you want to have removed "old"
pictures, you need to deselect them
before downloading new pictures.Select max. 10 pictures that you want
to be downloaded (added) to the
Infotainment system's memory or
stay stored in that memory.
Select Confirm to start the picture
download and/or removal.
A message is displayed that shows
how many pictures are going to be
downloaded and/or removed.
Select Continue if you want to start
the download and/or removal.
Displaying pictures Pictures stored in the Infotainment
system's memory can be shown on
the display one at a time.
Page 110 of 221
110Navigation
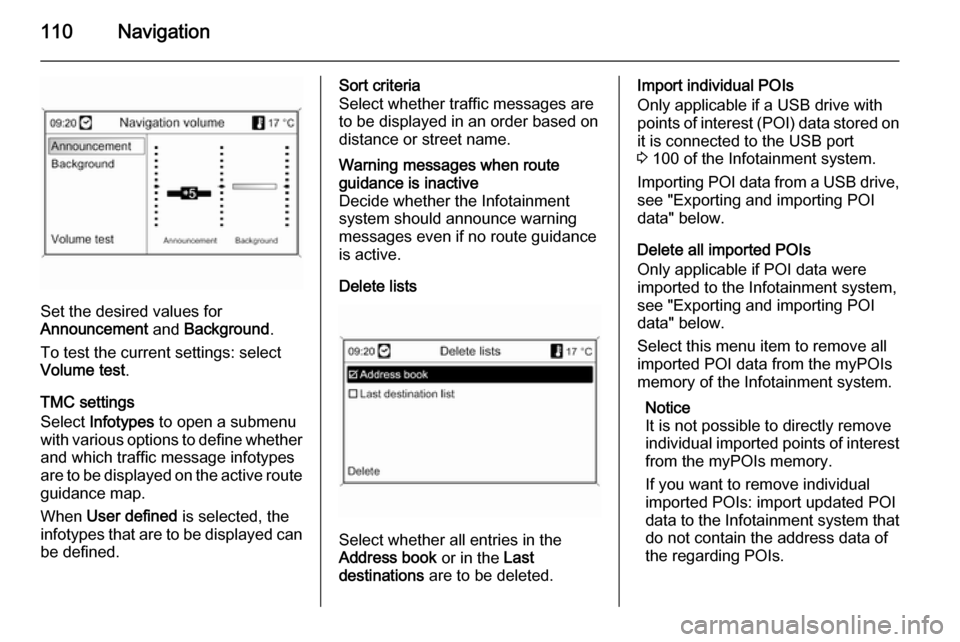
Set the desired values for
Announcement and Background .
To test the current settings: select Volume test .
TMC settings
Select Infotypes to open a submenu
with various options to define whether
and which traffic message infotypes
are to be displayed on the active route guidance map.
When User defined is selected, the
infotypes that are to be displayed can
be defined.
Sort criteria
Select whether traffic messages are
to be displayed in an order based on
distance or street name.Warning messages when route
guidance is inactive
Decide whether the Infotainment
system should announce warning
messages even if no route guidance
is active.
Delete lists
Select whether all entries in the
Address book or in the Last
destinations are to be deleted.
Import individual POIs
Only applicable if a USB drive with
points of interest (POI) data stored on
it is connected to the USB port
3 100 of the Infotainment system.
Importing POI data from a USB drive,
see "Exporting and importing POI
data" below.
Delete all imported POIs
Only applicable if POI data were
imported to the Infotainment system,
see "Exporting and importing POI
data" below.
Select this menu item to remove all
imported POI data from the myPOIs
memory of the Infotainment system.
Notice
It is not possible to directly remove
individual imported points of interest from the myPOIs memory.
If you want to remove individual
imported POIs: import updated POI
data to the Infotainment system that
do not contain the address data of
the regarding POIs.
Page 111 of 221

Navigation111
To remove all imported POIs of a
certain category: import an empty
POI data file of the regarding
category to the Infotainment system.
Export POIs
Exports all POI data stored in the
myPOIs memory of the Infotainment
system to a USB drive connected to
the USB port 3 100, see "Exporting
and importing POI data" below.
Delete Home address
Deletes the currently set home
address (displayed in the Enter
destination menu, see chapter
"Destination input" 3 115).
Exporting and importing POI data
Introductory explanationsTypes of POI data
The Infotainment system provides the following types of points of interest
data:
■ Predefined Points of Interest stored
on the map SD card and indicated
by icons on the map display.You can store such predefined
POIs in the address book or as
individual POIs in the myPOIs
memory of the Infotainment
system, see below.
■ Favourite destination addresses that were stored in the Address
book .
You can export these address book
data to a USB drive for later use,
e.g., in other vehicles.
■ Individual POIs : favourite
destination addresses that were
stored in the myPOIs memory.
You can export these individual
POI data to a USB drive for later
use, e.g., in other vehicles.
■ User defined POIs : favourite
destination addresses that you
defined via GPS coordinates
(taken, e.g., from a topographical
map) and that you entered into text files.
You can store these user defined
POI data on a USB drive and later
import the data to the myPOIsmemory of the Infotainment
system, see below.
■ Imported POIs : favourite
destination addresses that were
previously stored on a USB drive
and then imported to the myPOIs
memory of the Infotainment
system.Advantages of POI export and import The export and import of points of
interest data offer you, e.g., the
following advantages:
■ Define and store your favourite destination addresses only once,
and later use these address data in
other vehicles.
See "Exporting and importing
individual POIs and address book
entries" below.
■ Define your favourite destination addresses conveniently at home,
and later use them in your vehicle.
See "Creating and importing user
defined POIs" below.
■ Clearly arrange a large amount of destination addresses, e.g.,
favourite destination addresses of
Page 112 of 221
112Navigation
other family members or
destination addresses for your next journey or business trip in separate
submenus.
See "Organizing the POI data in
several subfolders" below.
Exporting and importing individual
POIs and address book entriesBrief description:
1. Connect a USB drive to the USB port of your vehicle's Infotainmentsystem.
2. Store (export) your favourite destination addresses on the USBdrive.
3. Connect the USB drive to the USB
port of a vehicle equipped with a
Navi 600 or Navi 900 system.
4. Download (import) the address data to the vehicle's Infotainment
system.
After the import, the addresses can
be selected as destinations for route
guidance.
Detailed descriptions see below.Exporting POI data to a USB drive
Connect a USB drive to the USB port of the Infotainment system, see
chapter "USB port" 3 100.
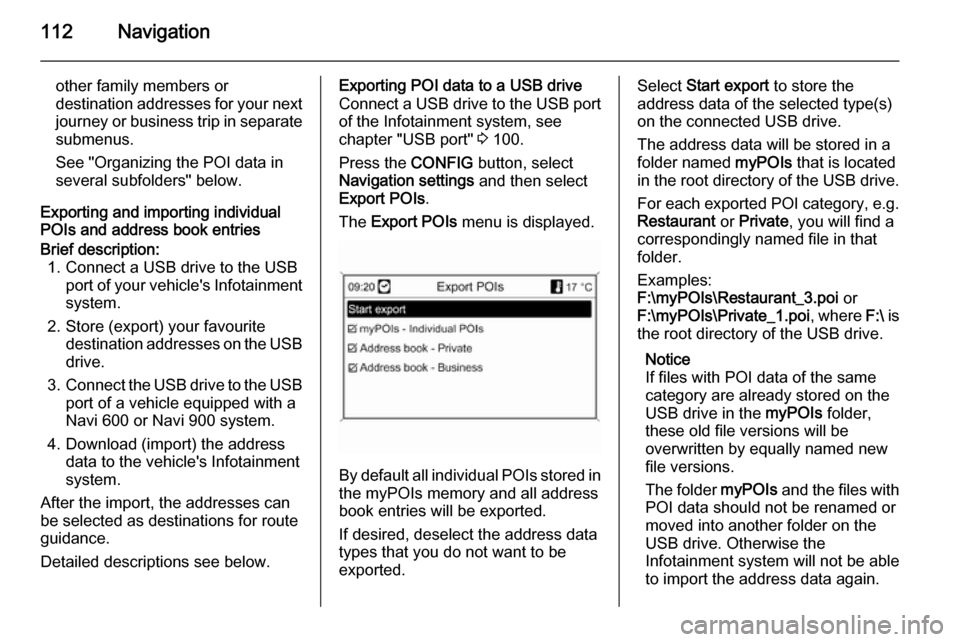
Press the CONFIG button, select
Navigation settings and then select
Export POIs .
The Export POIs menu is displayed.
By default all individual POIs stored in
the myPOIs memory and all address
book entries will be exported.
If desired, deselect the address data
types that you do not want to be
exported.
Select Start export to store the
address data of the selected type(s)
on the connected USB drive.
The address data will be stored in a
folder named myPOIs that is located
in the root directory of the USB drive.
For each exported POI category, e.g.
Restaurant or Private , you will find a
correspondingly named file in that
folder.
Examples:
F:\myPOIs\Restaurant_3.poi or
F:\myPOIs\Private_1.poi , where F:\ is
the root directory of the USB drive.
Notice
If files with POI data of the same
category are already stored on the
USB drive in the myPOIs folder,
these old file versions will be
overwritten by equally named new
file versions.
The folder myPOIs and the files with
POI data should not be renamed or
moved into another folder on the
USB drive. Otherwise the
Infotainment system will not be able
to import the address data again.
Page 113 of 221

Navigation113
Importing POI data from a USB drive
Connect a USB drive with POI data
stored on it (details see above) to the
USB port of the Infotainment system,
see chapter "USB port" 3 100.
To start the import: press the
CONFIG button, select Navigation
settings , select Import individual
POIs and then select Continue.
All POI data stored on the USB drive
is imported to the myPOIs memory of the Infotainment system.
After the import is finished, the
imported POIs are selectable as
destinations via the Enter
destination menu, see chapter
"Destination input" 3 115.
Creating and importing user defined
POIs
User defined points of interest need
to be defined via GPS coordinates
that can be taken, e.g., from a
topographical map.
The GPS coordinates and further
address data need to be entered into
text files, each file representing a POI category.Brief description: 1. Create the text files for the POI data.
2. Enter the desired address data into the text files.
3. Store the text files with your POI data on a USB drive.
4. Connect the USB drive to the USB
port of your vehicle's Infotainment system.
5. Download (import) the text files with your POI data to the
Infotainment system.
After the import, the addresses can
be selected as destinations for route
guidance.
Detailed descriptions see below.Creating the text files for POI data
You can assign your favourite
destination addresses to 20 different
POI categories, with each POI
category assigned a number, see
"POI categories and assigned
numbers" below.
For each POI category you need to create a separate text file.The text files can be created, e.g., by
using a simple text editor software.
Notice
The text editor must support the
UTF-8 character encoding for
Unicode.
Each text file name need to consist of the category name, a single
underscore, the category's number
and the file extension .poi.
Example file names: ■ Business_2.poi
■ Home & Living_8.poi
■ Culture_15.poi
Notice
The length of the text file names is
limited to 32 characters.
POI categories and assigned
numbers:
(1) Private , (2) Business , (3)
Restaurant , (4) Hotel , (5) Automotive ,
(6) Travel , (7) Cinema , (8) Home &
Living , (9) Shopping , (10) Craft, (11)
Sport , (12) Sight, (13) Health care ,
(14) Leisure , (15) Culture , (16)
Page 114 of 221
114Navigation
Nightlife, (17) Communication , (18)
News & broking , (19) Government
office , (20) General .Entering POI data into the text files
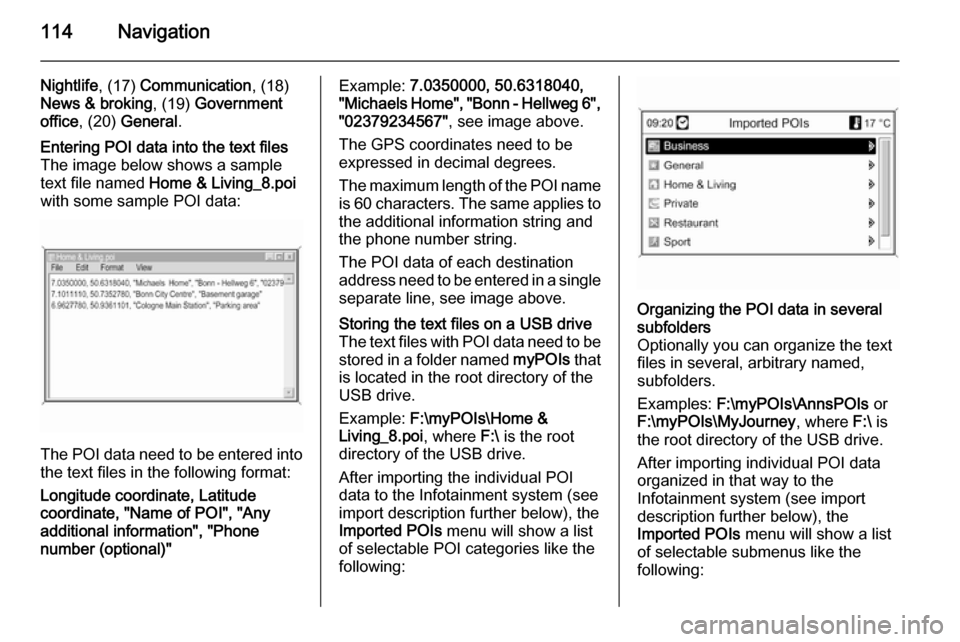
The image below shows a sample
text file named Home & Living_8.poi
with some sample POI data:
The POI data need to be entered into the text files in the following format:
Longitude coordinate, Latitude
coordinate, "Name of POI", "Any additional information", "Phone
number (optional)"
Example: 7.0350000, 50.6318040,
"Michaels Home", "Bonn - Hellweg 6", "02379234567" , see image above.
The GPS coordinates need to be
expressed in decimal degrees.
The maximum length of the POI name
is 60 characters. The same applies to the additional information string and
the phone number string.
The POI data of each destination
address need to be entered in a single
separate line, see image above.Storing the text files on a USB drive
The text files with POI data need to be
stored in a folder named myPOIs that
is located in the root directory of the
USB drive.
Example: F:\myPOIs\Home &
Living_8.poi , where F:\ is the root
directory of the USB drive.
After importing the individual POI
data to the Infotainment system (see
import description further below), the
Imported POIs menu will show a list
of selectable POI categories like the
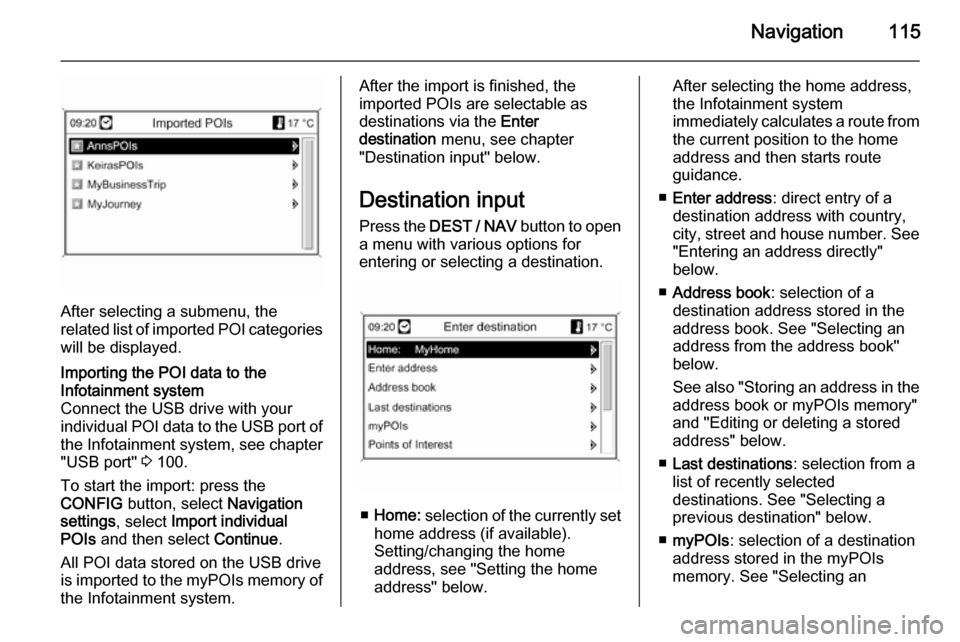
following:Organizing the POI data in several
subfolders
Optionally you can organize the text
files in several, arbitrary named,
subfolders.
Examples: F:\myPOIs\AnnsPOIs or
F:\myPOIs\MyJourney , where F:\ is
the root directory of the USB drive.
After importing individual POI data
organized in that way to the
Infotainment system (see import
description further below), the
Imported POIs menu will show a list
of selectable submenus like the
following:
Page 115 of 221
Navigation115
After selecting a submenu, the
related list of imported POI categories
will be displayed.
Importing the POI data to the
Infotainment system
Connect the USB drive with your
individual POI data to the USB port of the Infotainment system, see chapter
"USB port" 3 100.
To start the import: press the
CONFIG button, select Navigation
settings , select Import individual
POIs and then select Continue.
All POI data stored on the USB drive
is imported to the myPOIs memory of the Infotainment system.After the import is finished, the
imported POIs are selectable as
destinations via the Enter
destination menu, see chapter
"Destination input" below.
Destination input Press the DEST / NAV button to open
a menu with various options for entering or selecting a destination.
■ Home: selection of the currently set
home address (if available).
Setting/changing the home
address, see "Setting the home
address" below.
After selecting the home address,
the Infotainment system
immediately calculates a route from
the current position to the home
address and then starts route
guidance.
■ Enter address : direct entry of a
destination address with country,
city, street and house number. See "Entering an address directly"
below.
■ Address book : selection of a
destination address stored in the
address book. See "Selecting an address from the address book"below.
See also "Storing an address in the
address book or myPOIs memory"
and "Editing or deleting a stored address" below.
■ Last destinations : selection from a
list of recently selected
destinations. See "Selecting a
previous destination" below.
■ myPOIs : selection of a destination
address stored in the myPOIs
memory. See "Selecting an