Page 14 of 143
14Basic operationBasic operationDisplays....................................... 14
Controls ....................................... 15
Menu operation ............................ 21
Keyboards .................................... 24
Favourites .................................... 28
Contacts ....................................... 32
Touch operation overview ...........37
Tone settings ............................... 41
Volume settings ........................... 42
System settings ........................... 43Displays
Infotainment information are shown
on two separate displays.
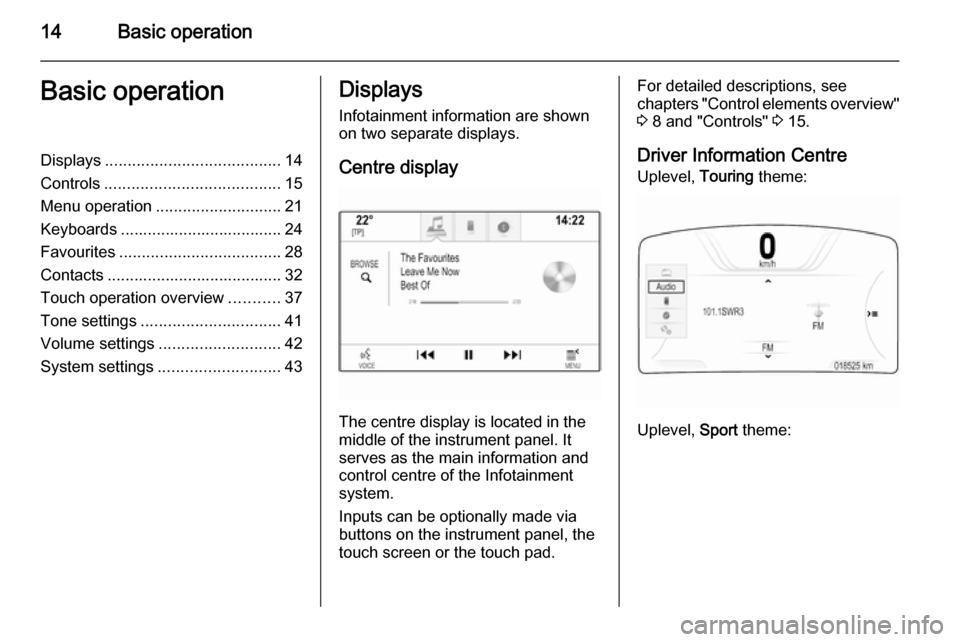
Centre display
The centre display is located in the
middle of the instrument panel. It
serves as the main information and
control centre of the Infotainment
system.
Inputs can be optionally made via
buttons on the instrument panel, the
touch screen or the touch pad.
For detailed descriptions, see
chapters "Control elements overview"
3 8 and "Controls" 3 15.
Driver Information Centre Uplevel, Touring theme:
Uplevel, Sport theme:
Page 15 of 143
Basic operation15
Midlevel:
The Driver Information Centre is part
of the instrument cluster and shows
Infotainment information as well as
vehicle-specific information (see
Owner's manual).
The Driver Information Centre serves
as an additional information and
control centre for a selection of
important Infotainment functions.
Inputs are made via the five-way
controller on the right-hand side of the steering wheel.
Find detailed descriptions in "Control
elements overview" 3 8 and
"Controls" 3 15.
Controls Instrument panel
Find an overview of all instrument panel controls in "Control elements
overview" 3 8.
MENU knob
The MENU knob is one of the central
control elements for the menus.Turn: ■ To select a screen button or menu item.
■ To scroll through a list of menu items.
Page 16 of 143
16Basic operation
■ To change a setting value.Notice
The selected item is highlighted by a red box.
Press: ■ To activate a selected screen button or menu item.
■ To confirm a changed settings value.
■ To switch to a different settings option.
■ To display the application-specific submenu.Notice
When not in the AUDIO application
and on a screen where turning the MENU knob does not execute an
application-related function, the
MENU knob may be used to adjust
the frequency (AM or FM waveband)
or skip to the previous or next station (DAB waveband).
Home button
Press the ; button on the instrument
panel to access the Home screen.
BACK button
When operating the menus, press the BACK button to return to the next
higher menu level.
Touch screen
The centre display has a touch-
sensitive surface that allows direct
interaction with the screen.
m screen button
To return to the next higher menu
level, select the m screen button.Exit screen button
To leave the menu currently active,
select the Exit screen button.
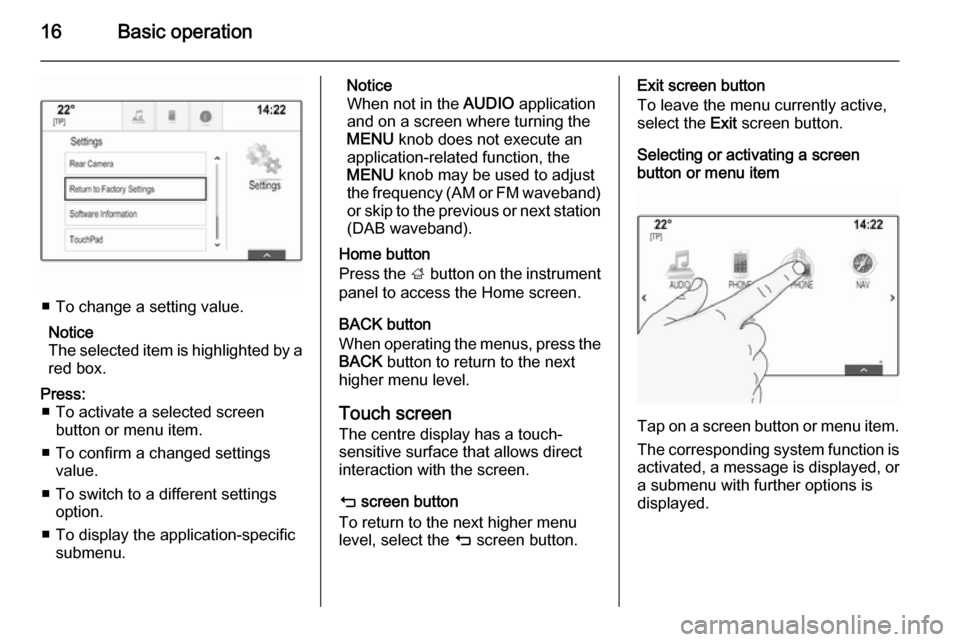
Selecting or activating a screen
button or menu item
Tap on a screen button or menu item.
The corresponding system function is
activated, a message is displayed, or a submenu with further options is
displayed.
Page 17 of 143
Basic operation17
Notice
In subsequent chapters the
operating steps for selecting and
activating a screen button or menu
item via the touch screen will be
described as "...select the...screen
button..." or "...select the...menu
item...".
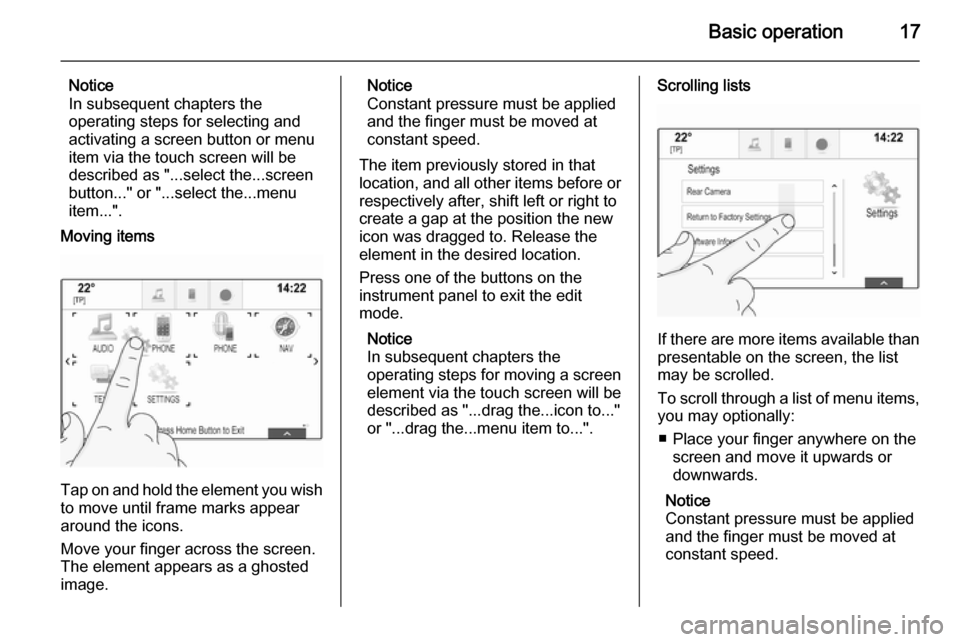
Moving items
Tap on and hold the element you wish to move until frame marks appear
around the icons.
Move your finger across the screen.
The element appears as a ghosted
image.
Notice
Constant pressure must be applied
and the finger must be moved at
constant speed.
The item previously stored in that location, and all other items before or respectively after, shift left or right to
create a gap at the position the new
icon was dragged to. Release the
element in the desired location.
Press one of the buttons on the
instrument panel to exit the edit
mode.
Notice
In subsequent chapters the
operating steps for moving a screen
element via the touch screen will be
described as "...drag the...icon to..."
or "...drag the...menu item to...".Scrolling lists
If there are more items available than
presentable on the screen, the list
may be scrolled.
To scroll through a list of menu items, you may optionally:
■ Place your finger anywhere on the screen and move it upwards or
downwards.
Notice
Constant pressure must be applied
and the finger must be moved at
constant speed.
Page 22 of 143
22Basic operation
All applications installed may be
accessed from the Home screen.
The Home screen comprises up to
five pages with up to eight
applications on each page.
Home button
Press the ; button on the instrument
panel to access the Home screen.
If you press the ; button while
already being on the Home screen,
you are returned to the first page.
Activating an application
Select the respective application icon
to launch the application and enter
the application main menu.
The radio and media functions are
selected via the respective buttons.
Notice
The icons of unavailable
applications are greyed out.Scrolling pages
To scroll from one page to another:
■ Place your finger anywhere on the screen and move it left to scroll to
the previous page or right to scroll
to the next page.
■ Tap on the p or q screen buttons at
the left and right side of the screen.
■ Place two fingers anywhere on the touch pad and move them left to
scroll to the previous page or right
to scroll to the next page.
Find a detailed description 3 15.
Notice
At the bottom right of the screen, indication marks designate how
many Home screen pages may be
accessed and which page is
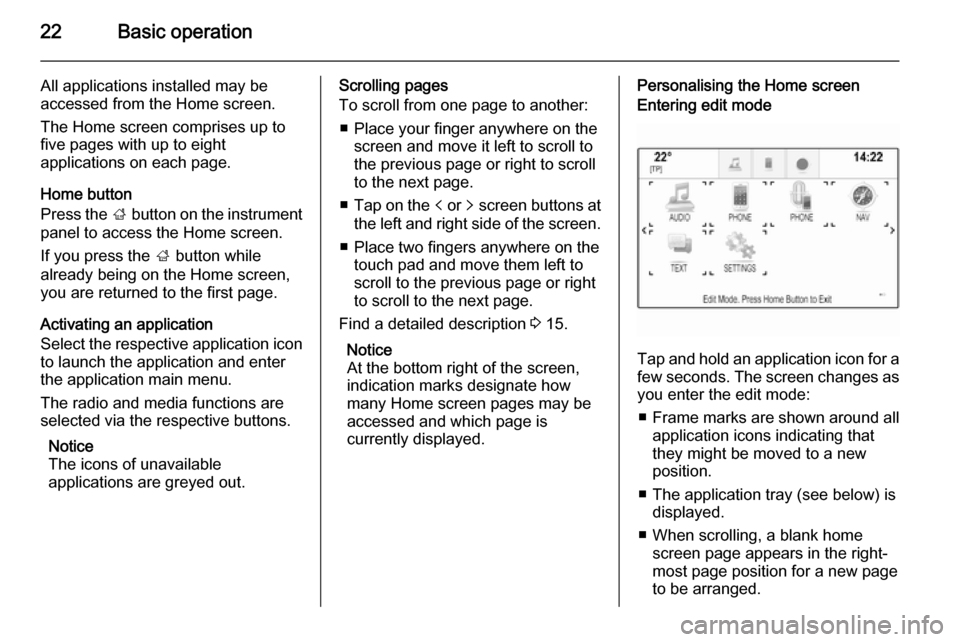
currently displayed.Personalising the Home screenEntering edit mode
Tap and hold an application icon for a
few seconds. The screen changes as you enter the edit mode:
■ Frame marks are shown around all
application icons indicating that
they might be moved to a new
position.
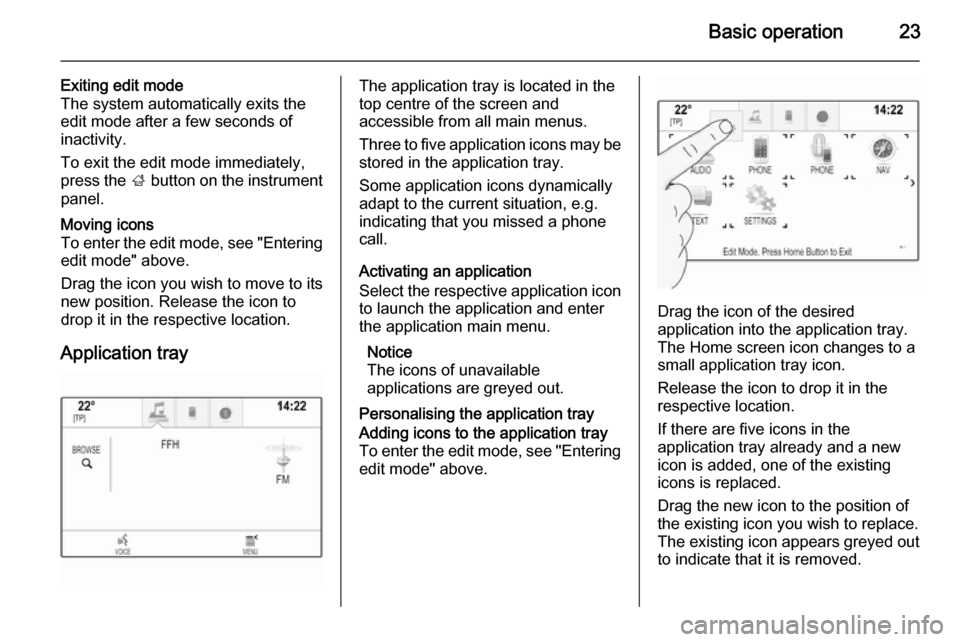
■ The application tray (see below) is displayed.
■ When scrolling, a blank home screen page appears in the right-
most page position for a new page
to be arranged.
Page 23 of 143
Basic operation23
Exiting edit mode
The system automatically exits the
edit mode after a few seconds of
inactivity.
To exit the edit mode immediately,
press the ; button on the instrument
panel.Moving icons
To enter the edit mode, see "Entering edit mode" above.
Drag the icon you wish to move to its
new position. Release the icon to
drop it in the respective location.
Application tray
The application tray is located in the
top centre of the screen and
accessible from all main menus.
Three to five application icons may be stored in the application tray.
Some application icons dynamically
adapt to the current situation, e.g.
indicating that you missed a phone
call.
Activating an application
Select the respective application icon
to launch the application and enter
the application main menu.
Notice
The icons of unavailable
applications are greyed out.
Personalising the application trayAdding icons to the application tray To enter the edit mode, see "Entering edit mode" above.
Drag the icon of the desired
application into the application tray.
The Home screen icon changes to a
small application tray icon.
Release the icon to drop it in the
respective location.
If there are five icons in the
application tray already and a new
icon is added, one of the existing
icons is replaced.
Drag the new icon to the position of
the existing icon you wish to replace.
The existing icon appears greyed out
to indicate that it is removed.
Page 45 of 143

Basic operation45
Mode
Select the Mode menu item to enter
the respective submenu.
Depending on the external lighting
conditions, select Day or Night .
If you select Auto, the system
automatically adjusts the display.
Calibrate Touchscreen
Select the Calibrate Touchscreen
menu item to enter the respective
submenu.Follow the instructions on the screen,
tapping on the respective points
indicated. The touch screen is
calibrated.
Turn Display Off
Select the Turn Display Off menu item
to turn off the display.
To turn the display back on, touch the touch screen or press a button on the
instrument panel.
Return to Factory Settings
Press the ; button and then select
the SETTINGS icon.
Scroll through the list and select the
Return to Factory Settings menu item.
Restore Vehicle Settings
Select Restore Vehicle Settings to
restore all vehicle personalisation
settings. A warning message is
displayed.
Select the Restore screen button.
The settings are reset.
Clear All Private Data
Select Clear All Private Data to delete
the following data:
■ Paired Bluetooth devices■ Stored phone books
■ Vehicle contacts list
■ Destination lists
■ Favourites
A warning message is displayed.
Select the Delete screen button. The
data is deleted.
Page 47 of 143

Radio47RadioUsage.......................................... 47
Station search .............................. 47
Waveband menus ........................48
Radio data system (RDS) ............49
Digital audio broadcasting ...........50Usage
The radio function is part of the
AUDIO application.
Activating the radio function
Press the RADIO button.
Selecting the waveband
Repeatedly press the RADIO button
on the instrument panel to toggle between the different wavebands.
Station search
Automatic station search
Press the t or v buttons to play the
previous or next station.
Manual station search Press and hold the t or v buttons.
Release the respective button when
the desired frequency has almost
been reached.
Station lists
In the station lists, all receivable radio stations within the current reception
area are available for selection.
To display the station list of the
waveband currently active, you may
optionally:
■ Tap anywhere on the screen.
■ Select the BROWSE screen button
on the left side of the screen.
■ Turn the MENU knob.
The station list is displayed.