2014 VAUXHALL ANTARA infotainment
[x] Cancel search: infotainmentPage 13 of 217

In brief11
1Side air vents .....................119
2 Fixed air vents .................... 120
3 High beam .......................... 106
Headlight flash ...................106
Turn and lane-change
signals ................................ 108
Exit lighting ......................... 112
Parking lights .....................109
Cruise control ....................... 90
4 Remote control on
steering wheel ......................72
Trip computer .....................100
5 Horn ..................................... 73
6 Instruments .......................... 79
7 Windscreen wiper and
washer system, headlight
washer system .....................73
Rear window wiper and
washer system .....................758Info-Display .......................... 93
Check control, tyre
pressure monitoring
system ................................ 176
Trip computer .....................100
9 Centre air vents .................. 119
10 Hazard warning flashers ....107
Parking assist ..................... 141
Electronic Stability Control . 137
Descent control system ...... 138
Status LED for anti-theft
alarm system ........................ 24
Folding exterior mirrors ........27
Eco button for stop/start
system ................................. 124
11 Infotainment system .............10
12 Front passenger airbag ........46
13 Status LEDs for front
passenger airbag .................48
Control indicator for front
passenger seat belt .............41
14 Glovebox .............................. 5515Fuse box ............................ 170
16 Climate control system ....... 114
17 Ignition switch with
steering wheel lock ............123
18 Accelerator pedal ...............122
19 Driver airbag ........................ 46
20 Brake pedal ........................ 135
21 Clutch pedal ....................... 122
22 Steering wheel adjustment ..72
23 Bonnet release ...................152
24 Coin storage ......................... 56
25 Card holder .......................... 56
26 Light switch ........................ 105
Automatic light control .......105
Instrument illumination .......110
Rear fog light ...................... 109
Front fog lights ...................108
Headlight range
adjustment ......................... 106
Page 59 of 217

Storage57Underseat storage
Front passenger seat undertray
Pull up on front of tray then pull it
forwards. Push the tray towards the
seat to return it to its original position.
Armrest storage
Console box in front armrest
To open: pull up lever and lift the lid.
To close: lower lid and push it down
until it latches into position.
Centre console storage To access the storage compartment,
power outlet and AUX input, slide the
cupholder tray rearwards.
Power outlets 3 77.
AUX input - see Infotainment system
manual for further information.
Rear carrier system
The rear carrier system (Flex-Fix
system) allows bicycles to be
attached to a pull-out carrier
integrated into the vehicle floor. The
transportation of other objects is not
permitted.
The maximum load of the rear carrier
system is 40 kg. The maximum load
per bicycle is 20 kg.
The wheelbase of a bicycle must not
exceed 1.15 metres. Otherwise the
secure fastening of a bicycle is not
possible.
Page 74 of 217

72Instruments and controlsInstruments and
controlsControls ....................................... 72
Warning lights, gauges and indi‐
cators ........................................... 79
Information displays .....................91
Vehicle messages ........................ 98
Trip computer ............................. 100Controls
Steering wheel adjustment
Unlock lever, adjust steering wheel,
then engage lever and ensure it is fully locked.
Do not adjust steering wheel unless
vehicle is stationary and steering
wheel lock has been released.
Steering wheel controls
The Infotainment system and a
connected mobile phone can be
operated via the controls on the
steering wheel.
Further information is available in the
Infotainment system instruction
manual.
Page 79 of 217

Instruments and controls77
Deactivate (Clock Sync.Off ) or
activate ( Clock Sync.On ) automatic
time synchronisation with the arrow
buttons on the Infotainment system.
To set date and time manually, select
the menu item for time and date
setting from the Settings menu and
make the desired setting. The value ready for modification is marked with
arrows. Use the arrow buttons to
make the required setting. The setting
is saved when the menu item is
exited.
To correct time with the help of RDS,
select the menu item for time
synchronisation from the Settings
menu and make the desired setting.
Board-Info-Display 3 91.Graphic-Info-Display, Colour-Info-
Display
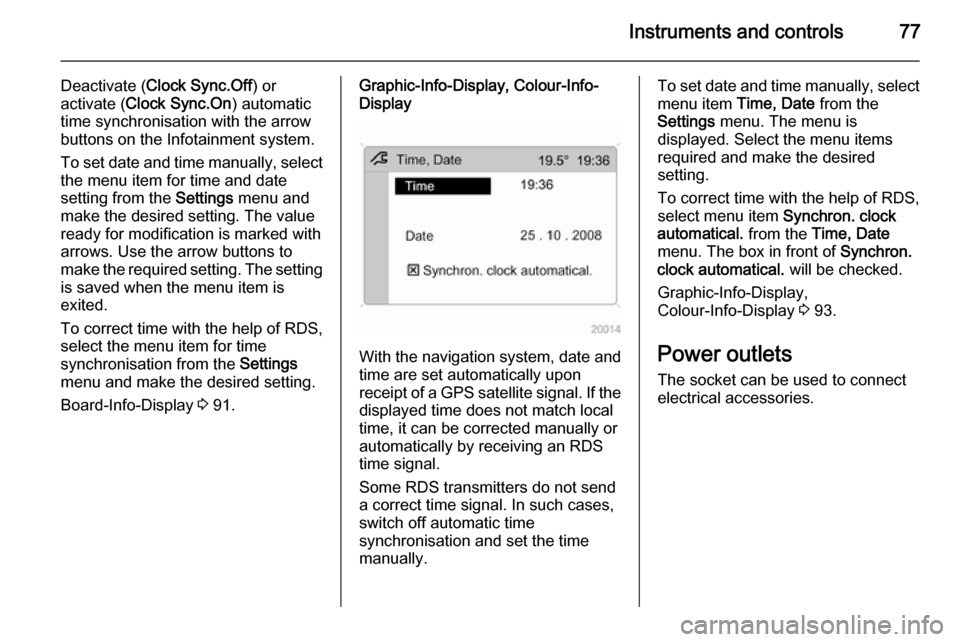
With the navigation system, date and
time are set automatically upon
receipt of a GPS satellite signal. If the
displayed time does not match local
time, it can be corrected manually or
automatically by receiving an RDS
time signal.
Some RDS transmitters do not send a correct time signal. In such cases,
switch off automatic time
synchronisation and set the time
manually.
To set date and time manually, select
menu item Time, Date from the
Settings menu. The menu is
displayed. Select the menu items
required and make the desired
setting.
To correct time with the help of RDS,
select menu item Synchron. clock
automatical. from the Time, Date
menu. The box in front of Synchron.
clock automatical. will be checked.
Graphic-Info-Display,
Colour-Info-Display 3 93.
Power outlets
The socket can be used to connect
electrical accessories.
Page 93 of 217

Instruments and controls91Information displaysBoard-Info-Display
The Info-Display is located in the
instrument panel above the
Infotainment system.
Info-Display indicates:
■ time 3 76
■ outside temperature 3 75
■ date 3 76
■ Infotainment system - see Infotainment system instruction
manual
The Info-Display is located in the
instrument panel above the
Infotainment system.
An F in the display indicates a fault.
Have the cause of the fault remedied by a workshop.
Trip computer, Board-Info-Display
3 100.
Selecting functions
Functions and settings of the
Infotainment system can be accessed via the Info-Display.
Functions are selected and executed
in the menu on the display using the
arrow buttons on the Infotainment
system or the left adjuster wheel on
the steering wheel.
If a check control warning message
appears on the Info-Display, the
display is blocked from other
functions. Acknowledge the message
by pressing the OK button or the left
adjuster wheel. If there are several
warning messages, acknowledge
them one at a time.
Check control 3 99.Select using the Infotainment system
buttons
In the Settings menu, use the OK
button to call up the required function.
Use the arrow buttons to change
settings.
In the BC menu, use the OK button to
call up the required function. Use the
OK button to operate the stop watch
or restart measurement and
calculation.
Page 94 of 217

92Instruments and controls
Select using the left adjuster wheel onthe steering wheel
Turn the adjuster wheel to call up the
required function.
Press the adjuster wheel to open the
BC menu, to select marked items and
confirm commands. In the BC menu
press to operate the stop watch or
restart measurement and calculation.
System settings
Press the Settings button of the
Infotainment system. Menu item
Audio then opens.
Call up System with the left arrow
button and select with the OK button.
The first function of the System menu
is highlighted. Some of the functions
appear on the display in an
abbreviated form.
The functions are displayed in the
following order:
■ Time synchronisation
■ Time, setting hours
■ Time, setting minutes
■ Date, setting day
■ Date, setting month
■ Date, setting year
■ Ignition logic
■ Language selection
■ Setting units of measure
Automatic time synchronisation
The RDS (Radio Data System) signal of most VHF transmitters
automatically sets the time, identified
by } in the display.
Page 95 of 217

Instruments and controls93
Some transmitters do not send acorrect time signal. In such cases,
switch off automatic time
synchronisation and set the time
manually.
Deactivate ( Clock Sync.Off ) or
activate ( Clock Sync.On ) automatic
time synchronisation with the arrow
buttons.
Setting date and time
To set date and time manually, select
the menu item for time and date
settings and make the desired
setting.
The value ready for modification is
marked with arrows. Use the arrow
buttons to make the required setting.
The setting is saved when the menu item is exited.
Ignition logic
See Infotainment system instruction
manual.
Language selection
The display language for some
functions can be selected.
Select the required language with the
arrow buttons.
Setting units of measure
Select the required unit of
measurement with the arrow buttons.
Graphic-Info-Display,
Colour-Info-Display Depending on the vehicle
configuration the vehicle has a
Graphic-Info-Display or
Colour-Info-Display. The
Info-Display is located in the
instrument panel above the
Infotainment system.
Page 96 of 217

94Instruments and controls
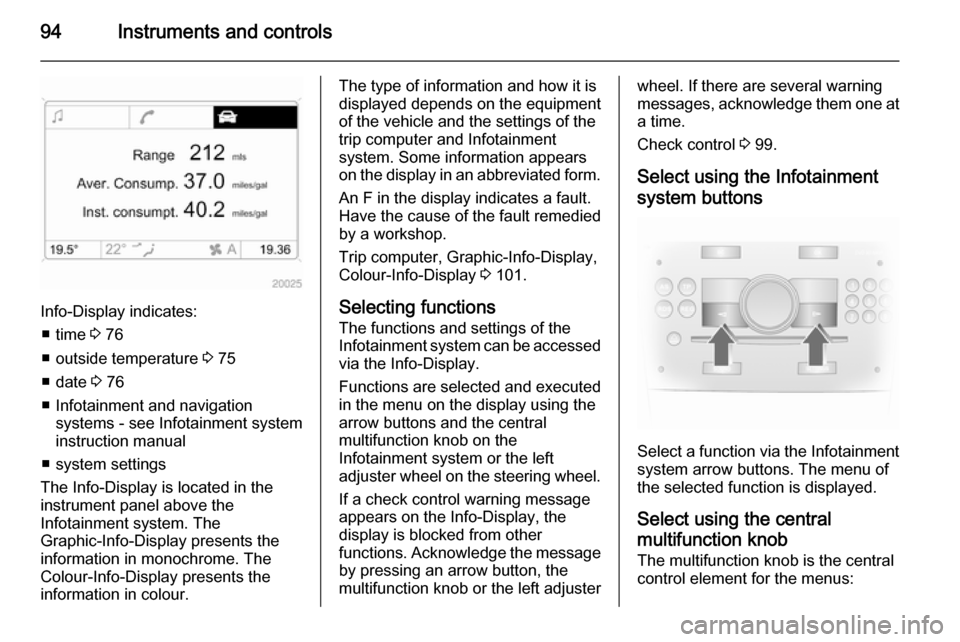
Info-Display indicates:■ time 3 76
■ outside temperature 3 75
■ date 3 76
■ Infotainment and navigation systems - see Infotainment systeminstruction manual
■ system settings
The Info-Display is located in the
instrument panel above the
Infotainment system. The
Graphic-Info-Display presents the
information in monochrome. The
Colour-Info-Display presents the
information in colour.
The type of information and how it is
displayed depends on the equipment
of the vehicle and the settings of the
trip computer and Infotainment
system. Some information appears
on the display in an abbreviated form.
An F in the display indicates a fault.
Have the cause of the fault remedied
by a workshop.
Trip computer, Graphic-Info-Display,
Colour-Info-Display 3 101.
Selecting functions
The functions and settings of the
Infotainment system can be accessed
via the Info-Display.
Functions are selected and executed
in the menu on the display using the
arrow buttons and the central
multifunction knob on the
Infotainment system or the left
adjuster wheel on the steering wheel.
If a check control warning message
appears on the Info-Display, the
display is blocked from other
functions. Acknowledge the message by pressing an arrow button, the
multifunction knob or the left adjusterwheel. If there are several warning
messages, acknowledge them one at a time.
Check control 3 99.
Select using the Infotainment system buttons
Select a function via the Infotainment
system arrow buttons. The menu of
the selected function is displayed.
Select using the central
multifunction knob The multifunction knob is the central
control element for the menus: