Page 175 of 712
1753-4. Adjusting the steering wheel and mirrors
3
Operation of each component
HIGHLANDER_U (OM48A12U)
Auto anti-glare inside rear view mirror
Responding to the level of brightness of the headlights of vehicles
behind, the reflected light is automatically reduced.
Changing automatic anti-glare function mode
ON/OFF
■ To prevent sensor error (vehicles with an auto anti-glare inside rear view
mirror)
Ty p e A : Ty pe B :
When the automatic anti-glare function is in ON mode, the indicator illumi-
nates.
The function will set to ON mode each time the engine switch is turned to
IGNITION ON mode.
Pressing the button turns the function to OFF mode. (The indicator also
turns off.)
To ensure that the sensors operate prop-
erly, do not touch or cover them.
WARNING
Do not adjust the position of the mirror while driving.
Doing so may lead to mishandling of the vehicle and cause an accident,
resulting in death or serious injury.
IndicatorIndicator
Page 191 of 712

191
4Driving
HIGHLANDER_U (OM48A12U)4-1. Before driving
Driving the vehicle ............. 192
Cargo and luggage ........... 201
Vehicle load limits ............. 206
Trailer towing..................... 207
Dinghy towing ................... 224
4-2. Driving procedures Engine (ignition) switch (vehicles without a
smart key system) ........... 225
Engine (ignition) switch (vehicles with a smart
key system) ..................... 228
Automatic transmission ..... 234
Turn signal lever................ 239
Parking brake .................... 240
4-3. Operating the lights and wipers
Headlight switch ................ 241
Automatic High Beam ....... 246
Fog light switch ................. 252
Windshield wipers and washer ............................ 253
Rear window wiper and washer ............................ 255
4-4. Refueling Opening the fuel tank cap .................................. 257 4-5. Using the driving support
systems
Cruise control .................... 261
Dynamic radar cruise control ............................. 266
LDA (Lane Departure Alert) .... 280
Rear view monitor system ............................ 288
All-wheel drive lock switch .............................. 297
Driving assist systems ...... 298
Downhill assist control system ............................ 304
PCS (Pre-Collision System) .... 306
BSM (Blind Spot Monitor) ........ 313
• The Blind Spot Monitor function ......................... 317
• The Rear Cross Traffic Alert function ................. 320
4-6. Driving tips Winter driving tips ............. 323
Off-road precautions ......... 327
Page 217 of 712

2174-1. Before driving
4
Driving
HIGHLANDER_U (OM48A12U)
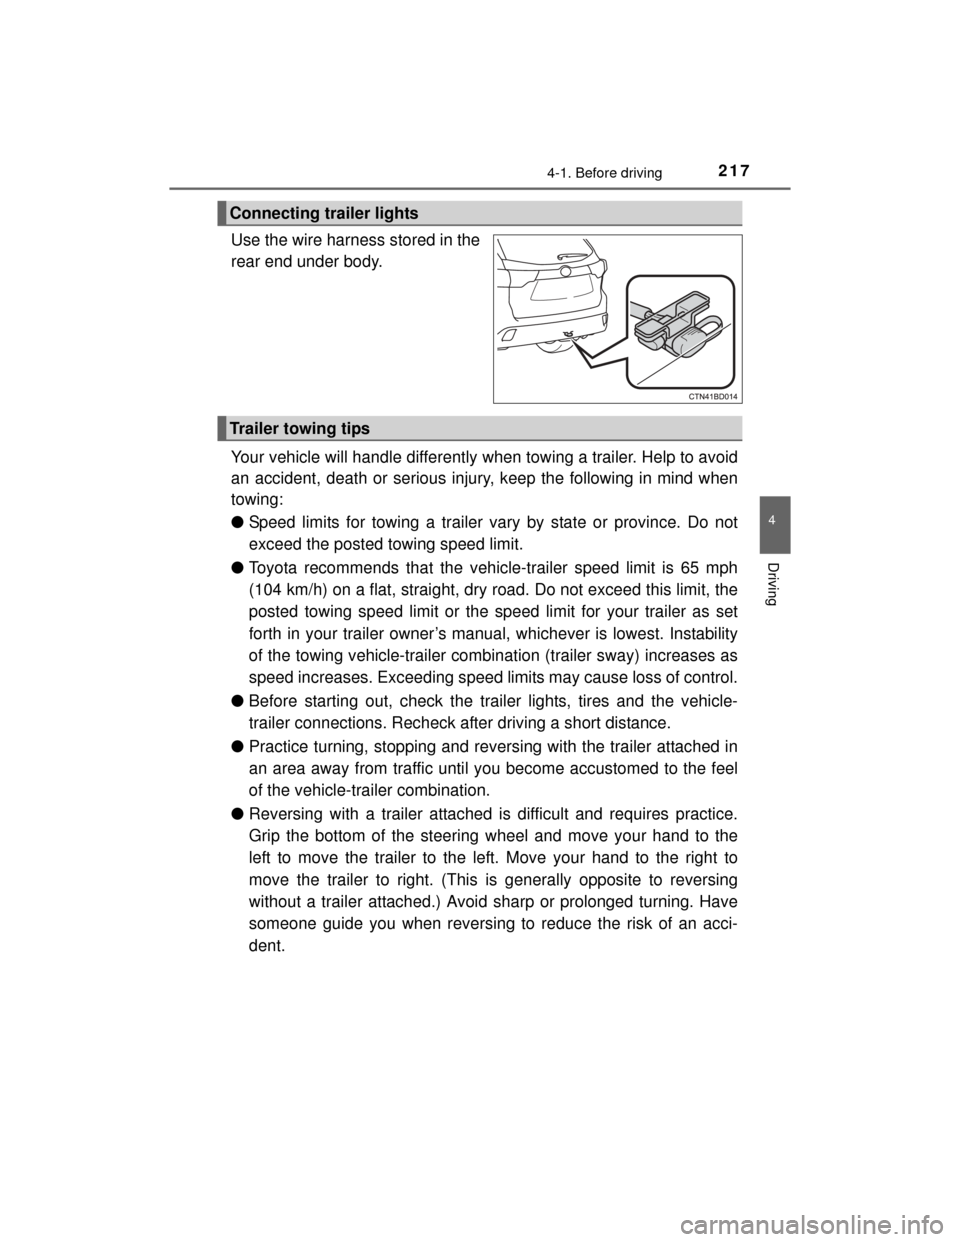
Use the wire harness stored in the
rear end under body.
Your vehicle will handle differently when towing a trailer. Help to avoid
an accident, death or serious injury, keep the following in mind when
towing:
●Speed limits for towing a trailer vary by state or province. Do not
exceed the posted towing speed limit.
● Toyota recommends that the vehicle-trailer speed limit is 65 mph
(104 km/h) on a flat, straight, dry road. Do not exceed this limit, the
posted towing speed limit or the speed limit for your trailer as set
forth in your trailer owner’s manual, whichever is lowest. Instability
of the towing vehicle-trailer combination (trailer sway) increases as
speed increases. Exceeding speed limits may cause loss of control.
● Before starting out, check the trailer lights, tires and the vehicle-
trailer connections. Recheck after driving a short distance.
● Practice turning, stopping and reversing with the trailer attached in
an area away from traffic until you become accustomed to the feel
of the vehicle-trailer combination.
● Reversing with a trailer attached is difficult and requires practice.
Grip the bottom of the steering wheel and move your hand to the
left to move the trailer to the left. Move your hand to the right to
move the trailer to right. (This is generally opposite to reversing
without a trailer attached.) Avoid sharp or prolonged turning. Have
someone guide you when reversing to reduce the risk of an acci-
dent.
Connecting trailer lights
Trailer towing tips
Page 220 of 712

2204-1. Before driving
HIGHLANDER_U (OM48A12U)
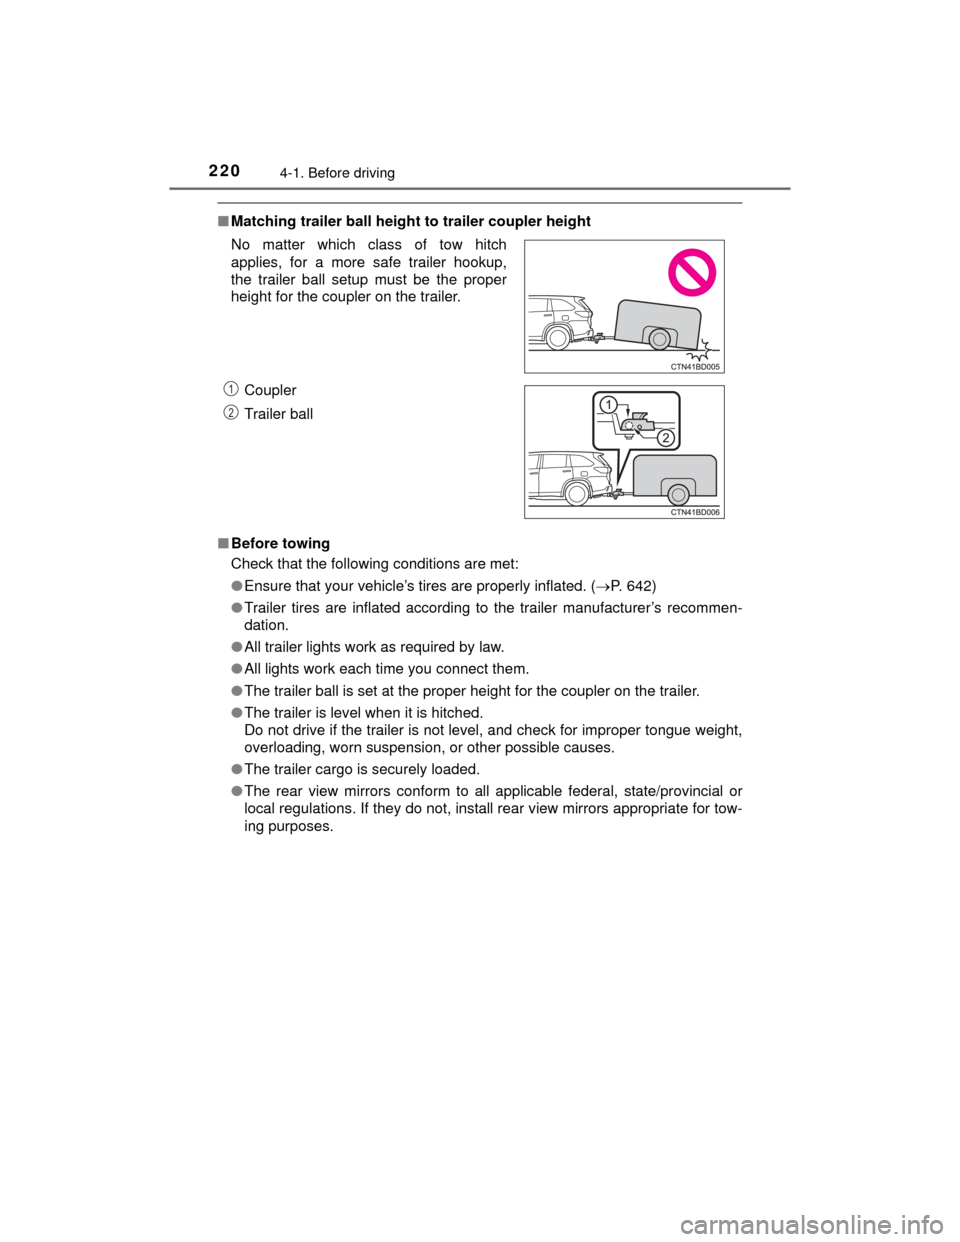
■Matching trailer ball height to trailer coupler height
■ Before towing
Check that the following conditions are met:
●Ensure that your vehicle’s tires are properly inflated. ( P. 642)
● Trailer tires are inflated according to the trailer manufacturer’s recommen-
dation.
● All trailer lights work as required by law.
● All lights work each time you connect them.
● The trailer ball is set at the proper height for the coupler on the trailer.
● The trailer is level when it is hitched.
Do not drive if the trailer is not level, and check for improper tongue weight,
overloading, worn suspension, or other possible causes.
● The trailer cargo is securely loaded.
● The rear view mirrors conform to a ll applicable federal, state/provincial or
local regulations. If they do not, instal l rear view mirrors appropriate for tow-
ing purposes.
No matter which class of tow hitch
applies, for a more safe trailer hookup,
the trailer ball setup must be the proper
height for the coupler on the trailer.
Coupler
Trailer ball
1
2
Page 223 of 712

2234-1. Before driving
4
Driving
HIGHLANDER_U (OM48A12U)
WARNING
●Vehicle-trailer instability is more likely on steep long downhills. Before
descending steep or long downhill grades, slow down and downshift. Do
not make sudden downshifts when descending steep or long downhill
grades. Avoid holding the brake pedal down too long or applying the
brakes too frequently. This could cause the brakes to overheat and result
in reduced braking efficiency.
● Vehicles with a compact spare tire: Do not tow a trailer when the compact
spare tire is installed on your vehicle.
■ Hitch
Trailer hitch assemblies have different weight capacities established by the
hitch manufacturer. Even though the vehicle may be physically capable of
towing a higher weight, the operator must determine the maximum weight
rating of the particular hitch assembly and never exceed the maximum
weight rating specified for the trailer-hitch. Exceeding the maximum weight
rating set by the trailer-hitch manufacturer can cause an accident resulting
in death or serious personal injuries.
■ When towing a trailer
Toyota recommends trailers with brakes that conform to any applicable fed-
eral and state/provincial regulations.
●If the gross trailer weight exceeds unbraked TWR, trailer brakes are
required. Toyota recommends trailers wi th brakes that conform to all appli-
cable federal and state/provincial regulations.
● Never tap into your vehicle’s hydraulic system, as this will lower the vehi-
cle’s braking effectiveness.
● Never tow a trailer without using a safety chain securely attached to both
the trailer and the vehicle. If damage occurs to the coupling unit or hitch
ball, there is danger of the trailer wandering into another lane.
NOTICE
■When installing a trailer hitch
Use only the position recommended by your Toyota dealer. Do not install
the trailer hitch on the bumper; this may cause body damage.
■ Do not directly splice trailer lights
Do not directly splice trailer lights. Directly splicing trailer lights may damage
your vehicle’s electrical system and cause a malfunction.
Page 239 of 712
2394-2. Driving procedures
4
Driving
HIGHLANDER_U (OM48A12U)
Right turn
Lane change to the right (move
the lever partway and release
it)
The right hand signals will flash 3
times.
Lane change to the left (move
the lever partway and release
it)
The left hand signals will flash 3
times.
Left turn
■Turn signals can be operated when
Vehicles without a smart key system
The engine switch is in the “ON” position.
Vehicles with a smart key system
The engine switch is in IGNITION ON mode.
■ If the indicator flashes faster than usual
Check that a light bulb in the front or rear turn signal lights has not burned
out.
■ Customization
The number of times the turn signals flash during a lane change can be
changed. (Customizable feature P. 668)
Tur n signal lever
Operating instructions
1
2
3
4
Page 241 of 712
241
4
Driving
HIGHLANDER_U (OM48A12U)
4-3. Operating the lights and wipers
Turning the end of the lever turns on the lights as follows:The headlights, day-
time running lights and
all the lights listed
below turn on and off
automatically.
(Vehicles without a
smart key system:
When the engine
switch is in the “ON”
position)
(Vehicles with a smart
key system: When the
engine switch is in
IGNITION ON mode)
The side marker, parking, tail, license plate, daytime run-
ning lights and instrument panel lights turn on.
The headlights and all the lights listed above (except day-
time running lights) turn on.
*1The daytime running lights turn off.
*2The daytime running lights turn on.
*1:For U.S.A.
*2: For Canada
Headlight switch
The headlights can be operated manually or automatically.
Operating instructions
*2*1
1
2
3
4
Page 242 of 712

2424-3. Operating the lights and wipers
HIGHLANDER_U (OM48A12U)
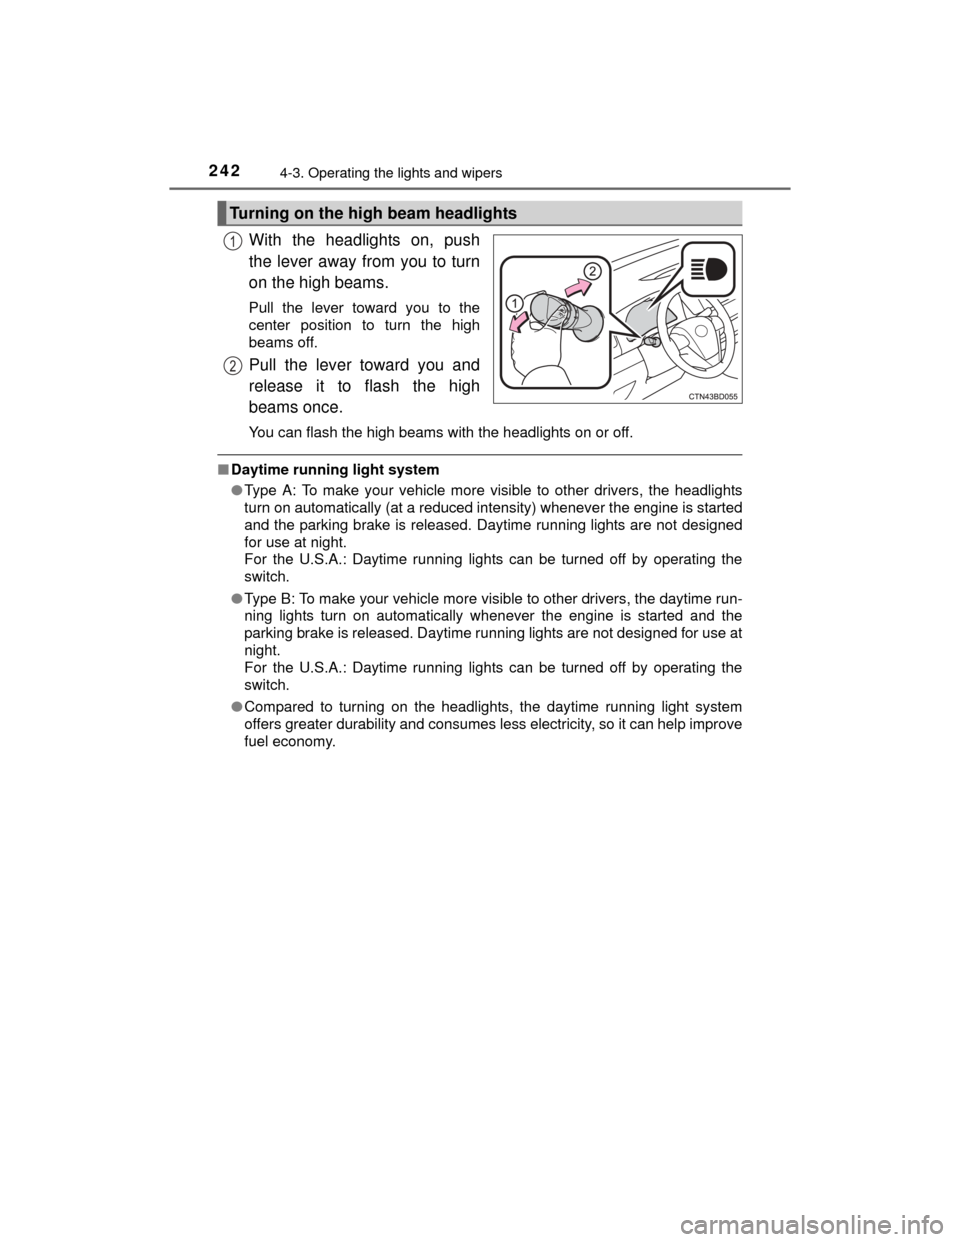
With the headlights on, push
the lever away from you to turn
on the high beams.
Pull the lever toward you to the
center position to turn the high
beams off.
Pull the lever toward you and
release it to flash the high
beams once.
You can flash the high beams with the headlights on or off.
■Daytime running light system
●Type A: To make your vehicle more visible to other drivers, the headlights
turn on automatically (at a reduced intensity) whenever the engine is started
and the parking brake is released. Daytime running lights are not designed
for use at night.
For the U.S.A.: Daytime running lights can be turned off by operating the
switch.
● Type B: To make your vehicle more visible to other drivers, the daytime run-
ning lights turn on automatically whenever the engine is started and the
parking brake is released. Daytime running lights are not designed for use at
night.
For the U.S.A.: Daytime running lights can be turned off by operating the
switch.
● Compared to turning on the headlights, the daytime running light system
offers greater durability and consumes less electricity, so it can help improve
fuel economy.
Turning on the high beam headlights
1
2