Page 302 of 712

3024-5. Using the driving support systems
HIGHLANDER_U (OM48A12U)■
Reduced effectiven ess of the EPS system
The effectiveness of the EPS system is reduced to prevent the system from
overheating when there is frequent steer ing input over an extended period of
time. The steering wheel may feel heavy as a result. Should this occur, refrain
from excessive steering input or stop the vehicle and turn the engine off. The
EPS system should return to normal within 10 minutes.
■ Operating conditions of hill-start assist control
When the following four conditions are met, the hill-start assist control will
operate:
●The shift lever is in a position other than P or N (when starting off forward/
backward on an upward incline).
● The vehicle is stopped.
● The accelerator pedal is not depressed.
● The parking brake is not engaged.
■ Automatic system cancelation of hill-start assist control
The hill-start assist control will turn off in any of the following situations:
●The shift lever is moved to P or N.
● The accelerator pedal is depressed.
● The parking brake is engaged.
● Approximately 2 seconds elapse after the brake pedal is released.
WARNING
■The ABS does not operate effectively when
●The limits of tire gripping performance have been exceeded (such as
excessively worn tires on a snow covered road).
● The vehicle hydroplanes while driving at high speed on wet or slick roads.
■ Stopping distance when the ABS is operating may exceed that of nor-
mal conditions
The ABS is not designed to shorten the vehicle’s stopping distance. Always
maintain a safe distance from the vehicle in front of you, especially in the
following situations:
●When driving on dirt, gravel or snow-covered roads
● When driving with tire chains
● When driving over bumps in the road
● When driving over roads with potholes or uneven surfaces
Page 303 of 712

3034-5. Using the driving support systems
4
Driving
HIGHLANDER_U (OM48A12U)
WARNING
■TRAC may not operate effectively when
Directional control and power may not be achievable while driving on slip-
pery road surfaces, even if the TRAC system is operating.
Drive the vehicle carefully in conditions where stability and power may be
lost.
■ Hill- start assist control
●Do not overly rely on hill-start assist control. Hill-start assist control may
not operate effectively on steep inclines and roads covered with ice.
● Unlike the parking brake, hill-start assist control is not intended to hold the
vehicle stationary for an extended period of time. Do not attempt to use
hill-start assist control to hold the vehicle on an incline, as doing so may
lead to an accident.
■ When the VSC is activated
The slip indicator light flashes. Always drive carefully. Reckless driving may
cause an accident. Exercise particular care when the indicator light flashes.
■ When the TRAC/VSC systems are turned off
Be especially careful and drive at a speed appropriate to the road condi-
tions. As these are the systems to help ensure vehicle stability and driving
force, do not turn the TRAC/VSC systems off unless necessary.
■ Replacing tires
Make sure that all tires are of the specified size, brand, tread pattern and
total load capacity. In addition, make sure that the tires are inflated to the
recommended tire inflation pressure level.
The ABS, TRAC and VSC systems will not function correctly if different tires
are installed on the vehicle.
Contact your Toyota dealer for further information when replacing tires or
wheels.
■ Handling of tires and the suspension
Using tires with any kind of problem or modifying the suspension will affect
the driving assist systems, and may cause a system to malfunction.
Page 312 of 712

3124-5. Using the driving support systems
HIGHLANDER_U (OM48A12U)
WARNING
■Cautions regarding the assist contents of the system
By means of alarms and brake control, the pre-collision system is intended
to assist the driver in avoiding collisions through the process of LOOK-
JUDGE-ACT. There are limits to the degree of assistance the system can
provide, so please keep in mind the following important points.
●Assisting the driver in watching the road
The pre-collision system is only able to detect obstacles directly in front of
the vehicle, and only within a limited range. It is not a mechanism that
allows careless or inattentive driving, and it is not a system that can assist
the driver in low-visibility conditions. It is still necessary for the driver to
pay close attention to the vehicle’s surroundings.
● Assisting the driver in making correct judgment
When attempting to estimate the possibility of a collision, the only data
available to the pre-collision system is that from obstacles it has detected
directly in front of the vehicle. Theref ore, it is absolutely necessary for the
driver to remain vigilant and to deter mine whether or not there is a possi-
bility of collision in any given situation.
● Assisting the driver in taking action
The pre-collision system’s braking assist feature is designed to help
reduce the severity of a collision, and so only acts when the system has
judged that a collision is unavoidable. This system by itself is not capable
of automatically avoiding a collision or bringing the vehicle to a stop safely.
For this reason, when encountering a dangerous situation the driver must
take direct and immediate action in order to ensure the safety of all
involved.
Page 384 of 712
384
HIGHLANDER_U (OM48A12U)
5-9.Bluetooth® phone
To display the screen shown below, press the switch on the steer-
ing wheel or the button.
Several functions are available to operate on each screen that is dis-
played by selecting the 4 tabs.Device name
Bluetooth
® connection status
Using a Bluetooth® Phone
The hands-free system is a function that allows you to use your
cellular phone without touching it.
This system supports Bluetooth
®. Bluetooth® is a wireless data
system that allows the cellular phone to wirelessly connect to
the hands-free system and make/receive calls.
Before making a phone call, check the connection status, battery
charge, call area and signal strength. ( P. 385)
If a Bluetooth
® device cannot be connected, check the connection
status on the phone screen. If the device is not connected, either
register or reconnect it. ( P. 379)
Phone screen
1
2
Page 510 of 712

5107-3. Do-it-yourself maintenance
HIGHLANDER_U (OM48A12U)■
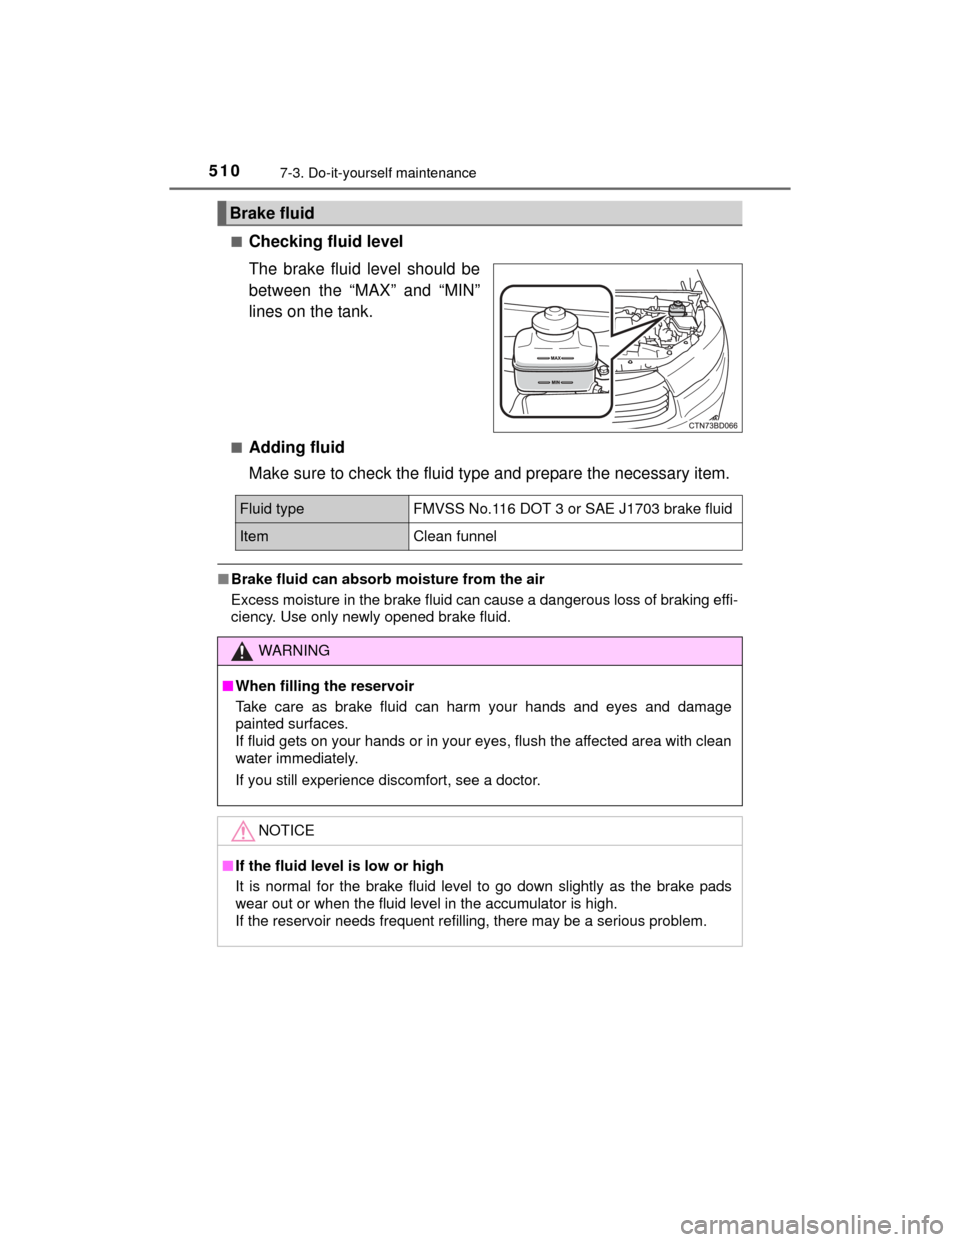
Checking fluid level
The brake fluid level should be
between the “MAX” and “MIN”
lines on the tank.
■Adding fluid
Make sure to check the fluid type and prepare the necessary item.
■
Brake fluid can absorb moisture from the air
Excess moisture in the brake fluid can cause a dangerous loss of braking effi-
ciency. Use only newly opened brake fluid.
Brake fluid
Fluid typeFMVSS No.116 DOT 3 or SAE J1703 brake fluid
ItemClean funnel
WARNING
■When filling the reservoir
Take care as brake fluid can harm your hands and eyes and damage
painted surfaces.
If fluid gets on your hands or in your eyes, flush the affected area with clean
water immediately.
If you still experience discomfort, see a doctor.
NOTICE
■If the fluid level is low or high
It is normal for the brake fluid level to go down slightly as the brake pads
wear out or when the fluid level in the accumulator is high.
If the reservoir needs frequent refilling, there may be a serious problem.
Page 541 of 712
5417-3. Do-it-yourself maintenance
7
Maintenance and care
HIGHLANDER_U (OM48A12U)■
Headlight low beams
For the right side only:
Remove the washer fluid
tank opening.
Turn the bulb base counter-
clockwise.
Unplug the connector while
pressing the lock release.
Replace the light bulb, and
install the bulb base.
Align the 3 tabs on the light bulb
with the mounting and insert.
Replacing light bulbs
1
2
3
4
Page 543 of 712
5437-3. Do-it-yourself maintenance
7
Maintenance and care
HIGHLANDER_U (OM48A12U)■
Headlight high beams/daytime running lights
Turn the bulb base counter-
clockwise.
Unplug the connector while
pressing the lock release.
Replace the light bulb, and
install the bulb base.
Align the 3 tabs on the light bulb
with the mounting, and insert.
Turn and secure the bulb
base.
Shake the bulb base gently to
check that it is not loose, turn
the headlights on once and visu-
ally confirm that no light is leak-
ing through the mounting.
1
2
3
4
Page 546 of 712
5467-3. Do-it-yourself maintenance
HIGHLANDER_U (OM48A12U)■
Front fog lights (if equipped)
Remove the 3 screws and
partly remove the fender
liner.
Unplug the connector while
pressing the lock release.
Turn the bulb base counter-
clockwise.
Install a new light bulb.
Align the 3 tabs on the light bulb
with the mounting and insert.
1
2
3
4