Page 352 of 620

352
3-2. Using the audio system
Bluetooth®
■When using the Bluetooth® audio system
● In the following conditions, the system may not function.
• If the portable audio player is turned off
• If the portable audio player is not connected
• If the portable audio player’s battery is low
● There may be a delay if a cellular phone connection is made during
Bluetooth
® audio play.
● Depending on the type of portable audio player that is connected to the
system, operation may differ slightly and certain functions may not be
available.
■ When using the hands-free system
●The audio system is muted when making a call.
● If both parties speak at the same time, it may be difficult to hear.
● If the received call volume is overly loud, an echo may be heard.
If the Bluetooth
® phone is too close to the system, quality of the sound
may deteriorate and connection status may deteriorate.
● In the following circumstances, it may be difficult to hear the other party:
• When driving on unpaved roads
• When driving at high speeds
• If a window is open
• If the air conditioning is blowing directly on the microphone
• If there is interference from the network of the cellular phone
■ Conditions under which th e system will not operate
● If using a cellular phone that does not support Bluetooth
®
●If the cellular phone is turned off
● If you are outside of cellular phone service coverage
● If the cellular phone is not connected
● If the cellular phone’s battery is low
● When outgoing calls are controlled, due to heavy traffic on telephone
lines, etc.
● When the cellular phone itself cannot be used
● When transferring phonebook data from the cellular phone
Page 354 of 620

354 3-2. Using the audio system
■Compatible models
The Bluetooth
® audio system supports portable audio players with the fol-
lowing specifications
● Bluetooth
® specifications:
Ver. 2.0, or higher (Recommended: Ver. 3.0+EDR or higher)
● Profiles:
• A2DP (Advanced Audio Distribution Profile) Ver. 1.0, or higher
(Recommended: Ver. 1.2 or higher)
This is a profile to transmit stereo audio or high quality sound to the
audio system.
• AVRCP (Audio/Video Remote Control Profile) Ver. 1.0 or higher (Recommended: Ver. 1.4 or higher)
This is a profile to allow remote control the A/V equipment.
However, please note that some functions may be limited depending on the
type of portable audio player connected.
The hands-free system supports cellular phones with the following specifica-
tions.
● Bluetooth
® specification:
Ver. 2.0, or higher (Recommended: Ver. 3.0+EDR or higher)
● Profiles:
• HFP (Hands Free Profile) Ver. 1.0 or higher (Recommended: Ver. 1.6
or higher)
This is a profile to allow hands-free phone calls using a cellular phone
or head set. It has outgoing and incoming call functions.
• OPP (Object Push Profile) Ver. 1. 1 or higher (Recommended: Ver. 1.2)
This is a profile to transfer phonebook data. When a Bluetooth
® com-
patible cellular phone has both PBAP and OPP, OPP cannot be used.
• PBAP (Phone Book Access Profile) Ver. 1.0 or higher (Recommended:
Ver. 1.1)
This is a profile to transfer contact data.
• MAP (Message Access Profile) Ver.1.0 or higher This is a profile to using phone message.
If the cellular phone does not support HFP, you cannot register it with the
hands-free system. OPP, PBAP or MAP services must be selected individu-
ally.
Page 363 of 620

363
3-2. Using the audio system
3
Interior features
■
Rear view monitor system camera
The camera for the rear view
monitor system is located
above the license plate.
● Using the camera
If the camera lens becomes dirty, it cannot transmit a clear image.
If water droplets, snow or mud adhere to the lens, rinse it with
water and wipe with a soft cloth. If the lens is extremely dirty, wash
it with a mild cleanser and rinse.
■ Differences between the screen and the actual road
The distance guide lines and the v ehicle width guide lines may not
actually be parallel with the divi ding lines of the parking space,
even when they appear to be so. Be sure to check visually.
The distances between the vehicl e width guide lines and the left
and right dividing lines of the parking space may not be equal,
even when they appear to be so. Be sure to check visually.
The distance guide lines give a distance guide for flat road sur-
faces. In any of the following situations, there is a margin of error
between the fixed guide lines on the screen and the actual dis-
tance/course on the road.
Page 370 of 620

370 3-2. Using the audio system
NOTICE
■How to use the camera
●The rear view monitor system may not operate properly in the following
cases.
• If the back of the vehicle is hit, the position and mounting angle of the
camera may change.
• As the camera has a water proof construction, do not detach, disas- semble or modify it. This may cause incorrect operation.
• Do not strongly rub the camera lens. If the camera lens is scratched, it cannot transmit a clear image.
• Do not allow organic solvent, car wax, window cleaner or glass coat to adhere to the camera. If this happens, wipe it off as soon as possible.
• If the temperature changes rapidly, such as when hot water is poured on the vehicle in cold weather, the system may not operate normally.
• When washing the vehicle, do not apply intensive bursts of water to the camera or camera area. Doing so may result in the camera malfunc-
tioning.
• When the camera is used under fluorescent lights, sodium light or mer- cury light etc., the lights and the illuminated areas may appear to
flicker.
● Do not expose the camera to strong impact as this could cause a malfunc-
tion. If this happens, have the vehicle inspected by your Toyota dealer as
soon as possible.
Page 401 of 620
401
3-5. Other interior features
3
Interior features
Garage door opener
The garage door opener (HomeLink Universal Transceiver) is manufac-
tured under license from HomeLink.
Programming HomeLink (for U.S. owners)
The HomeLink
compatible transceiver in your vehicle has 3 buttons
which can be programmed to operate 3 different devices. Refer to the
programming method below appropriate for the device.
Buttons
Indicator
The garage door opener can be programmed to operate garage
doors, gates, entry doors, door locks, home lighting systems, secu-
rity systems, and other devices.
: If equipped
Page 402 of 620
402 3-5. Other interior features
■Programming the HomeLink
Point the remote control trans-
mitter for the device 1 to 3 in. (25
to 75 mm) from the HomeLink
control buttons.
Keep the HomeLink indicator
light in view while programming.
Press and hold one of the
HomeLink buttons and the
transmitter button. When the
HomeLink
indicator light
changes from a slow to a rapid
flash, you can release both but-
tons.
If the HomeLink indicator light
comes on but does not flash, or
flashes rapidly for 2 seconds and
remains lit, the HomeLink
button
is already programmed. Use the
other buttons or follow the
“Reprogramming a HomeLink
button” instructions. ( P. 405)
STEP1
STEP2
Page 403 of 620

403
3-5. Other interior features
3
Interior features
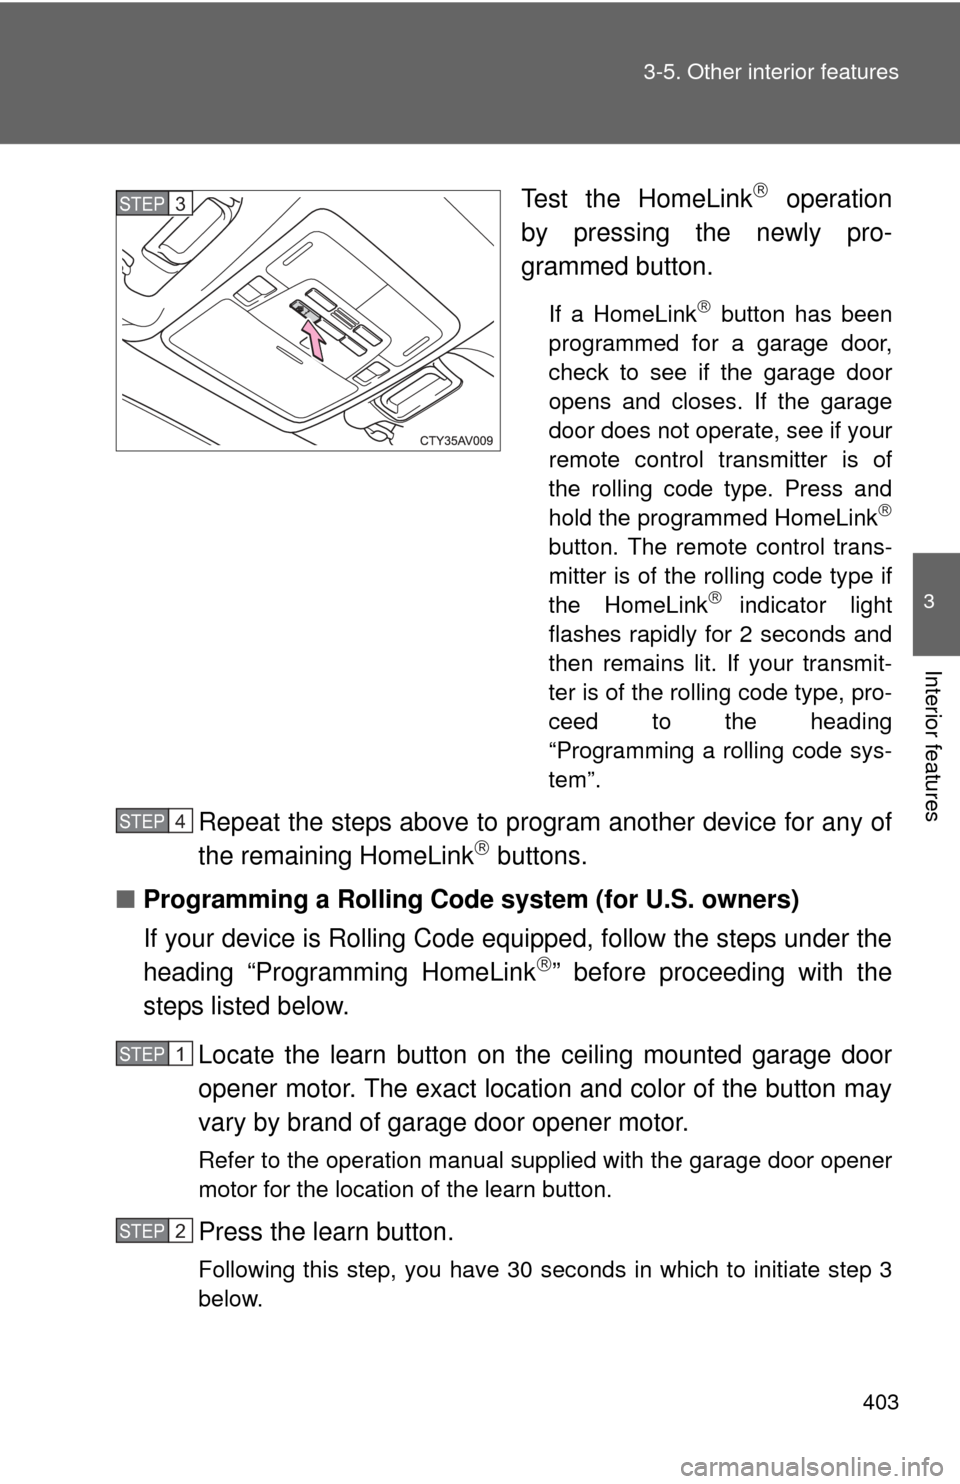
Test the HomeLink operation
by pressing the newly pro-
grammed button.
If a HomeLink button has been
programmed for a garage door,
check to see if the garage door
opens and closes. If the garage
door does not operate, see if your
remote control transmitter is of
the rolling code type. Press and
hold the programmed HomeLink
button. The remote control trans-
mitter is of the rolling code type if
the HomeLink
indicator light
flashes rapidly for 2 seconds and
then remains lit. If your transmit-
ter is of the rolling code type, pro-
ceed to the heading
“Programming a rolling code sys-
tem”.
Repeat the steps above to program another device for any of
the remaining HomeLink buttons.
■ Programming a Rolling Code system (for U.S. owners)
If your device is Rolling Code equipped, follow the steps under the
heading “Programming HomeLink
” before proceeding with the
steps listed below.
Locate the learn button on t he ceiling mounted garage door
opener motor. The exact location and color of the button may
vary by brand of garage door opener motor.
Refer to the operation manual supplied with the garage door opener
motor for the location of the learn button.
Press the learn button.
Following this step, you have 30 seconds in which to initiate step 3
below.
STEP3
STEP4
STEP1
STEP2
Page 404 of 620

404 3-5. Other interior features
Press and hold the vehicle’s programmed HomeLink button
for 2 seconds and then releas e it. Repeat this step once
again. The garage door may open.
If the garage door opens, the programming process is complete. If
the door does not open, press and release the button a third time.
This third press and release will complete the programming process
by opening the garage door.
The ceiling mounted garage door opener motor should now recog-
nize the HomeLink
signal and operate the garage door.
Repeat the steps above to prog ram another rolling code sys-
tem for any of the remaining HomeLink buttons.
■ Programming an entry gate (for U.S. owners)/Programming a
device in the Canadian market
Place the remote control transmitter 1 to 3 in. (25 to 75 mm)
away from the HomeLink
buttons.
Keep the HomeLink indicator light in view while programming.
Press and hold the selected HomeLink button.
Repeatedly press and release (cycle) the remote control
transmitter for 2 seconds each until step 4 is completed.
When the HomeLink
indicator light starts to flash rapidly,
release the buttons.
Test the HomeLink
operation by pressing the newly pro-
grammed button. Check to see if the gate/device operates
correctly.
Repeat the steps above to program another device for any of
the remaining HomeLink
buttons.
■ Programming other devices
To program other devices such as home security systems, home
door locks or lighting, contact y our Toyota dealer for assistance.
■ Reprogramming a button
The individual HomeLink
buttons cannot be erased but can be
reprogrammed. To reprogram a button, follow the “Reprogramming
a HomeLink
button” instructions.
STEP3
STEP4
STEP1
STEP2
STEP3
STEP4
STEP5
STEP6