Page 592 of 788
5926-3. Do-it-yourself maintenance
UK_AURIS/AURIS_HV_EE (OM12G88E)
License plate lights
Remove the light unit
Insert a flathead screwdriver or
similar into the hole next to the
light and remove it as shown in
the illustration.
To prevent damaging the vehi-
cle, wrap the flathead screw-
driver with a tape.
Turn the bulb base counter-
clockwise and remove it.
Remove the light bulb
When installing, reverse the steps listed.
1
2
3
4
Page 593 of 788
5936-3. Do-it-yourself maintenance
UK_AURIS/AURIS_HV_EE (OM12G88E)
6
Maintenance and care
Side turn signal lights
Remove the cover
Insert the flathead screwdriver
and slide along the side turn sig-
nal light.
To prevent damaging the vehi-
cle, wrap the flathead screw-
driver with a tape.
Press on the 2 clips and
remove the side turn signal
light from the visor housing.
Remove the socket from the
side turn signal light housing.
Remove the bulb.
1
2
3
4
Page 594 of 788
5946-3. Do-it-yourself maintenance
UK_AURIS/AURIS_HV_EE (OM12G88E)
Replace the bulb and install
the socket to the side turn
signal light housing.
Align the grooves of the socket
to the side turn signal light hous-
ing.
With the wire harness pass-
ing through the lower part of
the side turn signal light,
install it to the visor housing.
Align the 6 tabs and install
the cover.
After hearing a click sound, con-
firm that the cover is secure.
5
6
7
Page 595 of 788

5956-3. Do-it-yourself maintenance
UK_AURIS/AURIS_HV_EE (OM12G88E)
6
Maintenance and care
Replacing the following bulbs
If any of the lights listed below has burnt out, have it replaced by
any authorized Toyota dealer or repairer, or another duly qualified
and equipped professional.
Headlights (vehicles with discharge headlights)
Front position lights/daytime running lights
High mounted stoplight
Stop/tail lights (hybrid model)
Discharge headlights (vehicles with discharge headlights)
If voltage to the discharge bulbs is insufficient, the bulbs may not come on, or
may go out temporarily. The discharge bulbs will come on when normal
power is restored.
LED light bulbs
The high mounted stoplight, front position lights/daytime running lights and
stop/tail lights (hybrid model) consist of a number of LEDs. If any of the LEDs
burn out, take your vehicle to any authorized Toyota dealer or repairer, or
another duly qualified and equipped professional to have the light replaced.
Condensation build-up on the inside of the lens
Temporary condensation build-up on the inside of the headlight lens does not
indicate a malfunction.
Contact any authorized Toyota dealer or repairer, or another duly qualified
and equipped professional for more information in the following situations:
Large drops of water have built up on the inside of the lens.
Water has built up inside the headlight.
When replacing light bulbs
P. 581
Page 596 of 788

5966-3. Do-it-yourself maintenance
UK_AURIS/AURIS_HV_EE (OM12G88E)
CAUTION
Replacing light bulbs
Turn off the lights. Do not attempt to replace the bulb immediately after
turning off the lights.
The bulbs become very hot and may cause burns.
Do not touch the glass portion of the light bulb with bare hands. When it is
unavoidable to hold the glass portion, use and hold with a clean dry cloth
to avoid getting moisture and oils on the bulb.
Also, if the bulb is scratched or dropped, it may blow out or crack.
Fully install light bulbs and any parts used to secure them. Failure to do so
may result in heat damage, fire, or water entering the headlight unit. This
may damage the headlights or cause condensation to build up on the lens.
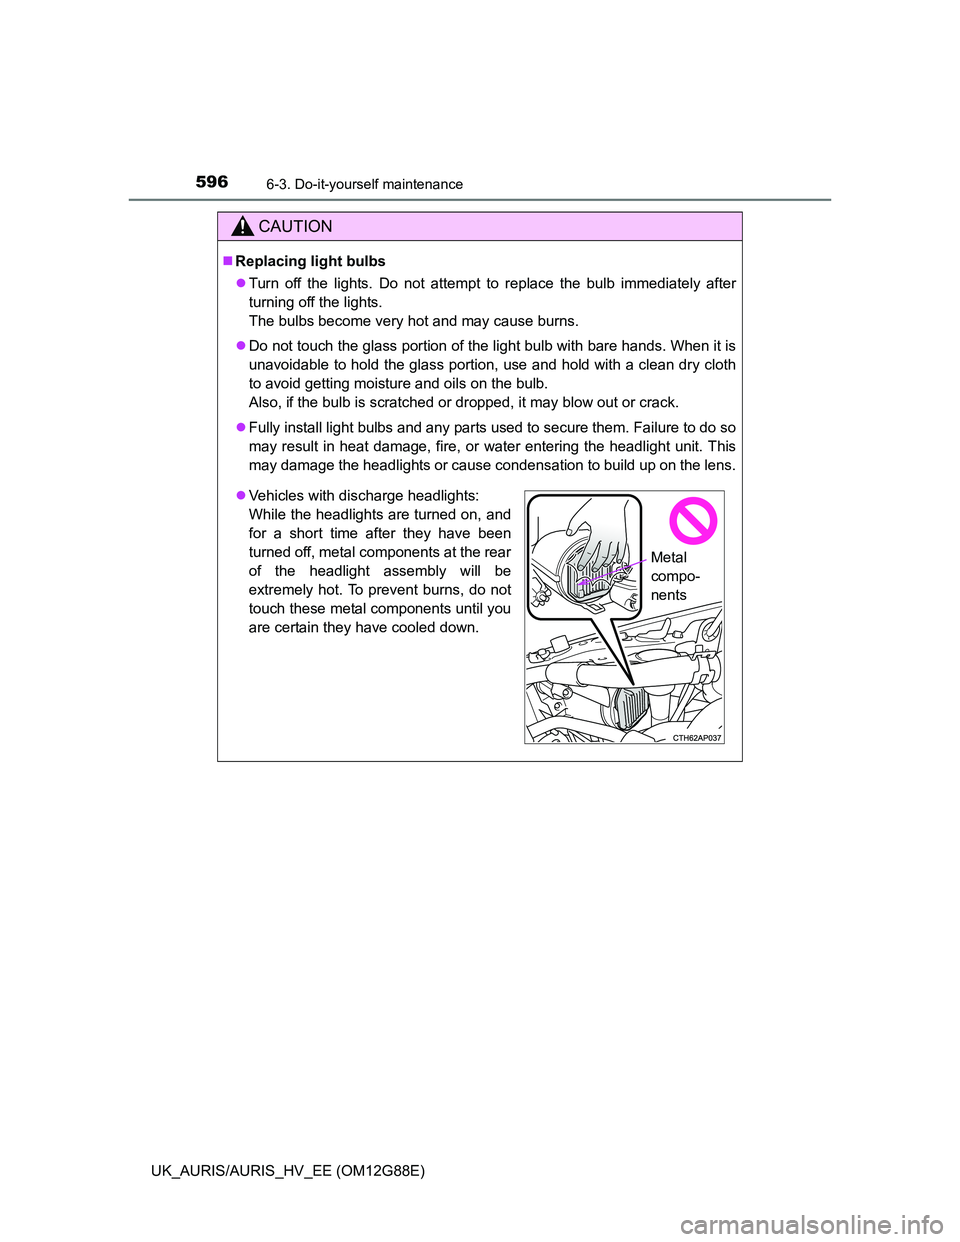
Vehicles with discharge headlights:
While the headlights are turned on, and
for a short time after they have been
turned off, metal components at the rear
of the headlight assembly will be
extremely hot. To prevent burns, do not
touch these metal components until you
are certain they have cooled down.
Metal
compo-
nents
Page 597 of 788
5976-3. Do-it-yourself maintenance
UK_AURIS/AURIS_HV_EE (OM12G88E)
6
Maintenance and care
CAUTION
Discharge headlights (vehicles with discharge headlights)
Contact any authorized Toyota dealer or repairer, or another duly qualified
and equipped professional, before replacing the discharge headlights
(including light bulbs).
Do not touch the discharge headlight’s high voltage socket when the head-
lights are turned on.
An extremely high voltage of 30000 V will be discharged and could result
in death or serious injury by electric shock.
Do not attempt to take apart or repair the headlight bulbs, connectors,
power supply circuits, or related components.
Doing so could result in electric shock and death or serious injury.
To prevent damage or fire
Make sure bulbs are fully seated and locked.
Page 598 of 788
5986-3. Do-it-yourself maintenance
UK_AURIS/AURIS_HV_EE (OM12G88E)
Page 620 of 788
6207-2. Steps to take in an emergency
UK_AURIS/AURIS_HV_EE (OM12G88E)
(Flashes)
Engine oil change
reminder light (diesel
engine)
*2
Indicates that the engine
oil is scheduled to be
changed.
1ND-TV engine
Flashes approximately
14500 km (9000 miles)
after the engine oil is
changed. (P. 628) (The
indicator will not work
properly unless the oil
maintenance date has
been reset).
1AD-FTV engine
Flashes approximately
25000 km (15000 miles)
after the engine oil is
changed. (P. 628) (The
indicator will not work
properly unless the oil
maintenance date has
been reset).
Check and change the
engine oil and oil filter by any
authorized Toyota dealer, or
another duly qualified and
equipped professional. After
changing the engine oil, the
oil change system should be
reset. (P. 519)
Warning lightWarning light/DetailsCorrection procedure