2014 SUBARU IMPREZA WRX audio
[x] Cancel search: audioPage 5 of 414
2
Chapter 4: Climate control
This chapter informs you how to operate
the climate control.
Chapter 5: Audio
This chapter informs you how to operate
your audio system.
Chapter 6: Interior equipment
This chapter informs you how to operate
interior equipment.
Chapter 7: Starting and operating
This chapter informs you how to start and
operate your SUBARU.
Chapter 8: Driving tips
This chapter informs you how to drive your
SUBARU in various conditions and ex-
plains some safety tips on driving.
Chapter 9: In case of emergency
This chapter informs you what to do if you
have a problem while driving, such as a
flat tire or engine overheating.
Chapter 10: Appearance care
This chapter informs you how to keep your
SUBARU looking good.
Chapter 11: Maintenance and service
This chapter informs you when you need
to take your SUBARU to the dealer for
scheduled maintenance and informs you
how to keep your SUBARU running
properly.Chapter 12: Specifications
This chapter informs you about dimen-
sions and capacities of your SUBARU.
Chapter 13: Consumer information and
Reporting safety defects
This chapter informs you about Uniform
tire quality grading standards and Report-
ing safety defects.
Chapter 14: Index
This is an alphabetical listing of all that
’sin
this manual. You can use it to quickly find
something you want to read.
& Safety warnings
You will find a number of WARNINGs,
CAUTIONs and NOTEs in this manual.
These safety warnings alert you to poten-
tial hazards that could result in injury to
you or others.
Please read these safety warnings as well
as all other portions of this manual care-
fully in order to gain a better understand-
ing of how to use your SUBARU vehicle
safely.
WARNING
A WARNING indicates a situation in
which serious injury or death could
result if the warning is ignored.
CAUTION
A CAUTION indicates a situation in
which injury or damage to your
vehicle, or both, could result if the
caution is ignored.
NOTE
A NOTE gives information or sugges-
tions how to make better use of yourvehicle. & Safety symbol
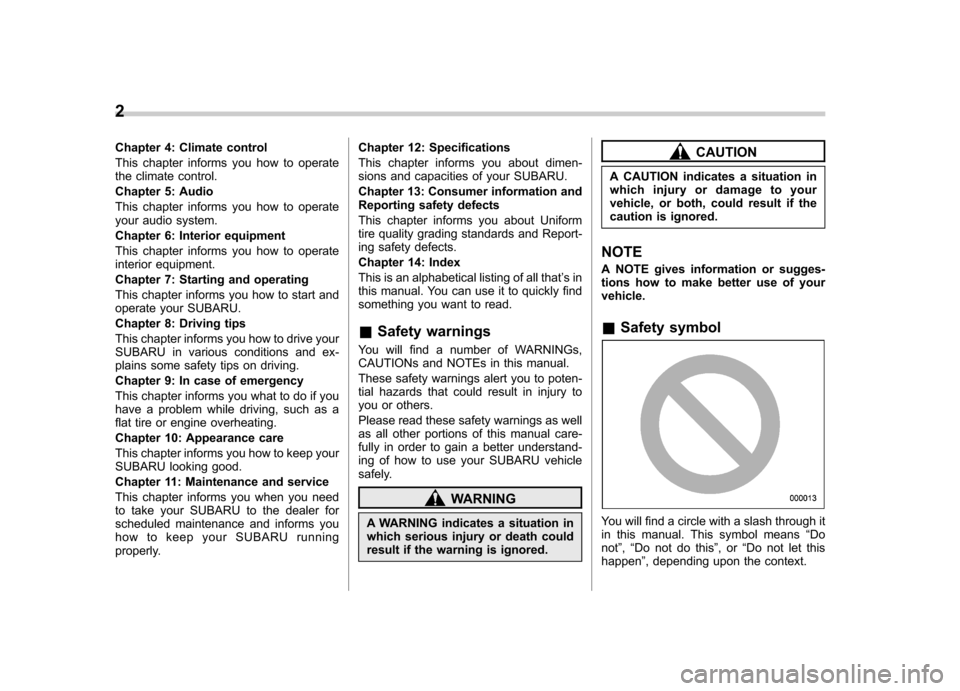
You will find a circle with a slash through it
in this manual. This symbol means “Do
not ”, “Do not do this ”,or “Do not let this
happen ”, depending upon the context.
Page 14 of 414
Table of contents
Seat, seatbelt and SRS airbags1
Keys and doors2
Instruments and controls
Climate control4
Audio5
Interior equipment6
Starting and operating7
Driving tips8
In case of emergency9
Appearance care10
Maintenance and service11
Specifications12
Consumer information and Reporting safety defects13
Index14
3
Page 19 of 414

16 &Instrument panel
1) Door locks (page 2-4)
2) Outside mirror switch (page 3-45)
3) Illumination brightness control
(page 3-31)
4) Headlight beam leveler (page 3-32)
5) Light control switch (page 3-29)
6) Combination meter (page 3-5)
7) Wiper control lever (page 3-34)
8) Hazard warning flasher switch (page 3-5)
9) Audio (page 5-1)
10) Shift lever (page 7-14/page 7-16)
11) Climate control (page 4-1)
12) Cruise control (page 7-37)
13) Horn (page 3-49)
14) SRS airbag (page 1-34)
15) Tilt/telescopic steering (page 3-48)
16) Hands-free switches (page 5-35)
17) Audio control buttons (page 5-31)
18) Fuse box (page 11-38)
19) Vehicle Dynamics Control OFF switch (page 7-31)/Vehicle Dynamics Control
OFF switch (STI) (page 7-30)
20) Hood lock release knob (page 11-5)
21) Power windows (page 2-20)
Page 71 of 414
1-44Seat, seatbelt and SRS airbags/*SRS airbag (Supplemental Restraint System airbag)
CAUTION
Observe the following precautions.
Failure to do so may prevent the
SUBARU advanced frontal airbag
system from functioning correctly
or cause the system to fail. . Do not apply any strong impact
to the front passenger ’sseat
such as by kicking.
. Do not spill liquid on the front
passenger ’s seat. If liquid is
spilled, wipe it off immediately.
. Do not remove or disassemble
the front passenger ’s seat.
. Do not install any accessory
(such as an audio amplifier) other
than a genuine SUBARU acces-
sory under the front passenger ’s
seat.
. Do not place anything (shoes,
umbrella, etc.) under the front passenger ’s seat.
. The front passenger ’s seat must
not be used with the head re-
straint removed.
. Do not leave any article including
a child restraint system on the
front passenger ’s seat or the
seatbelt tongue and buckle en- gaged when you leave your ve-hicle.
. Do not place a magnet near the
seatbelt buckle and the seatbelt
retractor.
. Do not use front seats with their
backward-forward position and
seatback not being locked into
place securely. If any of them are
not locked securely, adjust them
again. For adjusting procedure,
refer to “Front seats ”F 1-2.
If the seatbelt buckle switch and/or frontpassenger ’s occupant detection system
have failed, the SRS airbag system
warning light will illuminate. Have the
system inspected by your SUBARU deal-
er immediately if the SRS airbag system
warning light illuminates.
If your vehicle has sustained impact, this
may affect the proper function of the
SUBARU advanced frontal airbag system.
Have your vehicle inspected at your
SUBARU dealer. ! Passenger ’s frontal airbag ON and
OFF indicators
Refer to “Front passenger ’s frontal airbag
ON and OFF indicators ”F 3-14. !
Conditions in which front passen- ger’s SRS frontal airbag is not
activated
The front passenger ’s SRS frontal airbag
will not be activated when any of the
following conditions are met regarding the
front passenger ’s seat:
. The seat is empty.
. The seat is equipped with a rearward
facing child restraint system and an infant
is restrained with it. (See WARNING thatfollows.) . The seat is equipped with a forward
facing child restraint system and a small
child is restrained with it. (See WARNING
that follows.) . The seat is equipped with a booster
seat and a small child is in the booster
seat. (See WARNING that follows.) . The seat is relieved of the occupant
load for a time exceeding the predeter-
mined monitoring time period. . The seat is occupied by a child who
has outgrown a child restraint system
(See WARNING that follows.) or by a
small adult. . The front passenger ’s occupant detec-
tion system is malfunctioning.
Page 119 of 414
3-4Instruments and controls/Ignition switch
&Acc
In this position the electrical accessories
(audio, accessory power outlet, etc.) can
be used. & ON
This is the normal operating position after
the engine is started. & START
The engine is started in this position. The
starter cranks the engine to start it. When
the key is released (after the engine has
started), the key automatically returns tothe “ON ”position.
CAUTION
Do not turn the ignition switch to the “ START ”position while the engine
is running.
If your registered key fails to start the
engine, pull out the key once (the security
indicator light will blink), and then insert
the key in the ignition switch and turn it tothe “START ”position and again try to start
the engine. NOTE
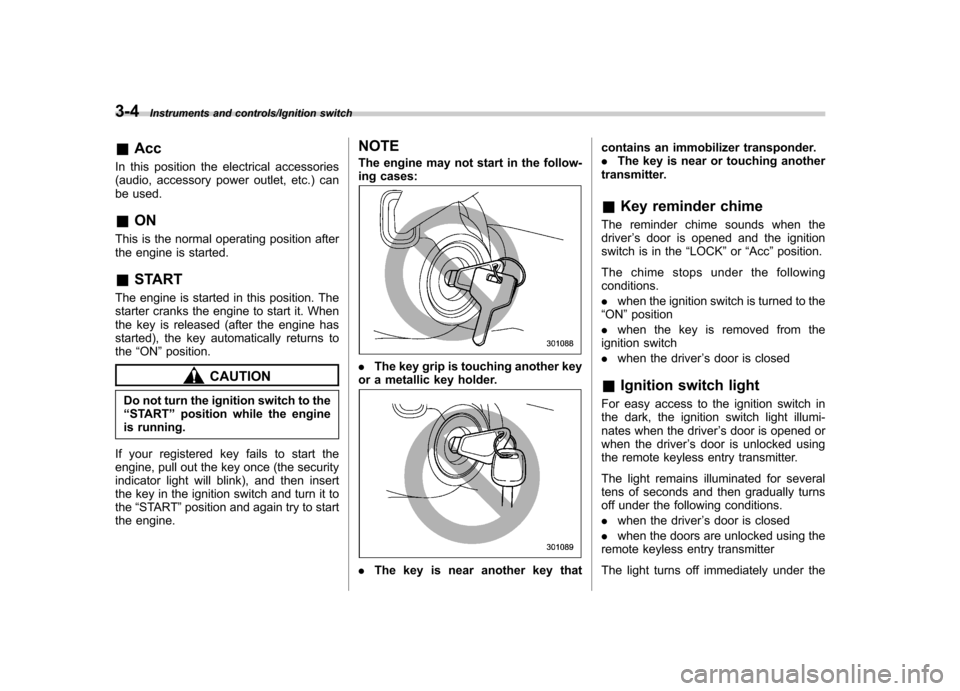
The engine may not start in the follow-
ing cases:.
The key grip is touching another key
or a metallic key holder.
. The key is near another key that contains an immobilizer transponder. .
The key is near or touching another
transmitter. & Key reminder chime
The reminder chime sounds when the driver ’s door is opened and the ignition
switch is in the “LOCK ”or “Acc ”position.
The chime stops under the followingconditions. . when the ignition switch is turned to the
“ ON ”position
. when the key is removed from the
ignition switch. when the driver ’s door is closed
& Ignition switch light
For easy access to the ignition switch in
the dark, the ignition switch light illumi-
nates when the driver ’s door is opened or
when the driver ’s door is unlocked using
the remote keyless entry transmitter.
The light remains illuminated for several
tens of seconds and then gradually turns
off under the following conditions. . when the driver ’s door is closed
. when the doors are unlocked using the
remote keyless entry transmitter
The light turns off immediately under the
Page 146 of 414
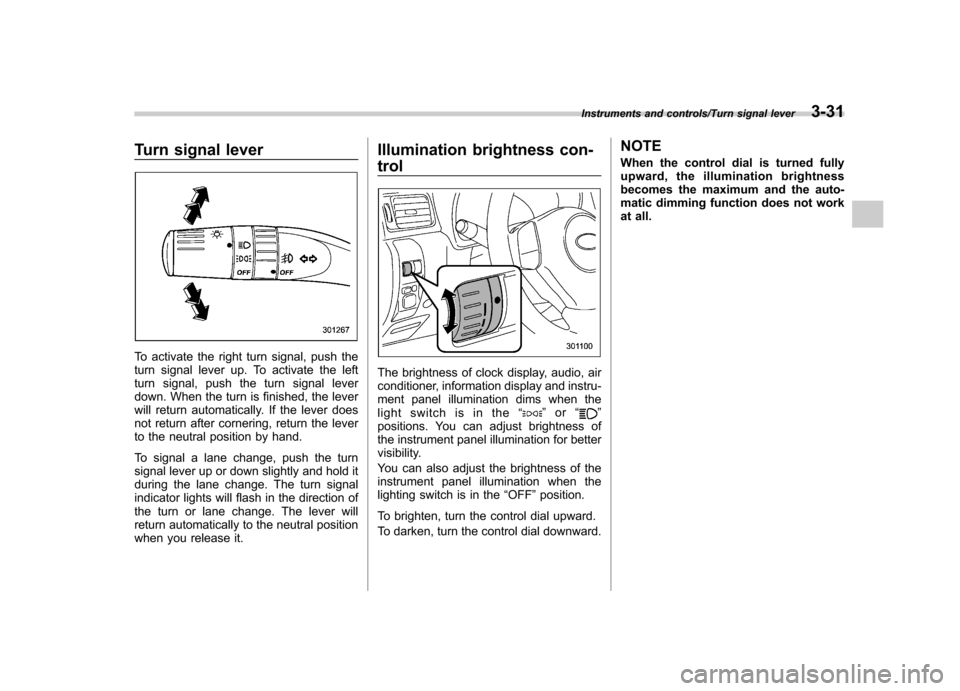
Turn signal lever
To activate the right turn signal, push the
turn signal lever up. To activate the left
turn signal, push the turn signal lever
down. When the turn is finished, the lever
will return automatically. If the lever does
not return after cornering, return the lever
to the neutral position by hand.
To signal a lane change, push the turn
signal lever up or down slightly and hold it
during the lane change. The turn signal
indicator lights will flash in the direction of
the turn or lane change. The lever will
return automatically to the neutral position
when you release it.Illumination brightness con- trol
The brightness of clock display, audio, air
conditioner, information display and instru-
ment panel illumination dims when the
light switch is in the
“
”or “”
positions. You can adjust brightness of
the instrument panel illumination for better
visibility.
You can also adjust the brightness of the
instrument panel illumination when the
lighting switch is in the “OFF ”position.
To brighten, turn the control dial upward.
To darken, turn the control dial downward. NOTE
When the control dial is turned fully
upward, the illumination brightness
becomes the maximum and the auto-
matic dimming function does not work
at all.
Instruments and controls/Turn signal lever3-31
Page 182 of 414
Antenna system.................................................. 5-3
Roof antenna ...................................................... 5-3
FM reception ....................................................... 5-3
Installation of accessories .................................. 5-4
Audio set ............................................................. 5-4
Type A audio set (if equipped) ............................. 5-5
Type B audio set (if equipped) ............................. 5-6
Power and sound controls ................................. 5-7
Power switch and volume control ........................ 5-7
Sound control ..................................................... 5-7
Adjustable level of each mode ............................. 5-9
FM/AM radio operation ...................................... 5-10
FM/AM selection ................................................. 5-10
Tuning ............................................................... 5-10
Displaying radio PS (Program Service Name) and RT (Radio Text) ................................................ 5-12
Station preset .................................................... 5-12
Satellite radio operation (if equipped) .............. 5-13
Sirius XM
TMSatellite Radio Activation (for U.S.A.
only) ................................................................ 5-13
Sirius satellite radio (for Canada only) ................ 5-13
Satellite radio reception ...................................... 5-13
Displaying satellite radio ID of tuner ................... 5-14
Band selection ................................................... 5-15
Channel and category selection .......................... 5-15
Channel preset ................................................... 5-16
Display selection ................................................ 5-16
CD player operation ........................................... 5-16
Play file. ............................................................. 5-17
How to insert a CD(s) (type A) ............................ 5-17
How to insert a CD (type B) ................................ 5-18 How to play back a CD
...................................... 5-18
To select a track from the beginning .................. 5-18
Fast-forwarding and rewinding . .......................... 5-19
Repeating .......................................................... 5-19
Random playback .............................................. 5-20
Scan ................................................................. 5-20
Display selection ............................................... 5-21
Folder selection ................................................. 5-21
How to eject CDs from the player (type A) ..... ..... 5-22
How to eject a CD from the player (type B) .... ..... 5-22
When the following messages are displayed. . ..... 5-22
Auxiliary input jack (if equipped). ..................... 5-23
Precautions to observe when handling a compact disc ................................................... 5-24
USB storage device / iPod
®operations
(type B audio) ................................................. 5-26
Play file ............................................................. 5-26
Connectable USB storage device ....................... 5-26
Connectable iPod
®models ................................. 5-27
Connecting USB storage device / iPod®............. 5-27
How to play back ............................................... 5-28
To select a track from the beginning .................. 5-29
To select a chapter from the beginning when connecting iPod
®............................................. 5-29
Fast-forwarding and rewinding . .......................... 5-29
Repeating .......................................................... 5-29
Random playback .............................................. 5-29
SCAN (only when connecting USB storage device) ............................................................ 5-30
Selecting category (only when connecting iPod
®) ............................................................. 5-30 Audio
5
Page 183 of 414
AudioDisplay selection ................................................ 5-30
Folder selection (only when connecting USB storage device) ................................................ 5-30
When “CHECK DEVICE ”is displayed .................. 5-30
Audio control buttons ........................................ 5-31
MODE button ..................................................... 5-31
“
” and “”buttons ......................................... 5-31
Volume control buttons ...................................... 5-32
MUTE button (models without Hands-free system) ............................................................ 5-33 Bluetooth
®audio (type B audio)
....................... 5-33
Media format ..................................................... 5-33
Setting Bluetooth
®audio .................................... 5-33
Bluetooth®audio operation ................................ 5-34
Hands-free system (if equipped) ...................... 5-35
Tips for the Hands-free system .......................... 5-35
Certification for the Hands-free system ............... 5-36
Safety precautions ............................................. 5-37
Using the Hands-free system ............................. 5-38
Bluetooth
®setting ............................................. 5-46