2014 SUBARU IMPREZA WRX ECO mode
[x] Cancel search: ECO modePage 228 of 414

2. After“CURRENT PIN? ”is displayed,
input the PIN code by performing either of
the following procedures.
–Operate the “TUNE/TRACK/CH ”
dial. – Press the talk switch
and say
the number.
3. Select the “CONFIRM ”menu.
– If the inputted PIN code is correct,
“ UNLOCKED ”is displayed and the
phonebook is unlocked.
! Phone setup
After selecting the “PHONE SETUP ”
menu, perform the following procedures.
!Setting pair phone
Refer to “Preparation for using the Hands-
free system ”F 5-38.
! Selecting phone
To select the registered cell phone for
connecting to the in-vehicle equipment,
perform the following procedure.
1. Select the “SELECT PHONE ”menu.
– If no cell phones are registered,
“ EMPTY ”is displayed and the mode
changes to the “PHONE SETUP ”
mode.
2. Select the cell phone by performing
either of the following procedures. –
Operate the “TUNE/TRACK/CH ”
dial. – Press the talk switch
and say
the voice tag.
3. Select the “CONFIRM ”menu.
–“ SELECTED ”is displayed, the se-
lected cell phone is connected to the
in-vehicle equipment and the mode
changes to the “PHONE SETUP ”
mode. ! Changing the voice tag of the cell phone
1. Select the “CHANGE NAME ”menu.
– If no cell phones are registered,
“ EMPTY ”is displayed and the mode
changes to the “PHONE SETUP ”
mode.
2. Select the cell phone by performing
either of the following procedures. –Operate the “TUNE/TRACK/CH ”
dial. – Press the talk switch
and say
the voice tag.
3. Select the “RECORD NAME ”menu.
4. Register the voice tag. For details,
refer to “Preparation for using the Hands-
free system ”F 5-38. !
List phones function
The cell phone voice tags saved in the cell
phone list are spoken by using the list
phones function.
1. Select the “LIST PHONES ”menu.
– If no cell phones are registered,
“ EMPTY ”is displayed and the mode
changes to the “PHONE SETUP ”
mode.
2. Registered cell phones are displayed
in the saved order. While displayed, if the“ TUNE/TRACK/CH ”dial is turned, the
next registered cell phone is displayed.
Press the ON hook button
to close the
Hands-free menu.
3. Select the cell phone by performing
either of the following procedures.
–Operate the “TUNE/TRACK/CH ”
dial. – Press the talk switch
.
4. After “SELECTED ”is displayed, you
can select the following menus. . “SELECT PHONE ”to connect the
selected cell phone . “CHANGE NAME ”to change the voice
tag. “DELETE ”to delete the selected cell
phone from the list. “GO BACK ”to go back to the “PHONE
SETUP ”mode
Audio/Hands –free system5-47
– CONTINUED –
Page 231 of 414
6-2Interior equipment/Interior lights
Interior lights
When leaving your vehicle, make sure the
lights are turned off to avoid batterydischarge. &Dome light
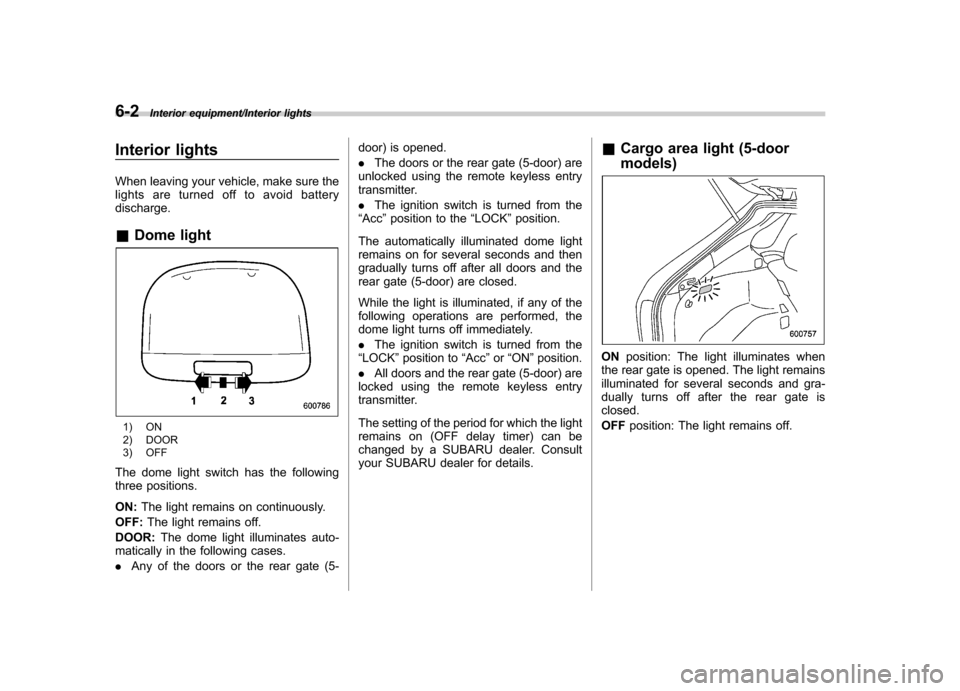
1) ON
2) DOOR
3) OFF
The dome light switch has the following
three positions. ON: The light remains on continuously.
OFF: The light remains off.
DOOR: The dome light illuminates auto-
matically in the following cases. . Any of the doors or the rear gate (5- door) is opened..
The doors or the rear gate (5-door) are
unlocked using the remote keyless entry
transmitter. . The ignition switch is turned from the
“ Acc ”position to the “LOCK ”position.
The automatically illuminated dome light
remains on for several seconds and then
gradually turns off after all doors and the
rear gate (5-door) are closed.
While the light is illuminated, if any of the
following operations are performed, the
dome light turns off immediately. . The ignition switch is turned from the
“ LOCK ”position to “Acc ”or “ON ”position.
. All doors and the rear gate (5-door) are
locked using the remote keyless entry
transmitter.
The setting of the period for which the light
remains on (OFF delay timer) can be
changed by a SUBARU dealer. Consult
your SUBARU dealer for details. &
Cargo area light (5-door models)
ON position: The light illuminates when
the rear gate is opened. The light remains
illuminated for several seconds and gra-
dually turns off after the rear gate isclosed. OFF position: The light remains off.
Page 232 of 414
&Map lights
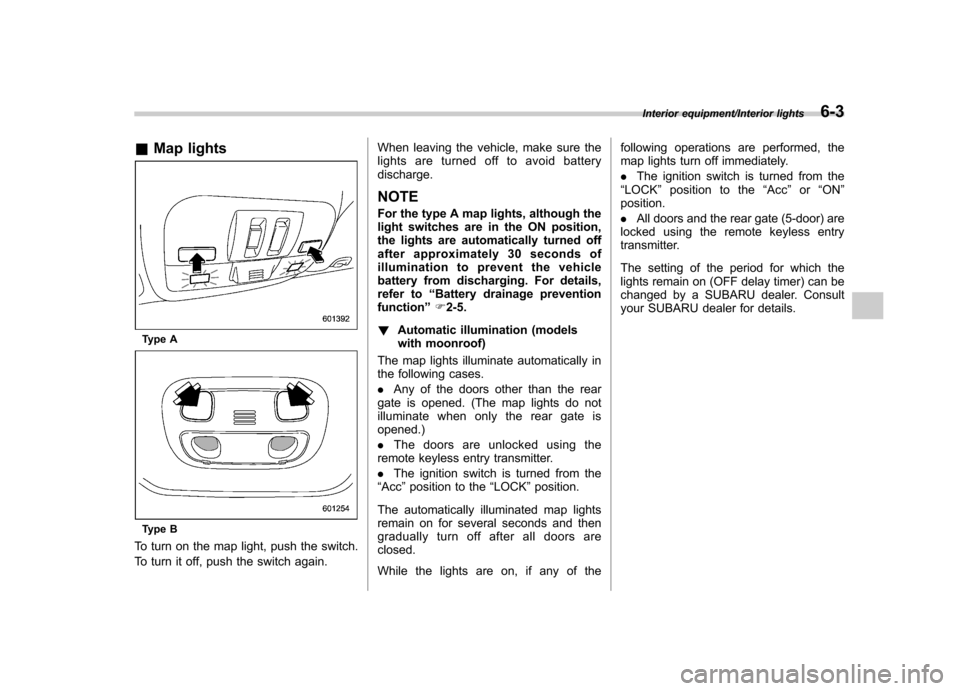
Type A
Type B
To turn on the map light, push the switch.
To turn it off, push the switch again. When leaving the vehicle, make sure the
lights are turned off to avoid batterydischarge.
NOTE
For the type A map lights, although the
light switches are in the ON position,
the lights are automatically turned off
after approximately 30 seconds of
illumination to prevent the vehicle
battery from discharging. For details,
refer to “Battery drainage prevention
function ”F 2-5.
! Automatic illumination (models
with moonroof)
The map lights illuminate automatically in
the following cases. . Any of the doors other than the rear
gate is opened. (The map lights do not
illuminate when only the rear gate isopened.) . The doors are unlocked using the
remote keyless entry transmitter.. The ignition switch is turned from the
“ Acc ”position to the “LOCK ”position.
The automatically illuminated map lights
remain on for several seconds and then
gradually turn off after all doors areclosed.
While the lights are on, if any of the following operations are performed, the
map lights turn off immediately. .
The ignition switch is turned from the
“ LOCK ”position to the “Acc ”or “ON ”
position.. All doors and the rear gate (5-door) are
locked using the remote keyless entry
transmitter.
The setting of the period for which the
lights remain on (OFF delay timer) can be
changed by a SUBARU dealer. Consult
your SUBARU dealer for details.
Interior equipment/Interior lights6-3
Page 253 of 414
7-10Starting and operating/Stopping the engine
Stopping the engine
The ignition switch should be turned off
only when the vehicle is stopped and the
engine is idling.
WARNING
Do not stop the engine when the
vehicle is moving. This will cause
loss of power to the power steering
and the brake booster, making steer-
ing and braking more difficult. It
could also result in accidental acti-
vation of the “LOCK ”position on the
ignition switch, causing the steering
wheel to lock. Remote engine start system
(dealer option)
WARNING
. Do not start the engine using the
remote start system in an en-
closed environment (e.g., in a
closed garage). Prolonged opera-
tion of a motor vehicle in an
enclosed environment can cause
a harmful build-up of Carbon
Monoxide. Carbon Monoxide is
harmful to your health. Exposure
to high levels of Carbon Monox-
ide can cause headaches, dizzi-
ness or in extreme cases uncon-
sciousness and/or death.
. Before performing any servicing
of the vehicle, temporarily place
the remote engine start system in
service mode to prevent the
system from unexpectedly start-
ing the engine.
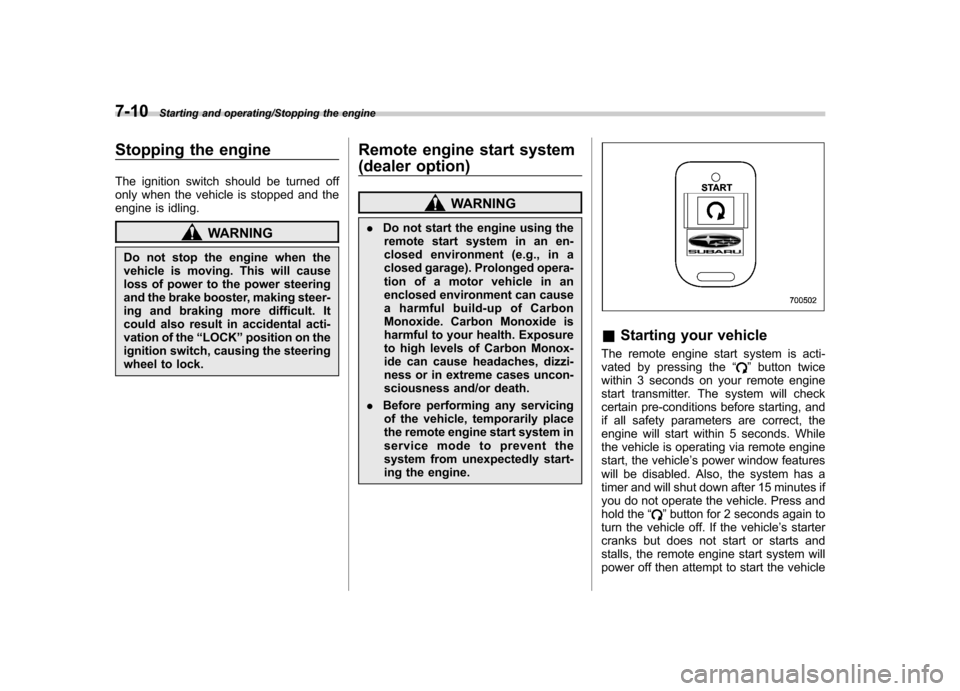
& Starting your vehicle
The remote engine start system is acti-
vated by pressing the “
”button twice
within 3 seconds on your remote engine
start transmitter. The system will check
certain pre-conditions before starting, and
if all safety parameters are correct, the
engine will start within 5 seconds. While
the vehicle is operating via remote engine
start, the vehicle ’s power window features
will be disabled. Also, the system has a
timer and will shut down after 15 minutes if
you do not operate the vehicle. Press and
hold the “
”button for 2 seconds again to
turn the vehicle off. If the vehicle ’s starter
cranks but does not start or starts and
stalls, the remote engine start system will
power off then attempt to start the vehicle
Page 254 of 414

an additional four times. If the vehicle fails
to start after the additional attempts, the
remote engine start system will abort and
return to a non-activated state. &Remote start safety features
For safety and security reasons, the
system will fail to start and beep the horn
twice or shut down the engine during
remote start operation if any of the
following conditions occur. . The brake pedal is depressed before
the vehicle ignition switch is turned “on ”.
. The key was already in the ignition
switch.. The engine hood is opened.
. The vehicle ’s engine idle speed has
reached a level over 3,000 rpm.. The alarm is triggered by opening a
door or the rear gate.
NOTE . The security indicator light on the
combination meter will stop flashing
while under remote engine start opera-
tion, but the vehicle is still protected.. If the vehicle is entered during
remote engine start operation, the
system will not record entry in the
alarm history. &
Entering the vehicle while it
is running via remote start
1. Unlock the vehicle doors using the
remote keyless entry system. If the vehi-cle ’s doors are unlocked manually using
the key, the vehicle ’s alarm system will
trigger and the remote engine start system
will turn off. Inserting the key into the
ignition switch and turning it to the “ON ”
position or pressing the unlock button “
”
on the remote keyless entry transmitter
will disarm the alarm system. Refer to“ Alarm system ”F 2-15.
2. Enter the vehicle. Do not depress the
brake pedal.
3. Insert the key into the ignition switch
and turn to the “ON ”position. If the ignition
switch is accidentally turned to the“ START ”position, the system ’s “starter
anti-grind ”feature will prevent the starter
from re-cranking.
4. Depress the brake pedal. The remote
starter disengages, the vehicle ’s power
window features are re-enabled and the
vehicle will operate normally.
& Entering the vehicle follow-
ing remote engine start shut-down
An alarm trigger may occur if the vehicle is
opened by the remote keyless entry transmitter within a few seconds immedi-
ately following remote engine start shut-down. &
Pre-heating or pre-cooling
the interior of the vehicle
Before exiting the vehicle, set the tem-
perature controls to the desired setting
and operation. After the system starts the
vehicle, the heater or air-conditioning will
activate and heat or cool the interior to
your setting. & Service mode
In service mode, the remote start function
is temporarily disabled to prevent the
system from unexpectedly starting the
engine while being serviced. ! To engage the service mode
Turntheignitionswitchtothe “ON ”
position, depress and hold the brake
pedal, then press and release the “
”
button on the remote engine start trans-
mitter three times. The system will pause
for 1 second and then flash the turn signal
lights and honk the horn three times
indicating that the system is in service
mode. When attempting to activate the
remote start system while in service
mode, the turn signal lights will flash and
the horn will honk two times and will not
Starting and operating/Remote engine start system (dealer option)7-11
– CONTINUED –
Page 255 of 414

7-12Starting and operating/Remote engine start system (dealer option)
start. !To disengage the service mode
Turn the ignition switch to the “ON ”
position, depress and hold the brake
pedal, then press and release the “
”
button on the remote engine start trans-
mitter three times. The system will pause
for 1 second and flash the turn signal
lights once indicating that the system has
exited service mode.
NOTE
When taking your vehicle in for service,
it is recommended that you inform the
service personnel that your vehicle is
equipped with a remote engine startsystem. & Remote engine start trans-
mitter programming and pro-
grammable feature option
New transmitters can be programmed to
the remote engine start system in the
event that remote engine start transmitters
are lost, stolen or damaged. The remote
engine start system also has one pro-
grammable feature that can be adjusted
for user preference.
The remote engine start system can be
programmed to either make an audible
horn chirp upon remote start activation or not. Remote engine start transmitter pro-
gramming and feature programming can
be adjusted using the following procedure.
1. Open the driver
’s door (the driver ’s
door must remain opened throughout the
entire process).
2. Insert the key into the vehicle ’s ignition
switch and turn to the “ON ”position.
3. Locate the small black programming
button behind the fuse box cover, on the
driver ’s side left under the dashboard
panel.
4. Press and hold the black programming
button for 10 to 15 seconds. The horn will
honk and the turn signal lights will flash
three times to indicate that the system has
entered programming mode. At this point
you can proceed to either step 5 or step 6.
5. To program a remote engine start
transmitter: press and release the “
”
button on each transmitter. The horn will
honk and the turn signal lights will flash
one time to indicate a successful trans-
mitter learn each time the “
”button is
pressed. You can program up to eight transmitters.
6. To toggle the Horn Confirmation chirps
ON/OFF: depress and release the brake
pedal to toggle the feature. The horn will
chirp and the turn signal lights will flash
one time to indicate Confirmation Horn
Chirps are “OFF ”. The horn will honk and the turn signal lights will flash 2 times to
indicate Confirmation Horn Chirps are“
ON ”. Depressing the brake pedal repeat-
edly will toggle the feature ON or OFF
each time.
7. To exit the remote engine start trans-
mitter and feature programming mode,
turn the ignition switch to the “LOCK ”
position, remove the key from the ignition
switch and test operation of the remote
engine start transmitter(s) and horn con-
firmation feature.
& System maintenance
! Changing the batteries
CAUTION
. Do not let dust, oil or water get on
or in the remote engine start
transmitter when replacing the
battery.
. Be careful not to damage the
printed circuit board in the re-
mote engine start transmitter
when replacing the battery.
. Be careful not to allow children to
touch the battery and any re-
moved parts; children could
swallow them.
. There is a danger of explosion if
Page 262 of 414
&Auto mode
In the auto mode, the system estimates
the driving and road conditions using
signals from the wheel speed sensor,
throttle position sensor, steering angle
sensor and brake switch, etc. According
to the result, it electronically and auto-
matically controls the degree of limitation
of the differential action (LSD torque) to
optimize the differential action of the
center differential. When the ignition
switch is turned ON, the “AUTO ”indicator
light on the combination meter illuminates. The auto mode has 3 modes as follows.
Mode Operation
AUTO [+] This mode emphasizes traction control and strengthens the
limitation of differential action
that is suitable for driving on
slippery roads for vehicle stabi-
lity.
AUTO This mode is suitable for most driving situations.
AUTO [ ] This mode is suitable when you
seek quick response from the
steering wheel and smooth driving.
! Mode setting method
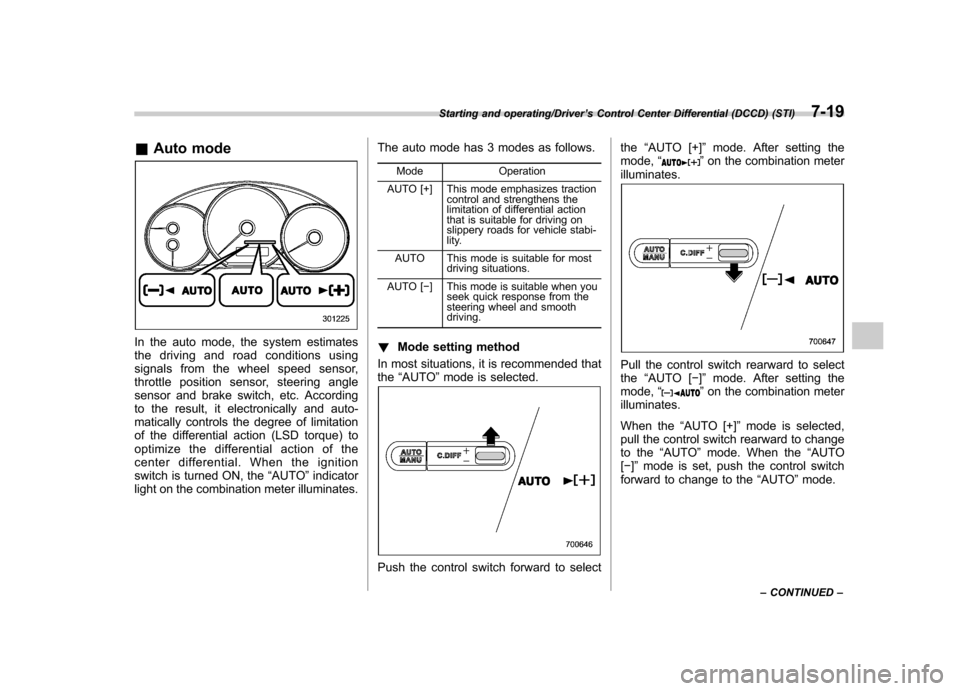
In most situations, it is recommended that the “AUTO ”mode is selected.
Push the control switch forward to select the
“AUTO [+] ”mode. After setting the
mode, “
”on the combination meter
illuminates.
Pull the control switch rearward to select the “AUTO [ ]” mode. After setting the
mode, “
”on the combination meter
illuminates.
When the “AUTO [+] ”mode is selected,
pull the control switch rearward to change
to the “AUTO ”mode. When the “AUTO
[ ]” mode is set, push the control switch
forward to change to the “AUTO ”mode.
Starting and operating/Driver ’s Control Center Differential (DCCD) (STI)7-19
– CONTINUED –
Page 264 of 414
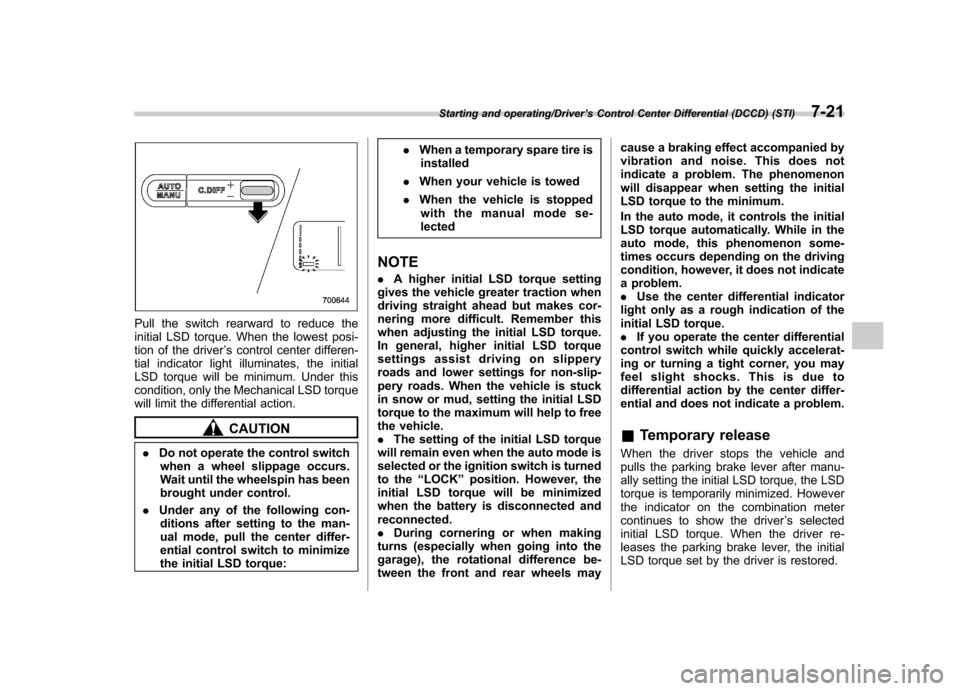
Pull the switch rearward to reduce the
initial LSD torque. When the lowest posi-
tion of the driver’s control center differen-
tial indicator light illuminates, the initial
LSD torque will be minimum. Under this
condition, only the Mechanical LSD torque
will limit the differential action.
CAUTION
. Do not operate the control switch
when a wheel slippage occurs.
Wait until the wheelspin has been
brought under control.
. Under any of the following con-
ditions after setting to the man-
ual mode, pull the center differ-
ential control switch to minimize
the initial LSD torque: .
When a temporary spare tire is
installed
. When your vehicle is towed
. When the vehicle is stopped
with the manual mode se-lected
NOTE . A higher initial LSD torque setting
gives the vehicle greater traction when
driving straight ahead but makes cor-
nering more difficult. Remember this
when adjusting the initial LSD torque.
In general, higher initial LSD torque
settings assist driving on slippery
roads and lower settings for non-slip-
pery roads. When the vehicle is stuck
in snow or mud, setting the initial LSD
torque to the maximum will help to free
the vehicle.. The setting of the initial LSD torque
will remain even when the auto mode is
selected or the ignition switch is turned
to the “LOCK ”position. However, the
initial LSD torque will be minimized
when the battery is disconnected andreconnected.. During cornering or when making
turns (especially when going into the
garage), the rotational difference be-
tween the front and rear wheels may cause a braking effect accompanied by
vibration and noise. This does not
indicate a problem. The phenomenon
will disappear when setting the initial
LSD torque to the minimum.
In the auto mode, it controls the initial
LSD torque automatically. While in the
auto mode, this phenomenon some-
times occurs depending on the driving
condition, however, it does not indicate
a problem..
Use the center differential indicator
light only as a rough indication of the
initial LSD torque.. If you operate the center differential
control switch while quickly accelerat-
ing or turning a tight corner, you may
feel slight shocks. This is due to
differential action by the center differ-
ential and does not indicate a problem. & Temporary release
When the driver stops the vehicle and
pulls the parking brake lever after manu-
ally setting the initial LSD torque, the LSD
torque is temporarily minimized. However
the indicator on the combination meter
continues to show the driver ’s selected
initial LSD torque. When the driver re-
leases the parking brake lever, the initial
LSD torque set by the driver is restored.
Starting and operating/Driver ’s Control Center Differential (DCCD) (STI)7-21