2014 SKODA ROOMSTER seats
[x] Cancel search: seatsPage 87 of 204

Storage compartment on the front passenger sideFig. 81
Dash panel: Storage compart-
ments on the front passenger
side
Read and observe on page 83 first.
Open/close
›
Pull the cover handle in the direction of the arrow » Fig. 81 and fold down the
cover.
›
Lift the lid upwards until it clicks into place.
A pin holder is located inside the lower flap.
WARNINGThe storage compartments must always be closed when driving for safety
reasons.
Cooling the storage compartment on the front passenger side
Fig. 82
Storage compartment: Using
cooling system
Read and observe on page 83 first.
›
Use the rotary switch » Fig. 82 to open and close the air supply.
Opening the air supply when the air conditioning system is switched on allows
cooled air to flow into the storage compartment.
Opening the air inlet when the air conditioning system is on causes fresh or in-
terior air to flow into the storage compartment.
We recommend closing the air supply if it is operated in heating mode or the
cooling system for the storage compartment is not being used.
Storage compartment on the driver's side
Fig. 83
Dash panel: Storage compart-
ment on the driver's side
Read and observe on page 83 first.
The open stowage compartment below the light switch » Fig. 83.
storage pockets on the front seats
Fig. 84
Front seat rests: Map pockets
Read and observe on page 83 first.
Map pockets are located on the rear of the seat backrests » Fig. 84.
The map pockets are intended for storage of maps, magazines, etc.
84Operation
Page 88 of 204

WARNINGNever put heavy items in the map pockets – risk of injury.
CAUTION
Do not put any large items such as bottles or sharp objects into the map pock-
ets, as the pockets and the seat covers could be damaged.
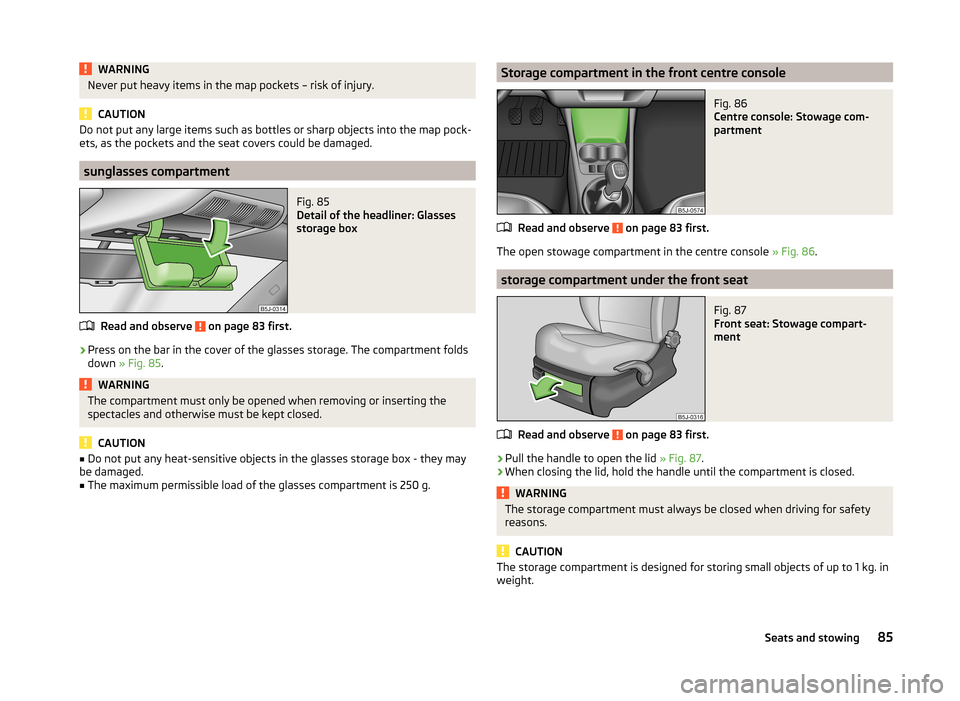
sunglasses compartment
Fig. 85
Detail of the headliner: Glasses
storage box
Read and observe on page 83 first.
›
Press on the bar in the cover of the glasses storage. The compartment folds
down » Fig. 85 .
WARNINGThe compartment must only be opened when removing or inserting the
spectacles and otherwise must be kept closed.
CAUTION
■ Do not put any heat-sensitive objects in the glasses storage box - they may
be damaged.■
The maximum permissible load of the glasses compartment is 250 g.
Storage compartment in the front centre consoleFig. 86
Centre console: Stowage com-
partment
Read and observe on page 83 first.
The open stowage compartment in the centre console » Fig. 86.
storage compartment under the front seat
Fig. 87
Front seat: Stowage compart-
ment
Read and observe on page 83 first.
›
Pull the handle to open the lid » Fig. 87.
›
When closing the lid, hold the handle until the compartment is closed.
WARNINGThe storage compartment must always be closed when driving for safety
reasons.
CAUTION
The storage compartment is designed for storing small objects of up to 1 kg. in
weight.85Seats and stowing
Page 89 of 204

Front armrest with storage compartmentFig. 88
Armrest: Storage compartment/open storage compartment
Read and observe
on page 83 first.
Fold the armrest forwards
›
Press the lower button on the end of the armrest » Fig. 88 -
.
›
Fold the arm rest forward and release the button again.
Opening the storage compartment
›
Press the upper button and open the cover of the stowage compartment up-
wards » Fig. 88 -
.
Note
The moving space of the arms can be restricted if the armrest is folded for-
wards. In city traffic the armrest should not be folded forwards.
folding table in the middle back seat
Fig. 89
Rear seats: Armrest
Read and observe on page 83 first.
The centre seat back can be used as an armrest forward or table with cup
holders » Fig. 89 by folding it forwards » page 71, Fold downseat backrest and
seat fold down completely .
Two beverage containers can be placed into the recesses.
WARNING■ Never put hot beverage containers in the cup holder. They may spill if the
vehicle moves – there is a risk of scalding.■
Do not use any cups or beakers made of fragile material (e.g. glass, porce-
lain). This could lead to injuries in the event of an accident.
CAUTION
■ Do not leave open beverage containers in the cup holder during the journey.
There is a risk of spilling e.g. when braking which may cause damage to the
electrical components or seat upholstery.■
If the middle rear seat backrest should be folded forward for lengthy periods,
then make sure that the belt locks are not located below it - this can warp the
upholstery or fabric.
slots in the doors
Fig. 90
Storage compartment: in the front door/in the rear door
Read and observe
on page 83 first.
There is a bottle holder at
B
» Fig. 90 of the pocket in the front doors.
86Operation
Page 90 of 204

WARNINGUse the section A » Fig. 90 of the door pocket only for storing objects
which do not project so that the effectiveness of the side airbag is not im-
paired.
stowage compartments in the luggage
Fig. 91
Storage compartments in the
side trim panel
Read and observe on page 83 first.
Storage compartments are located on both sides of the luggage compart-
ment » Fig. 91 .
CAUTION
The storage compartments are designed for storing small objects of up to 1.5
kg. in weight in total.
Flexible storage compartment
Fig. 92
Flexible storage compartment
Read and observe on page 83 first.
The flexible storage compartment » Fig. 92 can be fitted to the right-hand side
of the luggage compartment.
Fitting›Insert both ends of the flexible storage compartment into the openings of
the right side trim panel of the boot and push it downwards until it locks.
Removing›
Grasp the flexible storage compartment on the two upper corners.
›
Press the upper corners inwards and release the storage compartment by
pulling upwards.
›
Remove by pulling towards you.
CAUTION
The storage compartment is designed for storing small objects with a maxi-
mum total weight of 8 kg.
Note
If the variable loading floor » page 76 is installed in the luggage compartment,
no flexible storage compartment can be installed.
Praktik
Introduction
This chapter contains information on the following subjects:
Lashings
88
Adjustable safety partition behind the front seats
88
Attachment of the loading floor
88
Adjustment of the safety partition
88
Emergency release of the loading area door
89
Interior lighting
89WARNINGThe load to be transported must always be secured safely so that it does
not come loose when making an emergency braking or in a vehicle collision
which could cause injuries to occupants.87Seats and stowing
Page 91 of 204

LashingsFig. 93
Loading area: Lashing eyes
Read and observe on page 87 first.
Eyes are located on the sides of the loading area for lashing down the
load » Fig. 93 .
Adjustable safety partition behind the front seats
Fig. 94
Adjustable safety partition
Read and observe on page 87 first.
The adjustable safety partition behind the front seats can be adjusted up to
100 mm (only valid for certain countries) for improving the comfort for the driv-
er and the front passenger.
Attachment of the loading floorFig. 95
Loop for raising the loading floor/Fixing the loading floor with a
plastic hook
Read and observe
on page 87 first.
You can fix the loading floor with a hook on the top edge of the boot lid cut-
out, in order to e. g. reach the spare wheel.
›
Raise the loading floor by the loop » Fig. 95 -
and secure it by the plastic
hook (located below the loading floor edge) to the top edge of the tailgate
cutout » Fig. 95 -
.
Adjustment of the safety partition
Fig. 96
Top/lower support of the safety partition
Read and observe
on page 87 first.
Only valid for some countries.
›
Raise the loading floor part behind the safety partition.
88Operation
Page 92 of 204

›Undo and remove a bolt
» Fig. 96 - on either side in the upper body and
one bolt » Fig. 96 - in the lower area.›
Move the safety partition into the required position. Ensure it is always move
the same distance- the same number of holes on both sides both upwards
and downwards.
›
On each side in the upper area of the body, undo and remove a bolt and undo
and remove a bolt in the lower area.
›
Have the tightening torque of the bolts checked with a torque wrench as
soon as possible. The tightening torque must be 20 Nm.
›
Change the position of the cover of the luggage compartment floor behind
the safety partition so that it lines up with the new position of the safety
partition.
›
Fold back the loading floor part.
Emergency release of the loading area door
Fig. 97
Emergency unlocking of the
loading area door
Read and observe on page 87 first.
If there is a fault in the central locking, you can unlock the loading area door as
follows:
›
Pull the control cable towards you and pull on it.
›
Press on the loading area door to open it.
›
Press the control cable back again.
Interior lightingFig. 98
Interior lighting
Read and observe on page 87 first.
Switching on
›
Move the cover glass to the position
» Fig. 98.
Switching off
›
Move the cover glass to the O » Fig. 98 position.
Door contact setting
›
Move the cover glass to the middle position
» Fig. 98 .
Note
We recommend you have the bulb replacement performed by a specialist ga-
rage.89Seats and stowing
Page 137 of 204

any other agreements. You should keep the confirmed warranty certificate and
the receipt for these accessories for this period, so that the commencement of
the warranty term may be verified.
In addition, ŠKODA Service Partners also stock a range of suitable car care
products as well as those parts which are subject to natural wear and tear,
such as tyres, batteries, bulbs and wiper blades.
Note
The accessories authorized by ŠKODA AUTO a.s. will be offered by the ŠKODA
Partners in all countries where ŠKODA AUTO a.s. has a sales and service net- work. This will usually be in the form of a printed catalogue of Original ŠKODA
Accessories, in the form of separate printed brochures or in the form of offers
for ŠKODA Genuine Accessories on the ŠKODA Partner's website.
Spoiler
Read and observe
on page 132 first.
If your new vehicle is fitted with a spoiler on the front bumper in combination
with the spoiler on the luggage compartment lid, then the following instruc-
tions must be adhered to.
› For safety reasons, the vehicle must only be fitted with a spoiler on the front
bumper in combination with the associated spoiler on the luggage compart-
ment lid.
› This kind of spoiler cannot be left on the front bumper either on its own, in
combination with another spoiler not on the luggage compartment lid or in
combination with an unsuitable spoiler on the luggage compartment lid.
› We recommend that you consult the ŠKODA service partner for any repairs to
or replacement, addition or removal of spoilers.
WARNING■ If work on your vehicle's spoilers is not carried out properly, this can lead
to operational faults - risk of accident and serious injuries.■
If a front spoiler, full wheel trim, etc. is mounted retrospectively, it must
be ensured that the air supply to the front wheel brakes is not reduced.
The front brakes may overheat, which can have a negative impact on the
functioning of the braking system – there is a risk of an accident!
Airbags
Read and observe
on page 132 first.
The system components of the airbag system can be situated in the front
bumper, doors, front seats, roof lining or body.
WARNINGAny work on the airbag system including the installation and removal of
system components due to other repair work (e.g. removal of the steering
wheel) must only be carried out by a specialist garage.■
Modifications, repairs and technical alterations that have been carried out
unprofessionally can cause damage and operational faults, and can also se-
riously impair the effectiveness of the airbag system – risk of accident and
fatal injury!
■
The airbag system will then have to be replaced if the airbag is deployed.
Airbag modules cannot be repaired.
WARNINGInformation on the use of the airbag system■It is prohibited to manipulate individual parts of the airbag system, as this
might result in the airbag being deployed.■
Never install any airbag parts into the vehicle that have been removed
from old cars or have been recycled.
■
Never install damaged airbag parts in the vehicle. The airbags may then
not be deployed properly or even at all in the event of an accident.
■
No modifications of any kind must be made to parts of the airbag system.
WARNING■ A change to the vehicle's wheel suspension, including the use of non-ap-
proved wheels and tire combinations, can alter the functioning of the air-
bag system - risk of accident and fatal injury!■
Never make any changes to the front bumper or the bodywork.
134General Maintenance
Page 144 of 204

Synthetic leather, fabrics and Alcantara®
Read and observe
and on page 139 first.
Artificial leather
Clean artificial leather with a damp cloth.
If this method does not completely clean the artificial leather, use a mild soap
solution or cleaning products specially designed for this purpose.
Fabric
Clean upholstery cover materials and cloth trims on doors, boot cover, etc. us-
ing specific cleaning agents, e.g., dry foam.
Use a soft sponge, brush, or commercially available microfibre cloth.
Use a cloth and special detergent to clean the headlining.
Remove any lumps on the cover fabric and any fabric residue using a brush.
Remove stubborn hair using a “cleaning glove”.
Alcantara ®
Dust and fine dirt particles in pores, creases and seams may chafe and damage
the surface.
If you leave your vehicle parked in the open for lengthy periods, protect the Al-
cantara ®
seat upholstery from direct sunlight to prevent fading.
Minor changes in colour caused by use are normal.
CAUTION
■ Do not use leather cleaners on Alcantara ®
seat upholstery.■Do not use solvents, floor wax, shoe cream, stain remover or similar agents
on Alcantara ®
seat upholstery.■
Avoid leaving the vehicle in bright sunlight for long periods of time in order
to stop the fabric from bleaching. If the vehicle is parked outside for long peri-
ods of time, cover the fabric to protect it from direct sunlight.
■
Some clothing materials, e.g. dark denim, do not have sufficient colour fast-
ness. This can cause damage or clearly visible discolouration to seat covers,
even when used correctly. This applies particularly to light-coloured seat cov-
ers. This does not relate to a fault in the seat cover, but rather to poor colour
fastness of the clothing textiles.
Seat covers
Read and observe
and on page 139 first.
Electrically heated seats
Do not clean the covers by moistening, as this can damage the seat heating
system.
Use a specific cleaning agent such as dry foam or similar to clean the covers.
Seats without seat heating
Thoroughly vacuum the seat covers with a vacuum cleaner before cleaning.
Clean the seat covers with a damp cloth or cleaning products specially de-
signed for this purpose.
Indented points arising on the fabrics by everyday use, can be removed by
brushing against the direction of hair with a damp brush.
Always clean all parts of the covers, so that there are no visible edges. Then
allow the seat to dry completely.
CAUTION
■ Regularly remove dust from the seat covers using a vacuum cleaner.■Electrically heated seats must not be dried after cleaning by switching on the
heater.■
Do not sit on wet seats - risk of seat deformation.
■
Always clean the seats “from seam to seam”.
Seat belts
Read and observe
and on page 139 first.
The belt webbing must always be kept clean.
Wash dirty seat belts with mild soapy water.
Remove coarse dirt with a soft brush.
Dirty belt webbing may impair the correct functioning of the inertia reel.
WARNING■ The seat belts must not be removed for cleaning.■Never clean the seat belts chemically as chemical cleaning products could
destroy the fabric. 141Car care