2014 SKODA OCTAVIA 116
[x] Cancel search: 116Page 5 of 280
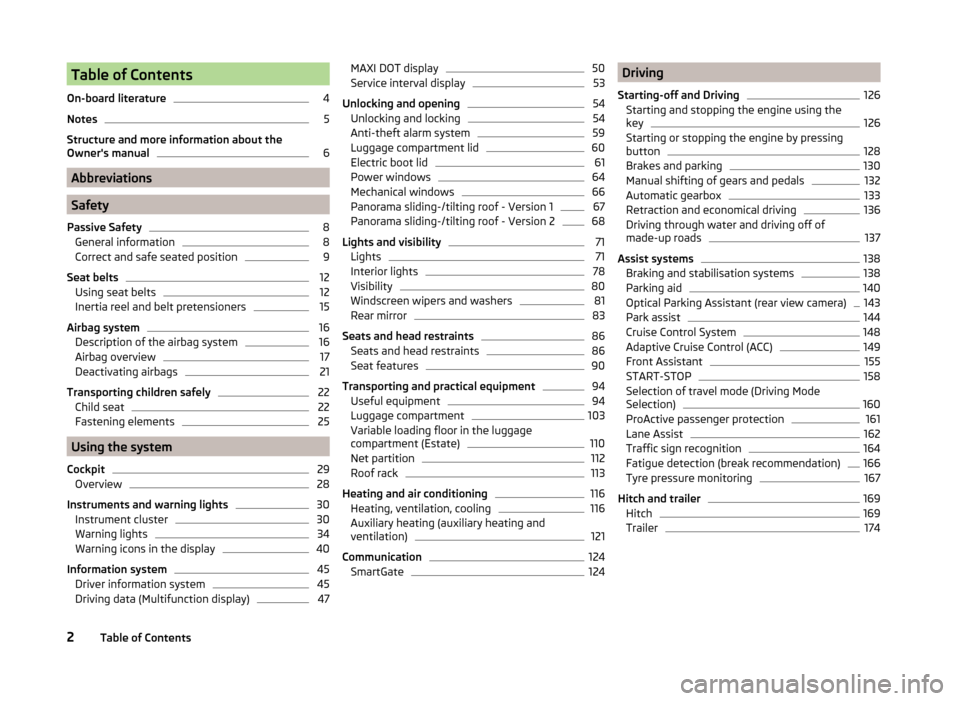
Table of Contents
On-board literature4
Notes
5
Structure and more information about the
Owner's manual
6
Abbreviations
Safety
Passive Safety
8
General information
8
Correct and safe seated position
9
Seat belts
12
Using seat belts
12
Inertia reel and belt pretensioners
15
Airbag system
16
Description of the airbag system
16
Airbag overview
17
Deactivating airbags
21
Transporting children safely
22
Child seat
22
Fastening elements
25
Using the system
Cockpit
29
Overview
28
Instruments and warning lights
30
Instrument cluster
30
Warning lights
34
Warning icons in the display
40
Information system
45
Driver information system
45
Driving data (Multifunction display)
47MAXI DOT display50Service interval display53
Unlocking and opening
54
Unlocking and locking
54
Anti-theft alarm system
59
Luggage compartment lid
60
Electric boot lid
61
Power windows
64
Mechanical windows
66
Panorama sliding-/tilting roof - Version 1
67
Panorama sliding-/tilting roof - Version 2
68
Lights and visibility
71
Lights
71
Interior lights
78
Visibility
80
Windscreen wipers and washers
81
Rear mirror
83
Seats and head restraints
86
Seats and head restraints
86
Seat features
90
Transporting and practical equipment
94
Useful equipment
94
Luggage compartment
103
Variable loading floor in the luggage
compartment (Estate)
110
Net partition
112
Roof rack
113
Heating and air conditioning
116
Heating, ventilation, cooling
116
Auxiliary heating (auxiliary heating and
ventilation)
121
Communication
124
SmartGate
124Driving
Starting-off and Driving126
Starting and stopping the engine using the key
126
Starting or stopping the engine by pressing
button
128
Brakes and parking
130
Manual shifting of gears and pedals
132
Automatic gearbox
133
Retraction and economical driving
136
Driving through water and driving off of
made-up roads
137
Assist systems
138
Braking and stabilisation systems
138
Parking aid
140
Optical Parking Assistant (rear view camera)
143
Park assist
144
Cruise Control System
148
Adaptive Cruise Control (ACC)
149
Front Assistant
155
START-STOP
158
Selection of travel mode (Driving Mode
Selection)
160
ProActive passenger protection
161
Lane Assist
162
Traffic sign recognition
164
Fatigue detection (break recommendation)
166
Tyre pressure monitoring
167
Hitch and trailer
169
Hitch
169
Trailer
1742Table of Contents
Page 32 of 280

Using the system
Cockpit
OverviewElectrical power windows
64
Electric exterior mirror adjustment
85
Door opening lever
56
Air outlet vent
116
Parking ticket holder
95
Operating lever:
› Turn signal light, headlight and parking light, headlight
flasher
73
› Speed regulating system
148
›Activating the Assist systems menu item
51
Steering wheel:
› With horn
› With driver’s front airbag
17
›With buttons for the operation of the information system
45
›With buttons for the Infotainment Control
» Infotainment
Manual , chapter Device Operation
Instrument cluster
30
Operating lever: › Windscreen wiper and wash system
81
›Multifunction display
47
›Information system
51
Infotainment
» owner's manual for the Infotainment radio or
navigation
Air outlets in the central part of the dash panel
116
Button for hazard warning light system
77
Warning light for the deactivated front seat passenger airbag
21
Interior rear-view mirror
84
Storage compartment on the front passenger side
100
Front passenger airbag
17
CD/DVD drive and memory card slot (in the passenger-side stor-
age compartment) » owner's manual for the Infotainment radio
and/or navigation
1234567891011121314151617Key switch for switching off the front passenger airbag (in front
passenger storage compartment)21
Air outlet vent
116
Door opening lever
56
Power window in the front passenger door
65
Light switch
71
Bonnet release lever
194
Storage compartment on the driver's side
95
Fuse box (behind the storage compartment on the driver's
side)
228
Operating lever for adaptive cruise control
152
Lever for adjusting the steering wheel
10
Ignition lock
127
Pedals
132
Handbrake lever
131
Depending on equipment fitted:
› Gearshift lever (manual gearbox)
132
›Selector lever (automatic gearbox)
133
Depending on equipment fitted:
› 12-Volt power socket
98
›Cigarette lighter
97
Bar with keys depending on the equipment fitted:
›
Central locking system
58
›
START STOP
158
›
Traction control TCS
139
›
Electronic Stability Control ESC
138
›
/
Selection of travel mode
160
›
Park Assist
144
›
Parking aid
140
›
Tyre control display
167
Shelf/phonebox
96
1819202122232425262728293031323329Cockpit
Page 115 of 280

Dividing the luggage compartmentFig. 116
Dividing the boot with variable
loading floor
Read and observe on page 110 first.
The luggage compartment can be divided with the variable loading floor in the lower and upper position.
›
Raise the rear of the variable loading floor by the handle
A
» Fig. 116 .
›
Push the rear edge of the variable loading floor into the grooves
B
in the
direction of the arrow.
The variable loading floor is secured against movements in the grooves
B
.
Net partition
Introduction
This chapter contains information on the following subjects:
Using the net partition
112
Removing and refitting the net partition housing
113WARNING■ Be convinced that the crossbar of the net partition is firmly seated in the
recesses E » Fig. 118 on page 112 .■
The seat belts and the belt locks must be in their original position after
folding back the seat backrests – they must be ready to use.
■
The seat backrests must be securely locked in position so that no objects
in the luggage compartment can slide into the passenger compartment on
sudden braking – risk of injury.
■
Ensure that the rear seat backrests are properly engaged. Only then can
the seat belt for the middle seat reliably fulfil its function.
Using the net partitionFig. 117
Open part of the roll-up luggage compartment cover / release
lever
Fig. 118
Net partition behind the front seats in the pulled-out state
Read and observe
on page 112 first.
The net partition can either be installed behind the rear seats or behind the front seats.
Removing the net partition behind the rear seats
›
Fold out part of the roll-up luggage compartment cover
A
in the direction of
the arrow » Fig. 117.
›
Pull out the net partition at the upper crossbar
C
from the housing
D
» Fig. 118 .
›
Hook the crossbar into one of the receptacles
E
.
112Using the system
Page 119 of 280

Heating and air conditioning
Heating, ventilation, cooling
Introduction
This chapter contains information on the following subjects:
Air outlet vents
116
Air distribution control
117
Heating
118
Air conditioning (manual air conditioning)
119
Climatronic (automatic air conditioning)
119
Efficient handling of the cooling system
121
malfunctions
121
The heating and air conditioning ventilate and heat the vehicle interior. The air
conditioning system also cools and dehumidifies the vehicle interior.
The heating effect is dependent upon the coolant temperature, thus full heat
output only occurs when the engine has reached its operating temperature.
The cooling system operates only if the following conditions are met. The cooling system is switched on.
The engine is running.
The outside temperature is above approx. +2 °C.
The blower is switched on.
If the cooling system is switched on, the temperature and air humidity drops in
the vehicle. The cooling system prevents the windows from misting up during
the cold season of the year.
It is possible to briefly activate recirculated air mode to enhance the cooling
effect » page 117 .
WARNING■
For your own safety and that of other road users, ensure that all the win-
dows are free of ice, snow and misting.■
The blower should always be on to prevent the windows from misting up.
WARNING (Continued)■ Under certain circumstances, air at a temperature of about 5 °C can flow
out of the vents when the cooling system is switched on.■
To reduce health risks (e.g. common colds), the following instructions for
the use of the cooling system are to be observed. ■The difference between the indoor temperature and the outdoor air
temperature should not be greater than about 5 ° C.
■ The cooling system is to be turned off about 10 minutes before the end
of the journey.
■ Once a year, a disinfection of the air conditioner or the Climatronic is to
be carried out by a specialist company.
CAUTION
■ The air inlet in front of the windscreen must be free of e.g. ice, snow or
leaves to ensure that the heating and cooling system operates properly.■
After switching on the cooling Condensation from the evaporator of the air
conditioning may drip down and form a puddle below the vehicle. This is not a
leak!
■
If the coolant temperature is too high, the cooling system is switched off to
ensure that the engine cools down.
Note
The used air streams out through the vents in the luggage compartment.
Air outlet vents
Fig. 122
Air vents at the front
116Using the system
Page 120 of 280

Fig. 123
Air vents at the rear
Read and observe
and on page 116 first.
Warmed, not warmed fresh or cooled air will flow out of the opened air outlet
vents according to the setting of the control and the outside atmospheric con-
ditions.
The direction of airflow can be adjusted using the air outlet vents 3,
4 » Fig. 122 and 6 » Fig. 123 - the outlets can be opened and closed individually.
Changing the direction of air flow
›
To change the height of the air flow, swivel the horizontal fins with the mov-
able adjuster
A
» Fig. 122 or » Fig. 123 upward or downward.
›
To change the lateral direction of the air flow, turn the vertical fins with the
movable adjuster
A
» Fig. 122 or » Fig. 123 to the left or right.
Opening
›
Turn regulator
B
» Fig. 122 or » Fig. 123 upwards.
Closing
›
Turn regulator
B
» Fig. 122 or » Fig. 123 downwards.
An overview of the available settings for adjusting the direction of the air
outlet
Setting the direction of the air outletActive air outlet nozzles » Fig. 122
and » Fig. 123 1, 2 , 41, 2 , 4 , 5 , 7Setting the direction of the air
outletActive air outlet nozzles » Fig. 122
and » Fig. 1233, 4 , 64 , 5 , 73 , 4 , 5 , 6 , 7
Note
To ensure that the heating and air conditioning systems are able to work prop-
erly, do not cover the air outlet vents.
Air distribution control
Read and observe
and on page 116 first.
Recirculated air mode prevents polluted air from outside the vehicle getting in-
to the vehicle, for example when driving through a tunnel or when standing in
a traffic jam.
In recirculated air mode air is sucked out of the interior of the vehicle and then
fed back into the interior.
Heating and air conditioning (manual air conditioning)
To switch on the recirculated air mode, press symbol button
. The warning
light below the button lights up.
To switch off the recirculated air mode, press symbol button
. The warning
light below the button goes out.
The air recirculation mode is turned off by turning the air distribution control
C
to position
» Fig. 124 on page 118 or » Fig. 125 on page 119 .
Recirculated air mode can be switched on again from this setting by repeatedly
pressing the symbol button .
Climatronic (automatic air conditioning)
To switch on the recirculated air mode, press symbol button
. The warning
light below the button lights up.
To switch off the recirculated air mode, press symbol button
again (the
warning light below the button goes out) or press button .
117Heating and air conditioning
Page 121 of 280

Automatic activation/deactivation of the air recirculation
Climatronic may have an air quality sensor for the detection of the pollutant
concentration in the sucked-in air.
If a considerable increase in concentration of pollutants is recognised by the
air quality sensor, the recirculated air mode will be switched on automatically.
When the pollutant concentration decreases to the normal level, the recircula-
ted air mode is automatically switched off.
The automatic activation/deactivation of the air recirculation can be activated or deactivated in the Infotainment » Infotainment operating instructions ,
chapter Vehicle settings .WARNINGThe recirculation system cannot be switched on for a longer period of time,
because there is no supply of fresh air from the outside. “Stale air” may re-
sult in fatigue in the driver and occupants, reduce attention levels and also
cause the windows to mist up. The risk of having an accident increases.
Switch off recirculated air mode as soon as the windows start to mist up.
CAUTION
We recommend not smoking in the vehicle when the recirculating air operation
is switched on. The smoke sucked from inside the vehicle is deposited on the
evaporator of the air conditioner. This produces a permanent odour when the
air conditioning system is operating which can only be eliminated through con-
siderable effort and expense (replacement of compressor).
Note
The automatic activation/deactivation of the air recirculation with Climatronic
only works if the outside temperature is higher than approx. 2 °C.HeatingFig. 124
Heating Controls
Read and observe
and on page 116 first.
Individual functions can be set or switched on by turning the rotary knob or
pressing the respective button. When the function is activated, the warning
light below the button lights up.
Functions of the individual controls » Fig. 124
Set temperature ›
Reduce temperature
›
Increase temperature
Set the blower speed (level 0: fan off, stage 6: highest blower speed)
Set the direction of the air outlet » page 116
›
Air flow over the windows
›
Air flow to the upper body
›
Air flow into the footwell and to the body (warmer air directed to the
footwell than to the body)
›
Air flow into the footwell
›
Airflow over the windows and into the footwell
Switching the rear window heater on/off » page 80
Switch recirculated air on/off » page 117
ABC118Using the system
Page 122 of 280

Air conditioning (manual air conditioning)Fig. 125
Controls of the air conditioning
Read and observe
and on page 116 first.
Individual functions can be set or switched on by turning the rotary knob or
pressing the respective button. When the function is activated, the warning
light below the button lights up.
Functions of the individual controls » Fig. 125
Set temperature ›
Reduce temperature
›
Increase temperature
Set the blower speed (level 0: fan off, stage 6: highest blower speed)
Set the direction of the air outlet » page 116
›
Air flow over the windows
›
Air flow to the upper body
›
Air flow into the footwell and to the body (warmer air directed to the
footwell than to the body)
›
Air flow into the footwell
›
Airflow over the windows and into the footwell
Depending on equipment fitted: ›
Switching on/off aux. heating (standard heating) on/off
» page 122
›
Switching the windscreen heater on/off
» page 80
Operate the seat heater on the front left seat » page 90
Switch the cooling system on/off
Switching the rear window heater on/off » page 80
Switch recirculated air on/off » page 117
Operate the seat heater on the front right seat » page 90
ABCDNote■
The warning light in the button lights after activation, even if not all of
the conditions for the function of the cooling system have been met. The light-
ing up of the indicator light in the button signals the operational readiness of
the cooling system.■
During operation of the air conditioning, an increase in engine idle speed may
occur under certain circumstances in order to ensure sufficient heating com-
fort.
Climatronic (automatic air conditioning)
Fig. 126
Controls the Climatronic
Read and observe
and on page 116 first.
The Climatronic in automatic mode ensures the best-possible setting of the
temperature of the outflowing air, the blower stage and air distribution.
The system also takes sunlight into account, which eliminates the need to al-
ter the settings manually afterwards.
Individual functions can be set or switched on by turning the rotary knob or
pressing the respective button. When the function is on, a warning light within
or below the button lights up.
Functions of the individual controls » Fig. 126
Adjust the temperature for the left side or for both sides
›
Reduce temperature
›
Increase temperature
Interior temperature sensor
Set the temperature (turn to the left: Reduce fan speed, turn to the right:
Increase blower speed)
ABC119Heating and air conditioning
Page 124 of 280

■As soon as the windscreen mists up, press the symbol button . Press the
button once the windscreen has demisted.■
During operation of the Climatronic, an increase in engine idle speed can oc-
cur under certain circumstances in order to ensure adequate heating comfort.
Efficient handling of the cooling system
Read and observe
and on page 116 first.
The air conditioning system compressor uses power from the engine when in
cooling mode, which will affect the fuel consumption.
It recommended to open the windows or the doors of a vehicle for which the
interior has been strongly heated through the effect of direct sunlight in order
to allow the heated air to escape.
The cooling system should not be on if the windows are open.
For the sake of the environment
Pollutant emissions are also lower when fuel is being saved » page 136.
malfunctions
Read and observe
and on page 116 first.
If the cooling system does not operate at outside temperatures higher than
+5 °C, there is a problem in the system. The reasons for this may be.
› One of the fuses has blown. Check the fuse and replace if necessa-
ry » page 229 .
› The cooling system has switched off automatically for a short time because
the coolant temperature of the engine is too hot » page 32.
If you are not able to resolve the operational problem yourself, or if the cooler
output has reduced, switch off the cooling system and seek assistance from a
specialist garage.
Auxiliary heating (auxiliary heating and ventilation)
Introduction
This chapter contains information on the following subjects:
Switching on/off
122
Radio remote control
123Conditions for the functioning of auxiliary heating (auxiliary heating and venti-
lation), hereinafter referred to only as auxiliary heating.
The charge state of the vehicle battery is sufficient.
The fuel supply is adequate (the warning icon
is not lit in the display of
the instrument cluster).
Auxiliary ventilation
The auxiliary ventilation enables fresh air to flow into the vehicle interior by
switching off the engine, whereby the interior temperature is effectively de-
creased (e.g. with the vehicle parked in the sun).
Auxiliary heating (parking heating)
The auxiliary heating can be used when both when stationary, when the en-
gine is switched off, to preheat the vehicle and also while driving (e.g. during
the heating phase of the engine).
The auxiliary heater functions in connection with the air-conditioning system
or Climatronic.
The auxiliary heating also warms up the engine.
The auxiliary heating warms up the coolant by combusting fuel from the vehi-
cle tank. This heats the air flowing into the passenger compartment (if the
blower is turned on).
The heater is switched on or off automatically depending on the ambient con-
ditions to give the best possible conditions for the engine running and the in-
terior heating.
The automatic switching on and off of the heater can be turned off by a spe-
cialist garage.WARNING■ The auxiliary heating must never be operated in closed rooms (e.g. garag-
es) – risk of poisoning!■
The auxiliary heating must not be allowed to run during refuelling – risk
of fire.
■
The exhaust pipe of the auxiliary heating is located on the underside of
the vehicle. If you want to use the heater, do not park the car in places
where the exhaust fumes can come into contact with flammable materials
such as dry grass, undergrowth, leaves, spilled fuel etc. - risk of fire.
121Heating and air conditioning