2014 SKODA OCTAVIA key
[x] Cancel search: keyPage 2 of 77

Structure of this Owner's Manual (explanations)
This Owner's Manual has been systematically designed to make it easy for you
to search for and obtain the information you require.
Chapters, table of contents and subject index
The text of the Owner's Manual is divided into relatively short sections which
are combined into easy-to-read chapters. The chapter you are reading at any
particular moment is always shown at the bottom right of the page.
The Table of contents arranged according to chapter and the detailed Subject
index at the end of the Owner's Manual help you to rapidly find the information
you are looking for.
Direction indications
All direction indications such as “left”, “right”, “front”, “rear” relate to the direction of travel of the vehicle.
Units of measurement
All values are expressed in metric units.
Explanation of symbolsDenotes a reference to a section with important information and safety
advice in a chapter.Denotes the continuation of a section on the next page.®Denotes a registered trademark.
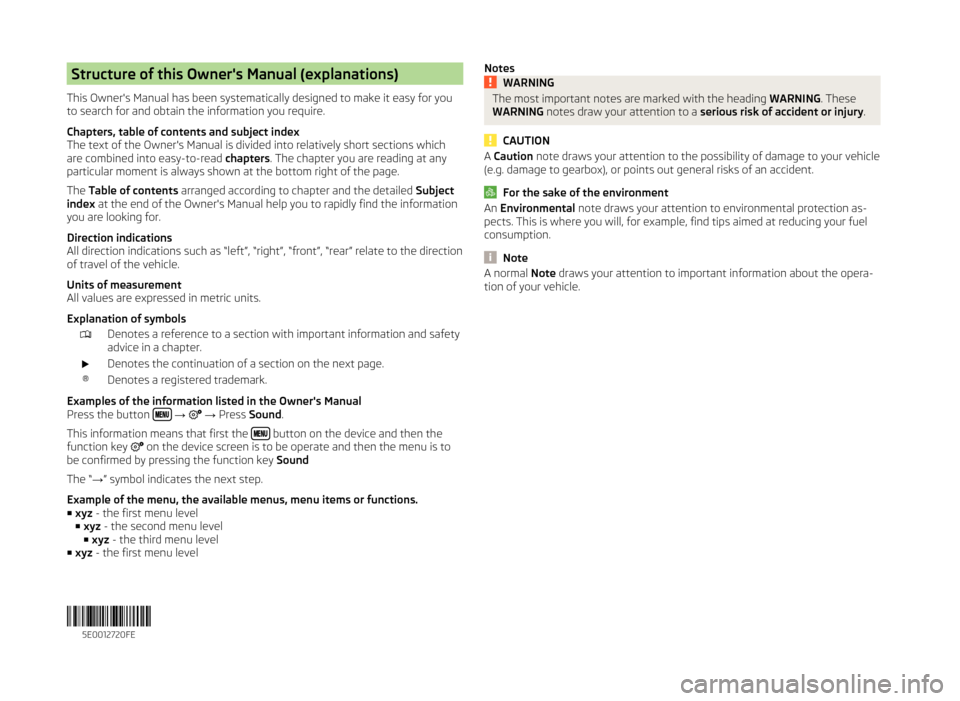
Examples of the information listed in the Owner's Manual
Press the button
→ → Press Sound .
This information means that first the
button on the device and then the
function key on the device screen is to be operate and then the menu is to
be confirmed by pressing the function key Sound
The “ →” symbol indicates the next step.
Example of the menu, the available menus, menu items or functions. ■ xyz - the first menu level
■ xyz - the second menu level
■ xyz - the third menu level
■ xyz - the first menu level
NotesWARNINGThe most important notes are marked with the heading WARNING. These
WARNING notes draw your attention to a serious risk of accident or injury .
CAUTION
A Caution note draws your attention to the possibility of damage to your vehicle
(e.g. damage to gearbox), or points out general risks of an accident.
For the sake of the environment
An Environmental note draws your attention to environmental protection as-
pects. This is where you will, for example, find tips aimed at reducing your fuel
consumption.
Note
A normal Note draws your attention to important information about the opera-
tion of your vehicle. 5E0012720FE
Page 5 of 77

AbbreviationsAbbreviationDefinitionA2DP- a software profile for data transfer via Bluetooth ®,
de-
signed for a one-way transfer of audio dataACCAdaptive cruise controlAFThe function ensures that the best receivable frequency of
the selected station is automatically and precisely set.AMIdentification of the radio-frequency rangeTCSTraction control for the drive wheelsAVRCPA software profile for data transfer via Bluetooth ®
, which
supports multimedia functionsAVAudio / visual source signal - typical for DVD player or TV tu-
nerBTBluetooth ®
- wireless communication for reception and
transmission of voice and data informationDABDigital radio receptionDRM- technical methods to monitor or restrict the use of digital
media contentESCElectronic Stability ControlFMIdentification of the radio-frequency rangeHFP- a software profile for data transfer via Bluetooth ®,
which
allows for communication between a mobile phone and the
in-vehicle hands-free equipmentGPSSatellite system for position determinationGSMGlobal System for Mobile communication, the most popular
standard for mobile phonesID3 tagAn additional feature of a music file that allows for the dis-
play of artist, title, album name etc.KESSYKey-less unlocking, starting and lockingNTSCCoding standard of the audiovisual signal in North and Cen-
tral America and some countries in South East AsiaPALCoding standard of the audiovisual signal in most European
countriesAbbreviationDefinitionPIStation identification by a single RDS code, for example,
when setting a different radio stationRDSSystem for the transmission of additional information for FM
radio receptionTMCService for transmitting traffic information to the driverTPProgram identifier for the transmission of traffic informationvCardFile format .vcf for contact data exchange, especially elec-
tronic business cards, can include first and last names, ad-
dresses, phone numbers, URLs, logos, photos and audio clipsVINVehicle identification numberWMAcompressed audio format3Abbreviations
Page 8 of 77

When the unit is switched on, the audio source last active and the most re-
cently selected menu before the unit was switched off will be restored.
If Telephone mode was active before you switched off the unit and the igni-
tion and Bluetooth ®
function is not switched on, the screen displays the mes-
sage » page 34 . Switch on the ignition or the Bluetooth ®
func-
tion » page 19 .
If the vehicle key is pulled out of the ignition lock while the unit is switched on,
the unit will switch off automatically. After switching on the ignition, the unit
is turned on automatically.
The unit will not be switched on automatically when the ignition is switched
on if the unit was switched off using the
knob.
The unit will switch off automatically after the engine is switched off and the
door is opened if your vehicle is fitted with the KESSY system. The unit will
switch off if you open the driver's door before switching off the engine.
When the ignition is switched off, the unit switches itself off automatically af-
ter approximately half an hour (prevents the vehicle battery being drained).
Unit menus
Fig. 2
Unit menus
Call up the main menu
›
Press the button.
Function keys in the MENU main menu - Menu Radio » page 21
- Menu Media » page 26
- Tone settings » page 17
- Unit settings » page 16
- Vehicle systems settings » page 62
- Navigation menu » page 43
- Menu Telephone » page 33
Adjusting volume
Increase the volume
›
Turn the knob to the right.
Reduce the volume
›
Turn the knob to the left.
Muting
›
Set the volume to 0 using the knob.
Note
■
The change in volume is displayed on the screen of the unit.■The following symbol appears in the display when the sound is muted: .■
High volumes can cause sound resonance in the vehicle.
■
The car speakers may be damaged if the volume is set too loud or is distor-
ted.
■
The loudspeakers in the vehicle are designed for a power output of the de-
vice of 4x20 W.
■
When equipped with a sound system, the speakers are adapted for a total
power output from the amplifier of 570 W.
6Familiarization with the unit
Page 9 of 77

Unit operation
In the unit screen
Introduction
This chapter contains information on the following subjects:
Operation
7
Input screen with keyboard
8
Input screen with numeric keyboard
8
First and foremost, pay attention to the safety instructions » page 4 , Impor-
tant notes .
This chapter covers the operation of the unit and working with the
touchscreen and with various types of input keyboard.
Operation
Fig. 3
Screen display
Explanation of graphic
Currently selected menu
- Return to the higher-level menu
Function with “checkbox”
Scroll bar - Shows the position in the menu; touch the scroll bar to navi-
gate the menu
Menu item with “pop-up window”
Screen areas which confirm a function or a menu are called “ function keys”.
White or green function keys are active.
Greyed out function keys are not active.
ABCDEProximity sensors
At the bottom of the device there are proximity sensors. When your hand ap-
proaches the screen, the device changes from display mode to operating mode
and the available function keys are highlighted.
Status line
In the main menu of some operating modes, the upper screen area contains a
status line displaying time details and the external temperature, as well as in-
formation on the operating mode currently selected.
Function keys in the main menu
In the main menu of some operating modes, the lower screen area contains
function keys with symbols for functions or menus.
Selecting menu/menu item
› Drag your finger over the screen in the required direction
› Turn the menu knob 2
» Fig. 1 on page 5
If you make the selection by turning the menu knob
2
, the currently selected
menu is highlighted in green.
Confirming menu/menu item
› Touch the function key with your finger
› Press the menu knob
2
Returning to higher-level menu
Context-dependent
› By pressing
› By pressing the relevant button next to the screen
› By touching the screen outside the pop-up window with your finger
Switching function on/off with “checkbox” Press the relevant function key
›
or
- Function is switched on
›
or
- Function is switched off
Set value › by touching the function keys with the symbols
/
,
/
, - / +
› Touch or move your finger over the scale
Note
For some menus or menu items, the current setting is displayed, e.g.
Dis-
tance: ... km or distance: ... mi .7Unit operation
Page 10 of 77

Input screen with keyboardFig. 4
Input screen
The input screen with keypad is used to input entries or find entries in the unit
memory (e.g. phone contacts, addresses, etc.).
Description of the function keys - Return to the higher-level menu
- Display the menu with the contacts found, information on the number of
relevant contacts
- Delete characters in the input line
- Change from upper case to lower case and vice versa
- Menu display with keys in the selected language, including diacrit-
ics » page 18
- Switch to numbers and special characters
- Switch to special characters
- Switch to letters
- Space
- Confirmation of text entered into the input line
Pressing the keyboard function key on the input screen places the character required in text line
A
.
Only those letters or symbols reasonably used in an entry will be available dur-
ing input. Do not forget to enter a space in terms made up of more than one
word, such as Lorem Ipsum. The entries can be entered without special charac-
ters (diacritics).
The system begins searching for the most relevant terms as soon as letters
are entered, so it is not necessary to enter the entire name.
In addition to the text line
A
, the number of matching entries is shown in the
function key
B
.
The numbers 1-99 indicate the number of matching entries found. If even more
entries were found, ** is indicated instead of a number. If less than 6 entries
were found, a list of the found entries opens automatically.
Input screen with numeric keyboard
Fig. 5
Input screen with numeric keypad
The input screen with keypad is used for number input in particular.
- Input screen in the
Telephone menu » page 39 .
- Input screen in the
Navigation menu » page 50
operation via the MAXI DOT display
Introduction
This chapter contains information on the following subjects:
Operate with the control lever buttons
9
Operating the audio using the buttons / dials on the multifunction steering
wheel
9
operation via the buttons / dials on the multifunction steering wheel -
Telephone
11
Operation with the buttons and wheels on the multifunction steering
wheel - Navigation
12
First and foremost, pay attention to the safety instructions » page 4 , Impor-
tant notes .
8Familiarization with the unit
Page 16 of 77

CAUTIONFor some languages voice control is not available. The device will notify the
user of this via a text message which is displayed after setting the device lan-
guage screen » page 16 .
Note
■
No navigation announcements or traffic announcements are played while
you are using voice control.■
Some voice commands must be spelled out, depending on the language of
communication selected, such as Card “S D ” One source selection.
Switching on/off
Fig. 10
Multifunction steering wheel
Read and observe
on page 13 first.
Switching on voice control › Briefly press the button
on the device.
› Briefly press the symbol button
1
on the multifunction steering wheel.
Activation of voice control is indicated by an acoustic signal and the unit
screen will display a collection of basic voice commands for the current menu.
The menu display and the acoustic signal can be enabled or disa-
bled » page 19 .
Switching off voice control › Press the button
on the device for a long time, or press it twice.
› Press the symbol button twice or press and hold
on the multifunction
steering wheel.
› Touch the screen with your finger (any part of the screen with the exception
of the function key with the symbol
).
› Pressing a button on the unit (except for a short press on the button
).
› Say the
Cancel voice dialogue voice command.
Help for voice control
Read and observe
on page 13 first.
Start introduction
When you give the voice command Start tutorial, the unit plays one of the sev-
en parts of the voice control tutorial.
Individual parts of the introduction can be requested separately by the voice
command Introduction part ... and numbers 1 through 7.
Help
When you give the voice command Help, the device displays a menu contain-
ing possible voice commands. In some cases repeating the Helpvoice com-
mand will bring up another part of the help section with a menu of additional
voice commands.
The help section does not contain all possible commands.
Operation
Read and observe
on page 13 first.
The voice control system can usually be operated applying the “ say what you
see ” method.
Announce the descriptions of the green highlighted function keys. For exam-
ple, the function key Dial no. can be accessed through the voice command
“ Call number. ”
Voice control settings » page 19.
Icons in the voice control menu A voice output is played
A voice command is awaited
a voice command entry is stopped » page 15
A voice command is recognized
As long as the system is playing a voice output, it is not necessary to await the
end of the message playback. The message can be ended by briefly pressing
the
button or the symbol key
on the multifunction steering wheel. In
this way the voice output is aborted and a new voice command is expected.
14Familiarization with the unit
Page 17 of 77

Non-recognition of a voice commandRead and observe
on page 13 first.
If a voice command is not recognised, the system answers with Pardon? and
you can give a new command.
If the system does not recognise the second voice command, the help mes-
sage is provided again and you can give a new command.
If the system does not recognise the third voice command, the system plays
the Voice control cancelled message and the dialogue is ended.
Option to correct a voice command input
Read and observe
on page 13 first.
A voice command can be corrected, modified or re-entered by briefly pressing
the button on the unit or the symbol key
on the multifunction steering
wheel. However this is only possible if the symbol appears.
You do not have to wait until the voice command is recognized by the system.
Stop/restore voice command input
Read and observe
on page 13 first.
In some menus, the procedure for entering voice commands can be stopped by
turning the knob
2
» Fig. 1 on page 5 .
The symbol displayed on the unit screen or in the information display then
changes from up
.
Restore input › by pressing the function key with the symbol
;
› by briefly pressing the button
on the multifunction steering wheel.
› by pressing the symbol key
on the multifunction steering wheel.
Not in the voice commands included in the help section
Read and observe
on page 13 first.
Voice commands to select menus, folders and directories in individual menus.
FunctionVoice commandReturning to the higher-level
menu BackScroll through the menu /
list / directory
next pageprevious pagefirst pagelast page
Voice commands for navigation parameters
FunctionVoice commandSwitch navigation announce-
ments on/offSwitch on navigation promptsSwitch off navigation promptsSwitch navigation guidance
assisted by TMC traffic mes-
sages on or offSwitch on dynamic route
Switch on dynamic navigationSwitch off dynamic route
Switch off dynamic navigationSwitch traffic sign display in
the unit screen on/
off » page 47Switch on traffic signs on the mapSwitch off traffic signs on the mapShow or hide lane guidance
in the unit screen » page 58Switch on lane recommendationsSwitch off track recommendationsShow or hide favourites icons
in the mapShow favouritesSwitch off favorites 15Unit operation
Page 18 of 77

Voice commands for querying route informationFunctionVoice commandInformation concerning dis-
tance to the destinationdistance to destinationInformation concerning time
of arrival at destinationarrival timeInformation concerning driv-
ing time to the destinationDriving time
Voice commands for the symbols in the settings menu for the map display
SymbolVoice commandMap “2 D ”Map “3 D ”Destination mapOverview map
Voice commands for the symbols to operate the map display
SymbolVoice commandOrientation zoomPosition mapAutozoomScale ... > Meter | Kilometre | Yards | Miles
e.g. Scale five kilometres
The destination address must be defined by saying the town and street name
and then the house number step-by-step in accordance with the system an-
nouncements. The navigation data must contain the house number.
The house number and a further address supplement in the form of a number can be said where necessary. The system will then offer the number combina-
tion it has found if the house number and the further address supplement,
where appropriate, exists in the street entered.
Device settings
Setup menu
Introduction
This chapter contains information on the following subjects:
Main menu
16
Sound settings
17
Screen settings
18
Time and date settings
18
Keyboard settings
18
Additional keypad language settings
18
Unit settings
19
Voice control settings
19
Restore factory settings
19
Bluetooth ®
settings
19
First and foremost, pay attention to the safety instructions » page 4 , Impor-
tant notes .
This chapter covers the basic settings for the unit.
Additional settings are described in the individual menus ■ Radio » page 24
■ Media » page 27
■ Telephone » page 35
■ Navigation » page 44
■ Vehicle system settings » page 62
Main menu
Fig. 11
Unit settings: Main menu
16Familiarization with the unit