2014 Seat Leon SC buttons
[x] Cancel search: buttonsPage 12 of 284

The essentials
Bonnet Fig. 8
See Fig. 3 for positioning Fig. 9
●
Opening the bonnet: Pull the lever under
the dashboard ›››
Fig. 8 1 .
● Lift up the bonnet. Press the release catch
under the bonnet upwards ›››
Fig. 9 2 . The
arrester hook under the bonnet is released. ●
The bonnet can be opened. Release the
bonnet stay and secure it in the fixture de-
signed for this in the bonnet.
››› in Work in the engine compartment
on page 198
››› page 198 Electric windows*
Fig. 10
See Fig. 3 for positioning ●
Opening the window: Press the button.
● Closing the window: Pull the button.
Buttons on the driver door Window on the front left door
1 Window on the front right door
Window on the rear left door (only 5-door
vehicles)
Window on the right rear door (only 5-
door vehicles)
Safety switch for deactivating the electric
window buttons on the rear doors (only 5-
door vehicles)
››› in Opening and closing of the elec-
tric windows* on page 91
››› page 90 2
3
4
5
10
Page 21 of 284
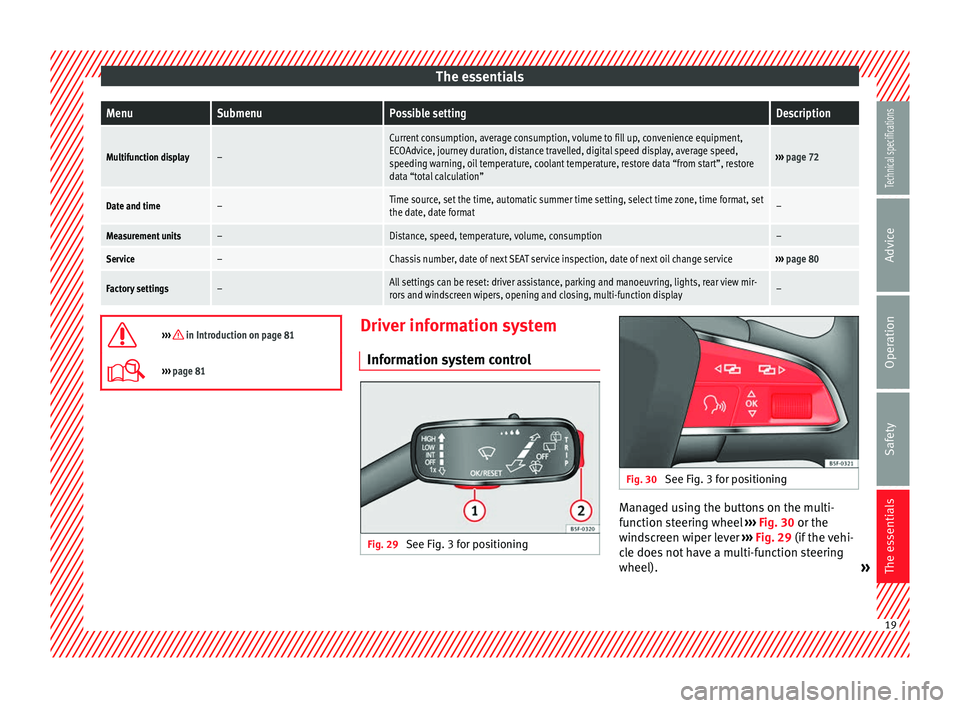
The essentialsMenuSubmenuPossible settingDescription
Multifunction display–
Current consumption, average consumption, volume to fill up, convenience equipment,
ECOAdvice, journey duration, distance travelled, digital speed display, average speed,
speeding warning, oil temperature, coolant temperature, restore data “from start”, restore
data “total calculation”
›››
page 72
Date and time–Time source, set the time, automatic summer time setting, select time zone, time format, set
the date, date format–
Measurement units–Distance, speed, temperature, volume, consumption–
Service–Chassis number, date of next SEAT service inspection, date of next oil change service››› page 80
Factory settings–All settings can be reset: driver assistance, parking and manoeuvring, lights, rear view mir-
rors and windscreen wipers, opening and closing, multi-function display–
››› in Introduction on page 81
›››
page 81 Driver information system
Information system control Fig. 29
See Fig. 3 for positioning Fig. 30
See Fig. 3 for positioning Managed using the buttons on the multi-
function steering wheel
››› Fig. 30 or the
w ind
screen wiper lever ››› Fig. 29 (if the vehi-
cle does not have a multi-function steering
wheel). » 19
Technical specifications
Advice
Operation
Safety
The essentials
Page 28 of 284

The essentials
Air conditioning How does Climatronic* work? Fig. 39
See Fig. 3 for positioning To switch a specific function on, press the ap-
propriate button. Press the button again to
switch off the function.
The LED on each control lights up to indicate
that the respective function of a control has
been switched on.1TemperatureThe left and right sides can be adjusted separately: Turn the control to adjust the temperature
2FanThe power of the fan is automatically adjusted. The fan is also adjusted manually by turning the control.
3Air distributionThe airflow adjusts automatically for comfort. You can also switch it on manually using the buttons
3.
4Indications on the temperature display screen selected for the right and left sides.26
Page 29 of 284
The essentials
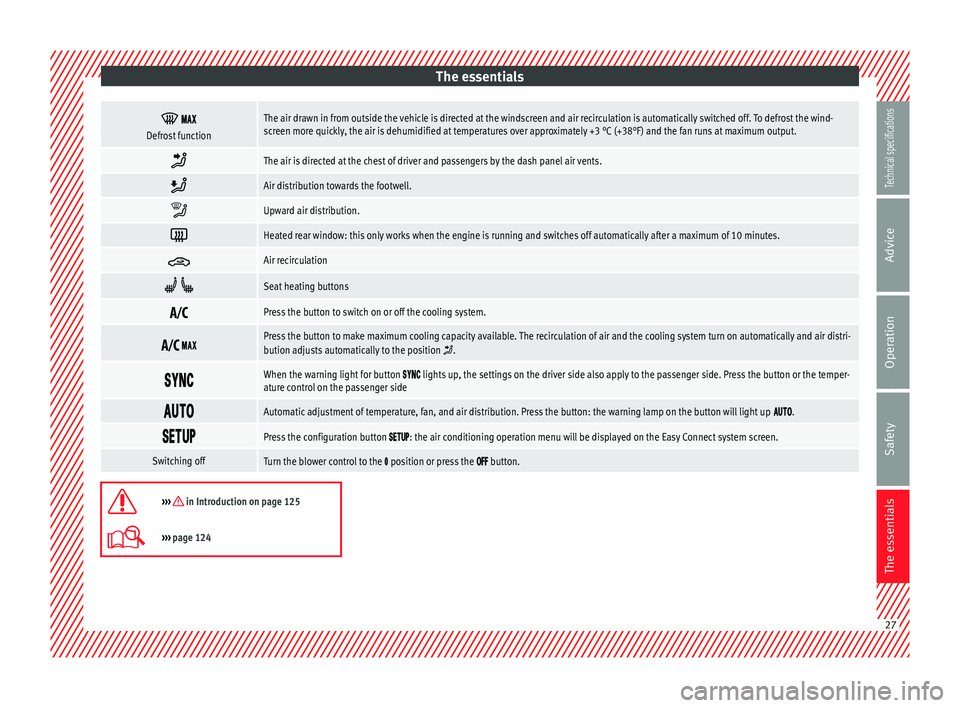
Defrost functionThe air drawn in from outside the vehicle is directed at the windscreen and air recirculation is automatically switched off. To defrost the wind-
screen more quickly, the air is dehumidified at temperatures over approximately +3 °C (+38°F) and the fan runs at maximum output.
The air is directed at the chest of driver and passengers by the dash panel air vents.
Air distribution towards the footwell.
Upward air distribution.
Heated rear window: this only works when the engine is running and switches off automatically after a maximum of 10 minutes.
Air recirculation
Seat heating buttons
Press the button to switch on or off the cooling system.
Press the button to make maximum cooling capacity available. The recirculation of air and the cooling system turn on automatically and air distri-
bution adjusts automatically to the position .
When the warning light for button lights up, the settings on the driver side also apply to the passenger side. Press the button or the temper-
ature control on the passenger side
Automatic adjustment of temperature, fan, and air distribution. Press the button: the warning lamp on the button will light up .
Press the configuration button : the air conditioning operation menu will be displayed on the Easy Connect system screen.
Switching offTurn the blower control to the position or press the button.
››› in Introduction on page 125
›››
page 124 27
Technical specifications
Advice
Operation
Safety
The essentials
Page 31 of 284

The essentials
Air distribution towards the footwell.
Air distribution towards the windscreen and the footwell.
Heated rear window: this only works when the engine is running and switches off automatically after a maximum of 10 minutes.
Air recirculation
Seat heating buttons
Maximum cooling power. The recirculation of air and the cooling system turn on automatically and air distribution adjusts automatically to the
position
››› in Introduction on page 125
›››
page 124 How does the heating and the fresh air system work?
Fig. 41
See Fig. 3 for positioning
» 29
Technical specifications
Advice
Operation
Safety
The essentials
Page 32 of 284
The essentials
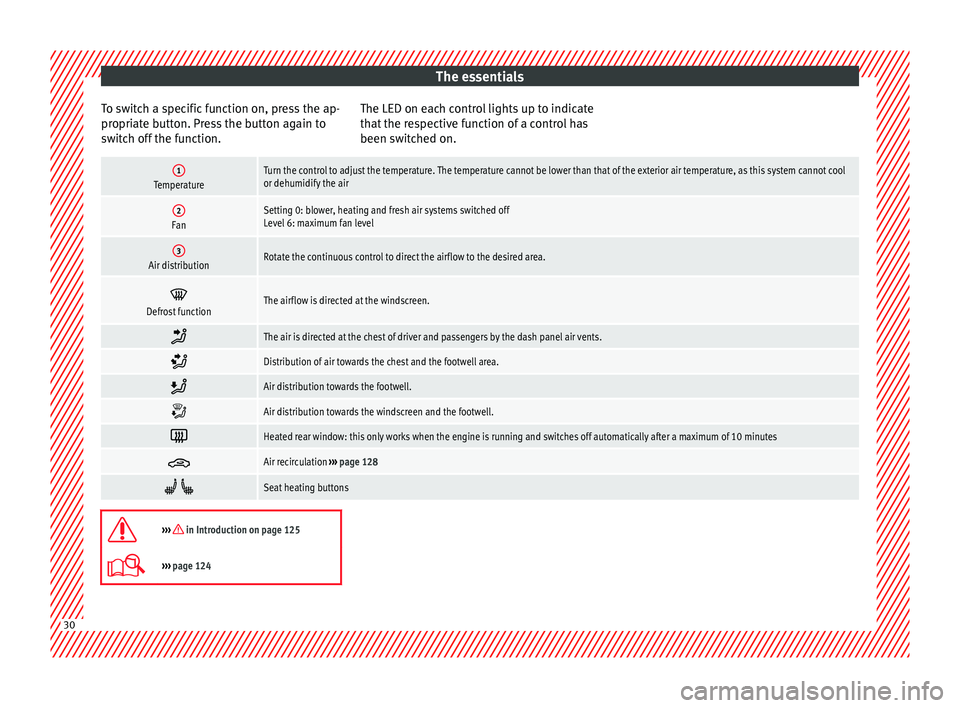
To switch a specific function on, press the ap-
propriate button. Press the button again to
switch off the function. The LED on each control lights up to indicate
that the respective function of a control has
been switched on.1TemperatureTurn the control to adjust the temperature. The temperature cannot be lower than that of the exterior air temperature, as this system cannot cool
or dehumidify the air
2FanSetting 0: blower, heating and fresh air systems switched off
Level 6: maximum fan level
3Air distributionRotate the continuous control to direct the airflow to the desired area.
Defrost functionThe airflow is directed at the windscreen.
The air is directed at the chest of driver and passengers by the dash panel air vents.
Distribution of air towards the chest and the footwell area.
Air distribution towards the footwell.
Air distribution towards the windscreen and the footwell.
Heated rear window: this only works when the engine is running and switches off automatically after a maximum of 10 minutes
Air recirculation
››› page 128
Seat heating buttons
››› in Introduction on page 125
›››
page 124 30
Page 74 of 284
Operation
are preheating. When the warning lamp goes
off, the engine should be started straight
away.
Control lamp flashes
If a f
ault develops in the engine management
system while you are driving, the glow plug
system lamp will flash
. Take the vehicle to
a specialised workshop as soon as possible
and have the engine checked. Driver information system
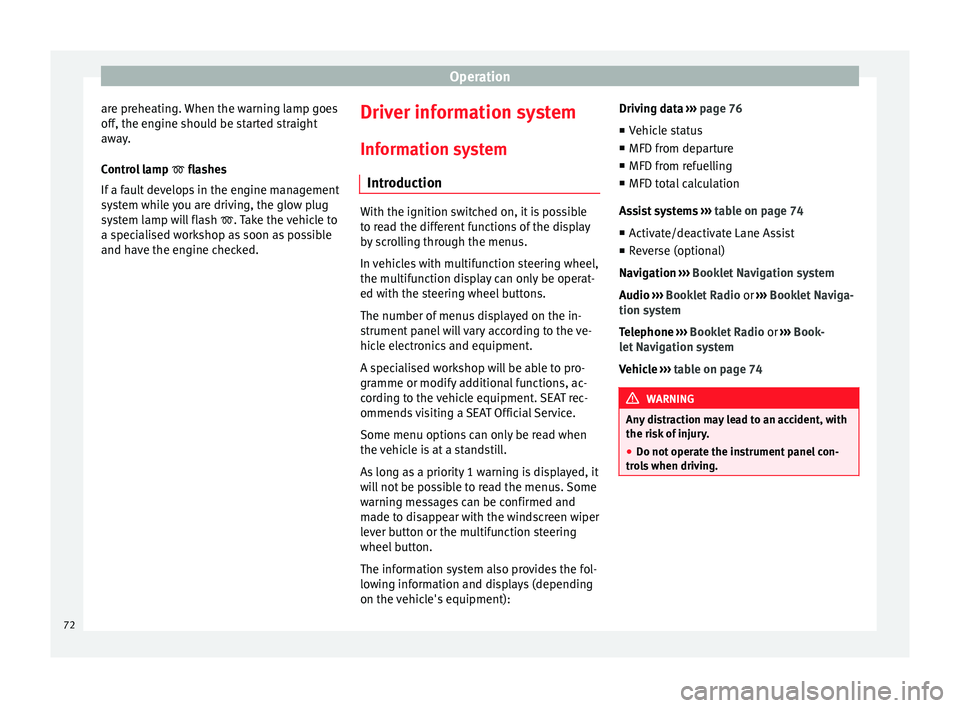
Information system Introduction With the ignition switched on, it is possible
to read the different functions of the display
by scrolling through the menus.
In vehicles with multifunction steering wheel,
the multifunction display can only be operat-
ed with the steering wheel buttons.
The number of menus displayed on the in-
strument panel will vary according to the ve-
hicle electronics and equipment.
A specialised workshop will be able to pro-
gramme or modify additional functions, ac-
cording to the vehicle equipment. SEAT rec-
ommends visiting a SEAT Official Service.
Some menu options can only be read when
the vehicle is at a standstill.
As long as a priority 1 warning is displayed, it
will not be possible to read the menus. Some
warning messages can be confirmed and
made to disappear with the windscreen wiper
lever button or the multifunction steering
wheel button.
The information system also provides the fol-
lowing information and displays (depending
on the vehicle's equipment):Driving data
››› page 76
■ Vehicle status
■ MFD from departure
■ MFD from refuelling
■ MFD total calculation
Assist systems ››› table on page 74
■ Activate/deactivate Lane Assist
■ Reverse (optional)
Navigation › ››
Book
let Navigation system
Audio
››› Booklet Radio or ››› Booklet Naviga-
tion system
Telephone
››› Booklet Radio or ››› Book-
let Navigation system
Vehicle
››› table on page 74 WARNING
Any distraction may lead to an accident, with
the risk of injury.
● Do not operate the instrument panel con-
trols when driving. 72
Page 75 of 284
Driver information system
Operating the instrument panel
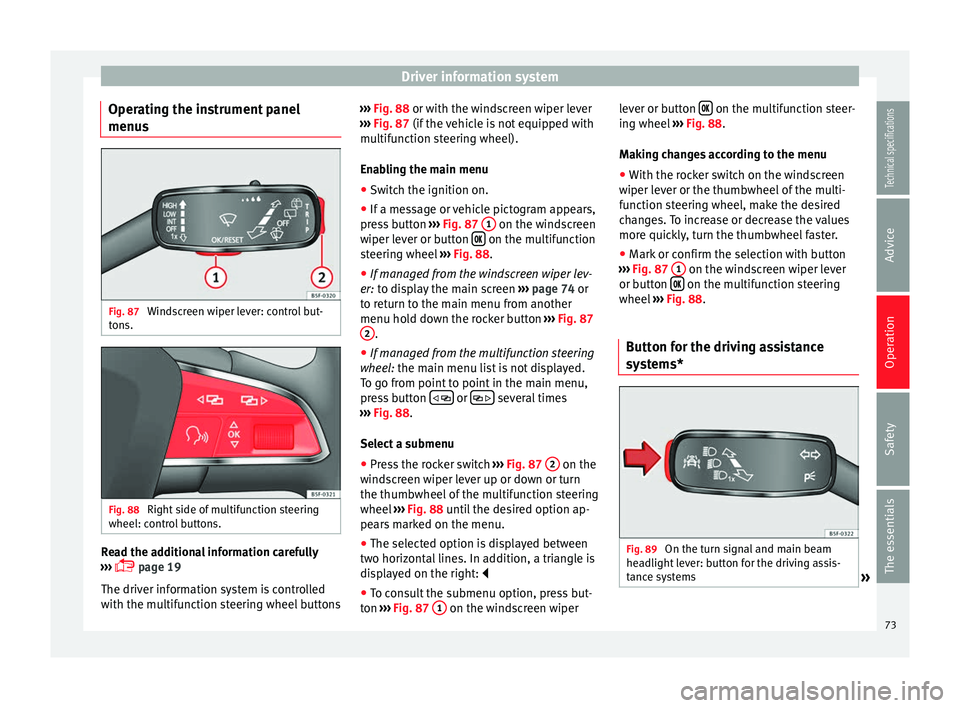
menus Fig. 87
Windscreen wiper lever: control but-
tons. Fig. 88
Right side of multifunction steering
wheel: control buttons. Read the additional information carefully
››› page 19
The driver information system is controlled
with the multifunction steering wheel buttons ›››
Fig. 88 or with the windscreen wiper lever
› ›
› Fig. 87 (if the vehicle is not equipped with
multif
unction steering wheel).
Enabling the main menu ● Switch the ignition on.
● If a message or vehicle pictogram appears,
press button ››› Fig. 87 1 on the windscreen
wiper lever or button on the multifunction
steering wheel ››› Fig. 88.
● If managed from the windscreen wiper lev-
er: to display the main screen
›
›
› page 74 or
to return to the main menu from another
menu hold down the rocker button ››› Fig. 87
2 .
● If managed from the multifunction steering
wheel: the main menu list is not displayed.
T o g
o from point to point in the main menu,
press button
or
several times
››› Fig. 88 .
Sel ect
a submenu
● Press the rocker switch ››› Fig. 87 2 on the
windscreen wiper lever up or down or turn
the thumbwheel of the multifunction steering
wheel ››› Fig. 88 until the desired option ap-
pe ar
s marked on the menu.
● The selected option is displayed between
two horizontal lines. In addition, a triangle is
displayed on the right:
● To consult the submenu option, press but-
ton ››› Fig. 87 1 on the windscreen wiperlever or button
on the multifunction steer-
ing wheel ››› Fig. 88 .
M ak
ing changes according to the menu
● With the rocker switch on the windscreen
wiper lever or the thumbwheel of the multi-
function steering wheel, make the desired
changes. To increase or decrease the values
more quickly, turn the thumbwheel faster.
● Mark or confirm the selection with button
››› Fig. 87 1 on the windscreen wiper lever
or button on the multifunction steering
wheel ››› Fig. 88 .
B utt
on for the driving assistance
systems* Fig. 89
On the turn signal and main beam
headlight lever: button for the driving assis-
tance systems » 73
Technical specifications
Advice
Operation
Safety
The essentials