2014 Seat Leon 5D change time
[x] Cancel search: change timePage 28 of 84
Audio and Media Mode
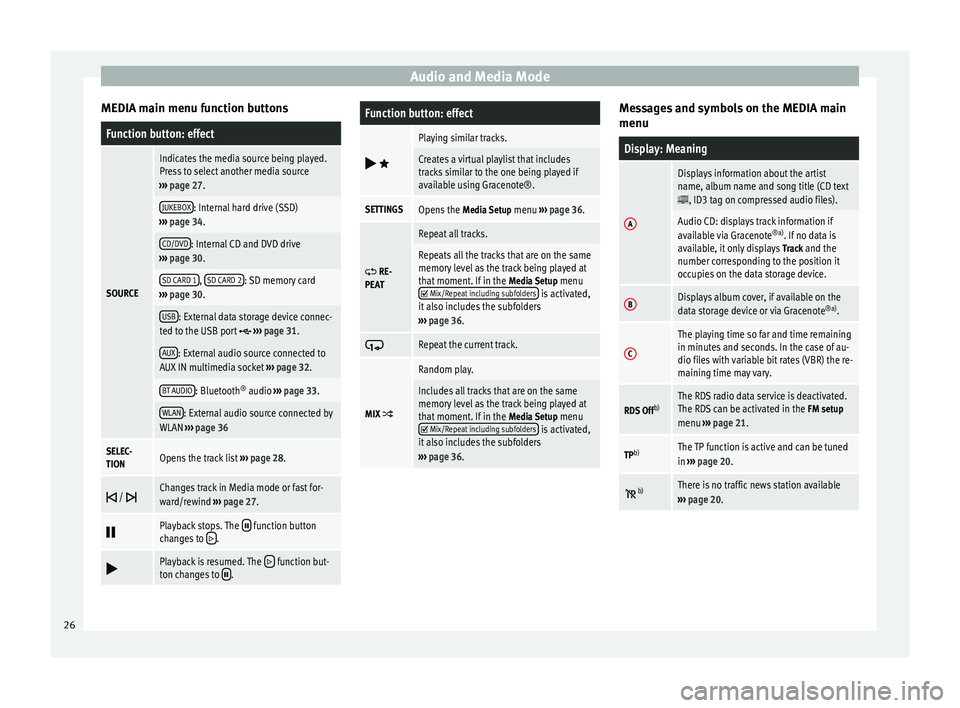
MEDIA main menu function buttonsFunction button: effect
SOURCE
Indicates the media source being played.
Press to select another media source
››› page 27.
JUKEBOX: Internal hard drive (SSD)
››› page 34.
CD/DVD: Internal CD and DVD drive
››› page 30.
SD CARD 1, SD CARD 2: SD memory card
››› page 30.
USB: External data storage device connec-
ted to the USB port ››› page 31.
AUX: External audio source connected to
AUX IN multimedia socket ››› page 32.
BT AUDIO: Bluetooth ®
audio ››› page 33.
WLAN: External audio source connected by
WLAN ››› page 36
SELEC-
TIONOpens the track list ››› page 28.
/ Changes track in Media mode or fast for-
ward/rewind
››› page 27.
Playback stops. The function button
changes to .
Playback is resumed. The function but-
ton changes to .
Function button: effect
Playing similar tracks.
Creates a virtual playlist that includes
tracks similar to the one being played if
available using Gracenote®.
SETTINGSOpens the
Media Setup menu ››› page 36.
RE-
PEAT
Repeat all tracks.
Repeats all the tracks that are on the same
memory level as the track being played at
that moment. If in the Media Setup menu
Mix/Repeat including subfolders is activated,
it also includes the subfolders
››› page 36.
Repeat the current track.
MIX
Random play.
Includes all tracks that are on the same
memory level as the track being played at
that moment. If in the
Media Setup menu
Mix/Repeat including subfolders is activated,
it also includes the subfolders
››› page 36. Messages and symbols on the MEDIA main
menu
Display: Meaning
A
Displays information about the artist
name, album name and song title (CD text
, ID3 tag on compressed audio files).
Audio CD: displays track information if
available via Gracenote
®a)
. If no data is
available, it only displays Track and the
number corresponding to the position it
occupies on the data storage device.
BDisplays album cover, if available on the
data storage device or via Gracenote ®a)
.
C
The playing time so far and time remaining
in minutes and seconds. In the case of au-
dio files with variable bit rates (VBR) the re-
maining time may vary.
RDS Off b)The RDS radio data service is deactivated.
The RDS can be activated in the
FM setup
menu ››› page 21.
TPb)The TP function is active and can be tuned
in
››› page 20.
b)There is no traffic news station available
››› page 20. 26
Page 29 of 84
Audio and Media ModeDisplay: Meaning
b)DAB not available
››› page 16.
a)
Gracenote ®
is a database available on the Infotainment sys-
tem hard drive that contains information on the tracks about dif-
ferent artists and albums. In order for the user to benefit from
the functions offered by Gracenote ®
, it is necessary for the
tracks to contain the artist and/or album data.
b) Depends on the market and unit in question.
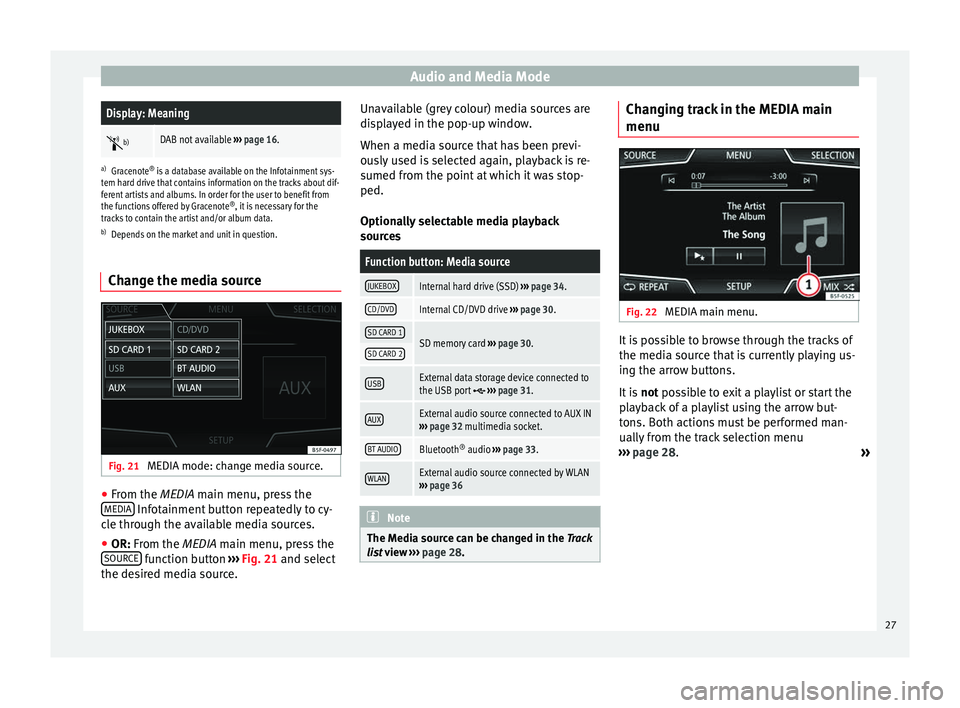
Change the media source Fig. 21
MEDIA mode: change media source. ●
From the MEDIA
main menu, press the
MEDIA Infotainment button repeatedly to cy-
cle through the available media sources.
● OR: From the
MEDIA
main menu, press the
SOURCE function button
›››
Fig. 21 and select
the de s
ired media source. Unavailable (grey colour) media sources are
displayed in the pop-up window.
When a media source that has been previ-
ously used is selected again, playback is re-
sumed from the point at which it was stop-
ped.
Optionally selectable media playback
sources
Function button: Media source
JUKEBOXInternal hard drive (SSD)
››› page 34.
CD/DVDInternal CD/DVD drive ››› page 30.
SD CARD 1SD memory card ››› page 30.SD CARD 2
USBExternal data storage device connected to
the USB port ››› page 31.
AUXExternal audio source connected to AUX IN
››› page 32 multimedia socket.
BT AUDIOBluetooth ®
audio ››› page 33.
WLANExternal audio source connected by WLAN
››› page 36 Note
The Media source can be changed in the Track
lis t
view ››› page 28. Changing track in the MEDIA main
menu
Fig. 22
MEDIA main menu. It is possible to browse through the tracks of
the media source that is currently playing us-
ing the arrow buttons.
It is
not possible to exit a playlist or start the
p l
ayback of a playlist using the arrow but-
tons. Both actions must be performed man-
ually from the track selection menu
››› page 28.
»
27
Page 32 of 84
Audio and Media Mode
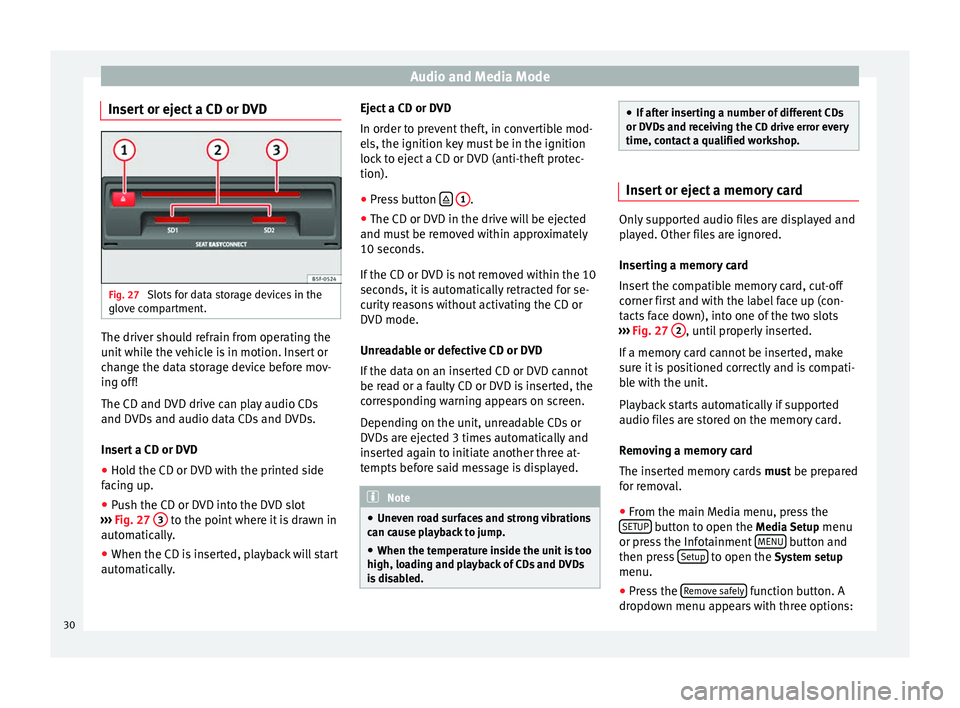
Insert or eject a CD or DVD Fig. 27
Slots for data storage devices in the
glove compartment. The driver should refrain from operating the
unit while the vehicle is in motion. Insert or
change the data storage device before mov-
ing off!
The CD and DVD drive can play audio CDs
and DVDs and audio data CDs and DVDs.
Insert a CD or DVD
● Hold the CD or DVD with the printed side
facing up.
● Push the CD or DVD into the DVD slot
››› Fig. 27 3 to the point where it is drawn in
automatically.
● When the CD is inserted, playback will start
automatically. Eject a CD or DVD
In order to prevent theft, in convertible mod-
els, the ignition key must be in the ignition
lock to eject a CD or DVD (anti-theft protec-
tion).
●
Press button
1 .
● The CD or DVD in the drive will be ejected
and must be removed within approximately
10 seconds.
If the CD or DVD is not removed within the 10
seconds, it is automatically retracted for se-
curity reasons without activating the CD or
DVD mode.
Unreadable or defective CD or DVD
If the data on an inserted CD or DVD cannot
be read or a faulty CD or DVD is inserted, the
corresponding warning appears on screen.
Depending on the unit, unreadable CDs or
DVDs are ejected 3 times automatically and
inserted again to initiate another three at-
tempts before said message is displayed. Note
● Uneven road surfaces and strong vibrations
can cause playback to jump.
● When the temperature inside the unit is too
high, loading and playback of CDs and DVDs
is disabled. ●
If after inserting a number of different CDs
or DVDs and receiving the CD drive error every
time, contact a qualified workshop. Insert or eject a memory card
Only supported audio files are displayed and
played. Other files are ignored.
Inserting a memory card
Insert the compatible memory card, cut-off
corner first and with the label face up (con-
tacts face down), into one of the two slots
››› Fig. 27 2 , until properly inserted.
If a memory card cannot be inserted, make
sure it is positioned correctly and is compati-
ble with the unit.
Playback starts automatically if supported
audio files are stored on the memory card.
Removing a memory card
The inserted memory cards must be prepared
for removal.
● From the main Media menu, press the
SETUP button to open the Media Setup
menu
or press the Infotainment MENU button and
then press Setup to open the System setup
menu.
● Press the Remove safely function button. A
dropdown menu appears with three options:
30
Page 35 of 84
Audio and Media Mode
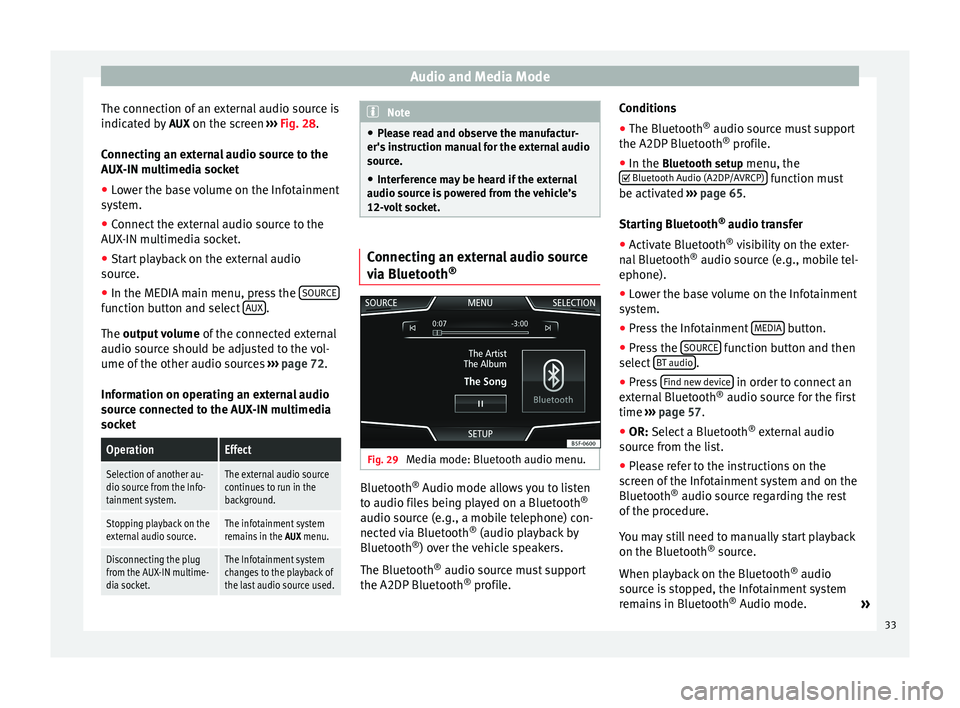
The connection of an external audio source is
indicated by AUX on the screen ››› Fig. 28 .
Connecting an external audio source to the
AUX-IN multimedia socket
● Lower the base volume on the Infotainment
system.
● Connect the external audio source to the
AUX-IN multimedia socket.
● Start playback on the external audio
source.
● In the MEDIA main menu, press the SOURCEfunction button and select
AUX .
The output volume
of
the c onnected external
audio source should be adjusted to the vol-
ume of the other audio sources ››› page 72.
Information on operating an external audio
source connected to the AUX-IN multimedia
socket
OperationEffect
Selection of another au-
dio source from the Info-
tainment system.The external audio source
continues to run in the
background.
Stopping playback on the
external audio source.The infotainment system
remains in the AUX menu.
Disconnecting the plug
from the AUX-IN multime-
dia socket.The Infotainment system
changes to the playback of
the last audio source used. Note
● Please read and observe the manufactur-
er's instruction manual for the external audio
source.
● Interference may be heard if the external
audio source is powered from the vehicle’s
12-volt socket. Connecting an external audio source
via Bluetooth
® Fig. 29
Media mode: Bluetooth audio menu. Bluetooth
®
Audio mode allows you to listen
to audio files being played on a Bluetooth ®
audio source (e.g., a mobile telephone) con-
nected via Bluetooth ®
(audio playback by
Bluetooth ®
) over the vehicle speakers.
The Bluetooth ®
audio source must support
the A2DP Bluetooth ®
profile. Conditions
●
The Bluetooth ®
audio source must support
the A2DP Bluetooth ®
profile.
● In the Bluetooth setup menu, the
Bluet
ooth Audio (A2DP/AVRCP) function must
be activated ››› page 65 .
St ar
ting Bluetooth ®
audio transfer
● Activate Bluetooth ®
visibility on the exter-
nal Bluetooth ®
audio source (e.g., mobile tel-
ephone).
● Lower the base volume on the Infotainment
system.
● Press the Infotainment MEDIA button.
● Press the SOURCE function button and then
select BT audio .
● Press Find new device in order to connect an
external Bluetooth ®
audio source for the first
time ››› page 57 .
● OR: Select a Bluetooth ®
e xt
ernal audio
source from the list.
● Please refer to the instructions on the
screen of the Infotainment system and on the
Bluetooth ®
audio source regarding the rest
of the procedure.
You may still need to manually start playback
on the Bluetooth ®
source.
When playback on the Bluetooth ®
audio
source is stopped, the Infotainment system
remains in Bluetooth ®
Audio mode. »
33
Page 36 of 84
Audio and Media Mode
Controlling playback
The extent to which the Bluetooth ®
audio
source can be controlled via the Infotainment
system depends on the connected Blue-
tooth ®
audio source.
The available functions will depend on the
Bluetooth ®
Audio profile that the connected
external player supports.
With media players that support the AVRCP
Bluetooth ®
profile, playback on the Blue-
tooth ®
audio source can be automatically
started or stopped when the unit is switched
to Bluetooth ®
Audio mode or to a different
audio source. In addition, it is possible to
view or change the track via the Infotainment
system. Note
● Due to the large number of possible Blue-
tooth ®
audio sources, it is not possible to
guarantee fault-free operation of all descri-
bed functions.
● Always switch off the warning and service
tones on a connected Bluetooth ®
audio
source, e.g. key tones on a mobile telephone,
to prevent possible interference noise and
malfunctions.
● Do not connect an external media player to
play music via Bluetooth ®
and via the USB
port ››› page 31 at the same time with the Infotainment system, as this could cause
playback limitations.
● If the external player is an Apple device™,
it cannot be simultaneously connected by
USB and by Bluetooth. Jukebox (SSD)
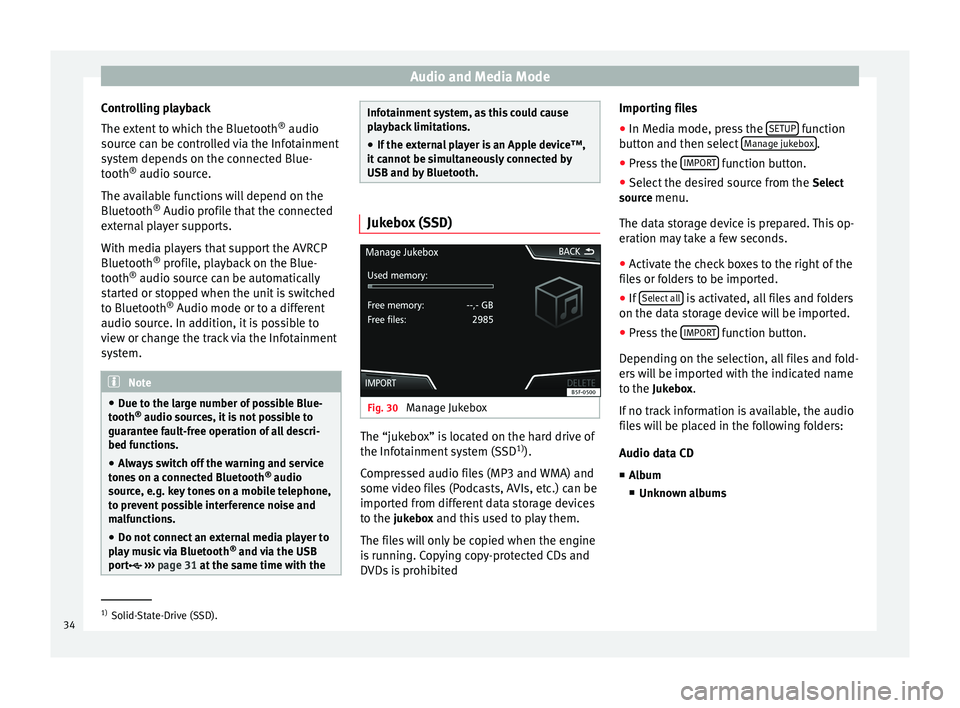
Fig. 30
Manage Jukebox The “jukebox” is located on the hard drive of
the Infotainment system (SSD
1)
).
Compressed audio files (MP3 and WMA) and
some video files (Podcasts, AVIs, etc.) can be
imported from different data storage devices
to the jukebox and this used to play them. The files will only be copied when the engine
is running. Copying copy-protected CDs and
DVDs is prohibited Importing files
● In Media mode, press the SETUP function
button and then select Manage jukebox .
● Press the IMPORT function button.
● Select the desired source from the Select
source menu.
The data storage device is prepared. This op-
eration may take a few seconds.
● Activate the check boxes to the right of the
files or folders to be imported.
● If Select all is activated, all files and folders
on the data storage device will be imported.
● Press the IMPORT function button.
Depending on the selection, all files and fold-
ers will be imported with the indicated name
to the Jukebox. If no track information is available, the audio
files will be placed in the following folders:
Audio data CD
■ Album
■ Unknown albums 1)
Solid-State-Drive (SSD).
34
Page 37 of 84
Audio and Media Mode
■ Track. mp3 1)
■ Artists
■Unknown artists
■ Unknown albums
■ Track. mp3 1)
Functions and progress display during the
copying operation
While copying, an animation is displayed
along with the progress percentage on the
import screen.
Audio data CD : It is not possible to copy and
p l
ay files at the same time.
● Press the Cancel function button to end the
import of the whole track that is currently be-
ing imported.
● To obtain information on the status of the
import, press the Information function button.
● Press the BACK function button to close
the import screen with the progress informa-
tion.
● When the file import ends, the following
message will appear: All files imported.
Deleting files
● In Media mode, press the SETUP function
button and then select Manage jukebox .●
Press the DELETE function button.
● Activate the check boxes to the right of the
files or folders to be deleted.
● If Select all is activated, all the files and
folders on the data storage device will be de-
leted.
● Press the DELETE function button. The files
and folders will be deleted according to the
selection made.
● When the files have been deleted, the fol-
lowing message will appear: All files deleted.
● Press the BACK function button to close
the menu.
Opening stored audio and video files
● Change to Jukebox (SSD) content
››› page 28 .
When s t
oring the tracks, they are stored un-
der different categories and lists according to
the information available.
The tracks saved can be checked and opened
from these lists according to different catego-
ries.
Jukebox
● Track list
● Artist ●
Album
● Music genre
● Title
● Video
● Unreadable files (an unsupported file has
been imported). Note
● If the Infotainment system cancels a copy-
ing operation, check the storage space on the
internal hard drive and check the data stor-
age device.
● Due to copyright laws, before any change in
ownership of the Infotainment system, all
files stored on the jukebox must be deleted. 1)
The name and extension of the file are examples.
35
Page 39 of 84
Audio and Media Mode
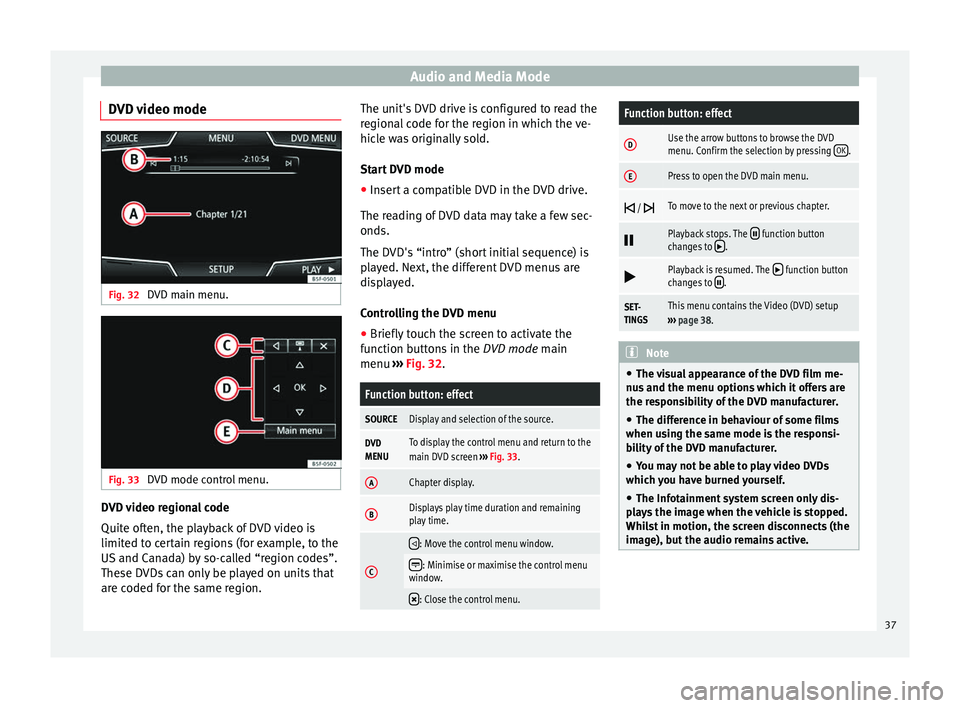
DVD video mode Fig. 32
DVD main menu. Fig. 33
DVD mode control menu. DVD video regional code
Quite often, the playback of DVD video is
limited to certain regions (for example, to the
US and Canada) by so-called “region codes”.
These DVDs can only be played on units that
are coded for the same region. The unit's DVD drive is configured to read the
regional code for the region in which the ve-
hicle was originally sold.
Start DVD mode
● Insert a compatible DVD in the DVD drive.
The reading of DVD data may take a few sec-
onds.
The DVD's “intro” (short initial sequence) is
played. Next, the different DVD menus are
displayed.
Controlling the DVD menu
● Briefly touch the screen to activate the
function buttons in the DVD mode main
menu ›
›
› Fig. 32.
Function button: effect
SOURCEDisplay and selection of the source.
DVD
MENUTo display the control menu and return to the
main DVD screen ››› Fig. 33.
AChapter display.
BDisplays play time duration and remaining
play time.
C
: Move the control menu window.
: Minimise or maximise the control menu
window.
: Close the control menu.
Function button: effect
DUse the arrow buttons to browse the DVD
menu. Confirm the selection by pressing
OK.
EPress to open the DVD main menu.
/ To move to the next or previous chapter.
Playback stops. The function button
changes to .
Playback is resumed. The function button
changes to .
SET-
TINGSThis menu contains the Video (DVD) setup
››› page 38. Note
● The visual appearance of the DVD film me-
nus and the menu options which it offers are
the responsibility of the DVD manufacturer.
● The difference in behaviour of some films
when using the same mode is the responsi-
bility of the DVD manufacturer.
● You may not be able to play video DVDs
which you have burned yourself.
● The Infotainment system screen only dis-
plays the image when the vehicle is stopped.
Whilst in motion, the screen disconnects (the
image), but the audio remains active. 37
Page 45 of 84
Navigation
The calculation will be performed in accord-
ance with the data selected in the Route op- tions menu ››› page 49 .
Af t
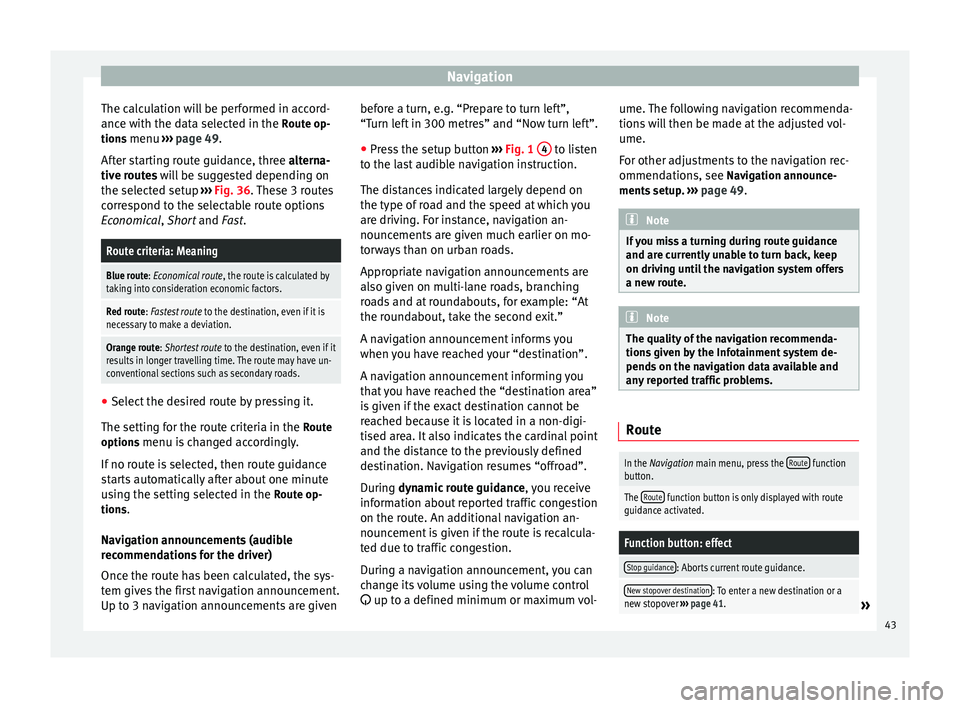
er starting route guidance, three
alterna-
tive routes will be suggested depending on
the selected setup ››› Fig. 36. These 3 routes
correspond to the selectable route options
Economical
, Short and Fast.
Route criteria: Meaning
Blue route: Economical route, the route is calculated by taking into consideration economic factors.
Red route: Fastest route to the destination, even if it is
necessary to make a deviation.
Orange route: Shortest route to the destination, even if it
results in longer travelling time. The route may have un-
conventional sections such as secondary roads. ●
Select the desired route by pressing it.
The setting for the route criteria in the Route
options menu is changed accordingly.
If no route is selected, then route guidance
starts automatically after about one minute
using the setting selected in the Route op-
tions .
Navigation announcements (audible
recommendations for the driver)
Once the route has been calculated, the sys-
tem gives the first navigation announcement.
Up to 3 navigation announcements are given before a turn, e.g. “Prepare to turn left”,
“Turn left in 300 metres” and “Now turn left”.
● Press the setup button ››› Fig. 1 4 to listen
to the last audible navigation instruction.
The distances indicated largely depend on
the type of road and the speed at which you
are driving. For instance, navigation an-
nouncements are given much earlier on mo-
torways than on urban roads.
Appropriate navigation announcements are
also given on multi-lane roads, branching
roads and at roundabouts, for example: “At
the roundabout, take the second exit.”
A navigation announcement informs you
when you have reached your “destination”.
A navigation announcement informing you
that you have reached the “destination area”
is given if the exact destination cannot be
reached because it is located in a non-digi-
tised area. It also indicates the cardinal point
and the distance to the previously defined
destination. Navigation resumes “offroad”.
During dynamic route guidance
,
y
ou receive
information about reported traffic congestion
on the route. An additional navigation an-
nouncement is given if the route is recalcula-
ted due to traffic congestion.
During a navigation announcement, you can
change its volume using the volume control
up to a defined minimum or maximum vol- ume. The following navigation recommenda-
tions will then be made at the adjusted vol-
ume.
For other adjustments to the navigation rec-
ommendations, see Navigation announce-
ments
setup. ››› page 49. Note
If you miss a turning during route guidance
and are currently unable to turn back, keep
on driving until the navigation system offers
a new route. Note
The quality of the navigation recommenda-
tions given by the Infotainment system de-
pends on the navigation data available and
any reported traffic problems. Route
In the Navigation main menu, press the
Route function
button.
The Route function button is only displayed with route
guidance activated.
Function button: effect
Stop guidance: Aborts current route guidance.
New stopover destination: To enter a new destination or a
new stopover ››› page 41.» 43