2014 Seat Leon 5D USB
[x] Cancel search: USBPage 7 of 64
Introduction
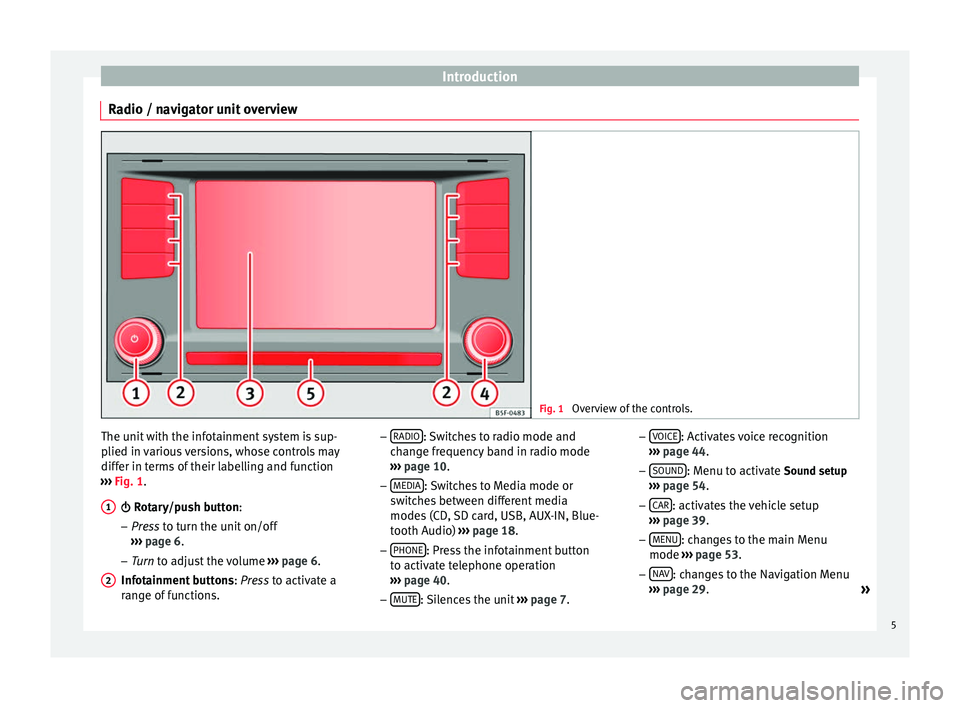
Radio / navigator unit overview Fig. 1
Overview of the controls. The unit with the infotainment system is sup-
plied in various versions, whose controls may
differ in terms of their labelling and function
››› Fig. 1
.
Rotary/push button:
– Pr
ess to turn the unit on/off
››
› page 6.
– Tur
n to adjust the volume ››
› page 6.
Infotainment buttons : Press to activate a
ran
ge of functions.
1
2 –
RADIO : Switches to radio mode and
change frequency band in radio mode
››› page 10
.
– MEDIA : Switches to Media mode or
switches between different media
modes (CD, SD card, USB, AUX-IN, Blue-
tooth Audio) ››› page 18.
– PHONE : Press the infotainment button
to activate telephone operation
››› page 40
.
– MUTE : Silences the unit
››› page 7. –
VOICE : Activates voice recognition
››› page 44
.
– SOUND : Menu to activate Sound setup
››› page 54
.
– CAR : activates the vehicle setup
››› page 39 .
– MENU : changes to the main Menu
mode ››› page 53 .
– NA
V : changes to the Navigation Menu
››› page 29
.
»
5
Page 15 of 64
Audio modeFunction button
View: effect
Station info: The radio text and slide show are displayed
instead of the stored station buttons in the lower half of
the screen.
Radio text: The Radio text is displayed instead of the stor-
ed station buttons in the lower half of the screen.
Presentation: The slide show is displayed instead of the
station buttons in the lower half of the screen. Function
called Slideshow; the icon ››› Fig. 13 will appear in the
list of DAB stations. Note
The radio stations are responsible for the
content broadcast. Stored station buttons
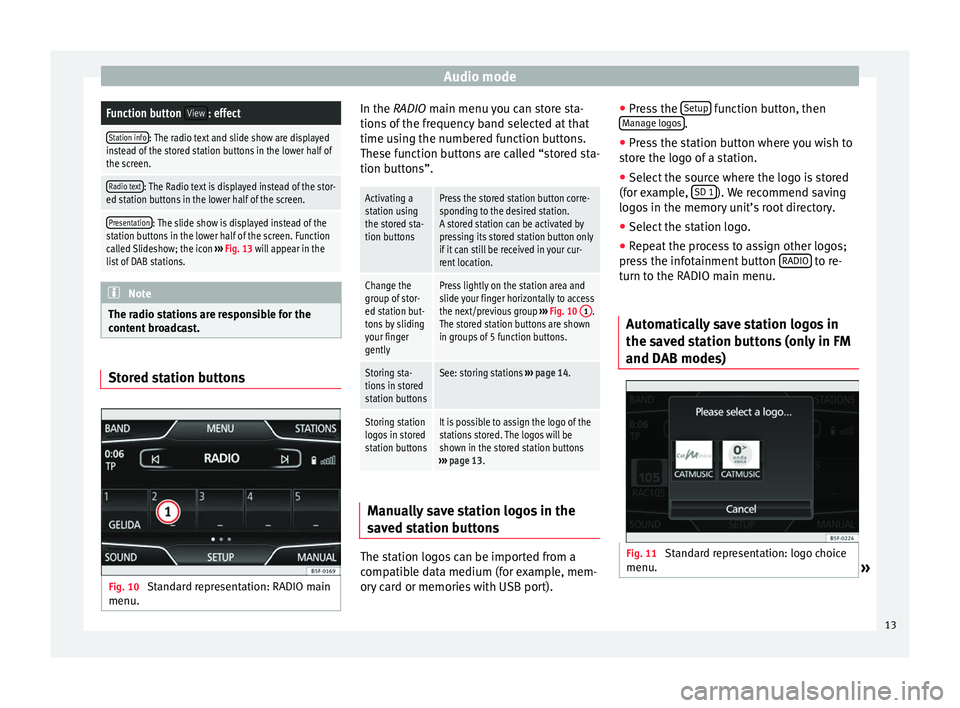
Fig. 10
Standard representation: RADIO main
menu. In the RADIO main menu you can store sta-
tions of the frequency band selected at that
time using the numbered function buttons.
These function buttons are called “stored sta-
tion buttons”.
Activating a
station using
the stored sta-
tion buttonsPress the stored station button corre-
sponding to the desired station.
A stored station can be activated by
pressing its stored station button only
if it can still be received in your cur-
rent location.
Change the
group of stor-
ed station but-
tons by sliding
your finger
gentlyPress lightly on the station area and
slide your finger horizontally to access
the next/previous group
››› Fig. 10 1
.
The stored station buttons are shown
in groups of 5 function buttons.
Storing sta-
tions in stored
station buttonsSee: storing stations ››› page 14.
Storing station
logos in stored
station buttonsIt is possible to assign the logo of the
stations stored. The logos will be
shown in the stored station buttons
››› page 13. Manually save station logos in the
saved station buttons
The station logos can be imported from a
compatible data medium (for example, mem-
ory card or memories with USB port).●
Press the Setup function button, then
Manage logos .
● Press the station button where you wish to
store the logo of a station.
● Select the source where the logo is stored
(for example, SD 1 ). We recommend saving
logos in the memory unit’s root directory.
● Select the station logo.
● Repeat the process to assign other logos;
press the infotainment button RADIO to re-
turn to the RADIO main menu.
Automatically save station logos in
the saved station buttons (only in FM
and DAB modes) Fig. 11
Standard representation: logo choice
menu. » 13
Page 26 of 64
Audio mode
● Start playback of the external audio source.
● In the main MEDIA
menu, press the SOURC E›››
Fig. 21 function button and A
UX .
The output volume
of
the c
onnected external
audio source should be adjusted to the vol-
ume of the other audio sources ››› page 54.
Things to note when operating an external
audio source using the AUX-IN multimedia
ActionEffect
Selection of another audio
source on the radio-navi-
gation system.The external audio source
continues to run in the
background.
Stopping playback on the
external audio source.The infotainment system
remains in the AUX menu.
Disconnecting the plug
from the AUX-IN multime-
dia socket.The infotainment system
changes, and plays the
last media source that was
active. Note
● Please read and observe the external audio
source manufacturer operating manual.
● Interference noise may be heard if the ex-
ternal audio source is powered from the 12-
volt power socket of the vehicle. MEDIA-IN multimedia interface
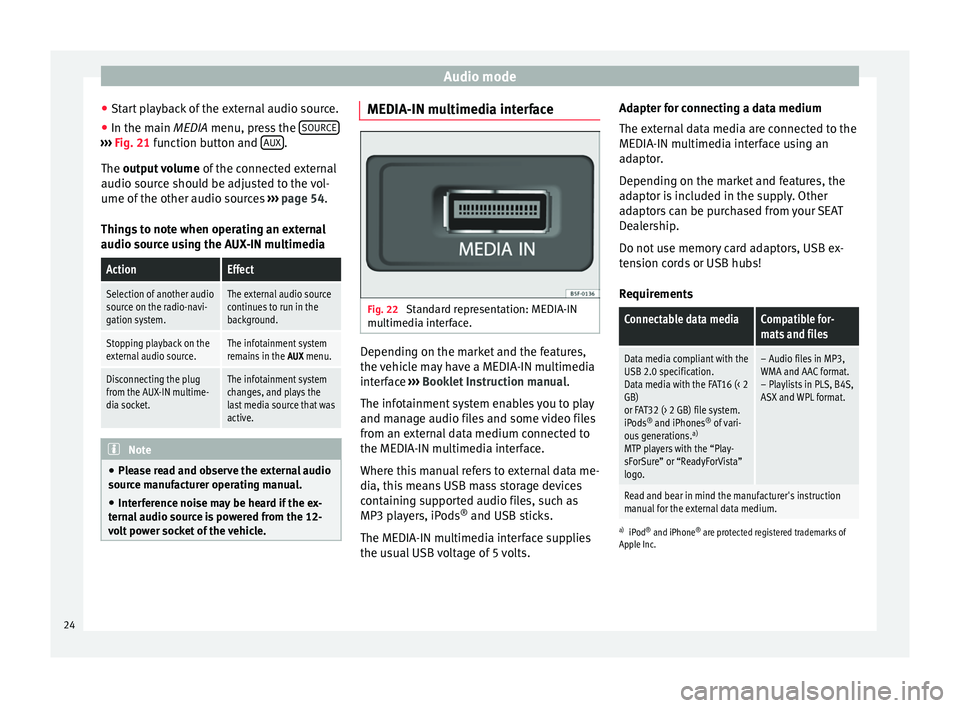
Fig. 22
Standard representation: MEDIA-IN
multimedia interface. Depending on the market and the features,
the vehicle may have a MEDIA-IN multimedia
interface
›››
Booklet Instruction manual.
The infotainment system enables you to play
and manage audio files and some video files
from an external data medium connected to
the MEDIA-IN multimedia interface.
Where this manual refers to external data me-
dia, this means USB mass storage devices
containing supported audio files, such as
MP3 players, iPods ®
and USB sticks.
The MEDIA-IN multimedia interface supplies
the usual USB voltage of 5 volts. Adapter for connecting a data medium
The external data media are connected to the
MEDIA-IN multimedia interface using an
adaptor.
Depending on the market and features, the
adaptor is included in the supply. Other
adaptors can be purchased from your SEAT
Dealership.
Do not use memory card adaptors, USB ex-
tension cords or USB hubs!
Requirements
Connectable data mediaCompatible for-
mats and files
Data media compliant with the
USB 2.0 specification.
Data media with the FAT16 (< 2
GB)
or FAT32 (> 2 GB) file system.
iPods ®
and iPhones ®
of vari-
ous generations. a)
MTP players with the “Play-
sForSure” or “ReadyForVista”
logo.– Audio files in MP3,
WMA and AAC format.
– Playlists in PLS, B4S,
ASX and WPL format.
Read and bear in mind the manufacturer's instruction
manual for the external data medium.
a) iPod ®
and iPhone ®
are protected registered trademarks of
Apple Inc.
24
Page 27 of 64
Audio mode
Notes and restrictions
The infotainment system enables you to view,
play and manage compatible audio files
through the MEDIA-IN multimedia interface.
In the case of MTP players and depending on
the battery charge and the quantity of data, it
may take a few minutes for them to be ready
for use.
External hard discs with a capacity greater
than 32 GB must, in certain circumstances,
be reformatted to the FAT32 file system. On
the Internet, for example, you will find pro-
grams and instructions for this.
If the data carrier has several partitions, only
the first partition will be recognised (except
with USB, in which the first 2 will be visible).
Take into account all other instructions and
limitations regarding requirements for media
sources.
Connecting and disconnecting an external
data medium
● Connect a suitable adaptor to the MEDIA-IN
multimedia interface.
● Connect the external data medium to the
MEDIA-IN multimedia interface via the adapt-
er.
● If necessary, switch on the external data
medium or select the appropriate data mode.
Regardless of any indications to the contrary
that there may be on the matter, the external data medium can be disconnected from the
MEDIA-IN multimedia interface at any time
without losing the data.
When disconnecting an iPod
®
or iPhone ®
from the adaptor, take care to press the two
unlocking tabs on the narrow sides of the
iPod ®
connector simultaneously.
Operating the infotainment system
An external data medium that is correctly
connected to the MEDIA-IN multimedia inter-
face can be operated using the infotainment
system.
● In the main MEDIA
menu, press the SOURC E ›››
Fig. 21 function button and select USB or
iPod ...
››› page 24 .
Other oper ation
s with the external data medi-
um (changing tracks, selecting tracks and ac-
tivating playback modes) are carried out as
described in the corresponding chapters.
iPod ®
and iPhone ®
If you connect an iPod ®
or iPhone ®
, the top
selection level will display the specific lists of
the iPod ( playlists, artist, album,
title, podcasts etc.). The appearance of
these lists is similar to that of the media cen-
tre , and they are managed as described.
Music management is blocked so it can be
managed with the iPod ®
or iPhone ®
that is
connected. The playback volume
of some iPods®
or
iPhones ®
can adapt to the volume of the oth-
er audio sources ››› page 24.
Files from iPods ®
or iPhones ®
cannot be im-
port
ed.
Possible error messages after connecting an ex-
ternal data medium
Error mes-
sageCauseProcedure
Device not
supportedThe external
data medium
cannot be
played– Consult the list of
supported devices
on the web.
– When possible,
update the software
of the external data
medium.
Unit not op-
erationalCommunication
interrupted.Check the connec-
tion and make sure
the external data
medium is working
correctly.
Due to the large number of different data media availa-
ble, it is not possible to guarantee fault-free operation of
all functions described here. Note
● The connecting adaptor used must not be
crushed or bent sharply. This could damage
the adaptor and cause operational faults.
● To play music, do not simultaneously link
the external media player to the infotainment » 25
Page 28 of 64
Audio mode
system using Bluetooth and the MEDIA-IN
multimedia interface, as this can cause play-
back limitations.
● If a connected device is not recognised, un-
plug all connected devices and reconnect the
device. External data support in MEDIA-IN*
port
Only supported audio files can be displayed
and played. Other files are ignored.
Playback starts automatically if there are
readable audio files stored on the data sup-
port.
End connection
The connected data support
must be pre-
pared for disconnection before it can be re-
moved.
● Press the infotainment button MENU ; then,
press Settings to open the menu System set-
tings ››› page 53 .
● Pr e
ss the Safely remove USB data stick function
button. After removing the data stick correct-
ly from the system, the function button be-
comes inactive (grey).
● The data media may now be disconnected. Illegible data medium
If the data on a connected support device
cannot be read, the warning
No playable files
is displayed. Note
Read and bear in mind the manufacturer's in-
struction manual for the external data medi-
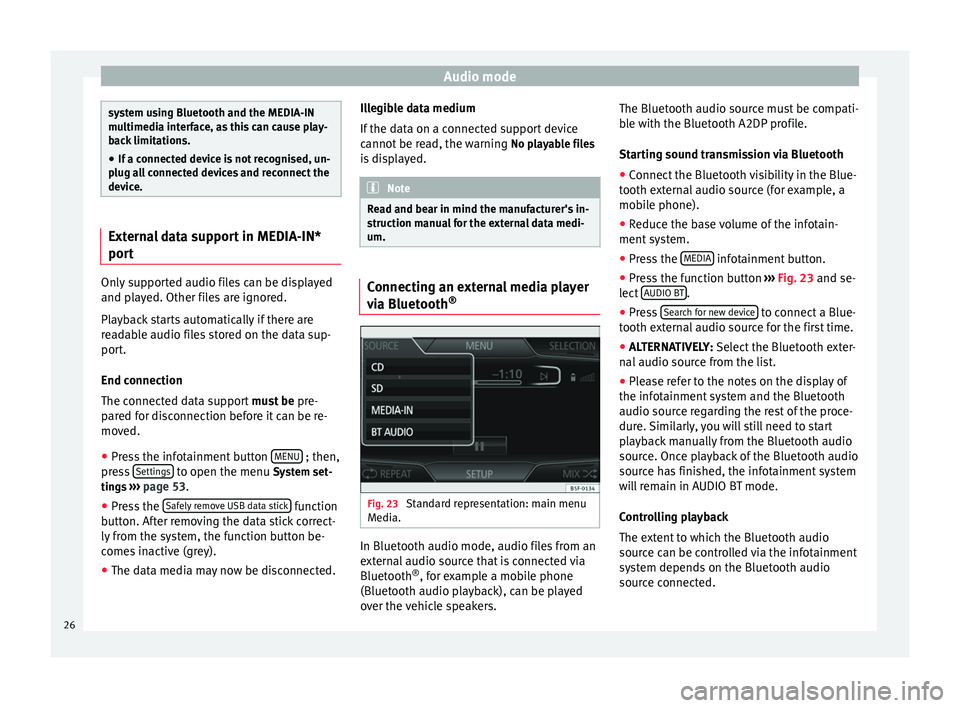
um. Connecting an external media player
via Bluetooth
® Fig. 23
Standard representation: main menu
Media. In Bluetooth audio mode, audio files from an
external audio source that is connected via
Bluetooth
®
, for example a mobile phone
(Bluetooth audio playback), can be played
over the vehicle speakers. The Bluetooth audio source must be compati-
ble with the Bluetooth A2DP profile.
Starting sound transmission via Bluetooth
● Connect the Bluetooth visibility in the Blue-
tooth external audio source (for example, a
mobile phone).
● Reduce the base volume of the infotain-
ment system.
● Press the MEDIA infotainment button.
● Press the function button ››› Fig. 23 and se-
l ect
AUDIO BT .
● Press Search for new device to connect a Blue-
tooth external audio source for the first time.
● ALTERNATIVELY: Select the Bluetooth exter-
n al
audio source from the list.
● Please refer to the notes on the display of
the infotainment system and the Bluetooth
audio source regarding the rest of the proce-
dure. Similarly, you will still need to start
playback manually from the Bluetooth audio
source. Once playback of the Bluetooth audio
source has finished, the infotainment system
will remain in AUDIO BT mode.
Controlling playback
The extent to which the Bluetooth audio
source can be controlled via the infotainment
system depends on the Bluetooth audio
source connected.
26
Page 55 of 64
Setup
Setup
Menu and system setting
(SETUP) Introduction Depending on the country, the device and
the features of the vehicle, some settings
may be different.
Activating the main menu.
● Press the infotainment button MENU to
open the main menu System setup (SETUP).
● Press the function button SETUP to access
the system setup.
Menu and system setup (SETUP) Activating the main menu.
● Press the infotainment button MENU to
open the main menu System setup (SETUP)
.
● Press the function button SETUP to access
the system setup.Function button: effect
Sound setup: adjust volume and sound setup
››› page 54.
Screen: complete the touch screen setting ››› page 53.
Function button: effect
Date and time: ››› Booklet Instruction Manual, chap-
ter System setup (CAR)
Idioma/Language: set the desired language for the texts
and announcements.
Keyboard: select the desired keyboard (ABC or QWERTY).
Additional keyboard languages: select an additional lan-
guage for the keyboard.
Units: ››› Booklet Instruction Manual, chapter System
setup (CAR)
Voice control: adjust the voice control setup ››› page 54.
Safely remove SD card 1, Safely remove SD card 2: eject the de-
sired memory card from the system. After ejecting the
memory card, the function button will be shown in grey.
Safely remove the USB data medium: eject the USB data medi-
um from the system.
Factory settings: ››› page 54.
Bluetooth: adjust the Bluetooth setup ››› page 51.
System information: indication of the system information
(device number, hardware and software version).
Copyright Note
For all the infotainment systems to work
properly, it is important to set the correct
time and date in the vehicle. Screen settings
Activating the main menu.
●
Press the infotainment button MENU to
open the main menu System setup (SETUP).
● Pr e
ss the function button SETUP to access
the system setup.
● Press the Screen function button. When you
close a menu, the changes will take effect au-
tomatically.
Summary of the indications and function
buttons
Function button: effect
Display switch off in 10 seconds: with this function activa-
ted, if you do not do anything with the infotainment sys-
tem, the screen will turn off automatically after approxi-
mately 10 seconds. When you touch the screen or press
an infotainment button, the screen will light up again.
Brightness: select the brightness level of the screen.
Acoustic touchscreen feedback: pressing the function but-
ton on the screen activates a feedback tone.
Animation on approach: the proximity sensors are activa-
ted. When activated, certain function buttons will be dis-
played upon placing your hand close to the touch
screen.
Show clock in standby mode: in standby mode the current
time will be shown on the display of the infotainment
system. 53