2014 Peugeot Boxer ABS
[x] Cancel search: ABSPage 71 of 240
69
3
EASE OF USE
and
COMFORT
Seats
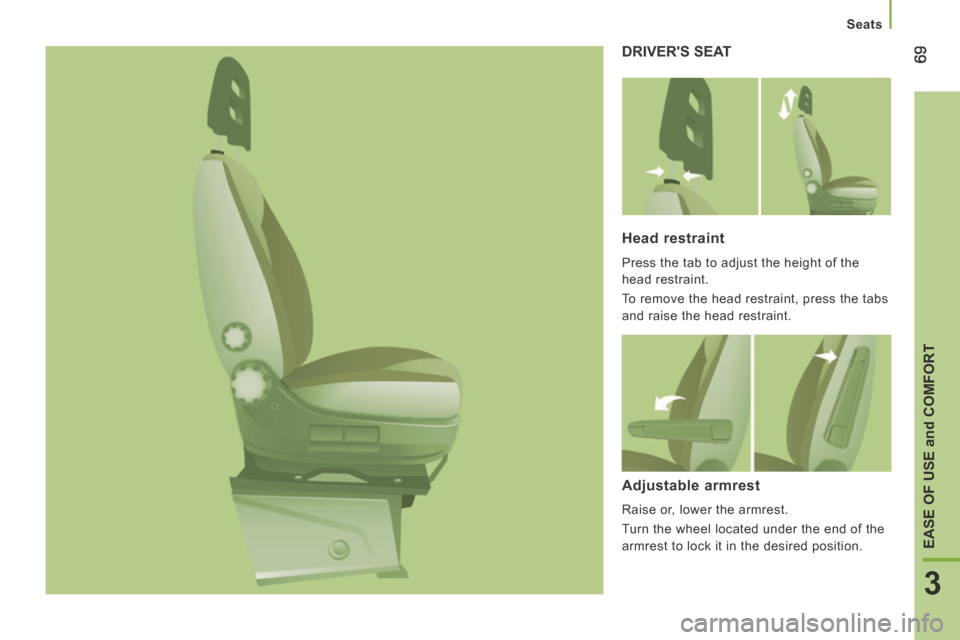
DRIVER'S SEAT
Head restraint
Press the tab to adjust the height of the
head restraint.
To remove the head restraint, press the tabs
and raise the head restraint.
Adjustable armrest
Raise or, lower the armrest.
Turn the wheel located under the end of the
armrest to lock it in the desired position.
Page 98 of 240
96
Driving safely
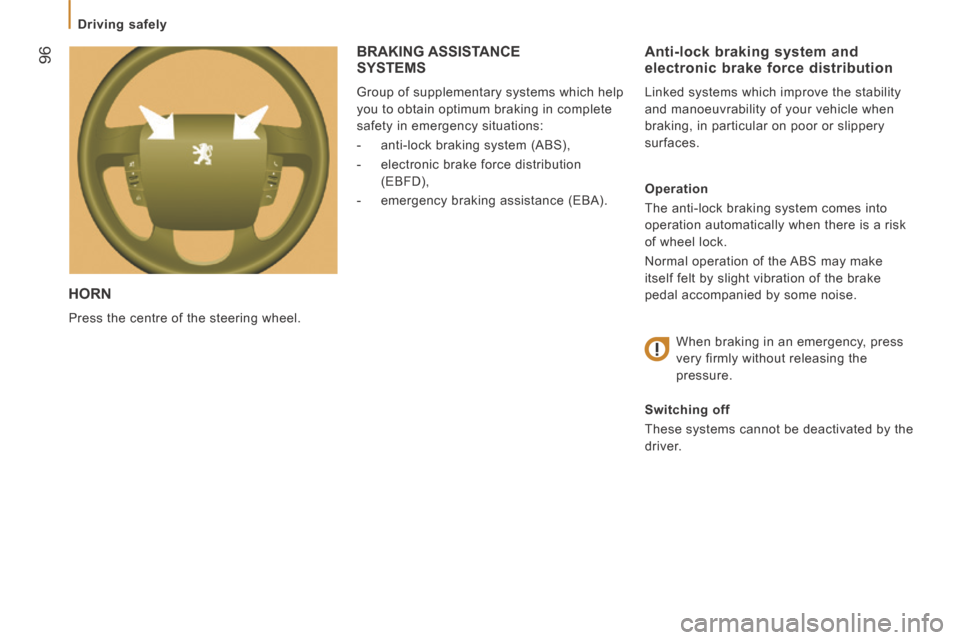
HORN
Press the centre of the steering wheel.
Anti-lock braking system and electronic brake force distribution
Linked systems which improve the stability
and manoeuvrability of your vehicle when
braking, in particular on poor or slippery
surfaces.
Operation
The anti-lock braking system comes into
operation automatically when there is a risk
of wheel lock.
Normal operation of the ABS may make
itself felt by slight vibration of the brake
pedal accompanied by some noise.
When braking in an emergency, press
very firmly without releasing the
pressure.
Switching off
These systems cannot be deactivated by the
driver.
BRAKING ASSISTANCE SYSTEMS
Group of supplementary systems which help
you to obtain optimum braking in complete
safety in emergency situations:
- anti-lock braking system (ABS),
- electronic brake force distribution (EBFD),
- emergency braking assistance (EBA).
Page 99 of 240
97
5
Driving safely
SAFETY
Good practice
The ABS system does not provide shorter
braking distances. On very slippery surfaces
(black ice, oil...) the ABS can extend braking
distances. For emergency braking, press the
brake pedal hard and do not release it, even
on a slipper surface; you will then be able to
steer the vehicle and avoid an obstacle.
When replacing wheels (tyres and
rims), ensure that they conform to the
manufacturer's recommendations. Emergency braking assistance
System which, in an emergency, enables
you to obtain the optimum braking pressure
more quickly, thus reducing the stopping
distance.
Operation
It is triggered by the speed at which the
brake pedal is pressed.
The effect of this is a reduction in the
resistance of the pedal and an increase in
braking efficiency.
Switching off
This system cannot be deactivated by the
driver.
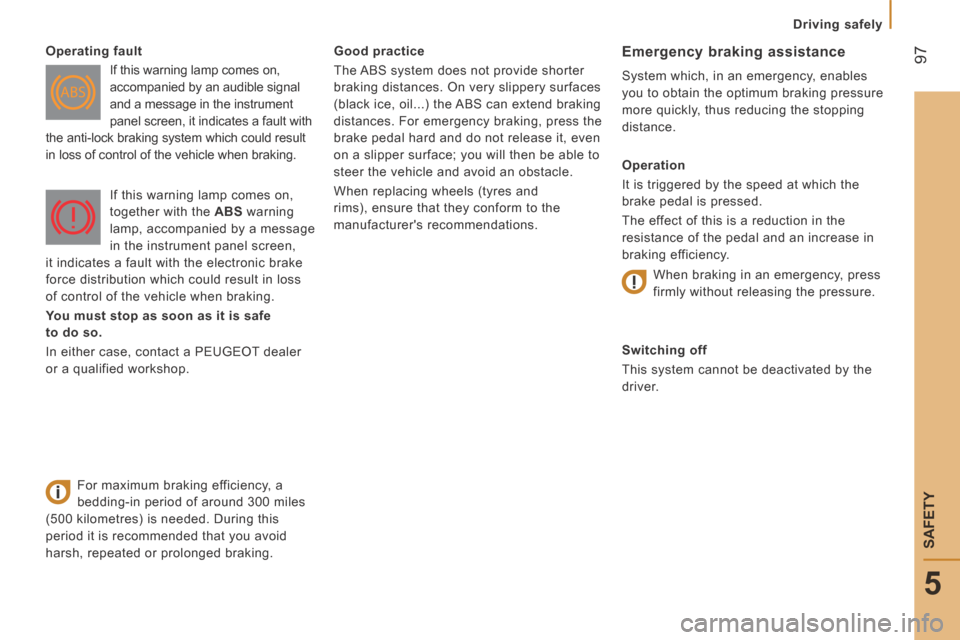
Operating fault
If this warning lamp comes on,
accompanied by an audible signal
and a message in the instrument
panel screen, it indicates a fault with
the anti-lock braking system which could result
in loss of control of the vehicle when braking.
For maximum braking efficiency, a
bedding-in period of around 300 miles
(500 kilometres) is needed. During this
period it is recommended that you avoid
harsh, repeated or prolonged braking. If this warning lamp comes on,
together with the
ABS warning
lamp, accompanied by a message
in the instrument panel screen,
it indicates a fault with the electronic brake
force distribution which could result in loss
of control of the vehicle when braking.
You must stop as soon as it is safe
to do so.
In either case, contact a PEUGEOT dealer
or a qualified workshop. When braking in an emergency, press
firmly without releasing the pressure.
Page 119 of 240
11 7
6
Transport solutions
ACCESSORIES
Distribution of loads: distribute the load in
the trailer so that the heaviest objects are as
close as possible to the axle and the nose
weight is close to the maximum authorised
without, however, exceeding it.
Driving advice
A towed vehicle must free wheel: gearbox in
neutral.
Cooling: towing a trailer on a slope
increases the coolant temperature.
As the fan is electrically controlled, its
cooling capacity is not dependent on the
engine speed.
On the contrary, use a high gear to lower the
engine speed and reduce your speed.
In all cases, pay attention to the coolant
temperature. Tyres: check the tyre pressures of the
towing vehicle and of the trailer, observing
the recommended pressures.
Fitting a towbar
We recommend the use of genuine
PEUGEOT towbars and their harnesses,
which have been tested and approved from
the design stage of your vehicle and that
the fitting of this equipment is entrusted to a
PEUGEOT dealer.
These genuine towbars are compatible with
the operation of the rear parking sensors
and the reversing camera, if fitted to your
vehicle.
If this equipment is not fitted by a PEUGEOT
dealer, it must be fitted in line with the
manufacturer's instructions.
Good practice
In certain cases of particularly arduous
use (towing the maximum load up a steep
slope in high temperatures), the engine
automatically limits its power. In this
case, the automatic cutting off of the air
conditioning allows the engine power to be
recovered.
If the coolant temperature
warning lamp comes on, stop the
vehicle and switch off the engine
as soon as possible.
Refer to the "Checks - Levels and
checks" section.
Brakes: towing increases the braking
distance. Drive at a moderate speed,
change down early and brake gradually. Side wind: sensitivity to side wind is
increased. Drive smoothly and at a
moderate speed.
ABS: the system only controls the vehicle,
not the trailer.
Rear parking sensors: the system does not
operate while the vehicle is towing.
Refer to the "Technical data -
Identification markings" section.
Page 137 of 240
135
QUICK HELP
8
Failed fuse
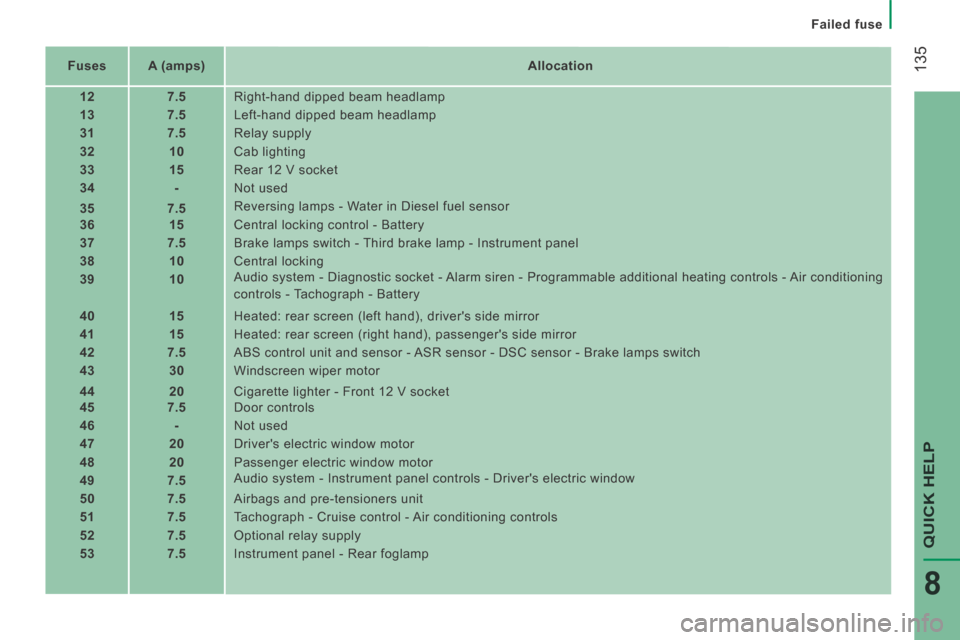
Fuses A (amps) Allocation
12 7.5 Right-hand dipped beam headlamp
13 7.5 Left-hand dipped beam headlamp
31 7.5 Relay supply
32 10 Cab lighting
33 15 Rear 12 V socket
34 - Not used
35 7.5 Reversing lamps - Water in Diesel fuel sensor
36 15 Central locking control - Battery
37 7.5 Brake lamps switch - Third brake lamp - Instrument panel
38 10 Central locking
39 10 Audio system - Diagnostic socket - Alarm siren - Programmable additional heating controls - Air conditioning
controls - Tachograph - Battery
40 15 Heated: rear screen (left hand), driver's side mirror
41 15 Heated: rear screen (right hand), passenger's side mirror
42 7.5 ABS control unit and sensor - ASR sensor - DSC sensor - Brake lamps switch
43 30 Windscreen wiper motor
44 20 Cigarette lighter - Front 12 V socket
45 7.5 Door controls
46 - Not used
47 20 Driver's electric window motor
48 20 Passenger electric window motor
49 7.5 Audio system - Instrument panel controls - Driver's electric window
50 7.5 Airbags and pre-tensioners unit
51 7.5 Tachograph - Cruise control - Air conditioning controls
52 7.5 Optional relay supply
53 7.5 Instrument panel - Rear foglamp
Page 139 of 240
137
QUICK HELP
8
Failed fuse
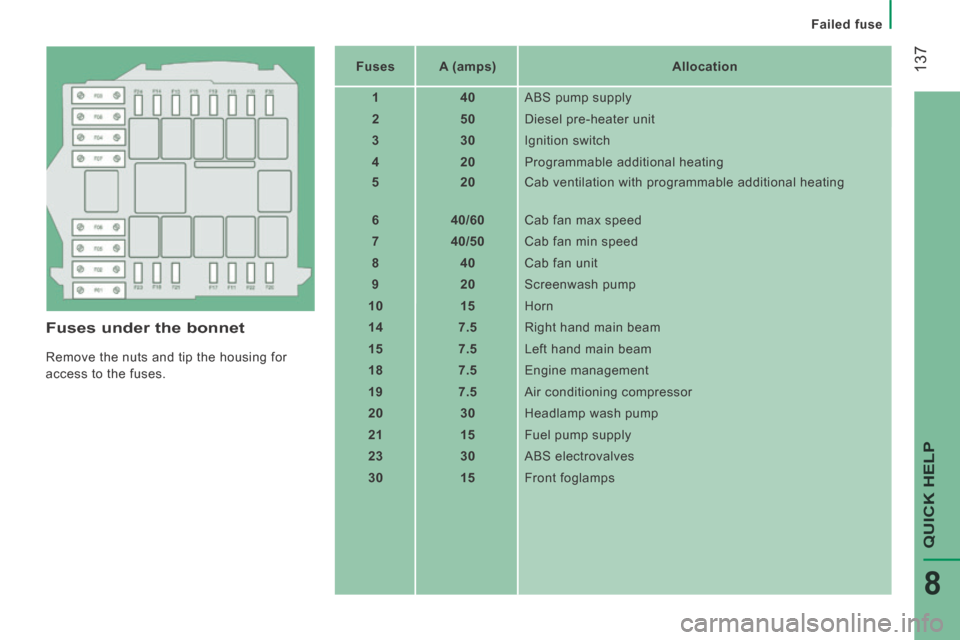
Fuses under the bonnet
Remove the nuts and tip the housing for
access to the fuses. Fuses
A (amps) Allocation
1 40 ABS pump supply
2 50 Diesel pre-heater unit
3 30 Ignition switch
4 20 Programmable additional heating
5 20 Cab ventilation with programmable additional heating
6 40/60 Cab fan max speed
7 40/50 Cab fan min speed
8 40 Cab fan unit
9 20 Screenwash pump
10 15 Horn
14 7.5 Right hand main beam
15 7.5 Left hand main beam
18 7.5 Engine management
19 7.5 Air conditioning compressor
20 30 Headlamp wash pump
21 15 Fuel pump supply
23 30 ABS electrovalves
30 15 Front foglamps
Page 145 of 240
143
QUICK HELP
8
Failed bulb or lamp
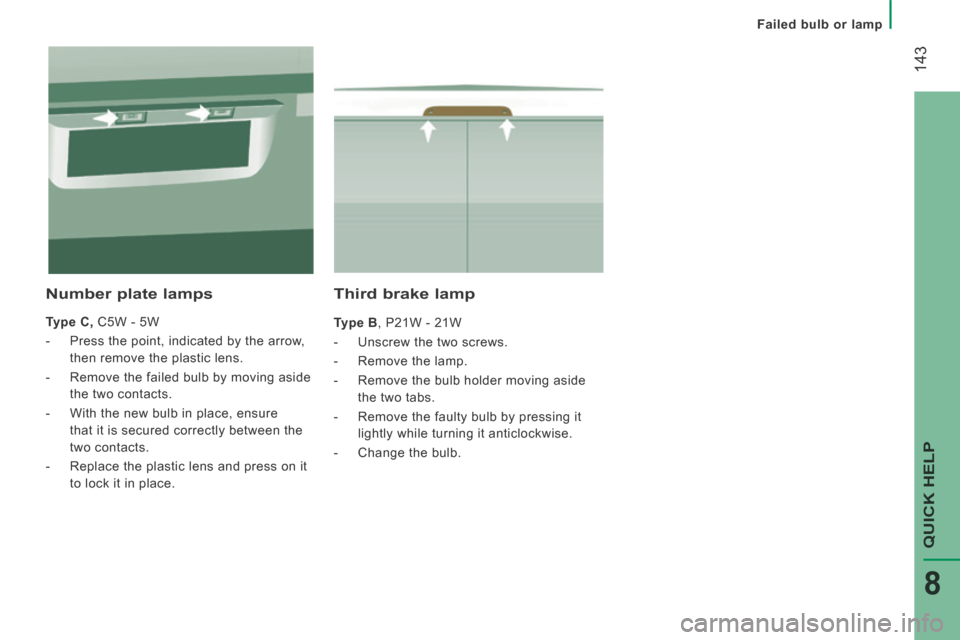
Third brake lamp
Type B , P21W - 21W
- Unscrew the two screws.
- Remove the lamp.
- Remove the bulb holder moving aside the two tabs.
- Remove the faulty bulb by pressing it lightly while turning it anticlockwise.
- Change the bulb.
Number plate lamps
Type C, C5W - 5W
- Press the point, indicated by the arrow, then remove the plastic lens.
- Remove the failed bulb by moving aside the two contacts.
- With the new bulb in place, ensure that it is secured correctly between the
two contacts.
- Replace the plastic lens and press on it to lock it in place.