2014 Peugeot 508 RXH headlamp
[x] Cancel search: headlampPage 4 of 338

.
.
508RXH_en_Chap00a_sommaire_ed01-2014
Instrument panel 39
Indicator and warning lamps
4
1
ga
uges and indicators
5
2
tr
ip computer
5
7
to
uch screen
6
1
Setting the date and time
6
4
MonitoringOver view
Remote control key 6
5
Alarm
75
el
ectric windows
7
7
Boot
79
Motorised tailgate
8
0
Panoramic sunroof
8
3
Fuel tank
8
4
Diesel misfuel prevention
8
5
Access
Front seats 87
R ear seats
9
1
Mirrors
93
Steering wheel adjustment
9
5
Interior fittings
9
6
Boot fittings
9
9
Heating and Ventilation
1
04
Dual-zone digital air conditioning
1
06
Quad-zone digital air conditioning
1
09
Front demist - defrost
1
14
Front demist - defrost
1
14
Rear screen demist - defrost
1
14
Programmable Heating
/ Ventilation
1
15
Comfort
electric parking brake 1 17
ge
ar shift indicator
1
23
ele
ctronic gearbox
1
24
Hill start assist
1
28
Head-up display
1
29
Blind spot sensors
1
31
Speed limiter
1
35
Cruise control
1
37
Parking sensors
1
39
Reversing camera
1
41
Driving
Lighting controls 142
L
eD l
amps
1
45
Automatic illumination of headlamps
1
47
Headlamp adjustment
1
50
Additional headlamps
1
51
Wiper controls
1
52
Automatic rain sensitive wipers
1
54
Courtesy lamps
1
56
Interior mood lighting
1
57
Visibility
Hybrid system
Presentation
12
Starting / switching off
1
5
Ready lamp
1
9
HYbrid4 mode selector
1
9
en
ergy consumption / generation indicator
2
2
Display of hybrid power flow
2
3
HYbrid4 frequently asked questions
2
6
ec
o off
2
9
ec
o-driving
30
Consumption
32
High voltage battery
3
3
Car washing machine or tunnel
3
7
Recovery on a flat-bed
3
8
Contents
Page 32 of 338

30
508RXH_en_Chap00c_systeme-hybride_ed01-2014
eco-driving
eco-driving is a range of everyday practices that allow the motorist to optimise their fuel consumption and CO2 emissions.
Eco-driving suited to your
HYbrid4 vehicle
use gear selector position A, as this
optimises gear changes to suit the
circumstances, and the AUTO mode of the
HYbrid4 mode selector.
When moving off, accelerate normally
up to the desired speed ( POWER zone
between 20 and 40 %).
At steady speeds, drive gently with small
movements of the accelerator pedal ( ECO or
CHARGE zone), run in electric mode as often
as possible when driving at low speed.
Anticipate the need to slow down and use
engine braking ( CHARGE zone), so as to
make use of free energy recovery while
keeping light pressure on the accelerator
pedal.
Control the use of your
electrical equipment
Before moving off, if the passenger
compartment is too warm, ventilate it by
opening the windows and air vents before
using the air conditioning.
Above 30 mph (50 km/h), close the windows
and leave the air vents open.
Remember to make use of equipment that can
help keep the temperature in the passenger
compartment down (sun roof and window
blinds...).
Switch off the air conditioning, unless it has
automatic digital regulation, as soon as the
desired temperature is attained.
Switch off the demisting and defrosting
controls, if not automatic.
Switch off the heated seat as soon as possible.
Switch off the headlamps and front foglamps
when the level of light does not require
their
use. Avoid running the Diesel engine when
stationary, particularly in winter; your vehicle
will warm up much faster while driving.
As a passenger, if you avoid connecting
your multimedia devices (film, music, video
game...), you will contribute towards limiting
the consumption of electrical energy, and so
of fuel.
Disconnect your portable devices before
leaving the vehicle.
Hybrid system
Page 42 of 338

40
1
2
2
2
3
3
3
3
2
3
3
Instrument panel screen
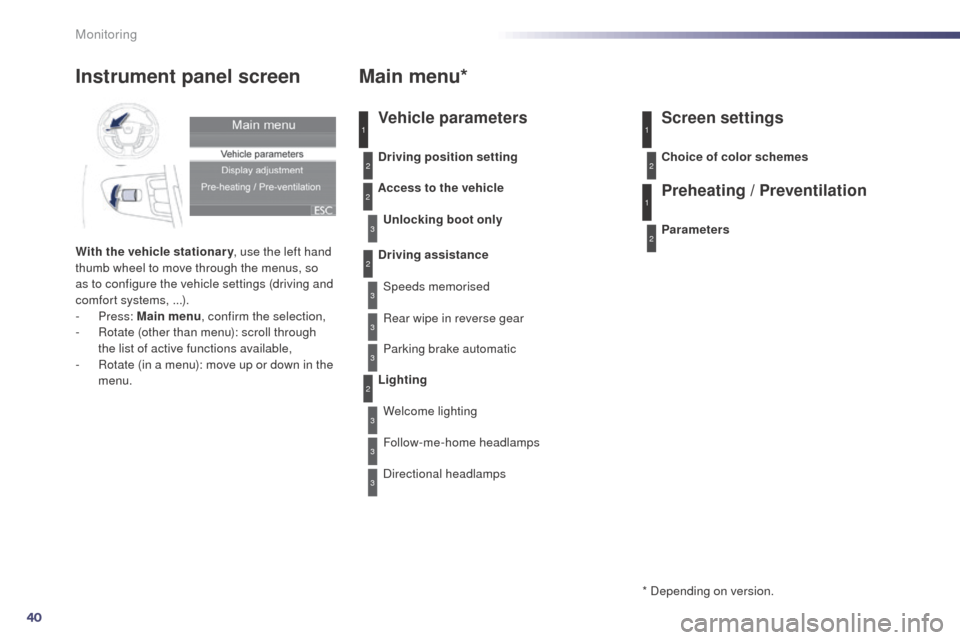
With the vehicle stationary, use the left hand
thumb wheel to move through the menus, so
as to configure the vehicle settings (driving and
comfort systems, ...).
-
Press: Main menu , confirm the selection,
-
R
otate (other than menu): scroll through
the list of active functions available,
-
R
otate (in a menu): move up or down in the
menu.
Main menu*
Vehicle parameters Screen settings
Preheating / Preventilation
Driving position setting
Unlocking boot only
Driving assistance
Access to the vehicle
Speeds memorised
Rear wipe in reverse gear
Parking brake automatic
Lighting
Welcome lighting
Follow-me-home headlamps
Directional headlamps Parameters Choice of color schemes
3
1
2
1
2
* Depending on version.
Monitoring
Page 44 of 338

42
Operation indicator lamps
If one of the following indicator lamps comes on in the instrument panel and/or instrument panel screen, this confirms that the corresponding system has come into operation.
Warning / indicator lamp State Cause Action / Observations
Left-hand
direction indicato rflashing with buzzer.
th
e lighting stalk is pushed down.
Right-hand
direction indicator flashing with buzzer.
th
e lighting stalk is pushed up.
Sidelamps fixed.
th
e lighting stalk is in the
"Sidelamps" position.
Dipped beam
headlamps fixed.
th
e lighting stalk is in the "Dipped
beam headlamps" position.
Main beam
headlamps fixed.
th
e lighting stalk is pulled towards
you. Pull the stalk to return to dipped beam headlamps.
Ready
fixed.
th
e vehicle is ready to move off; you
can press the accelerator. It comes on once high voltage is established in the
vehicle.
Rear foglamps fixed.
th
e rear foglamps are switched on.
tu
rn the ring on the stalk rear wards to switch off the
rear foglamps.
For more information on the lighting controls, refer to the corresponding section. Adaptive lighting
fixed.
th
e lighting stalk has been pulled
towards you and the button has been
pressed.
Its indicator lamp is on.
th
e camera, located in the interior rear view mirror,
authorises or not switching between main and dipped
beam, depending on the exterior lighting and the
driving conditions.
Pulling the lighting stalk to return to dipped beam.
Monitoring
Page 53 of 338

51
508RXH_en_Chap01_controle-de-marche_ed01-2014
Warning / indicator lamp State Cause Action / Observations
Airbags on temporarily.
th
is lamp comes on for a few
seconds when you turn on the
ignition, then goes off.
th
is lamp should go off when the engine is started.
If it does not go off, contact a P
e
uge
Ot
dealer or a
qualified workshop.
fixed. One of the airbag or seat belt
pretensioner systems has a fault. Have it checked by a P
e
uge
Ot
dealer or a qualified
workshop.
Directional
headlamps flashing.
th
e directional headlamps system
has a fault. Have it checked by a P
e
uge
Ot
dealer or a qualified
workshop.
Seat belt(s)
not fastened
/
unfastened fixed then flashing
accompanied by an
increasing audible
signal. A seat belt has not been fastened or
has been unfastened.
Pull the strap then insert the tongue in the buckle.
Under-inflation fixed.
th
e pressure in one or more wheels
is too low. Check the pressure of the tyres as soon as possible.
th
is check should preferably be carried out when the
tyres are cold.
+ flashing then fixed,
accompanied by the
Service warning lamp.
th
e tyre pressure monitoring system
has a fault or no sensor is detected
on one of the wheels.
un
der-inflation detection is not assured.
Have the system checked by a P
e
uge
Ot
dealer or a
qualified workshop.
1
Monitoring
Page 55 of 338

53
508RXH_en_Chap01_controle-de-marche_ed01-2014
* According to country.
CHECK (vehicle autotest)
Automatic CHECK
With the key in the ignition on position, all of the
warning lamps for the functions tested are displayed.
th
ey are switched off after a few seconds.
At the same time, an automatic CHeC K
(vehicle autotest) is carried out.
In the presence of a fault
A "minor" fault has been detected: the warning
lamp(s) are displayed then go off.
You can start your vehicle; however, contact a
P
e
uge
Ot
dealer or a qualified workshop as
soon as possible.
A "major" fault has been detected: the
associated warning lamps(s) remain on
accompanied by the S
tO
P or S
eR
VIC
e
warning lamp.
Do not start your vehicle.
Call a P
e
uge
Ot
dealer or a qualified
workshop without delay.
Manual CHECK
Pressing the "CHECK" button on the instrument
panel starts the manual CHeC K (vehicle autotest).
th
is function enables you to recall at any time (with
the key in the ignition on position or with the engine
running), the alerts present.
the passenger's airbag deactivated warning
lamp* remains on while the airbag is deactivated.
With the engine running and the vehicle
moving, the instrument panel displays the
warning lamps (in the event of a fault).
If no "major" fault is found, you can start your
vehicle.
Lighting dimmer control
With the headlamps on, press button B to
increase the brightness of the instruments
and controls and the interior mood lighting or
button
A to reduce it.
As soon as the lighting reaches the required
level of brightness, release the button.
1
Monitoring
Page 97 of 338

95
508RXH_en_Chap03_confort_ed01-2014
Automatic day/night model
By means of a sensor, which measures the
light from the rear of the vehicle, this system
automatically and progressively changes
between the day and night uses.
Adjustable mirror providing a central rearward
view.
eq
uipped with an anti-dazzle system, which
darkens the mirror glass and reduces the
nuisance to the driver caused by the sun,
headlamps from other vehicles...
Rear view mirror
Manual day/night model
Adjustment
F Adjust the mirror so that the glass is directed correctly in the "day" position.
Day / night position
F Pull the lever to change to the "night" anti-dazzle position.
F
P
ush the lever to change to the normal
"day" position. In order to ensure optimum visibility
during your manoeuvres, the mirror
lightens automatically when reverse
gear is engaged.
Steering wheel adjustment
F When stationary
, lower the control lever
to release the steering wheel adjustment
mechanism.
F
A
djust the height and reach to suit your
driving position.
F
P
ull the control lever to lock the steering
wheel adjustment mechanism.
As a safety precaution, these
operations should only be carried out
while the vehicle is stationary.
3
Comfort
Page 144 of 338

142
508RXH_en_Chap05_visibilite_ed01-2014
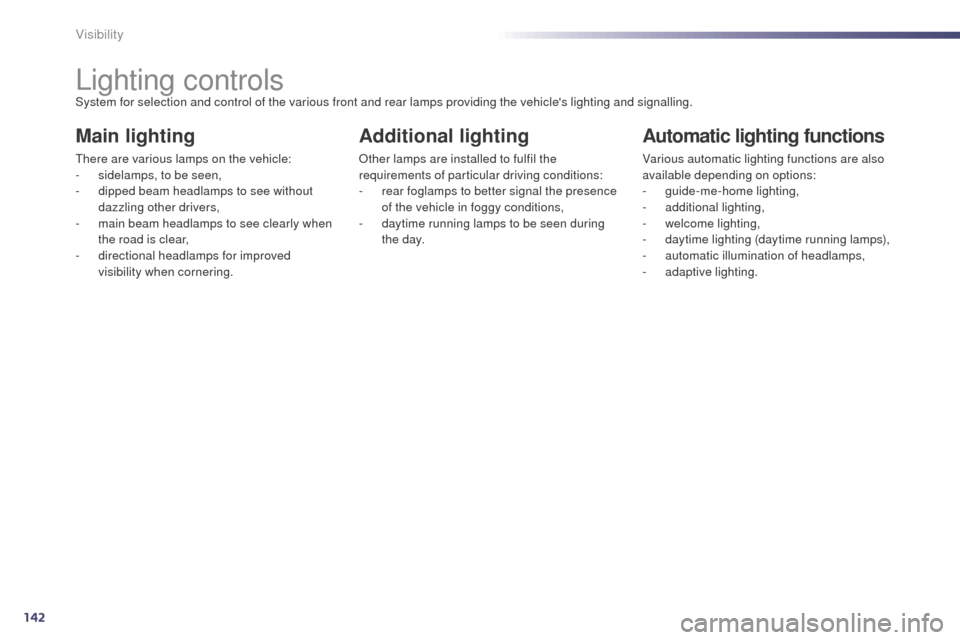
Lighting controlsSystem for selection and control of the various front and rear lamps providing the vehicle's lighting and signalling.
Main lighting
there are various lamps on the vehicle:
- s idelamps, to be seen,
-
d
ipped beam headlamps to see without
dazzling other drivers,
-
m
ain beam headlamps to see clearly when
the road is clear,
-
d
irectional headlamps for improved
visibility when cornering.
Additional lighting
Other lamps are installed to fulfil the
requirements of particular driving conditions:
-
r
ear foglamps to better signal the presence
of the vehicle in foggy conditions,
-
d
aytime running lamps to be seen during
t h e d ay.
Automatic lighting functions
Various automatic lighting functions are also
available depending on options:
-
gu
ide-me-home lighting,
-
a
dditional lighting,
-
w
elcome lighting,
-
d
aytime lighting (daytime running lamps),
-
a
utomatic illumination of headlamps,
-
a
daptive lighting.
Visibility