2014 Peugeot 508 warning light
[x] Cancel search: warning lightPage 85 of 352
3
83
Comfort
Warning triangle (stowing)
Before leaving your vehicle to set up and install the triangle, put on your high visibility vest.
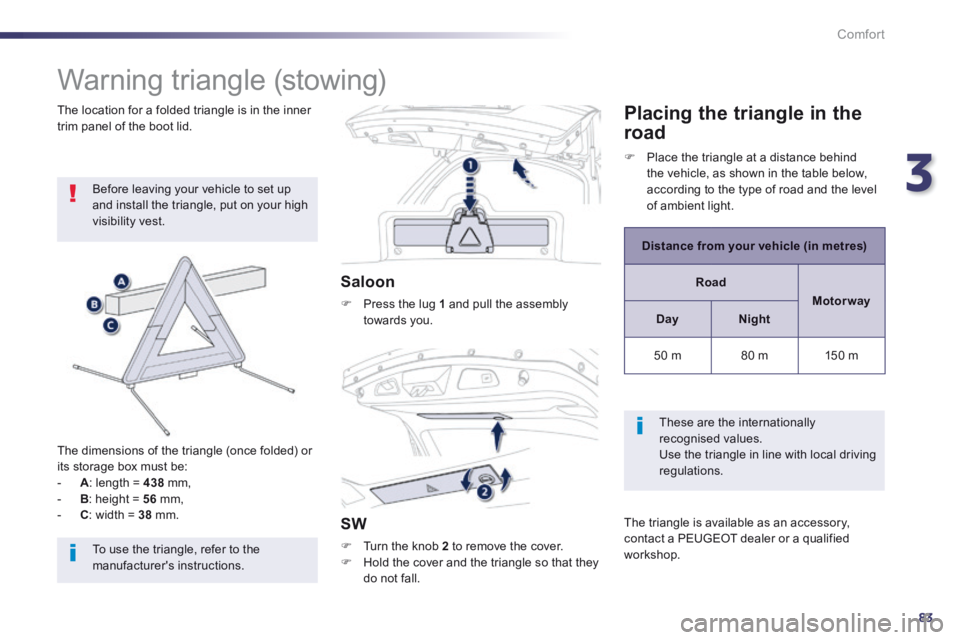
The dimensions of the triangle (once folded) or its storage box must be: - A : length = 438 mm, - B : height = 56 mm, - C : width = 38 mm.
Saloon
Press the lug 1 and pull the assembly towards you.
SW
Turn the knob 2 to remove the cover. Hold the cover and the triangle so that they do not fall.
The location for a folded triangle is in the inner trim panel of the boot lid. Placing the triangle in the
road
Distance from your vehicle (in metres)
Road
Motor way
DayNight
50 m 80 m 150 m
These are the internationally recognised values. Use the triangle in line with local driving regulations.
The triangle is available as an accessory, contact a PEUGEOT dealer or a qualified workshop.
Place the triangle at a distance behind the vehicle, as shown in the table below, according to the type of road and the level of ambient light.
To use the triangle, refer to the manufacturer's instructions.
Page 103 of 352
4
101
Driving
Starting-switching off the engine With a manual gearbox , put the gear lever in neutral. With an electronic gear control gearbox , put the gear lever in N . With an automatic gearbox , put the gear lever in P or N .
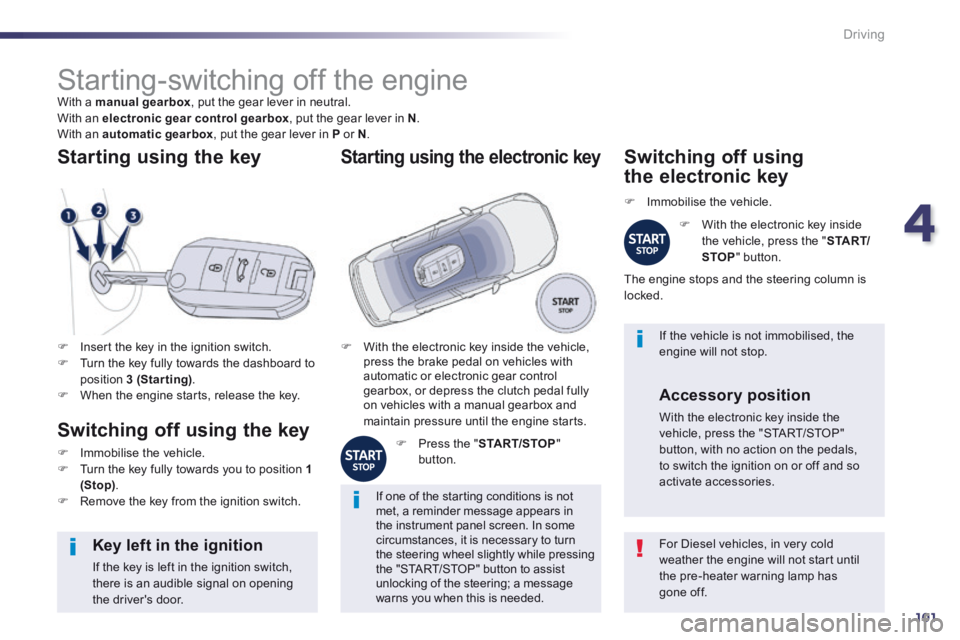
Insert the key in the ignition switch. Turn the key fully towards the dashboard to position 3 (Starting) . When the engine starts, release the key.
Starting using the key
Switching off using the key
Immobilise the vehicle. Turn the key fully towards you to position 1 (Stop) . Remove the key from the ignition switch.
For Diesel vehicles, in very cold weather the engine will not start until the pre-heater warning lamp has gone off.
Key left in the ignition
If the key is left in the ignition switch, there is an audible signal on opening the driver's door.
If one of the starting conditions is not met, a reminder message appears in the instrument panel screen. In some circumstances, it is necessary to turn the steering wheel slightly while pressing the "START/STOP" button to assist unlocking of the steering; a message warns you when this is needed.
If the vehicle is not immobilised, the engine will not stop. With the electronic key inside the vehicle, press the brake pedal on vehicles with automatic or electronic gear control gearbox, or depress the clutch pedal fully on vehicles with a manual gearbox and maintain pressure until the engine starts.
Starting using the electronic key
Press the " START/STOP " button.
Switching off using
the electronic key
Immobilise the vehicle.
With the electronic key inside the vehicle, press the " S TA R T/STOP " button.
The engine stops and the steering column is locked.
Accessory position
With the electronic key inside the vehicle, press the "START/STOP" button, with no action on the pedals, to switch the ignition on or off and so activate accessories.
Page 105 of 352
4
103
Driving
It is recommended that you do not apply the parking brake in very cold conditions (ice) and during towing (breakdown, caravan...). Deactivate the automatic functions and release the parking brake manually.
Before leaving the vehicle, check that parking brake warning lamps in the instrument panel and the control lever Aare on, not flashing.
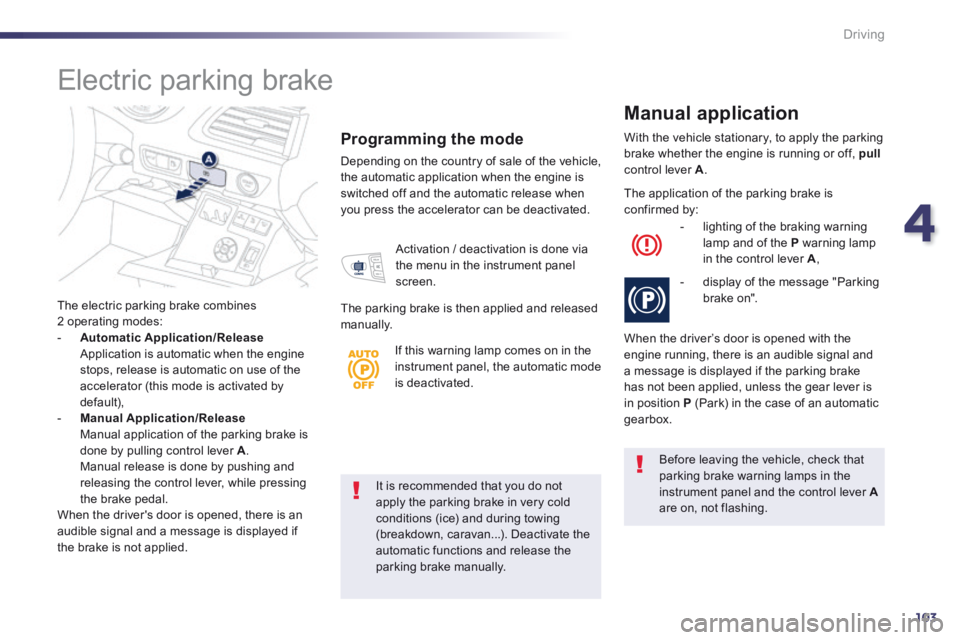
The electric parking brake combines 2 operating modes: - Automatic Application/Release Application is automatic when the engine stops, release is automatic on use of the accelerator (this mode is activated by default), - Manual Application/Release
Manual application of the parking brake is done by pulling control lever A. Manual release is done by pushing and releasing the control lever, while pressing the brake pedal. When the driver's door is opened, there is an audible signal and a message is displayed if the brake is not applied.
Programming the mode
Depending on the country of sale of the vehicle, the automatic application when the engine is switched off and the automatic release when you press the accelerator can be deactivated.
With the vehicle stationary, to apply the parking brake whether the engine is running or off, pullcontrol lever A .
Manual application
Activation / deactivation is done via the menu in the instrument panel screen.
The parking brake is then applied and released manually.
The application of the parking brake is confirmed by:
- lighting of the braking warning lamp and of the P warning lamp in the control lever A ,
- display of the message "Parking brake on".
When the driver’s door is opened with the engine running, there is an audible signal and a message is displayed if the parking brake has not been applied, unless the gear lever is in position P (Park) in the case of an automatic gearbox.
Electric parking brake
If this warning lamp comes on in the instrument panel, the automatic mode is deactivated.
Page 108 of 352
106
Driving
Emergency braking
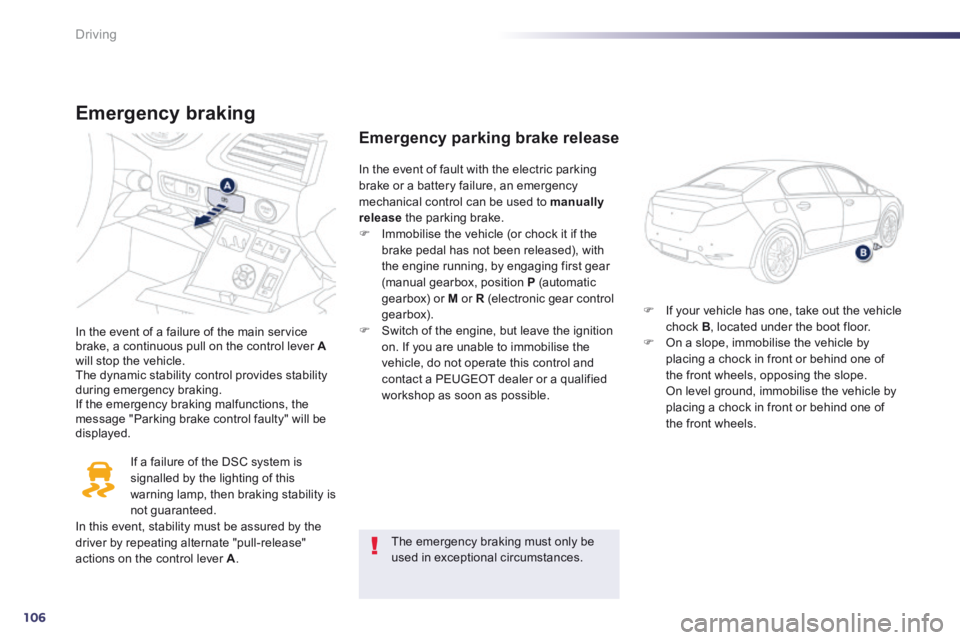
In the event of a failure of the main service brake, a continuous pull on the control lever Awill stop the vehicle. The dynamic stability control provides stability during emergency braking. If the emergency braking malfunctions, the message "Parking brake control faulty" will be displayed.
If a failure of the DSC system is signalled by the lighting of this warning lamp, then braking stability is not guaranteed. In this event, stability must be assured by the
driver by repeating alternate "pull-release" actions on the control lever A .
Emergency parking brake release
If your vehicle has one, take out the vehicle chock B , located under the boot floor. On a slope, immobilise the vehicle by placing a chock in front or behind one of the front wheels, opposing the slope. On level ground, immobilise the vehicle by placing a chock in front or behind one of the front wheels.
In the event of fault with the electric parking brake or a battery failure, an emergency mechanical control can be used to manually release the parking brake.
Immobilise the vehicle (or chock it if the brake pedal has not been released), with the engine running, by engaging first gear (manual gearbox, position P (automatic gearbox) or M or R (electronic gear control gearbox). Switch of the engine, but leave the ignition on. If you are unable to immobilise the vehicle, do not operate this control and contact a PEUGEOT dealer or a qualified workshop as soon as possible.
The emergency braking must only be used in exceptional circumstances.
Page 123 of 352
4
121
Driving
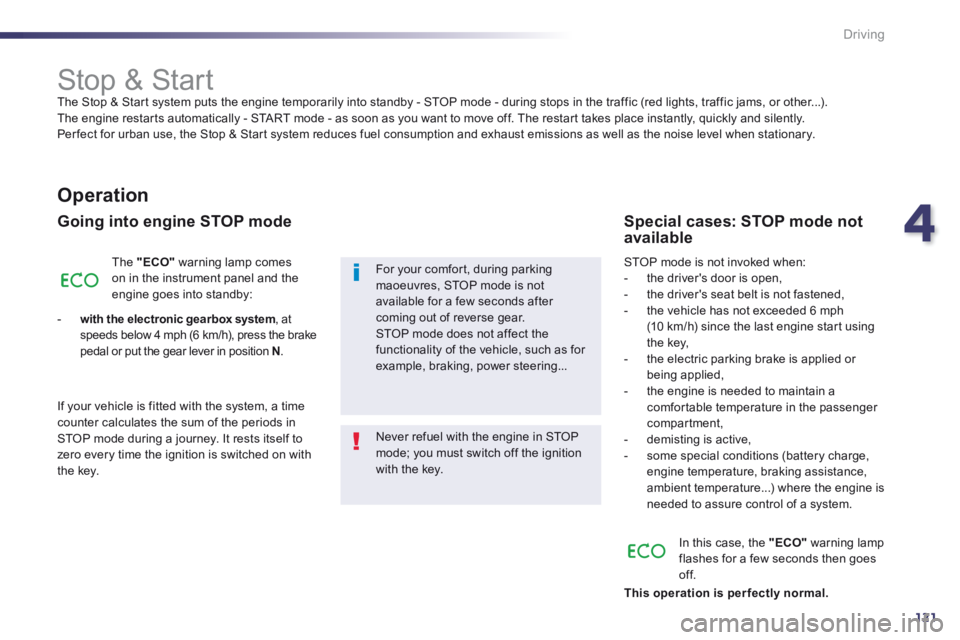
Stop & Start The Stop & Start system puts the engine temporarily into standby - STOP mode - during stops in the traffic (red lights, traffic jams, or other...). The engine restarts automatically - START mode - as soon as you want to move off. The restart takes place instantly, quickly and silently. Per fect for urban use, the Stop & Start system reduces fuel consumption and exhaust emissions as well as the noise level when stationary.
Operation
Going into engine STOP mode
The "ECO" warning lamp comes on in the instrument panel and the engine goes into standby:
- with the electronic gearbox system , at speeds below 4 mph (6 km/h), press the brake pedal or put the gear lever in position N .
If your vehicle is fitted with the system, a time counter calculates the sum of the periods in STOP mode during a journey. It rests itself to zero every time the ignition is switched on with the key.
Never refuel with the engine in STOP mode; you must switch off the ignition with the key.
For your comfort, during parking maoeuvres, STOP mode is not available for a few seconds after coming out of reverse gear. STOP mode does not affect the functionality of the vehicle, such as for example, braking, power steering...
Special cases: STOP mode not available
STOP mode is not invoked when: - the driver's door is open, - the driver's seat belt is not fastened, - the vehicle has not exceeded 6 mph (10 km/h) since the last engine start using the key, - the electric parking brake is applied or being applied, - the engine is needed to maintain a comfortable temperature in the passenger compartment, - demisting is active, - some special conditions (battery charge, engine temperature, braking assistance, ambient temperature...) where the engine is needed to assure control of a system.
In this case, the "ECO" warning lamp flashes for a few seconds then goes of f.
This operation is perfectly normal.
Page 142 of 352
140
Visibility
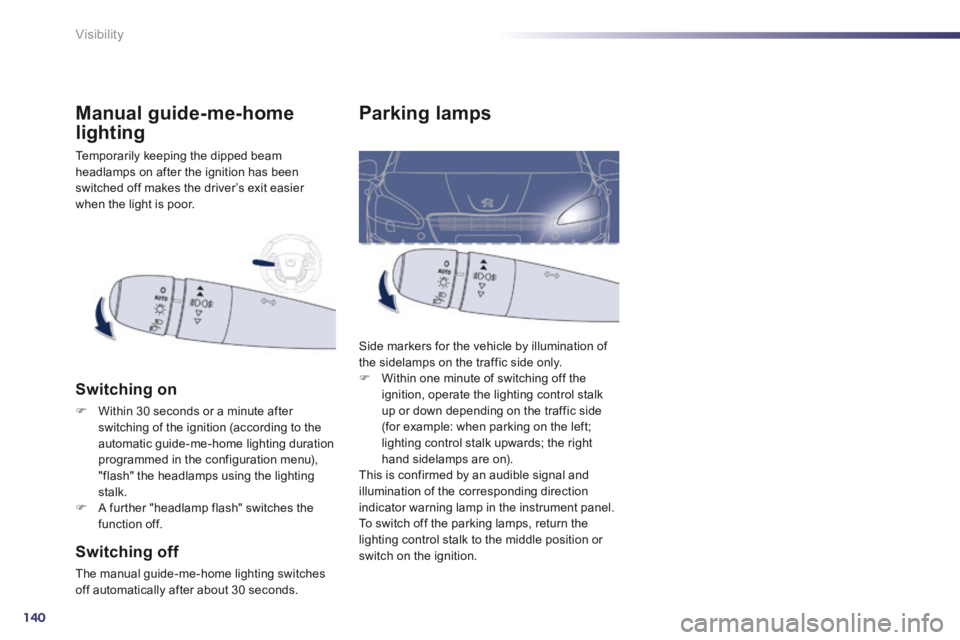
Parking lamps
Side markers for the vehicle by illumination of the sidelamps on the traffic side only. Within one minute of switching off the ignition, operate the lighting control stalk up or down depending on the traffic side (for example: when parking on the left;
lighting control stalk upwards; the right hand sidelamps are on). This is confirmed by an audible signal and illumination of the corresponding direction indicator warning lamp in the instrument panel. To switch off the parking lamps, return the lighting control stalk to the middle position or switch on the ignition.
Temporarily keeping the dipped beam headlamps on after the ignition has been switched off makes the driver’s exit easier when the light is poor.
Manual guide-me-home
lighting
Switching on
Within 30 seconds or a minute after switching of the ignition (according to the automatic guide-me-home lighting duration programmed in the configuration menu), "flash" the headlamps using the lighting stalk. A further "headlamp flash" switches the function off.
Switching off
The manual guide-me-home lighting switches off automatically after about 30 seconds.
Page 143 of 352
5
141
Visibility
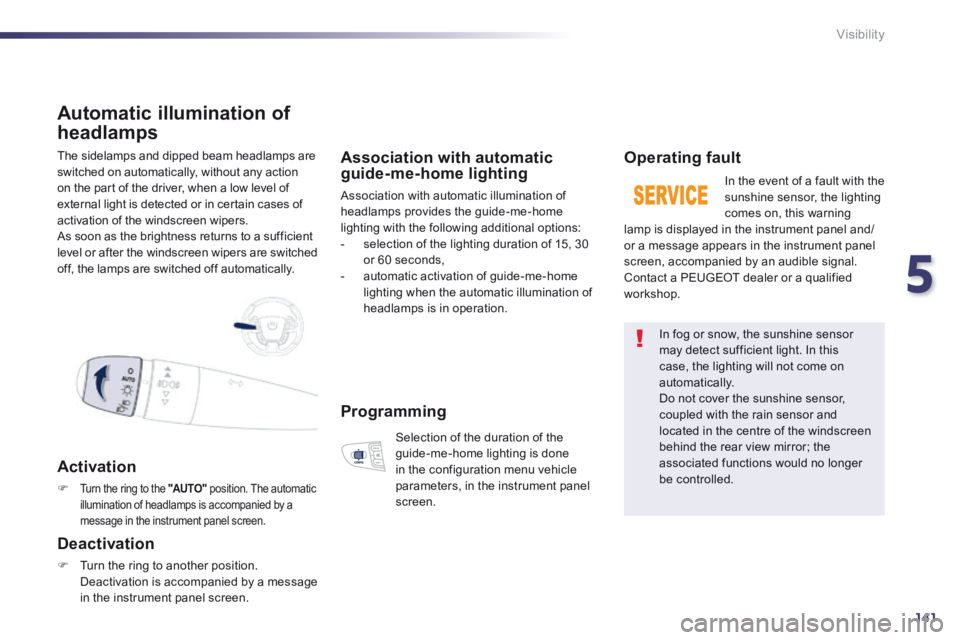
The sidelamps and dipped beam headlamps are switched on automatically, without any action on the part of the driver, when a low level of external light is detected or in certain cases of activation of the windscreen wipers. As soon as the brightness returns to a sufficient level or after the windscreen wipers are switched off, the lamps are switched off automatically.
Automatic illumination of
headlamps
Activation
Turn the ring to the "AUTO" position. The automatic illumination of headlamps is accompanied by a message in the instrument panel screen.
Deactivation
Turn the ring to another position. Deactivation is accompanied by a message
in the instrument panel screen.
Association with automatic guide-me-home lighting
Association with automatic illumination of headlamps provides the guide-me-home lighting with the following additional options: - selection of the lighting duration of 15, 30 or 60 seconds, - automatic activation of guide-me-home lighting when the automatic illumination of headlamps is in operation.
Operating fault
In the event of a fault with the sunshine sensor, the lighting comes on, this warning lamp is displayed in the instrument panel and/or a message appears in the instrument panel screen, accompanied by an audible signal. Contact a PEUGEOT dealer or a qualified workshop.
In fog or snow, the sunshine sensor may detect sufficient light. In this case, the lighting will not come on automatically. Do not cover the sunshine sensor, coupled with the rain sensor and
located in the centre of the windscreen behind the rear view mirror; the associated functions would no longer be controlled.
Programming
Selection of the duration of the guide-me-home lighting is done in the configuration menu vehicle parameters, in the instrument panel screen.
Page 144 of 352
142
Visibility
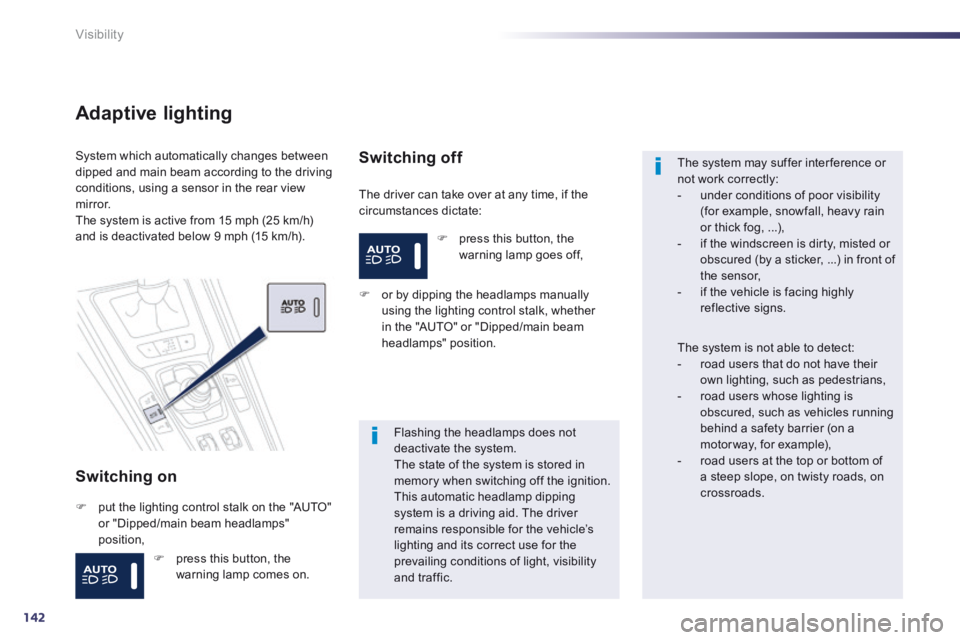
Adaptive lighting
Switching on
The driver can take over at any time, if the circumstances dictate:
System which automatically changes between dipped and main beam according to the driving conditions, using a sensor in the rear view m i r r o r. The system is active from 15 mph (25 km/h) and is deactivated below 9 mph (15 km/h).
put the lighting control stalk on the "AUTO" or "Dipped/main beam headlamps" position,
Switching off
or by dipping the headlamps manually using the lighting control stalk, whether in the "AUTO" or "Dipped/main beam headlamps" position.
Flashing the headlamps does not deactivate the system. The state of the system is stored in memory when switching off the ignition. This automatic headlamp dipping system is a driving aid. The driver remains responsible for the vehicle’s
lighting and its correct use for the prevailing conditions of light, visibility and traffic.
The system may suffer interference or not work correctly: - under conditions of poor visibility (for example, snowfall, heavy rain or thick fog, ...), - if the windscreen is dirty, misted or obscured (by a sticker, ...) in front of the sensor, - if the vehicle is facing highly reflective signs.
The system is not able to detect: - road users that do not have their own lighting, such as pedestrians, - road users whose lighting is obscured, such as vehicles running behind a safety barrier (on a motor way, for example), - road users at the top or bottom of a steep slope, on twisty roads, on crossroads.
press this button, the warning lamp goes off,
press this button, the warning lamp comes on.