2014 PEUGEOT 5008 checking oil
[x] Cancel search: checking oilPage 208 of 404

Checks
206
Petrol engines
The various caps and covers allow access for checking the levels of the various fluids and for replacing certain components.
1. Power steering reservoir.
2. Screenwash and headlamp wash reservoir.
3. Coolant reservoir.
4. Brake fluid reservoir.
5. Battery/Fuses.
6. Fusebox.
7. Air filter.
8. Engine oil dipstick.
9. Engine oil filler cap.
Page 209 of 404

10
Checks207
Diesel engines
The various caps and covers allow access for checking the levels of the various fluids, for replacing certain components and for priming the fuel system.
1. Power steering reservoir.
2. Screenwash and headlamp wash reservoir.
3. Coolant reservoir.
4. Brake fluid reservoir.
5. Battery/Fuses.
6. Fusebox.
7. Air filter.
8. Engine oil dipstick.
9. Engine oil filler cap.
10. Priming pump * .
11. Bleed screw * .
* According to engine.
Page 210 of 404
Checks
208
Checking levels
Engine oil level
The check is carried out either when the ignition is switched on using the oil level indicator in the instrument panel for vehicles with and electric oil level gauge, or using the dipstick.
Check all of these levels regularly, in line with the warranty and maintenance record. Top them up if necessary, unless other wise indicated. If a level drops significantly, have the corresponding system checked by a PEUGEOT dealer or a qualified workshop.
It is normal to top up the oil level between two services (or oil changes). PEUGEOT recommends that you check the level, and top
up if necessary, every 3 000 miles (5 000 kms).
Take care when working under the bonnet, as certain areas of the engine may be extremely hot (risk of burns) and the cooling fan could start at any time (even with the ignition off).
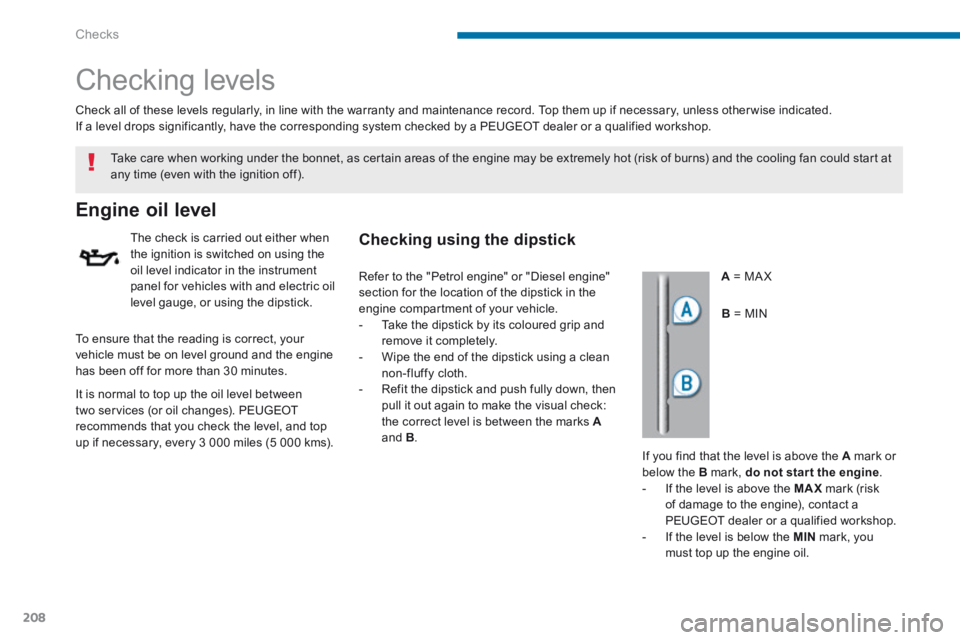
If you find that the level is above the A mark or below the B mark, do not star t the engine . - If the level is above the MAX mark (risk of damage to the engine), contact a PEUGEOT dealer or a qualified workshop. - If the level is below the MIN mark, you must top up the engine oil.
A = M A X
To ensure that the reading is correct, your vehicle must be on level ground and the engine has been off for more than 30 minutes.
Checking using the dipstick
B = M I N
Refer to the "Petrol engine" or "Diesel engine" section for the location of the dipstick in the engine compartment of your vehicle. - Take the dipstick by its coloured grip and remove it completely. - Wipe the end of the dipstick using a clean non-fluffy cloth. - Refit the dipstick and push fully down, then pull it out again to make the visual check: the correct level is between the marks Aand B .
Page 211 of 404
10
Checks209
Power steering fluid level
The power steering fluid level should be close to the "MA X" mark. With the engine cold, unscrew the cap to check the level.
Fluid specifi cation
The brake fluid must conform to the manufacturer's recommendations.
Changing the fl uid
Refer to the warranty and maintenance record for details of the interval for this operation.
Brake fluid level
The brake fluid level should be close to the "MA X" mark. If it is not, check the brake pad wear.
After topping up the oil, the check when switching on the ignition with the oil level indicator in the instrument panel is not valid during the 30 minutes after
topping up.
Topping up the engine oil level
Oil grade The oil must be the correct grade for your engine and conform to the manufacturer's recommendations.
Refer to the "Petrol engine" or "Diesel engine" section for the location of the oil filler cap in the engine compartment of your vehicle. - Unscrew the oil filler cap to reveal the filler aperture. - Add oil in small quantities, avoiding any spills on engine components (risk of fire). - Wait a few minutes before checking the level again using the dipstick. - Add more oil if necessary. - After checking the level, carefully refit the oil filler cap and the dipstick in its tube.
Engine oil change
Refer to the warranty and maintenance record for details of the interval for this operation. In order to maintain the reliability of the engine and emission control system, the use of additives in the engine oil is prohibited.
Page 214 of 404
Checks
212
Brake disc wear
Brake pads
Brake wear depends on the style of driving, particularly in the case of vehicles used in town, over short distances. It may be necessary to have the condition of the brakes checked, even between vehicle services. Unless there is a leak in the circuit, a drop in the brake fluid level indicates that the brake pads are worn.
For information on checking brake disc wear, contact a PEUGEOT dealer or a qualified workshop.
Manual gearbox
The gearbox does not require any maintenance (no oil change). Refer to the warranty and maintenance record for the details of the level checking interval for this component.
Electronic gearbox
The gearbox does not require any maintenance (no oil change). Refer to the warranty and maintenance record for details of the checking interval for this component.
Automatic gearbox
The gearbox does not require any maintenance (no oil change). Refer to the warranty and maintenance record for details of the level checking interval for this component.
This system does not require any routine servicing. However, in the event of a problem, have the system checked by a PEUGEOT dealer or a qualified workshop.
Electric parking brake
Only use products recommended by PEUGEOT or products of equivalent quality and specification. In order to optimise the operation of units as important as those in the braking system, PEUGEOT selects and offers very specific products. After washing the vehicle, dampness, or in wintry conditions, ice can form on the brake discs and pads: braking efficiency may be reduced. Make light brake applications to dry and defrost the brakes.
For more information, refer to the "Electric parking brake - Operating faults" section.
Page 220 of 404
Practical information
218
Removing the cartridge
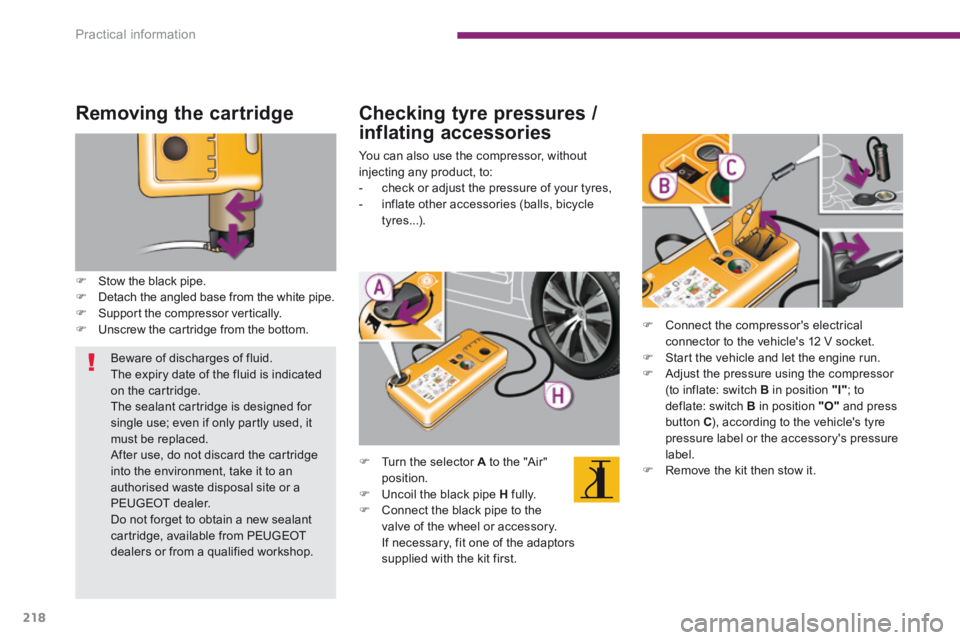
Stow the black pipe. Detach the angled base from the white pipe. Support the compressor vertically. Unscrew the cartridge from the bottom.
Checking tyre pressures /
inflating accessories
You can also use the compressor, without injecting any product, to: - check or adjust the pressure of your tyres, - inflate other accessories (balls, bicycle tyres...).
Turn the selector A to the "Air" position. Uncoil the black pipe H fully. Connect the black pipe to the valve of the wheel or accessory. If necessary, fit one of the adaptors supplied with the kit first.
Connect the compressor's electrical connector to the vehicle's 12 V socket. Start the vehicle and let the engine run. Adjust the pressure using the compressor (to inflate: switch B in position "I" ; to deflate: switch B in position "O" and press button C ), according to the vehicle's tyre pressure label or the accessory's pressure label. Remove the kit then stow it.
Beware of discharges of fluid. The expiry date of the fluid is indicated on the cartridge. The sealant cartridge is designed for single use; even if only partly used, it must be replaced. After use, do not discard the cartridge into the environment, take it to an authorised waste disposal site or a PEUGEOT dealer. Do not forget to obtain a new sealant cartridge, available from PEUGEOT dealers or from a qualified workshop.
Page 390 of 404
Alphabetical index
388
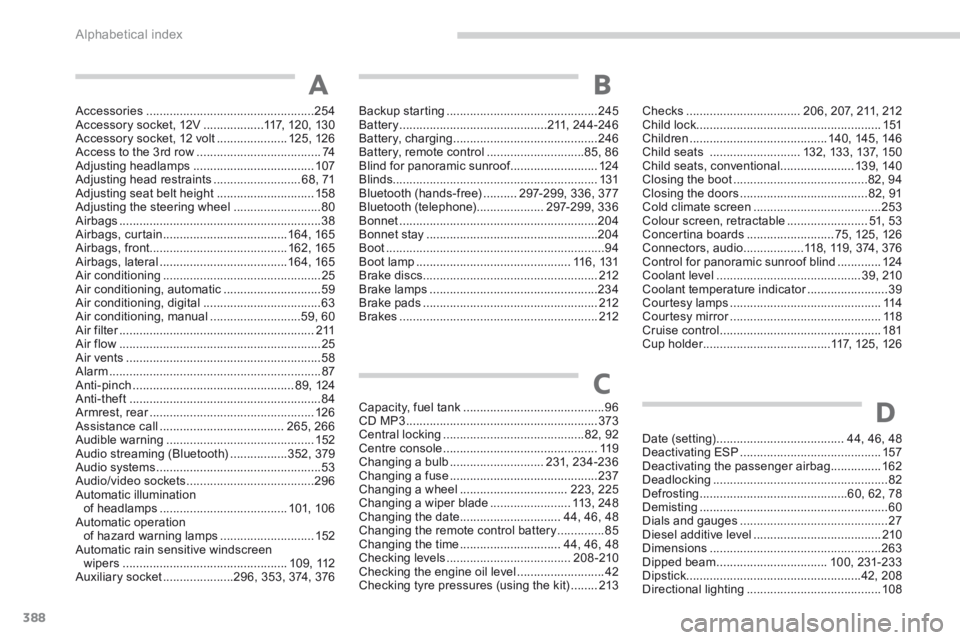
Accessories ..................................................254Accessory socket, 12V ..................117, 120, 130Accessory socket, 12 volt .....................125, 126Access to the 3rd row .....................................74Adjusting headlamps ....................................107Adjusting head restraints ..........................68, 71Adjusting seat belt height .............................15 8Adjusting the steering wheel ..........................80Airbags ............................................................38Airbags, curtain .....................................16 4, 165Airbags, front.........................................162, 165Airbags, lateral ......................................16 4, 165Air conditioning ...............................................25Air conditioning, automatic .............................59Air conditioning, digital ...................................63Air conditioning, manual ...........................59, 60Air filter ..........................................................Air filter ..........................................................Air filter2 11Air flow ............................................................25Air vents ..........................................................58Alarm ...............................................................87Anti-pinch ................................................89, 124Anti-theft .........................................................84Armrest, rear .................................................Armrest, rear .................................................Armrest, rear126Assistance call .....................................265, 266Audible warning ............................................152Audio streaming (Bluetooth) .................352, 379Audio systems .................................................53Audio/video sockets ......................................296Automatic illumination of headlamps ......................................101, 10 6Automatic operation of hazard warning lamps ............................152Automatic rain sensitive windscreen wipers .................................................109, 112Auxiliary socket .....................296, 353, 374, 376
Backup starting .............................................245Battery ............................................211, 244-246Battery, charging ...........................................246Battery, remote control .............................85, 86Blind for panoramic sunroof ..........................Blind for panoramic sunroof ..........................Blind for panoramic sunroof124Blinds.............................................................131Bluetooth (hands-free) ..........297-299, 336, 377Bluetooth (telephone) ....................297-299, 336Bonnet ...........................................................204Bonnet stay ...................................................204Boot .................................................................94Boot lamp ..............................................116, 131Brake discs ....................................................212Brake lamps ..................................................234Brake pads ....................................................212Brakes ...........................................................212
A
D
Checks ..................................206, 207, 211, 212Child lock .......................................................151Children .........................................140, 145, 146Child seats ...........................132, 133, 137, 150Child seats, conventional ......................139, 140Closing the boot ........................................82, 94Closing the doors ......................................82, 91Cold climate screen ......................................253Colour screen, retractable ........................51, 53Concertina boards ..........................75, 125, 126Connectors, audio ..................118, 119, 374, 376Control for panoramic sunroof blind .............124Coolant level ...........................................39, 210Coolant temperature indicator ........................Coolant temperature indicator ........................Coolant temperature indicator39Courtesy lamps .............................................114Courtesy mirror .............................................Courtesy mirror .............................................Courtesy mirror118Cruise control ................................................181Cup holder ......................................Cup holder ......................................Cup holder117, 125, 126
Date (setting) ......................................44, 46, 48Deactivating ESP ..........................................157Deactivating the passenger airbag ...............162Deadlocking ....................................................82Defrosting ............................................60, 62, 78Demisting ........................................................60Dials and gauges ............................................27Diesel additive level ......................................210Dimensions ...................................................263Dipped beam .................................100, 231-233Dipstick ....................................................42, 208Directional lighting ........................................108
Capacity, fuel tank ..........................................96CD MP3 .........................................................373Central locking ..........................................82, 92Centre console ..............................................11 9Changing a bulb ............................231, 234-236Changing a fuse ............................................237Changing a wheel ................................223, 225Changing a wiper blade ........................113, 248Changing the date ..............................44, 46, 48Changing the remote control battery ..............85Changing the time ..............................44, 46, 48Checking levels .....................................208 -210Checking the engine oil level ..........................42Checking tyre pressures (using the kit) ........213
B
C
Page 399 of 404
.
Visual search397
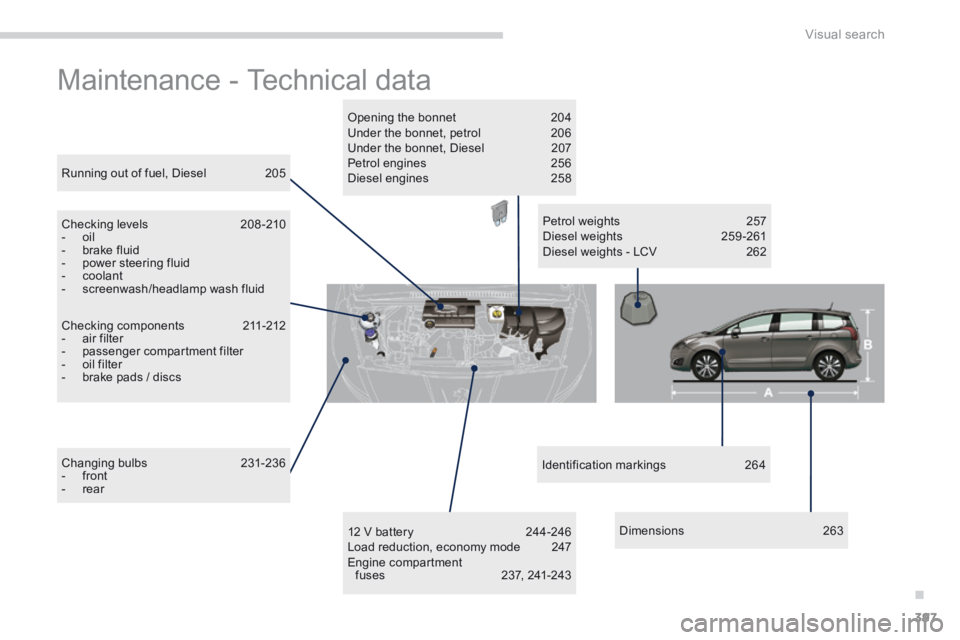
Maintenance - Technical data
Checking components 211-212 - air filter - passenger compartment filter - oil filter - brake pads / discs
Running out of fuel, Diesel 205
Checking levels 208 -210 - oil - brake fluid - power steering fluid - coolant - screenwash/headlamp wash fluid
Changing bulbs 231-236 - front - rear
Petrol weights 257 Diesel weights 259 -261 Diesel weights - LCV 262
Opening the bonnet 204 Under the bonnet, petrol 206 Under the bonnet, Diesel 207 Petrol engines 256 Diesel engines 258
12 V battery 244-246 Load reduction, economy mode 247 Engine compartment fuses 237, 241-243
Identification markings 264
D i m e n s i o n s 2 6 3