Page 158 of 404
Safety
156
Operation
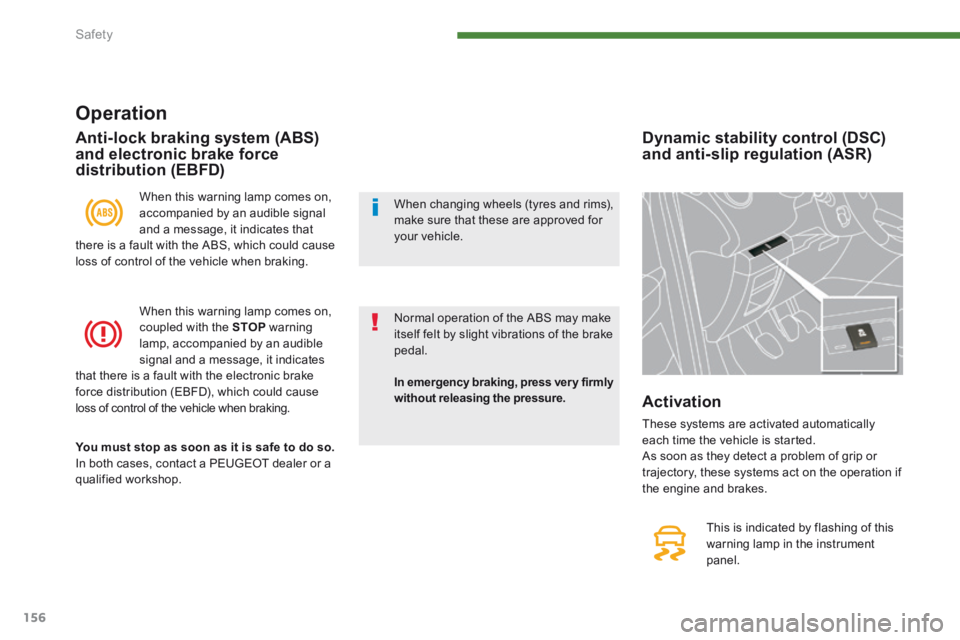
When this warning lamp comes on, accompanied by an audible signal and a message, it indicates that there is a fault with the ABS, which could cause loss of control of the vehicle when braking.
When this warning lamp comes on, coupled with the STOP warning lamp, accompanied by an audible signal and a message, it indicates that there is a fault with the electronic brake force distribution (EBFD), which could cause loss of control of the vehicle when braking.
You must stop as soon as it is safe to do so. In both cases, contact a PEUGEOT dealer or a qualified workshop.
Anti-lock braking system (ABS) and electronic brake force distribution (EBFD)
In emergency braking, press ver y firmly without releasing the pressure.
Dynamic stability control (DSC) and anti-slip regulation (ASR)
This is indicated by flashing of this
warning lamp in the instrument panel.
Activation
These systems are activated automatically each time the vehicle is started. As soon as they detect a problem of grip or trajectory, these systems act on the operation if the engine and brakes.
Normal operation of the ABS may make itself felt by slight vibrations of the brake pedal.
When changing wheels (tyres and rims), make sure that these are approved for your vehicle.
Page 163 of 404
8
Safety161
The driver must ensure that passengers use the seat belts correctly and that they are all restrained securely before setting off. Wherever you are seated in the vehicle, always fasten your seat belt, even for short journeys. Do not interchange the seat belt buckles as they will not fulfil their role fully. The seat belts are fitted with an inertia reel permitting automatic adjustment of the length of the strap to your size. The seat belt is stowed automatically when not in use. Before and after use, ensure that the seat belt is reeled in correctly. The lower part of the strap must be positioned as low as possible on the pelvis. The upper part must be positioned in the hollow of the shoulder. The inertia reels are fitted with an automatic locking device which comes into operation in the event of a collision, emergency braking or if the vehicle rolls over. You can release the device by pulling firmly on the strap and releasing it so that it reels in slightly.
In order to be effective, a seat belt must: - be tightened as close to the body as possible, - be pulled in front of you with a smooth movement, checking that it does not twist, - be used to restrain only one person, - not bear any trace of cuts or fraying, - not be converted or modified to avoid affecting its performance.
In the event of an impact
Depending on the nature and seriousness of the impact , the pretensioning device may be deployed before and independently of the airbags. Deployment of the pretensioners is accompanied by a slight discharge of harmless smoke and a noise, due to the activation of the pyrotechnic cartridge incorporated in the system. In all cases, the airbag warning lamp comes on. Following an impact, have the seat belts system checked, and if necessary replaced, by a PEUGEOT dealer or a qualified workshop.
Recommendations for children
Use a suitable child seat if the passenger is less than 12 years old or shorter than one and a half metres. Never use the same seat belt to secure more than one person. Never allow a child to travel on your lap.
In accordance with current safety regulations, for all repairs on your vehicle, go to a qualified workshop with the skills and equipment needed, which a PEUGEOT dealer is able to provide. Have your seat belts checked regularly by a PEUGEOT dealer or a qualified workshop, particularly if the straps show signs of damage.
Clean the seat belt straps with soapy water or a textile cleaning product, sold by PEUGEOT dealers. After folding or moving a seat or rear bench seat, ensure that the seat belt is positioned and reeled in correctly.
Page 176 of 404
Driving
174
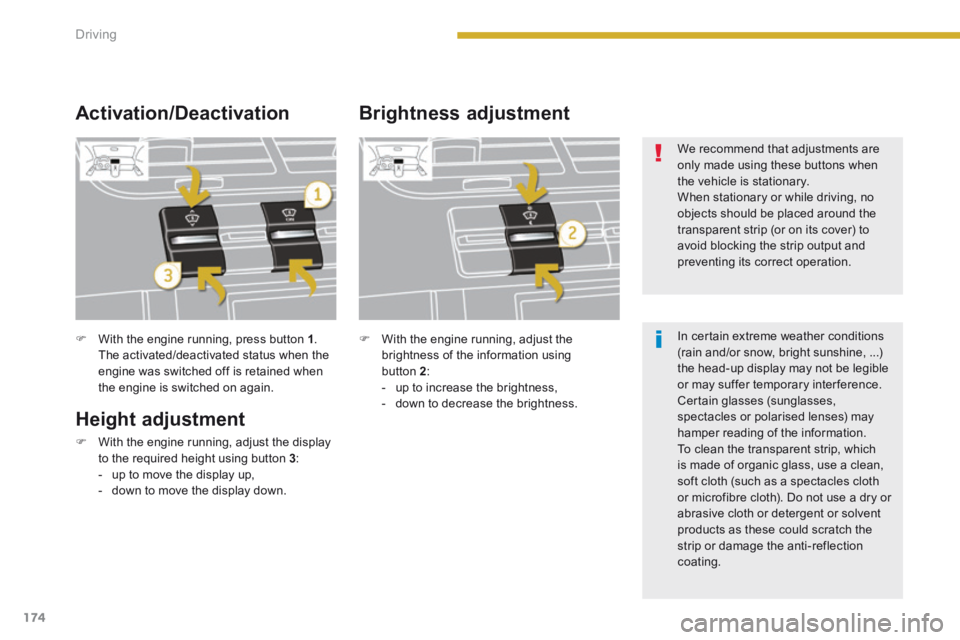
With the engine running, press button 1 . The activated/deactivated status when the engine was switched off is retained when the engine is switched on again.
Height adjustment
With the engine running, adjust the display to the required height using button 3 : - up to move the display up, - down to move the display down.
Activation/Deactivation Brightness adjustment
With the engine running, adjust the brightness of the information using button 2 : - up to increase the brightness, - down to decrease the brightness.
We recommend that adjustments are only made using these buttons when the vehicle is stationary. When stationary or while driving, no objects should be placed around the
transparent strip (or on its cover) to avoid blocking the strip output and preventing its correct operation.
In certain extreme weather conditions (rain and/or snow, bright sunshine, ...) the head-up display may not be legible or may suffer temporary interference. Certain glasses (sunglasses, spectacles or polarised lenses) may
hamper reading of the information. To clean the transparent strip, which is made of organic glass, use a clean, soft cloth (such as a spectacles cloth or microfibre cloth). Do not use a dry or abrasive cloth or detergent or solvent products as these could scratch the strip or damage the anti-reflection coating.
Page 196 of 404
Driving
194
Stopping the vehicle
Before switching off the engine, you can engage position P or N to place the gearbox in neutral. In both cases, apply the parking brake to immobilise the vehicle, unless it is programmed to automatic mode.
Operating fault
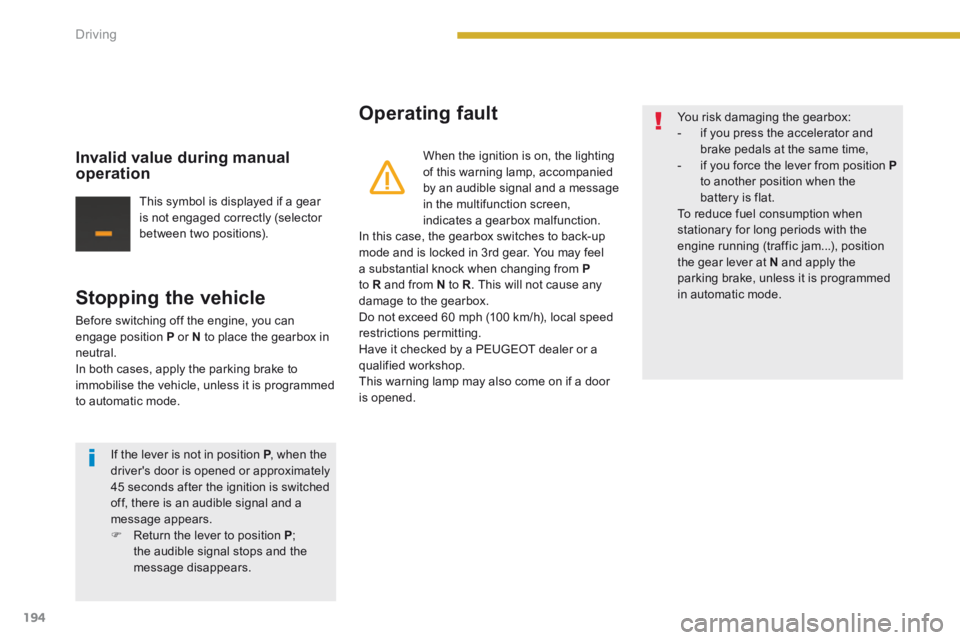
When the ignition is on, the lighting of this warning lamp, accompanied by an audible signal and a message in the multifunction screen, indicates a gearbox malfunction. In this case, the gearbox switches to back-up mode and is locked in 3rd gear. You may feel a substantial knock when changing from Pto R and from N to R . This will not cause any damage to the gearbox. Do not exceed 60 mph (100 km/h), local speed restrictions permitting. Have it checked by a PEUGEOT dealer or a qualified workshop. This warning lamp may also come on if a door is opened.
Invalid value during manual operation
This symbol is displayed if a gear is not engaged correctly (selector between two positions).
You risk damaging the gearbox: - if you press the accelerator and brake pedals at the same time, - if you force the lever from position Pto another position when the battery is flat. To reduce fuel consumption when stationary for long periods with the engine running (traffic jam...), position the gear lever at N and apply the parking brake, unless it is programmed in automatic mode.
If the lever is not in position P , when the P , when the Pdriver's door is opened or approximately 45 seconds after the ignition is switched off, there is an audible signal and a message appears.
Return the lever to position P ; the audible signal stops and the message disappears.
Page 200 of 404
Driving
198
Visual and audible front and rear parking sensors
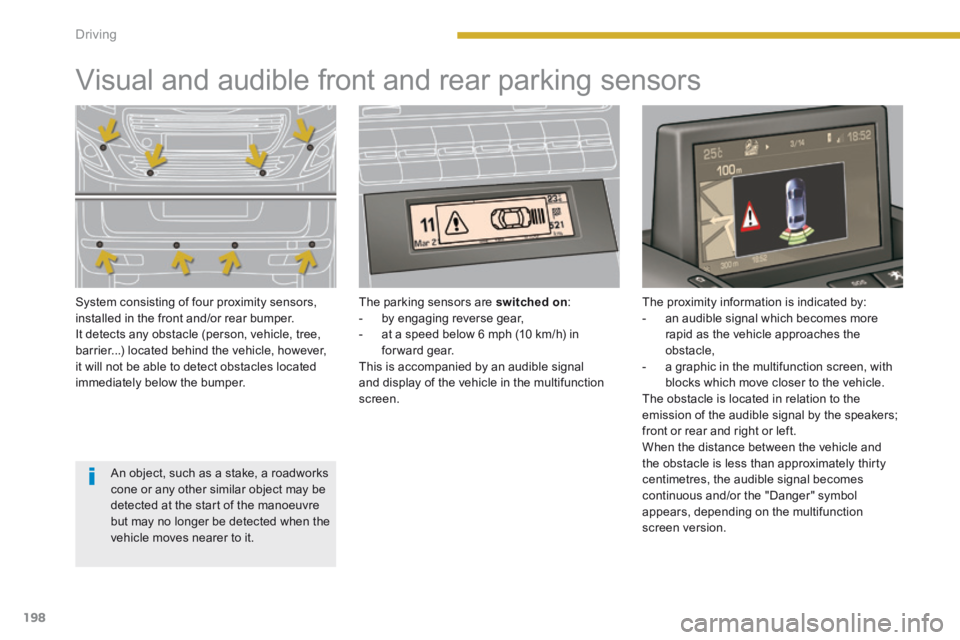
System consisting of four proximity sensors, installed in the front and/or rear bumper. It detects any obstacle (person, vehicle, tree, barrier...) located behind the vehicle, however, it will not be able to detect obstacles located immediately below the bumper.
The parking sensors are switched on : - by engaging reverse gear, - at a speed below 6 mph (10 km/h) in forward gear. This is accompanied by an audible signal and display of the vehicle in the multifunction screen.
The proximity information is indicated by: - an audible signal which becomes more rapid as the vehicle approaches the obstacle, - a graphic in the multifunction screen, with blocks which move closer to the vehicle. The obstacle is located in relation to the emission of the audible signal by the speakers;
front or rear and right or left. When the distance between the vehicle and the obstacle is less than approximately thirty centimetres, the audible signal becomes continuous and/or the "Danger" symbol appears, depending on the multifunction screen version.
An object, such as a stake, a roadworks cone or any other similar object may be detected at the start of the manoeuvre but may no longer be detected when the vehicle moves nearer to it.
Page 227 of 404
11
Practical information225
Access to the spare wheel *
The spare wheel is supported by a cable-driven carrier underneath the vehicle. Taking out the wheel
Raise the concertina board to reveal the spare wheel carrier drive nut. Turn this drive nut fully clockwise, using the wheelbrace 1 and the extension 7 , to 7 , to 7unwind the carrier cable.
Detach the wheel/box assembly from the rear of the vehicle. Remove the hook with its connection plate to release the wheel/box assembly, as shown in the illustration.
Pull out the wheel to gain access to the box. Slide the box cover to the centre and remove it to gain access to the other tools. * Depending on destination country.
Page 228 of 404
Practical information
226
Putting the wheel back in place
Store the tools used in the box and close the cover. Position the box on the ground and centre the spare wheel on it. Pass the hook with its connection plate into the wheel then the box, as illustrated.
Raise the wheel/box assembly underneath the vehicle by turning the carrier drive nut anticlockwise using the wheelbrace 1 and the extension 7 . 7 . 7 Tighten fully and check that the wheel is horizontally flush against the floor.
Tyre under-infl ation detection
The spare wheel (space-saver or steel rim) does not have a sensor. The punctured wheel must be repaired by a PEUGEOT dealer or a qualified workshop.
Page 229 of 404
11
Practical information227
Removing a wheel
List of operations
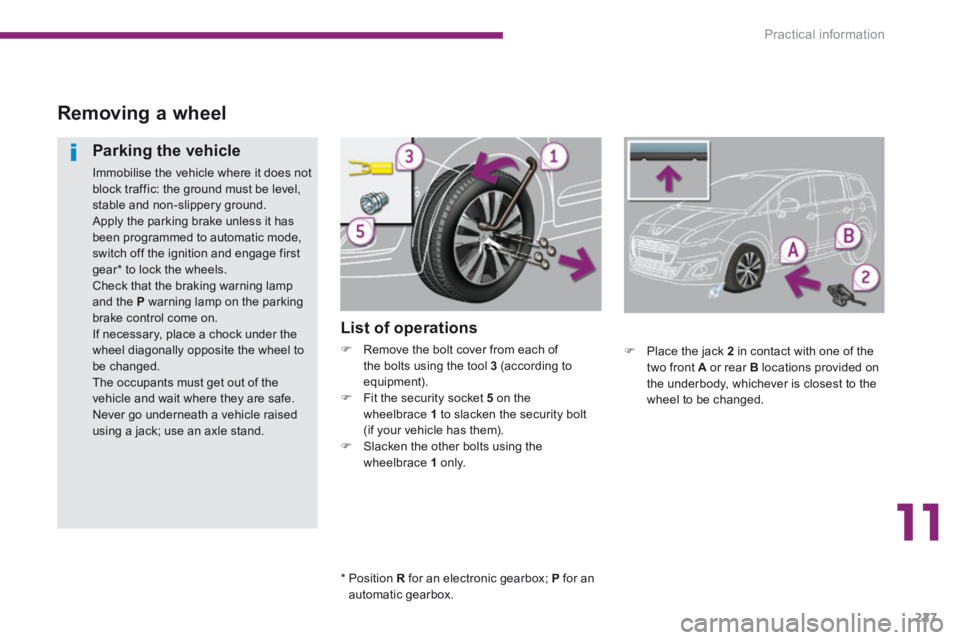
Remove the bolt cover from each of the bolts using the tool 3 (according to equipment). Fit the security socket 5 on the wheelbrace 1 to slacken the security bolt (if your vehicle has them). Slacken the other bolts using the wheelbrace 1 o n l y.
Parking the vehicle
Immobilise the vehicle where it does not block traffic: the ground must be level, stable and non-slippery ground. Apply the parking brake unless it has been programmed to automatic mode, switch off the ignition and engage first gear * to lock the wheels. Check that the braking warning lamp and the P warning lamp on the parking brake control come on. If necessary, place a chock under the wheel diagonally opposite the wheel to be changed. The occupants must get out of the vehicle and wait where they are safe. Never go underneath a vehicle raised using a jack; use an axle stand.
Place the jack 2 in contact with one of the two front A or rear B locations provided on the underbody, whichever is closest to the wheel to be changed.
* Position R for an electronic gearbox; P for an automatic gearbox.