Page 20 of 389
123
Familiarisation
18
Arrange your boot
3 position adjustable boot
Low position (150 kg max) (except for version with standard spare wheel). Intermediate position (100 kg max).
High position (50 kg max) with the lower tailgate closed to isolate the lower part of the
boot.
From the high position, place the floor at an angle), supported by the side stops, to allow access to the spare wheel or to the storage areas in the bottom of the boot.
To release the floor, push it slightly for wards then raise it from the rear. Use the stops A , placed on each side of the boot to change the height of the floor more easily.
Page 28 of 389

Familiarisation
26
Limit the causes of excess
consumption
Spread loads throughout the vehicle; place the heaviest items in the bottom of the boot, as close as possible to the rear seats. Limit the loads carried in the vehicle and reduce wind resistance (roof bars, roof rack, bicycle carrier, trailer...). Use a roof box in preference. Remove roof bars and roof racks after use.
At the end of winter, remove snow tyres and refit your summer tyres.
Observe the recommendations
on maintenance
Check the tyre pressures regularly, when cold, referring to the label in the door aperture, driver's side.
Have your vehicle serviced regularly (engine oil, oil filter, air filter...) and observe the schedule of operations recommended by the manufacturer.
When refuelling, do not continue after the third cut-off of the nozzle to avoid any over flow.
At the wheel of your new vehicle, it is only after the first 1 800 miles (3 000 kilometres) that you will see the fuel consumption settle down to a consistent average.
Carry out this check in particular: - before a long journey, - at each change of season, - after a long period out of use. Don't forget the spare wheel and the tyres on any trailer or caravan.
Page 123 of 389
6
Fittings121
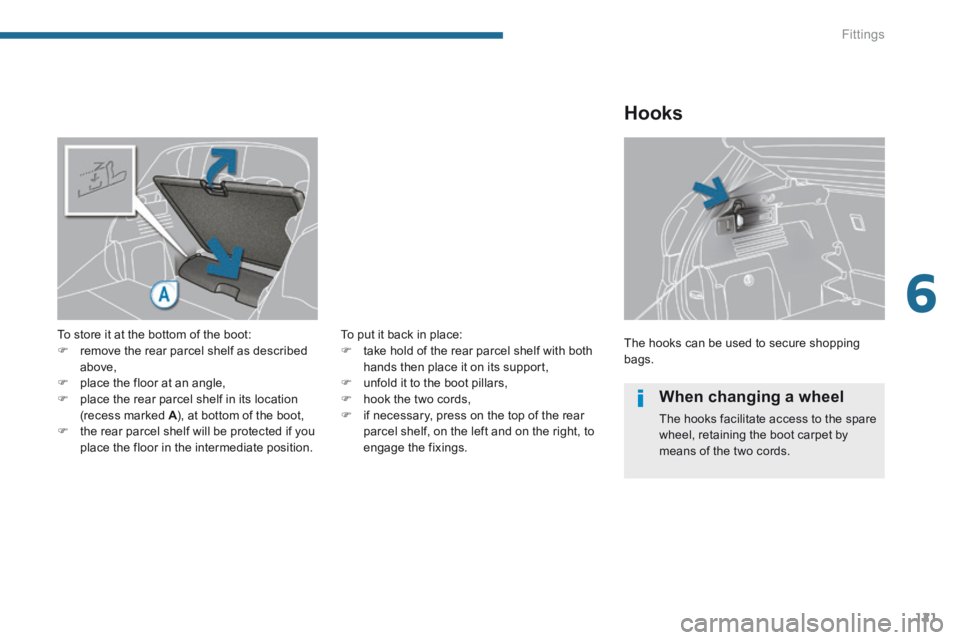
The hooks can be used to secure shopping bags.
Hooks
To store it at the bottom of the boot: remove the rear parcel shelf as described above, place the floor at an angle, place the rear parcel shelf in its location (recess marked A ), at bottom of the boot, A ), at bottom of the boot, A the rear parcel shelf will be protected if you place the floor in the intermediate position.
To put it back in place: take hold of the rear parcel shelf with both hands then place it on its support, unfold it to the boot pillars, hook the two cords, if necessary, press on the top of the rear parcel shelf, on the left and on the right, to engage the fixings.
When changing a wheel
The hooks facilitate access to the spare
wheel, retaining the boot carpet by means of the two cords.
Page 125 of 389
6
Fittings123
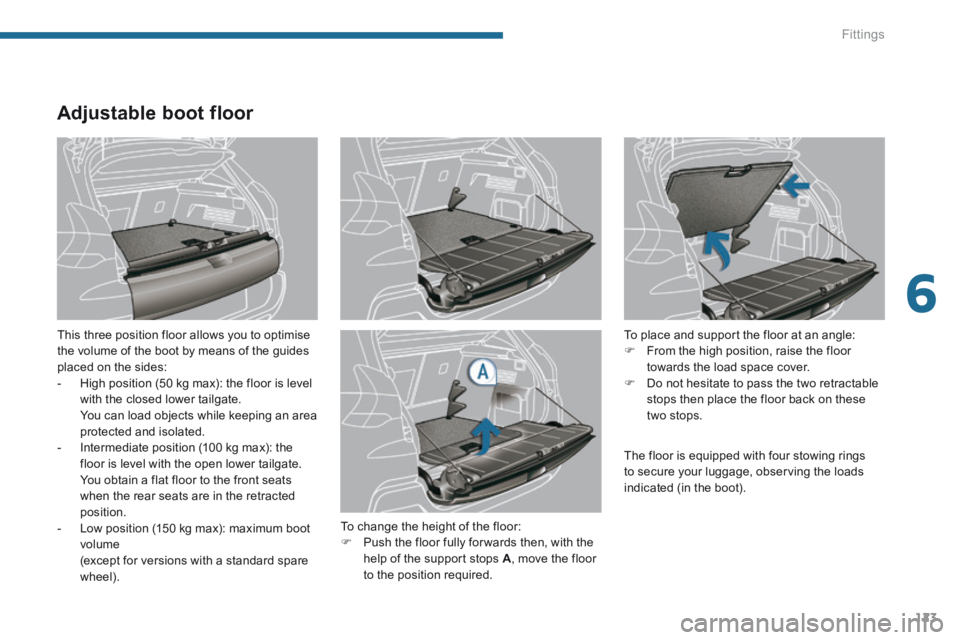
Adjustable boot floor
This three position floor allows you to optimise the volume of the boot by means of the guides placed on the sides: - High position (50 kg max): the floor is level with the closed lower tailgate. You can load objects while keeping an area protected and isolated. - Intermediate position (100 kg max): the floor is level with the open lower tailgate. You obtain a flat floor to the front seats when the rear seats are in the retracted position. - Low position (150 kg max): maximum boot volume (except for versions with a standard spare wheel).
To place and support the floor at an angle: From the high position, raise the floor towards the load space cover. Do not hesitate to pass the two retractable stops then place the floor back on these two stops.
To change the height of the floor:
Push the floor fully for wards then, with the help of the support stops A , move the floor to the position required.
The floor is equipped with four stowing rings to secure your luggage, observing the loads indicated (in the boot).
Page 142 of 389
Safety
140
Tyre under-infl ation detection
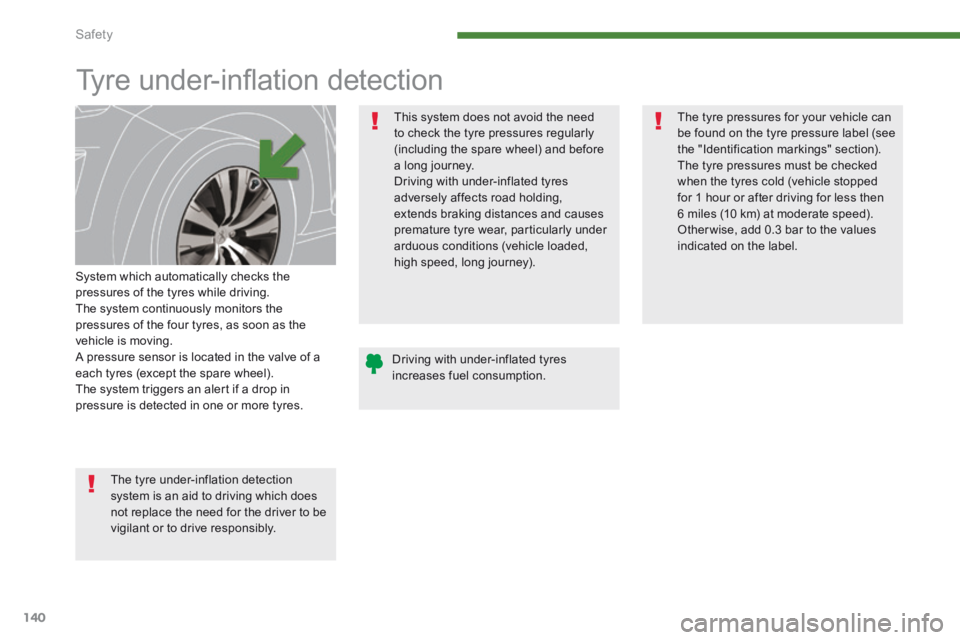
System which automatically checks the pressures of the tyres while driving. The system continuously monitors the pressures of the four tyres, as soon as the vehicle is moving. A pressure sensor is located in the valve of a each tyres (except the spare wheel). The system triggers an alert if a drop in pressure is detected in one or more tyres.
This system does not avoid the need to check the tyre pressures regularly (including the spare wheel) and before a long journey. Driving with under-inflated tyres adversely affects road holding, extends braking distances and causes premature tyre wear, particularly under arduous conditions (vehicle loaded, high speed, long journey).
The tyre pressures for your vehicle can be found on the tyre pressure label (see the "Identification markings" section). The tyre pressures must be checked when the tyres cold (vehicle stopped for 1 hour or after driving for less then 6 miles (10 km) at moderate speed). Other wise, add 0.3 bar to the values indicated on the label.
Driving with under-inflated tyres increases fuel consumption.
The tyre under-inflation detection system is an aid to driving which does not replace the need for the driver to be vigilant or to drive responsibly.
Page 143 of 389
8
Safety141
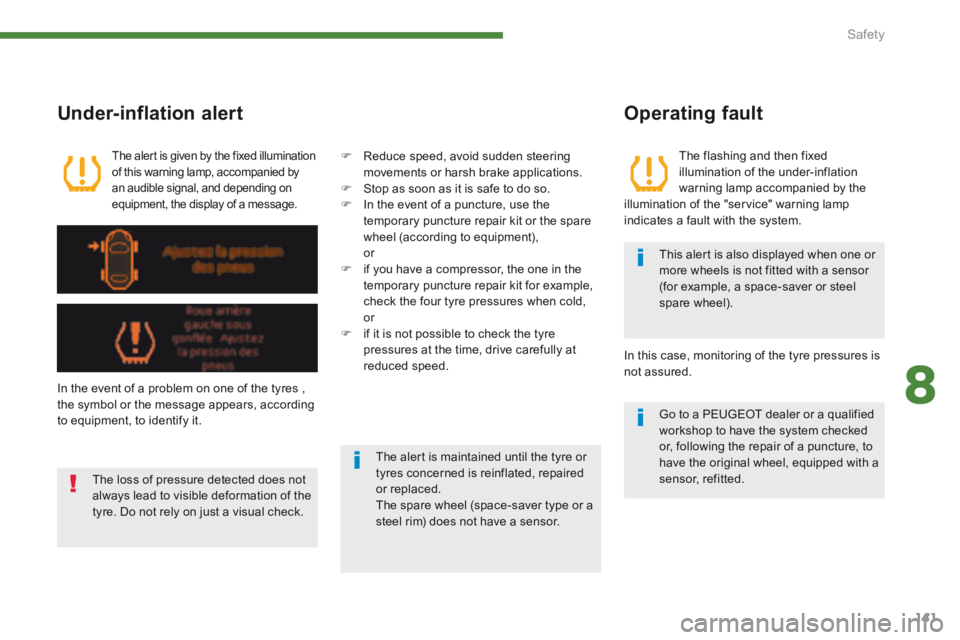
The flashing and then fixed illumination of the under-inflation warning lamp accompanied by the illumination of the "service" warning lamp indicates a fault with the system.
This alert is also displayed when one or more wheels is not fitted with a sensor (for example, a space-saver or steel spare wheel).
Under-inflation alert
The alert is given by the fixed illumination of this warning lamp, accompanied by an audible signal, and depending on equipment, the display of a message.
In the event of a problem on one of the tyres , the symbol or the message appears, according to equipment, to identify it.
Reduce speed, avoid sudden steering movements or harsh brake applications. Stop as soon as it is safe to do so. In the event of a puncture, use the temporary puncture repair kit or the spare
wheel (according to equipment), or if you have a compressor, the one in the temporary puncture repair kit for example, check the four tyre pressures when cold, or if it is not possible to check the tyre pressures at the time, drive carefully at reduced speed.
The loss of pressure detected does not always lead to visible deformation of the tyre. Do not rely on just a visual check.
The alert is maintained until the tyre or tyres concerned is reinflated, repaired or replaced. The spare wheel (space-saver type or a steel rim) does not have a sensor.
Operating fault
Go to a PEUGEOT dealer or a qualified workshop to have the system checked or, following the repair of a puncture, to have the original wheel, equipped with a sensor, refitted.
In this case, monitoring of the tyre pressures is not assured.
Page 209 of 389
11
Practical information207
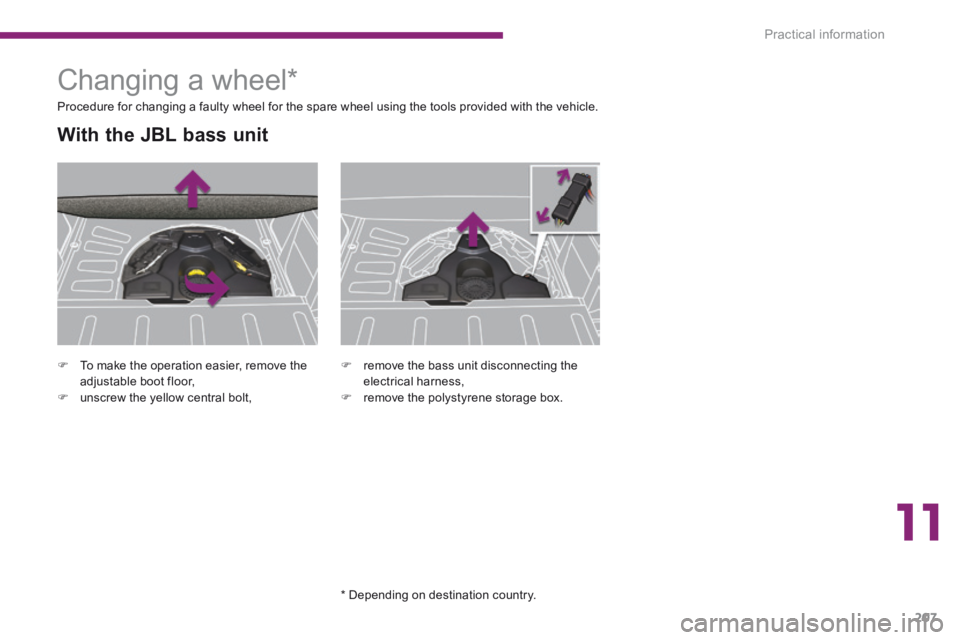
To make the operation easier, remove the adjustable boot floor, unscrew the yellow central bolt,
With the JBL bass unit
remove the bass unit disconnecting the electrical harness, remove the polystyrene storage box.
Changing a wheel *
Procedure for changing a faulty wheel for the spare wheel using the tools provided with the vehicle.
* Depending on destination country.
Page 212 of 389
Practical information
210
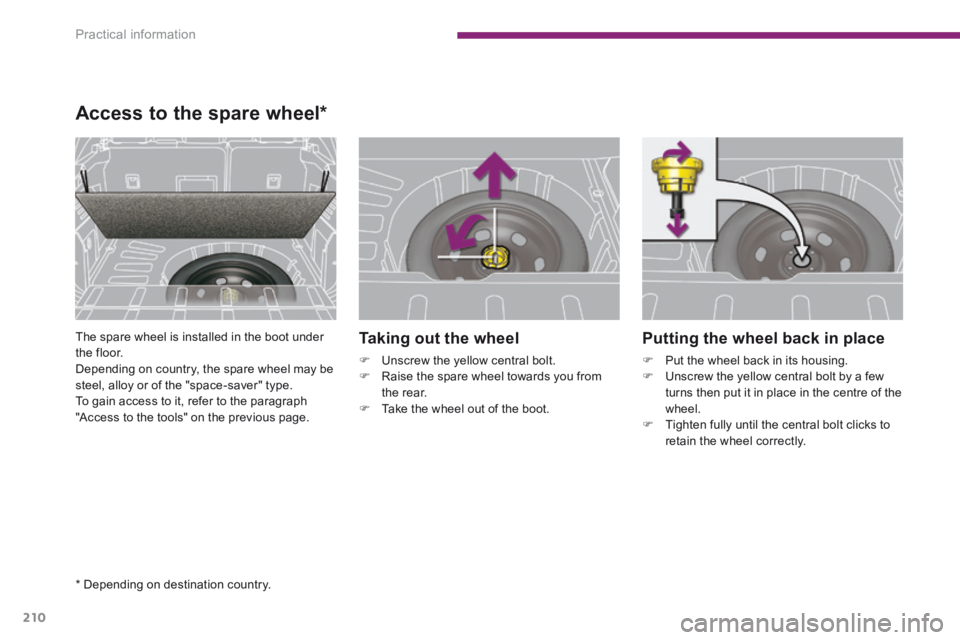
Putting the wheel back in place
Put the wheel back in its housing. Unscrew the yellow central bolt by a few turns then put it in place in the centre of the wheel. Tighten fully until the central bolt clicks to retain the wheel correctly.
Access to the spare wheel *
The spare wheel is installed in the boot under the floor. Depending on country, the spare wheel may be steel, alloy or of the "space-saver" type. To gain access to it, refer to the paragraph "Access to the tools" on the previous page.
Taking out the wheel
Unscrew the yellow central bolt. Raise the spare wheel towards you from the rear. Take the wheel out of the boot.
* Depending on destination country.