Page 13 of 400

11
.Eco-driving
308_EN_CHAP00C_ECO CONDUITE_ED02-2013
Limit the causes of excess consumption
Spread loads throughout the vehicle; place the heaviest items in the bottom of the boot, as close as possible to the rear seats. Limit the loads carried in the vehicle and reduce wind resistance (roof bars, roof rack, bicycle carrier, trailer...). Use a roof box in preference. Remove roof bars and roof racks after use.
At the end of winter, remove snow tyres and refit your summer tyres.
Observe the recommendations on
maintenance
Check the tyre pressures regularly, when cold, referring to the label in the door aperture, driver's side. Carry out this check in particular: - before a long journey, - at each change of season, - after a long period out of use. Don't forget the spare wheel and the tyres on any trailer or caravan.
Have your vehicle serviced regularly (engine oil, oil filter, air filter, passenger compartment filter...) and observe the schedule of operations recommended in the warranty and maintenance record.
When refuelling, do not continue after the third cut-off of the nozzle to avoid any over flow.
At the wheel of your new vehicle, it is only after the first 1 800 miles (3 000 kilometres) that you will see the fuel consumption settle down to a consistent average.
Page 92 of 400
90
Comfort
308_EN_CHAP03_CONFORT_ED02-2013
Boot fi ttings (saloon)
1. Rear parcel shelf2. Boot floor Boot floor Boot floor Raise the floor for access to the storage. 3. Storage wells in which are stowed: - the towing eye, - the temporary puncture repair kit, - the spare wheel, depending on trim level, an option or standard. 4. Stowing rings
Page 93 of 400
91
3
Comfort
308_EN_CHAP03_CONFORT_ED02-2013
Boot fi ttings (SW)
1. Boot lamp2. Rear Rear Rearseat folding controls3. 12 V accessor y socket (120 W max)4. Removable storage boxes Pull on the separations to unclip them. 5. Storage wells where are stowed: - the towing eye, - the temporary puncture repair kit, - the spare wheel, depending on trim level, an option or standard. 6. Load space cover Load space cover Load space cover (see corresponding section)
7. Towing eyes Extract the eyes one at a time then slide them into the oblong housing. While pressing the button, move the eye to the desired position. Observe the direction of fitting (rings to the
outside of the vehicle).
Page 191 of 400

189
6
Safety
308_EN_CHAP06_SECURITE_ED02-2013
Tyre under-infl ation detection
The system continuously monitors the pressures on the four tyres, once the vehicle is moving. It compares the information given by the four wheel speed sensors with reference values, which must be reinitialised ever y time the tyre pressures are adjusted or a wheel changed. The system triggers an alert as soon as it detects a drop in the inflation pressure of one or more tyres.
The under-inflation detection system does not replace the vigilance or the responsibility of the driver. This system does not avoid the need to check the tyre pressures (including the spare wheel) every month as well as before a long journey. Driving with under-inflated tyres impairs road holding, extends braking distances and causes premature tyre wear, particularly under arduous condition (high loading, high speed, long journey).
System which automatically checks the pressure of the tyres while driving.
The inflation pressures defined for your vehicle can be found on the tyre pressure label. See the "Identification markings" section. Tyre pressures should be checked when the tyres are "cold" (vehicle stopped for 1 hour or after a journey of less than 6 miles (10 km) at moderate speeds). Other wise, add 0.3 bar to the pressures shown on the label.
Driving with under-inflated tyres increases fuel consumption.
Page 192 of 400

190
Safety
308_EN_CHAP06_SECURITE_ED02-2013
Under-inflation alert Reinitialisation
Before reinitialising the system, ensure that the pressures of the four tyres are correct for the use of the vehicle and in line with the recommendations on the tyre pressure label. The under-inflation detection system does not give a warning if a pressure is incorrect at the time of reinitialisation.
This is given by fixed illumination of this warning lamp, accompanied by an audible signal and, depending on
equipment, the display of a message.
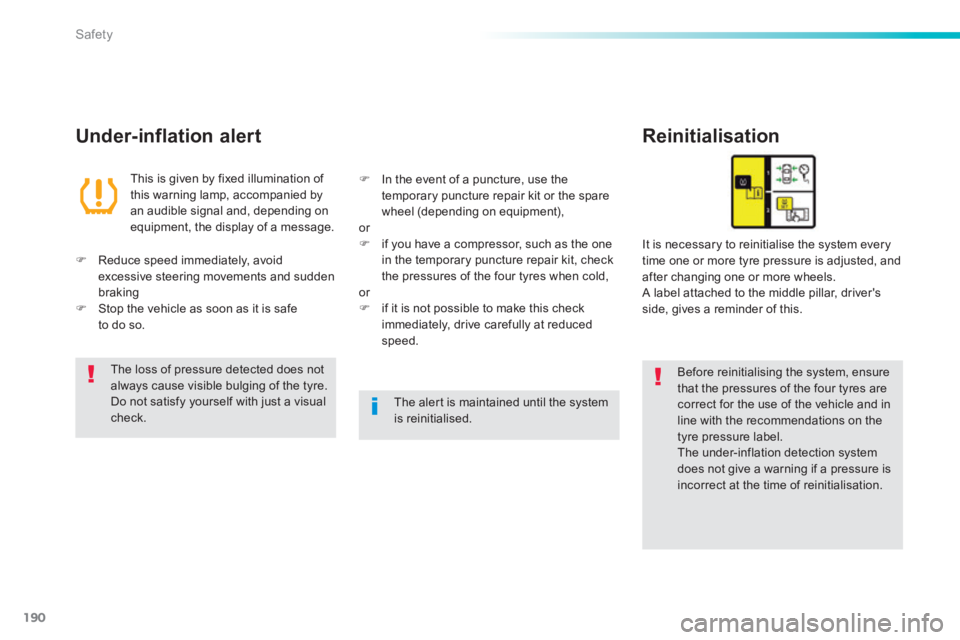
It is necessary to reinitialise the system every time one or more tyre pressure is adjusted, and after changing one or more wheels. A label attached to the middle pillar, driver's side, gives a reminder of this.
Reduce speed immediately, avoid excessive steering movements and sudden braking Stop the vehicle as soon as it is safe to do so.
In the event of a puncture, use the temporary puncture repair kit or the spare wheel (depending on equipment), or if you have a compressor, such as the one in the temporary puncture repair kit, check the pressures of the four tyres when cold, or if it is not possible to make this check immediately, drive carefully at reduced speed.
The loss of pressure detected does not always cause visible bulging of the tyre. Do not satisfy yourself with just a visual check. The alert is maintained until the system is reinitialised.
Page 216 of 400

214
Safety
308_EN_CHAP06_SECURITE_ED02-2013
The incorrect installation of a child seat in a vehicle compromises the child's
protection in the event of an accident.
Observe strictly the fitting instructions provided with the child seat. For information regarding the ISOFIX child seats which can be installed in your vehicle, refer to the table showing the locations for
installing ISOFIX child seats.
To secure the child seat to the top tether: - Remove and stow the head restraint before installing the child seat on the vehicle seat (refit it when the child seat is removed). - Pass the child seat upper strap over the top of the seat backrest, centred between the holes for the head restraint rods. - Attach the upper strap to the ring B . - Tighten the upper strap.
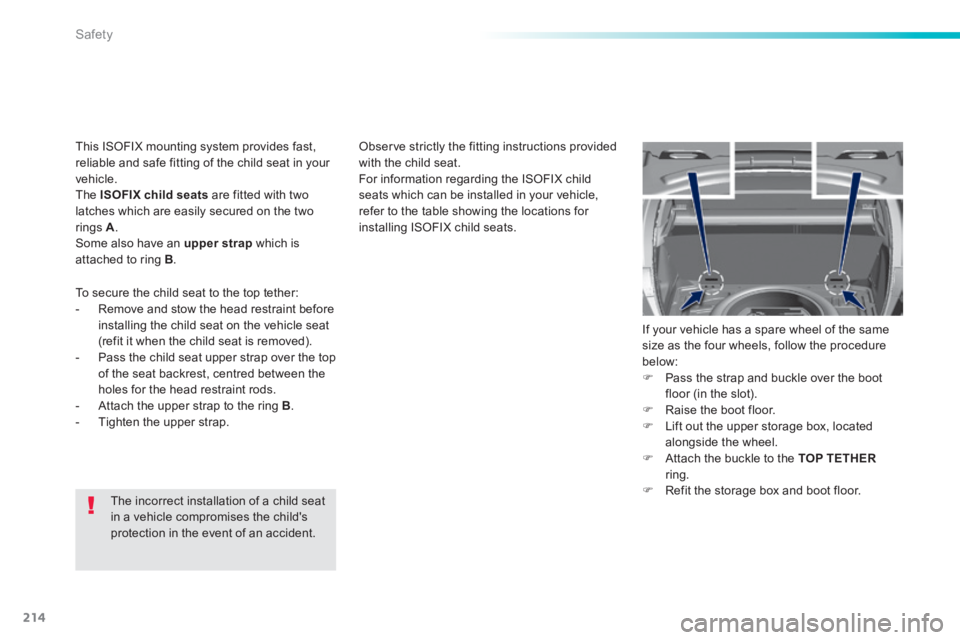
If your vehicle has a spare wheel of the same size as the four wheels, follow the procedure below: Pass the strap and buckle over the boot floor (in the slot). Raise the boot floor. Lift out the upper storage box, located alongside the wheel. Attach the buckle to the TOP TETHERring. Refit the storage box and boot floor.
This ISOFIX mounting system provides fast, reliable and safe fitting of the child seat in your vehicle. The ISOFIX child seats are fitted with two latches which are easily secured on the two
rings A . Some also have an upper strap which is attached to ring B .
Page 229 of 400
227
7
Practical information
308_EN_CHAP07_INFO PR ATIQUES_ED02-2013
Changing a wheel
The tools are installed in the boot under the f l o o r.
Access to the tools
List of tools
These tools are specific to your vehicle and can vary according to the level of equipment. Do not use them for other purposes. 1. Wheelbrace. For removing the wheel trim and removing the wheel bolts. 2. Jack with integral handle. For raising the vehicle.
3. "Bolt cover" tool. For removing the bolt protectors (covers) on alloy wheels. 4. Socket for the security bolts (located in the glove box). For adapting the wheelbrace to the special "security" bolts. 5. Towing eye. See "Towing the vehicle".
Procedure for changing a faulty wheel for the spare wheel using the tools provided with the vehicle.
Page 230 of 400
228
Practical information
308_EN_CHAP07_INFO PR ATIQUES_ED02-2013
Wheel with trim
When refitting the wheel , refit the trim starting by placing its notch facing the valve and press around its edge with the palm of your hand.
The spare wheel is located in the boot under the floor. According to country, the spare wheel may be steel, alloy or of the "space-saver" type. To gain access to it, refer to the "Access to the tools" section.
Access to the spare wheel
Taking out the wheel
Unscrew the (coloured) central bolt. Raise the spare wheel towards you from the rear. Take the wheel out of the boot.