Page 269 of 400
267
8
Checks
308_EN_CHAP08_VERIFICATIONS_ED02-2013
Bonnet
Before doing anything under the bonnet, switch off the Stop & Start system to avoid any risk of injury resulting from an automatic change to START mode.
Opening
Closing
Take the stay out of its support slot. Clip the stay back into its housing. Lower the bonnet and release it at the end of its travel. Pull on the bonnet to check that it has latched correctly.
Unclip the stay from its housing and place it in the support slot to hold the bonnet open.
Do not open the bonnet under very windy conditions.
When the engine is hot, handle the exterior safety catch and the stay with care (risk of burns). To avoid damaging electrical units, it is strictly forbidden to use a high pressure jet wash under the bonnet.
Pull the safety catch towards you, then raise the bonnet.
Open the door.
Pull the release lever, located at the bottom of the door aperture, towards you.
Page 279 of 400
277
8
Checks
308_EN_CHAP08_VERIFICATIONS_ED02-2013
Recommendations on storage
Never store bottles of AdBlue ® in your ® in your ®
vehicle.
AdBlue ® freezes at about -11°C and ® freezes at about -11°C and ®
deteriorates above 25°C. It is recommended that bottles be stored in a cool area and protected from direct sunlight. Under these conditions, the additive can be kept for at least a year. Additive that has been frozen can be used once it has thawed out.
Procedure
Before topping-up, ensure that the vehicle is parked on a flat and level sur face. In wintry conditions, ensure that the temperature of the vehicle is above -11°C.
Otherwise, by freezing, the AdBlue ® cannot ® cannot ®
be poured into its tank. Park your vehicle in a warmer area for a few hours to allow the top-up to be carried out.
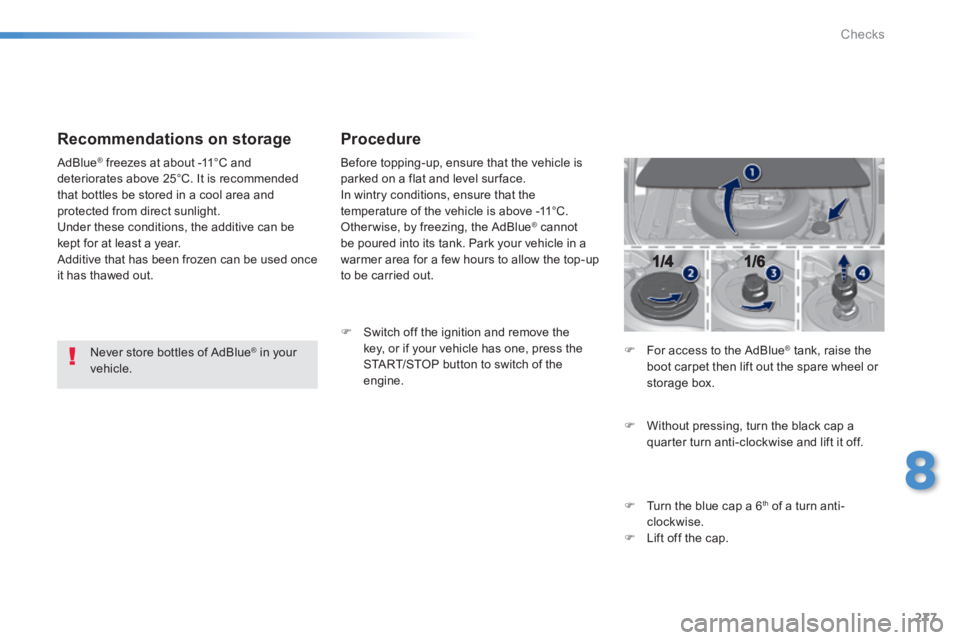
Switch off the ignition and remove the key, or if your vehicle has one, press the START/STOP button to switch of the engine.
For access to the AdBlue ® tank, raise the ® tank, raise the ®
boot carpet then lift out the spare wheel or storage box.
Without pressing, turn the black cap a quarter turn anti-clockwise and lift it off.
Turn the blue cap a 6 th of a turn anti-clockwise. Lift off the cap.
Page 280 of 400
278
Checks
308_EN_CHAP08_VERIFICATIONS_ED02-2013
Never dispose of AdBlue ® additive ® additive ®
bottles in the household waste. Place them in a special container provided this purpose or take them to your dealer.
Important: if your vehicle's AdBlue ®
tank is completely empty - which is
confirmed by the alert messages and the impossibility of starting the engine - you must add at least 3.8 litres, so two 1.89 litre bottles.
After emptying the bottle, wipe away any spillage around the tank filler using a damp cloth.
If any additive is split or splashed, wash immediately with cold water or wipe with a damp cloth. If the additive has crystallised, clean it off using a sponge and hot water.
Refit the blue cap to the tank and turn it a 6 th of a turn clockwise, to its stop. Refit the black cap and turn it a quarter of a turn clockwise without pressing. Ensure that the indicator on the cap lines up with
the indicator on the support. Lower the boot floor and close the tailgate.
Important: when topping-up after running out of additive , signalled by the message "Top up emissions additive: Starting prevented", you must wait for about 5 minutes before switching on the ignition, without opening the driver's door, unlocking the vehicle, introducing the key into the ignition switch, or placing the key of the "Keyless Entr y and Star ting" system inside the vehicle. Switch on the ignition, then wait for 10 seconds before starting the engine.
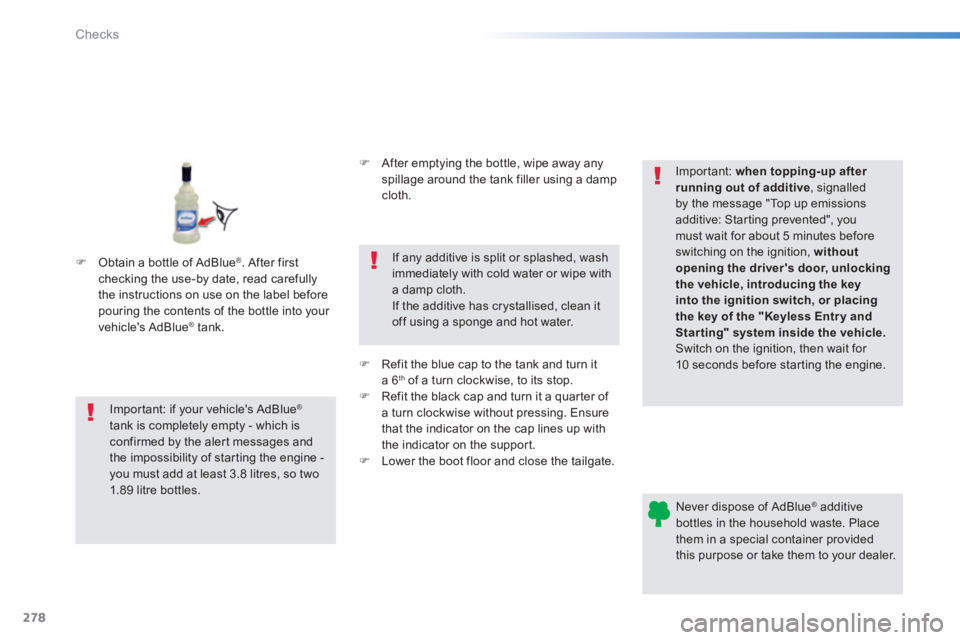
Obtain a bottle of AdBlue ® . After first checking the use-by date, read carefully the instructions on use on the label before pouring the contents of the bottle into your vehicle's AdBlue ® tank. ® tank. ®
Page 285 of 400
283
8
Checks
308_EN_CHAP08_VERIFICATIONS_ED02-2013
Checks
12 V battery
The battery does not require any maintenance. However, check that the terminals are clean and correctly tightened, particularly in summer and winter.
Refer to the warranty and maintenance record for details of the replacement intervals for these components.
Air filter and passenger compartment filter
Replace the oil filter each time the engine oil is changed. Refer to the warranty and maintenance record for details of the replacement interval for this component.
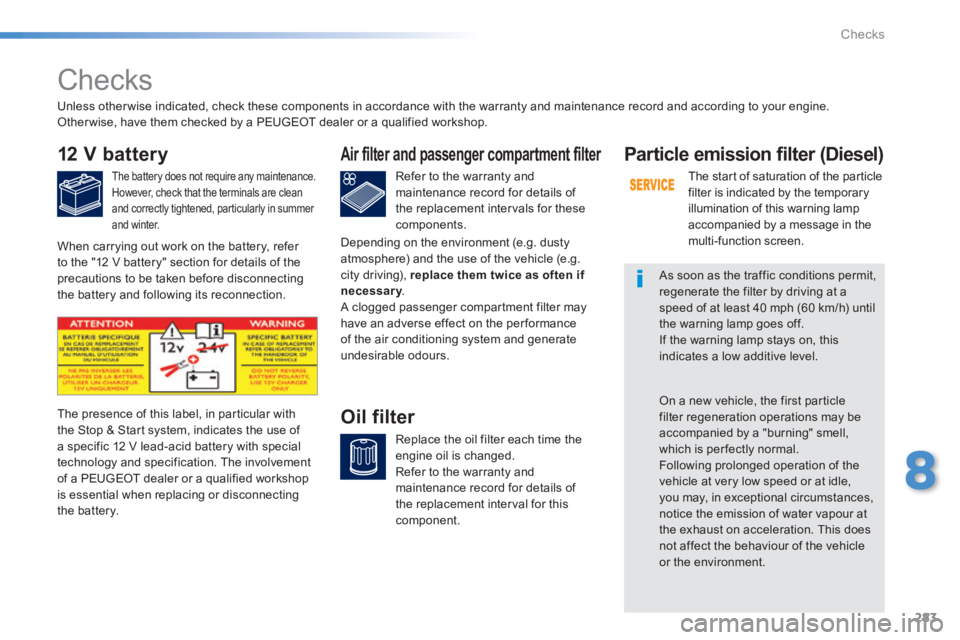
Oil filter The presence of this label, in particular with the Stop & Start system, indicates the use of a specific 12 V lead-acid battery with special technology and specification. The involvement of a PEUGEOT dealer or a qualified workshop is essential when replacing or disconnecting the battery.
Particle emission filter (Diesel)
The start of saturation of the particle filter is indicated by the temporary illumination of this warning lamp accompanied by a message in the multi-function screen.
As soon as the traffic conditions permit, regenerate the filter by driving at a speed of at least 40 mph (60 km/h) until the warning lamp goes off. If the warning lamp stays on, this indicates a low additive level.
On a new vehicle, the first particle filter regeneration operations may be accompanied by a "burning" smell, which is per fectly normal. Following prolonged operation of the vehicle at very low speed or at idle, you may, in exceptional circumstances, notice the emission of water vapour at the exhaust on acceleration. This does not affect the behaviour of the vehicle or the environment.
Unless other wise indicated, check these components in accordance with the warranty and maintenance record and according to your engine. Other wise, have them checked by a PEUGEOT dealer or a qualified workshop.
When carrying out work on the battery, refer to the "12 V battery" section for details of the precautions to be taken before disconnecting the battery and following its reconnection.
Depending on the environment (e.g. dusty atmosphere) and the use of the vehicle (e.g. city driving), replace them twice as often if necessary . necessary . necessary A clogged passenger compartment filter may have an adverse effect on the per formance of the air conditioning system and generate undesirable odours.
Page 319 of 400
317
308_EN_CHAP10C_SMEGPLUS_ED02-2013
Level 1Level 2Level 3Comments
Navigation
Settings
Navigation
Recent destinations Display recent destinations .
Calculatory criteria
Fastest
Choose the navigation criteria.
The map displays the route chosen according to these criteria.
Shortest
Time/distance
Ecological
Tolls
Ferries
Strict - Close
Show route on map Display the map and start navigation.
Confi rm Save the options.
Save current location Save the current address.
Stop navigation Delete the navigation information.
Voice synthesis Choose the volume for voice and announcement of street names.
Diversion Detour from your initial route by a certain distance.
Navigation
Map
Zoom in.
Zoom out.
Use the arrows to move the map.
Calculatory criteria
Add a waypoint.
Switch to 2D map.
Page 324 of 400
05
322
308_EN_CHAP10C_SMEGPLUS_ED02-2013
Towards a new destination
Choosing a new destination
Select " Enter destination ".
Select " Save " to save the address entered as a contact entry.
The system allows up to 200 entries.
Select " Confi rm " or press " Show route on map " to start navigation guidance.
Select " Address ".
Select the " Country: " from the list offered then in the same way:
the " City: " or its post code, the " Road: ", the " N°: ". Confi rm each time.
Select " Navigate to ".
Choose the restriction criteria: " Include tollroads ", " Include ferries ", " Traffi c ", " Strict ", " Close ".
Choose the navigation criteria: " Fastest " or " Shortest " or " Time/distance " or " Ecological ".
To delete navigation information, press on " Settings " then " Stop navigation ".
To restore the navigation information press on " Settings " then " Resume navigation ".
Press on Navigation to display the primary page then go to the secondary page.
NAVIGATION - GUIDANCE
Page 353 of 400
351
308_EN_CHAP10C_SMEGPLUS_ED02-2013
Level 1Level 2Level 3Comments
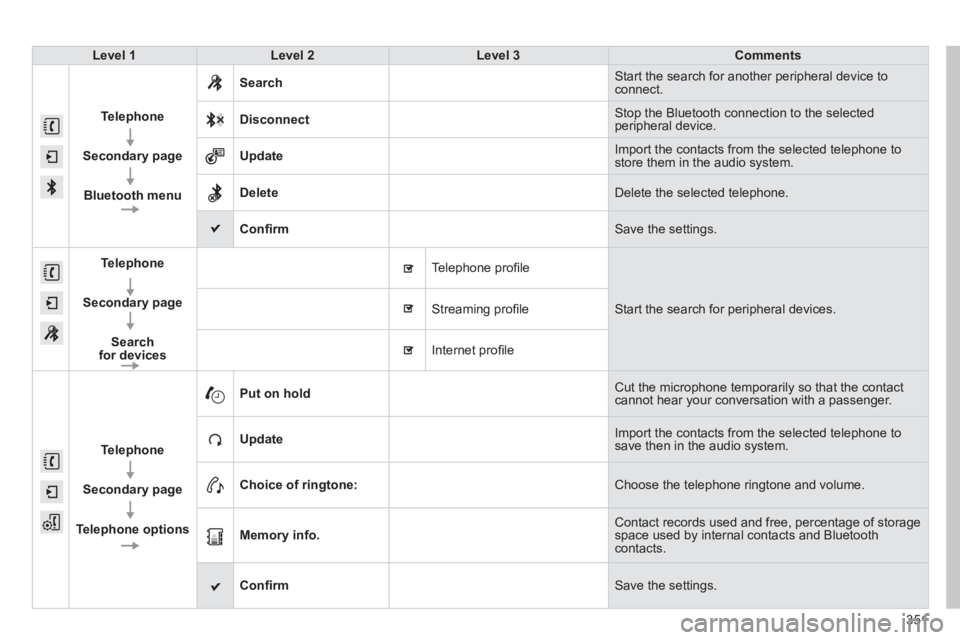
Telephone
Secondary page
Bluetooth menu
Search Start the search for another peripheral device to connect.
Disconnect Stop the Bluetooth connection to the selected peripheral device.
Update Import the contacts from the selected telephone to store them in the audio system.
Delete Delete the selected telephone.
Confi rm Save the settings.
Telephone
Secondary page
Search for devices
Telephone profi le
Start the search for peripheral devices . Streaming profi le
Internet profi le
Telephone
Secondary page
Telephone options
Put on hold Cut the microphone temporarily so that the contact cannot hear your conversation with a passenger.
Update Import the contacts from the selected telephone to save then in the audio system.
Choice of ringtone: Choose the telephone ringtone and volume.
Memory info. Contact records used and free, percentage of storage space used by internal contacts and Bluetooth contacts.
Confi rm Save the settings.
Page 387 of 400
385
308_EN_CHAP10D_RD45_ED02_2013
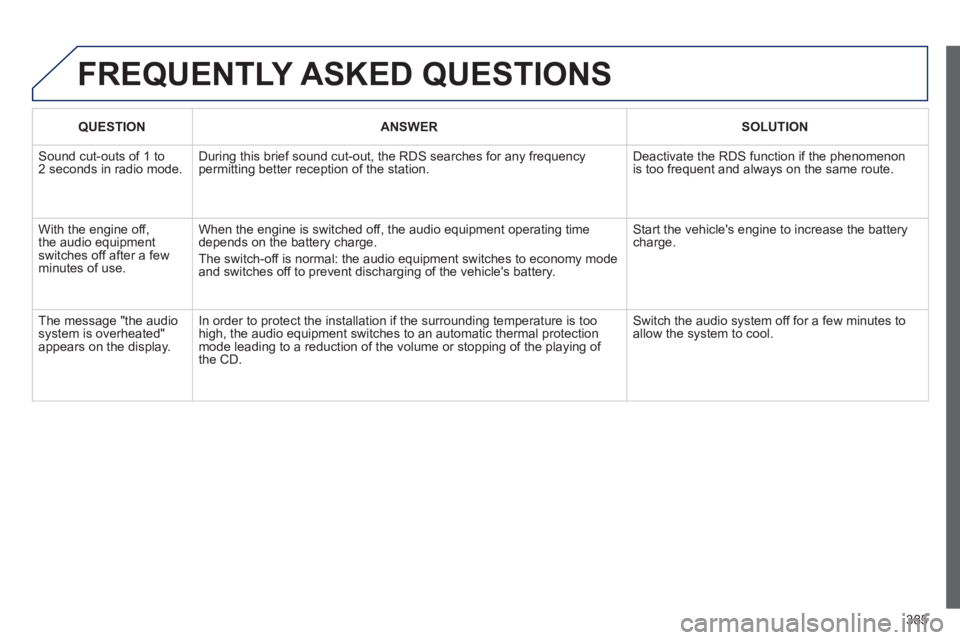
FREQUENTLY ASKED QUESTIONS
QUESTIONANSWERSOLUTION
Sound cut-outs of 1 to 2 seconds in radio mode. During this brief sound cut-out, the RDS searches for any frequency permitting better reception of the station. Deactivate the RDS function if the phenomenon is too frequent and always on the same route.
With the engine off, the audio equipment switches off after a few minutes of use.
When the engine is switched off, the audio equipment operating time depends on the battery charge.
The switch-off is normal: the audio equipment switches to economy mode and switches off to prevent discharging of the vehicle's battery.
Start the vehicle's engine to increase the battery charge.
The message "the audio system is overheated" appears on the display.
In order to protect the installation if the surrounding temperature is t\
oo high, the audio equipment switches to an automatic thermal protection mode leading to a reduction of the volume or stopping of the playing of \
the CD.
Switch the audio system off for a few minutes to allow the system to cool.