Page 103 of 378
4
Access101
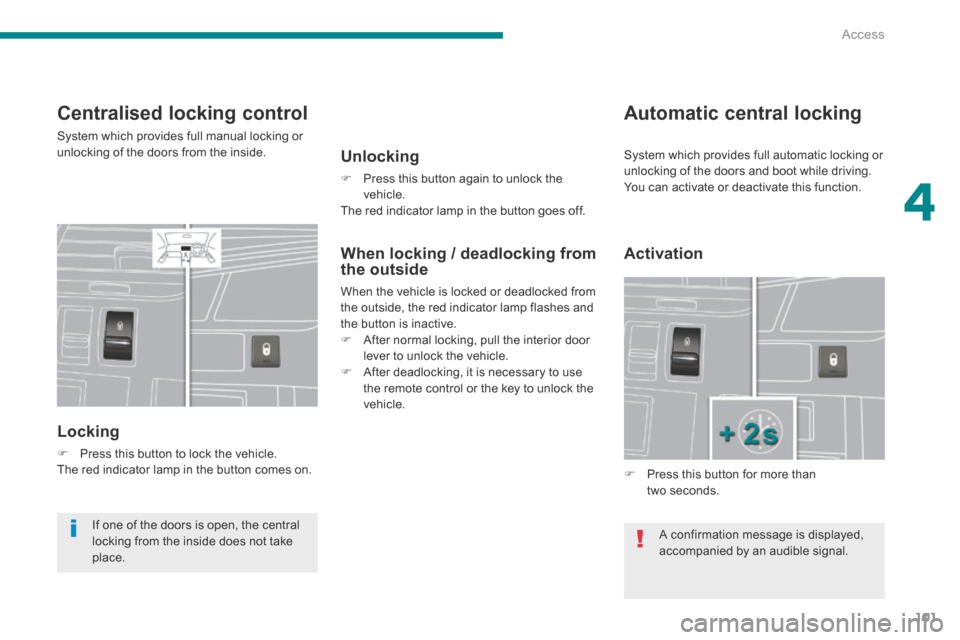
Centralised locking control
System which provides full manual locking or unlocking of the doors from the inside.
Locking
Press this button to lock the vehicle. The red indicator lamp in the button comes on.
Automatic central locking
Unlocking
Press this button again to unlock the vehicle. The red indicator lamp in the button goes off.
Activation
Press this button for more than two seconds.
A confirmation message is displayed, accompanied by an audible signal.
When locking / deadlocking from the outside
When the vehicle is locked or deadlocked from the outside, the red indicator lamp flashes and the button is inactive. After normal locking, pull the interior door lever to unlock the vehicle. After deadlocking, it is necessary to use the remote control or the key to unlock the vehicle.
If one of the doors is open, the central
locking from the inside does not take place.
System which provides full automatic locking or unlocking of the doors and boot while driving. You can activate or deactivate this function.
Page 104 of 378
Access
102
A confirmation message is displayed, accompanied by an audible signal.
Deactivation
Press this button again for more than two seconds.
Unlocking
Above 6 mph (10 km/h), press this button to unlock the doors and boot temporarily.
Emergency control
System allowing the doors to be locked and unlocked manually in the event of a malfunction of the central locking system or battery failure.
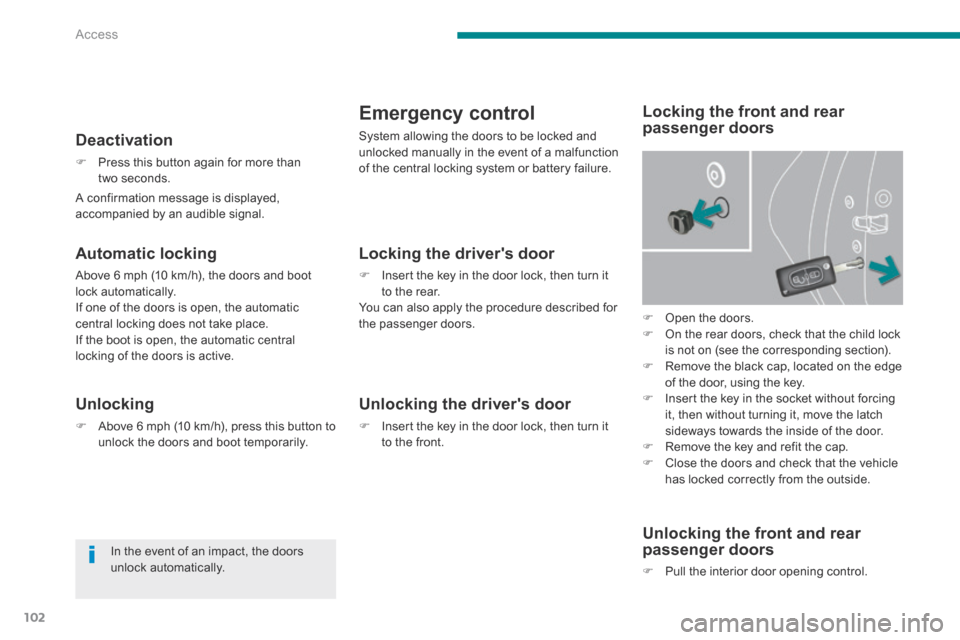
Open the doors. On the rear doors, check that the child lock is not on (see the corresponding section). Remove the black cap, located on the edge of the door, using the key. Insert the key in the socket without forcing it, then without turning it, move the latch sideways towards the inside of the door. Remove the key and refit the cap. Close the doors and check that the vehicle has locked correctly from the outside.
Locking the driver's door
Insert the key in the door lock, then turn it to the rear. You can also apply the procedure described for the passenger doors.
Unlocking the driver's door
Insert the key in the door lock, then turn it to the front.
Locking the front and rear passenger doors
Unlocking the front and rear passenger doors
Pull the interior door opening control.
In the event of an impact, the doors unlock automatically.
Automatic locking
Above 6 mph (10 km/h), the doors and boot lock automatically. If one of the doors is open, the automatic central locking does not take place. If the boot is open, the automatic central locking of the doors is active.
Page 111 of 378
5
Visibility109
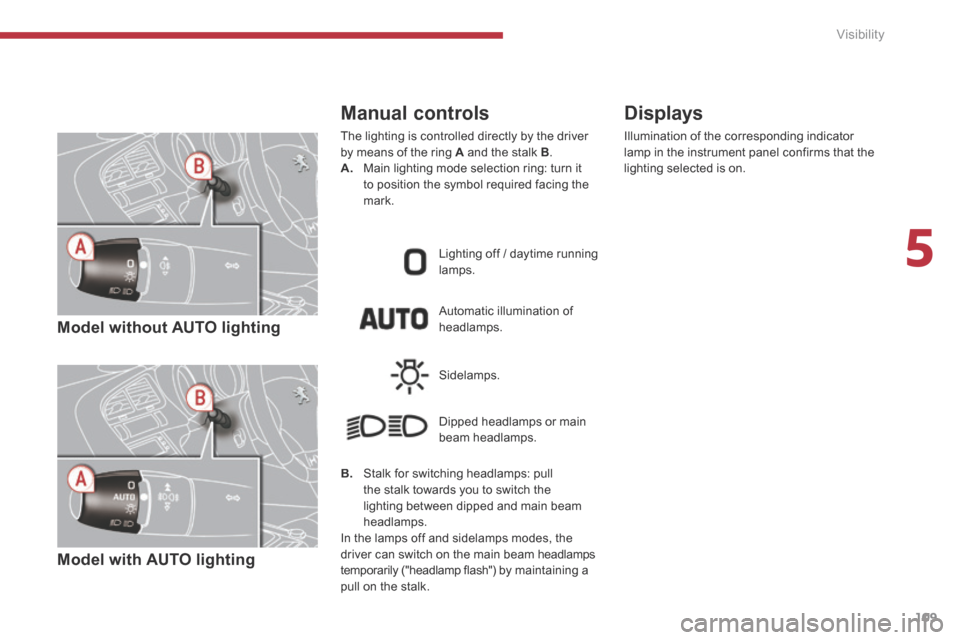
Model without AUTO lighting
Model with AUTO lighting
Automatic illumination of headlamps.
Manual controls
The lighting is controlled directly by the driver by means of the ring A and the stalk B . A. Main lighting mode selection ring: turn it to position the symbol required facing the mark.
Lighting off / daytime running lamps.
Sidelamps.
B. Stalk for switching headlamps: pull the stalk towards you to switch the lighting between dipped and main beam headlamps. In the lamps off and sidelamps modes, the driver can switch on the main beam headlamps temporarily ("headlamp flash") by maintaining a pull on the stalk.
Dipped headlamps or main beam headlamps.
Displays
Illumination of the corresponding indicator lamp in the instrument panel confirms that the lighting selected is on.
Page 116 of 378
Visibility
114
Automatic illumination of
headlamps
When a low level of ambient light is detected by a sunshine sensor, the number plate lamps, sidelamps and dipped beam headlamps are switched on automatically, without any action on the part of the driver. They can also come on if rain is detected, at the same time as automatic operation of the windscreen wipers. As soon as the brightness returns to a sufficient level or after the windscreen wipers are switched off, the lamps are switched off automatically.
Activation
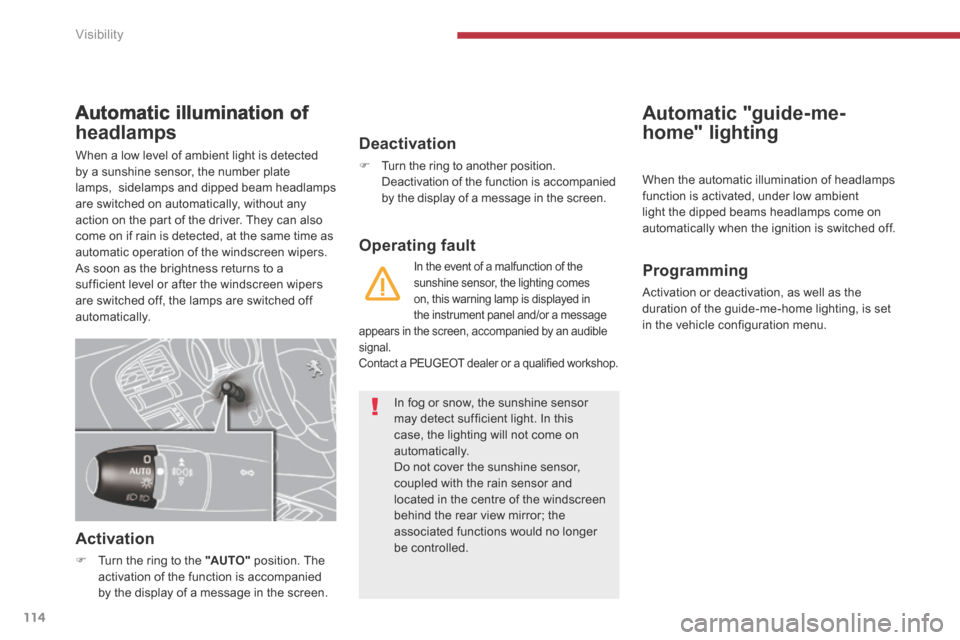
Turn the ring to the "AUTO" position. The activation of the function is accompanied by the display of a message in the screen.
Deactivation
Turn the ring to another position. Deactivation of the function is accompanied by the display of a message in the screen.
When the automatic illumination of headlamps function is activated, under low ambient light the dipped beams headlamps come on automatically when the ignition is switched off.
Operating fault
In the event of a malfunction of the sunshine sensor, the lighting comes on, this warning lamp is displayed in the instrument panel and/or a message appears in the screen, accompanied by an audible signal. Contact a PEUGEOT dealer or a qualified workshop.
Automatic "guide-me-
home" lighting
Programming
Activation or deactivation, as well as the duration of the guide-me-home lighting, is set in the vehicle configuration menu.
In fog or snow, the sunshine sensor may detect sufficient light. In this
case, the lighting will not come on automatically. Do not cover the sunshine sensor, coupled with the rain sensor and located in the centre of the windscreen behind the rear view mirror; the associated functions would no longer be controlled.
Page 120 of 378
Visibility
118
Windscreen and headlamp wash
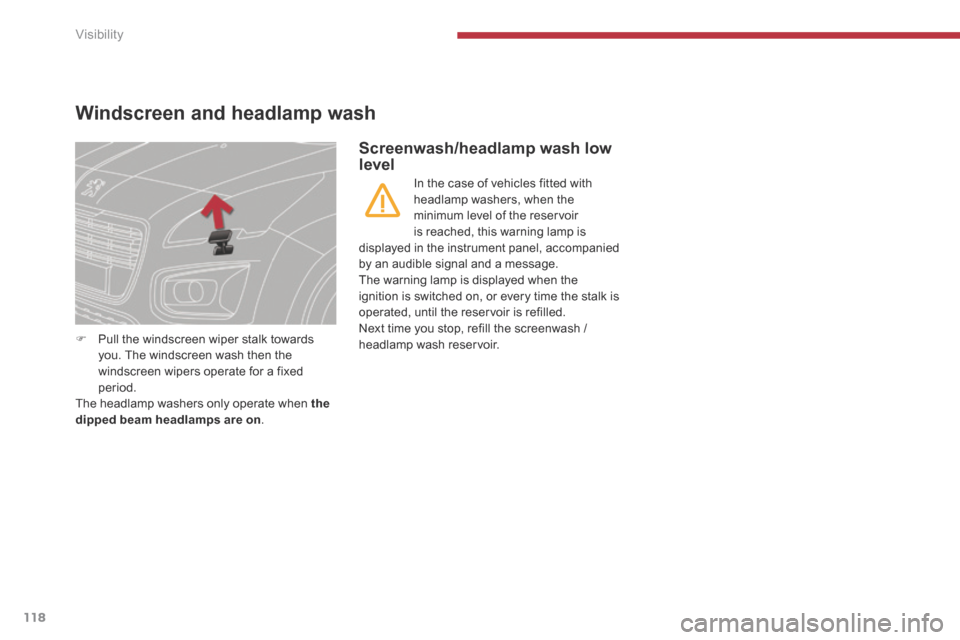
Pull the windscreen wiper stalk towards you. The windscreen wash then the windscreen wipers operate for a fixed period. The headlamp washers only operate when the dipped beam headlamps are on .
Screenwash/headlamp wash low level
In the case of vehicles fitted with headlamp washers, when the minimum level of the reservoir is reached, this warning lamp is displayed in the instrument panel, accompanied by an audible signal and a message. The warning lamp is displayed when the ignition is switched on, or every time the stalk is operated, until the reservoir is refilled. Next time you stop, refill the screenwash / headlamp wash reservoir.
Page 128 of 378
Fittings
126
Front armrest
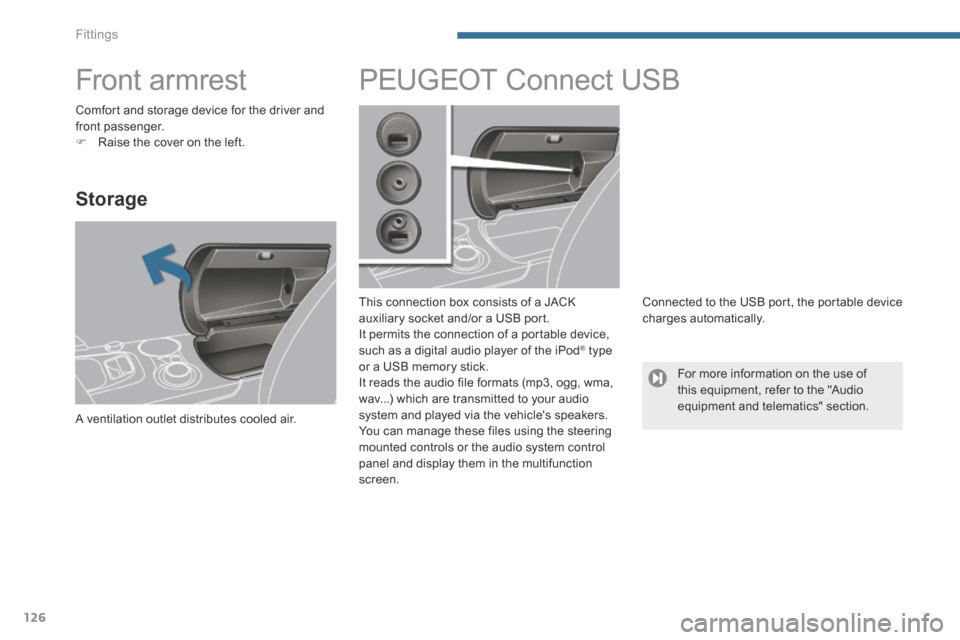
Storage
A ventilation outlet distributes cooled air.
PEUGEOT Connect USB
This connection box consists of a JACK auxiliary socket and/or a USB port. It permits the connection of a portable device, such as a digital audio player of the iPod ® type ® type ®
or a USB memory stick. It reads the audio file formats (mp3, ogg, wma, wav...) which are transmitted to your audio system and played via the vehicle's speakers.
You can manage these files using the steering mounted controls or the audio system control panel and display them in the multifunction screen.
Connected to the USB port, the portable device charges automatically.
Comfort and storage device for the driver and front passenger. Raise the cover on the left.
For more information on the use of this equipment, refer to the "Audio equipment and telematics" section.
Page 130 of 378
Fittings
128
Rear multimedia
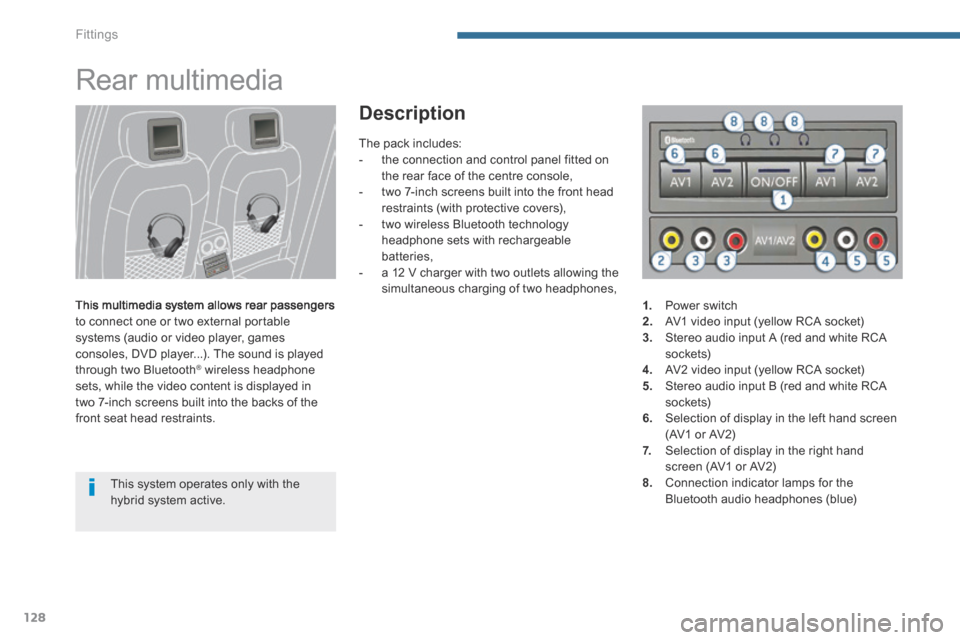
This multimedia system allows rear passengers to connect one or two external portable systems (audio or video player, games consoles, DVD player...). The sound is played through two Bluetooth ® wireless headphone ® wireless headphone ®
sets, while the video content is displayed in two 7-inch screens built into the backs of the front seat head restraints.
This system operates only with the hybrid system active.
Description
The pack includes: - the connection and control panel fitted on the rear face of the centre console, - two 7-inch screens built into the front head restraints (with protective covers), - two wireless Bluetooth technology headphone sets with rechargeable batteries, - a 12 V charger with two outlets allowing the simultaneous charging of two headphones,
1. Power switch 2. AV1 video input (yellow RCA socket) 3. Stereo audio input A (red and white RCA s o c ket s) 4. AV2 video input (yellow RCA socket) 5. Stereo audio input B (red and white RCA s o c ket s) 6. Selection of display in the left hand screen (AV1 or AV2) 7. Selection of display in the right hand screen (AV1 or AV2) 8. Connection indicator lamps for the Bluetooth audio headphones (blue)
Page 131 of 378
6
Fittings129
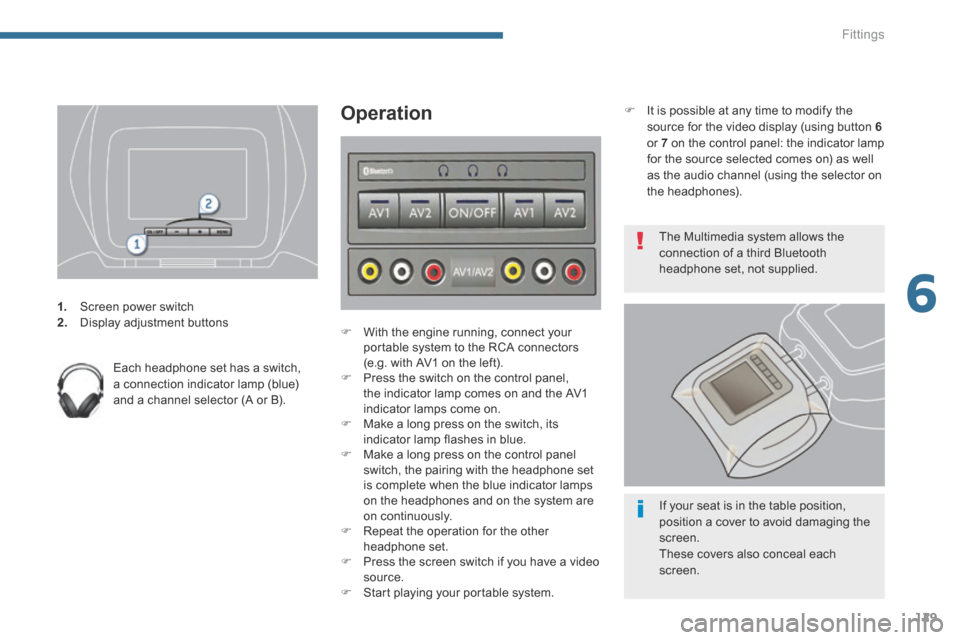
1. Screen power switch 2. Display adjustment buttons
Each headphone set has a switch, a connection indicator lamp (blue) and a channel selector (A or B).
Operation
With the engine running, connect your portable system to the RCA connectors (e.g. with AV1 on the left). Press the switch on the control panel, the indicator lamp comes on and the AV1 indicator lamps come on. Make a long press on the switch, its indicator lamp flashes in blue. Make a long press on the control panel switch, the pairing with the headphone set is complete when the blue indicator lamps on the headphones and on the system are on continuously. Repeat the operation for the other headphone set. Press the screen switch if you have a video source. Start playing your portable system.
It is possible at any time to modify the source for the video display (using button 6or 7 on the control panel: the indicator lamp for the source selected comes on) as well as the audio channel (using the selector on the headphones).
The Multimedia system allows the connection of a third Bluetooth headphone set, not supplied.
If your seat is in the table position, position a cover to avoid damaging the screen. These covers also conceal each screen.