Page 87 of 256
85
Before doing anything under the
bonnet, deactivate the Stop & Start
system to avoid any risk of injury
resulting from automatic operation of
S
t
A R
t m
o d e .
Maintenance
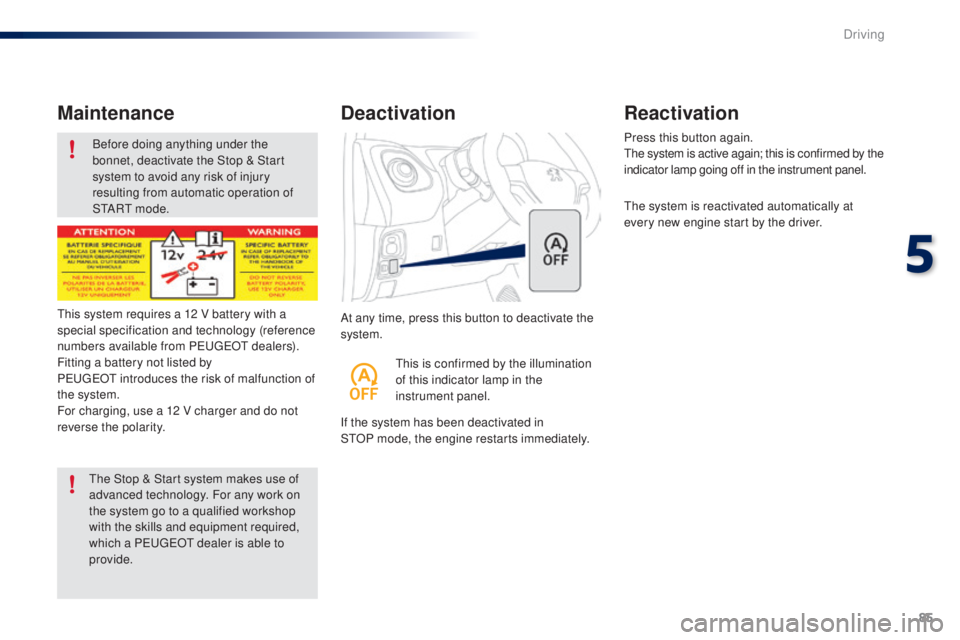
At any time, press this button to deactivate the
system.
Deactivation
If the system has been deactivated in
StOP mode, the engine restarts immediately. Press this button again.
th
e system is active again; this is confirmed by the
indicator lamp going off in the instrument panel.
th
e system is reactivated automatically at
every new engine start by the driver.
Reactivation
this is confirmed by the illumination
of this indicator lamp in the
instrument panel.
th
is system requires a 12 V battery with a
special specification and technology (reference
numbers available from P
e
uge
Ot d
ealers).
Fitting a battery not listed by
Pe
ugeOt
introduces the risk of malfunction of
the system.
For charging, use a 12 V charger and do not
reverse the polarity.
th
e Stop & Start system makes use of
advanced technology. For any work on
the system go to a qualified workshop
with the skills and equipment required,
which a P
e
uge
Ot
dealer is able to
provide.
5
Driving
Page 88 of 256
86
the speed limiter cannot, in any
circumstances, replace the need to
observe speed limits, nor can it replace the
need for vigilance on the part of the driver.
Speed limiter (Vti 82 engine)
the speed limiter is switched on manually:
this can be done whatever the speed of the
vehicle. However, if you are driving at less than
20 mph (30 km/h), the programmed speed will
be fixed at 20 mph (30 km/h).
th
e speed limiter is paused by operation of the
control.
th
e programmed speed can be exceeded
temporarily by pressing the accelerator firmly
beyond the point of resistance.
to r
eturn to the programmed speed, simply
release the accelerator pedal until the vehicle
returns to the programmed speed limit. System which prevents the vehicle from exceeding the speed programmed by the driver.Steering mounted controls
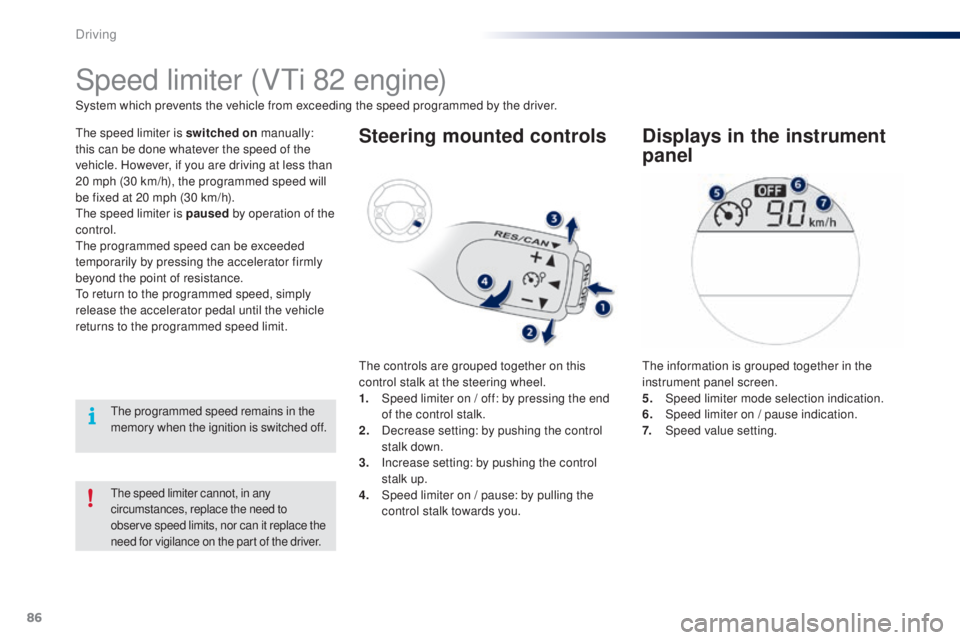
the controls are grouped together on this
control stalk at the steering wheel.
1.
S
peed limiter on / off: by pressing the end
of the control stalk.
2.
D
ecrease setting: by pushing the control
stalk down.
3.
I
ncrease setting: by pushing the control
stalk up.
4.
S
peed limiter on / pause: by pulling the
control stalk towards you.
Displays in the instrument
panel
the information is grouped together in the
instrument panel screen.
5.
Spe
ed limiter mode selection indication.
6.
S
peed limiter on / pause indication.
7.
Spe
ed value setting.
th
e programmed speed remains in the
memory when the ignition is switched off.
Driving
Page 90 of 256
88
Switching off
F Press the end of the control stalk. th e display of information related to the
speed limiter disappears.
Operating fault
Illumination of this warning lamp in
the instrument panel indicates a fault
with the speed limiter.
Have it checked by a P
e
uge
Ot
dealer or a qualified workshop.
th
e use of mats not approved by
P
e
uge
Ot
may inter fere with the
operation of the speed limiter.
to a
void any risk of jamming of the
pedals:
-
e
nsure that the mat is secured
c o r r e c t l y,
-
d
o not fit one mat on top of another.
Temporarily exceeding the
programmed speed
F Press f irmly on the accelerator pedal,
going beyond the point of resistance, to
exceed the programmed speed limit.
th
e speed limiter is deactivated temporarily
and the displayed programmed speed flashes.
As soon as the vehicle's speed returns to the
programmed value, the limiter operates again:
the display of the programmed speed becomes
steady again. An audible signal accompanies the
flashing of the programmed speed
when exceeding the speed is not due to
an action by the driver (steep hill...).
Driving
Page 91 of 256
89
Speed limiter (Vti 68 engine)
System which prevents the vehicle from exceeding the speed programmed by the driver.
th
e speed limiter is switched on manually:
this can be done whatever the speed of the
vehicle. However, if you are driving at less than
20 mph (30 km/h), the programmed speed will
be fixed at 20 mph (30 km/h).
th
e speed limiter is paused by operation of the
control.
th
e programmed speed can be exceeded
temporarily by pressing the accelerator firmly
beyond the point of resistance.
to r
eturn to the programmed speed, simply
release the accelerator pedal until the vehicle
returns to the programmed speed limit.
th
e programmed limit speed is erased
when switching off the ignition.
Steering mounted controls
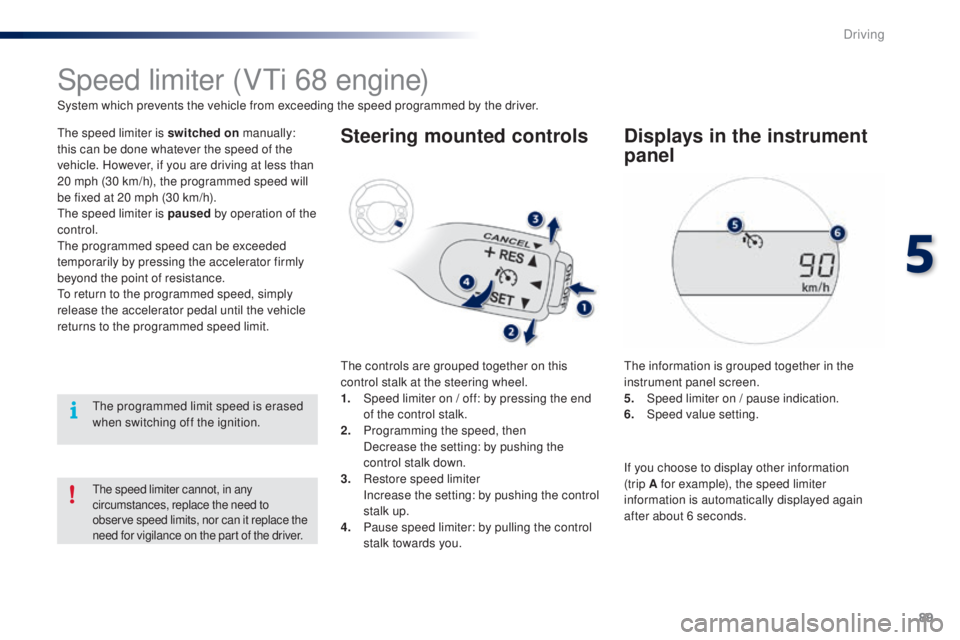
the controls are grouped together on this
control stalk at the steering wheel.
1.
S
peed limiter on / off: by pressing the end
of the control stalk.
2.
P
rogramming the speed, then
D
ecrease the setting: by pushing the
control stalk down.
3.
R
estore speed limiter
I
ncrease the setting: by pushing the control
stalk up.
4.
P
ause speed limiter: by pulling the control
stalk towards you.
Displays in the instrument
panel
the information is grouped together in the
instrument panel screen.
5.
S
peed limiter on / pause indication.
6.
Spe
ed value setting.
the speed limiter cannot, in any
circumstances, replace the need to
observe speed limits, nor can it replace the
need for vigilance on the part of the driver.
If you choose to display other information
(trip A for example), the speed limiter
information is automatically displayed again
after about 6 seconds.
5
Driving
Page 92 of 256
90
F Press the end of the control stalk: the speed limiter is switched on.
F
A
ccelerate or decelerate to attain the
desired speed.
F
P
ush the control stalk down and release, to
programme the speed.
t
h
e speed at which the vehicle is running
at the moment when you release the
control stalk becomes the programmed
speed.
Adjusting the speed limit
setting
Once a speed is programmed, you can modify
it by pushing and releasing the control stalk:
-
u
p to increase the speed setting,
-
d
own to reduce the speed setting.
A brief push on the control stalk modifies the
speed setting by + or - 1 km/h.
A maintained push on the control stalk modifies
the speed setting by + or - 5 km/h.
Switching on
this indicator lamp comes on in the
instrument panel.
Pause
F You can temporarily stop the the speed limiter by pulling the control stalk towards
you.
F
P
ush the control stalk up to restore
operation of the speed limiter with the
same speed setting.
Driving
Page 93 of 256
91
Switching off
F Press the end of the control stalk th e display of information related to the
speed limiter disappears.
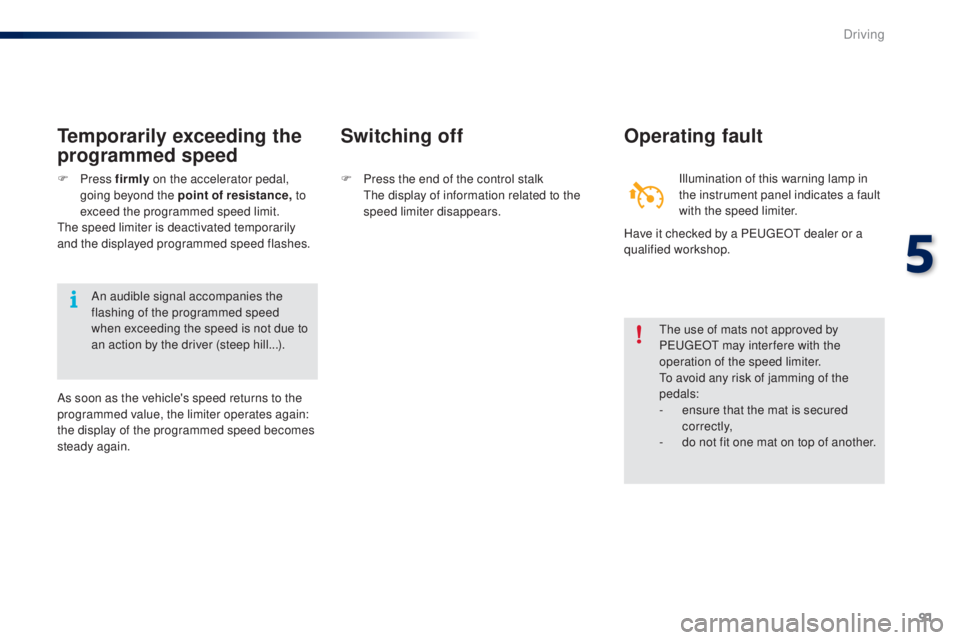
Operating fault
Illumination of this warning lamp in
the instrument panel indicates a fault
with the speed limiter.
th
e use of mats not approved by
P
e
uge
Ot
may inter fere with the
operation of the speed limiter.
to a
void any risk of jamming of the
pedals:
-
e
nsure that the mat is secured
c o r r e c t l y,
-
d
o not fit one mat on top of another.
Temporarily exceeding the
programmed speed
F Press f irmly on the accelerator pedal,
going beyond the point of resistance, to
exceed the programmed speed limit.
th
e speed limiter is deactivated temporarily
and the displayed programmed speed flashes. Have it checked by a P
e
uge
Ot
dealer or a
qualified workshop.
An audible signal accompanies the
flashing of the programmed speed
when exceeding the speed is not due to
an action by the driver (steep hill...).
As soon as the vehicle's speed returns to the
programmed value, the limiter operates again:
the display of the programmed speed becomes
steady again.
5
Driving
Page 96 of 256
94
Model without AUTO lighting
Model with AUTO lightingSelection ring for main lighting
mode
turn the ring to position the symbol required
facing the mark.
Lighting off / Daytime running lamps.
Sidelamps only.
Dipped or main beam headlamps.
Automatic illumination of
headlamps.
Dipping the headlamps
With dipped beam on, push the control stalk
away from you to change to main beam. Pull
the stalk toward you change back to dipped
beam.
In the lighting off and sidelamps modes, the
driver can switch on the main beam headlamps
temporarily ("headlamp flash") by maintaining a
pull on the stalk.
Displays
Illumination of the corresponding indicator lamp
in the instrument panel confirms the lighting
switched on.
Visibility
Page 107 of 256
105
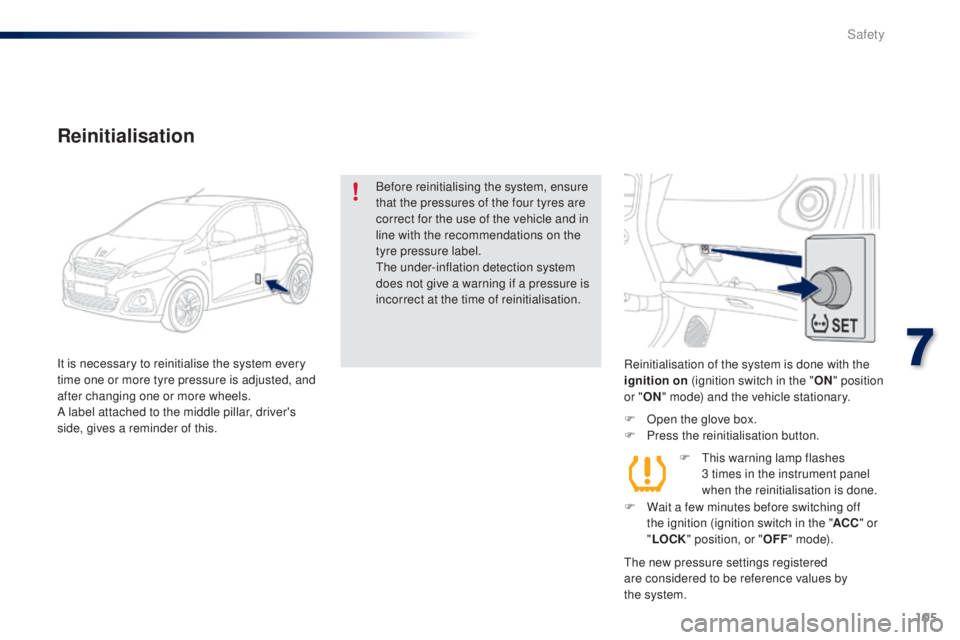
Reinitialisation of the system is done with the
ignition on (ignition switch in the " ON" position
or " ON" mode) and the vehicle stationary.
F
O
pen the glove box.
F
P
ress the reinitialisation button.
the
new pressure settings registered
are considered to be reference values by
the
system.
Reinitialisation
Before reinitialising the system, ensure
that the pressures of the four tyres are
correct for the use of the vehicle and in
line with the recommendations on the
tyre pressure label.
th
e under-inflation detection system
does not give a warning if a pressure is
incorrect at the time of reinitialisation.
It is necessary to reinitialise the system every
time one or more tyre pressure is adjusted, and
after changing one or more wheels.
A label attached to the middle pillar, driver's
side, gives a reminder of this. F
t
h
is warning lamp flashes
3
times in the instrument panel
when the reinitialisation is done.
F
W
ait a few minutes before switching off
the ignition (ignition switch in the " ACC" or
" LOCK " position, or " OFF" m o d e).
7
Safety