Page 368 of 442
CHECKING ENGINE OIL LEVEL
1. Park the vehicle on a level surface and applythe parking brake.
2. Start the engine and let it idle until it reaches operating temperature.
3. Turn off the engine. Wait more than
10 minutes for the oil to drain back into
the oil pan.
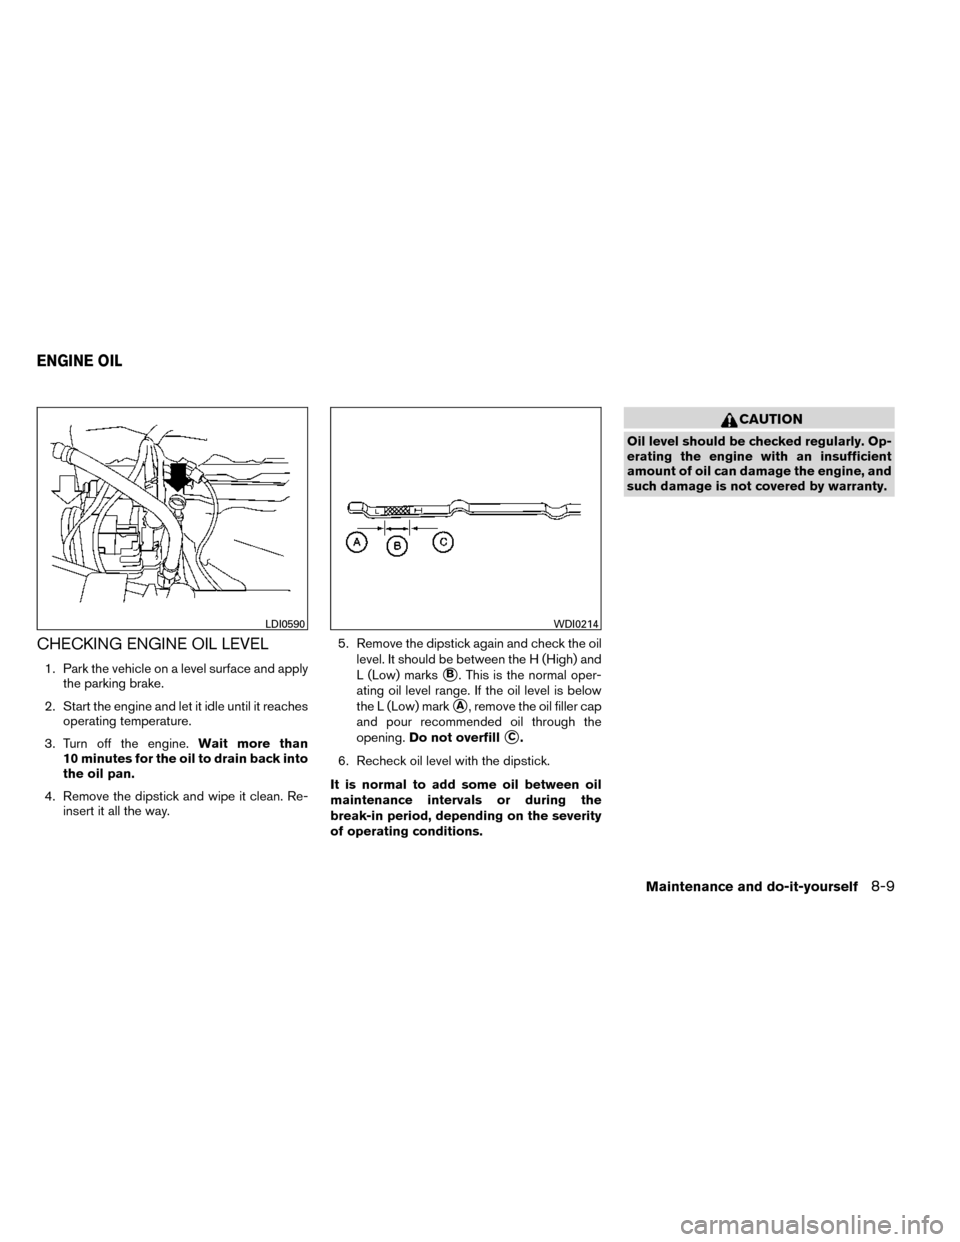
4. Remove the dipstick and wipe it clean. Re- insert it all the way. 5. Remove the dipstick again and check the oil
level. It should be between the H (High) and
L (Low) marks�B. This is the normal oper-
ating oil level range. If the oil level is below
the L (Low) mark
�A, remove the oil filler cap
and pour recommended oil through the
opening. Do not overfill
�C.
6. Recheck oil level with the dipstick.
It is normal to add some oil between oil
maintenance intervals or during the
break-in period, depending on the severity
of operating conditions.
CAUTION
Oil level should be checked regularly. Op-
erating the engine with an insufficient
amount of oil can damage the engine, and
such damage is not covered by warranty.
LDI0590WDI0214
ENGINE OIL
Maintenance and do-it-yourself8-9
Page 369 of 442
CHANGING ENGINE OIL
1. Park the vehicle on a level surface and applythe parking brake.
2. Start the engine and let it idle until it reaches operating temperature, then turn it off. 3. Remove the oil filler cap
�Bby turning it
counterclockwise.
4. Place a large drain pan under the drain plug
�A.
5. Remove the drain plug
�Awith a wrench by
turning it counterclockwise and completely
drain the oil.
If the oil filter is to be changed, remove and
replace it at this time. See “Changing engine
oil filter” in this section.
● Waste oil must be disposed of prop-
erly.
● Check your local regulations.
WARNING
●Prolonged and repeated contact with
used engine oil may cause skin cancer.
● Try to avoid direct skin contact with
used oil. If skin contact is made, wash
thoroughly with soap or hand cleaner as
soon as possible.
● Keep used engine oil out of reach of
children.
CAUTION
Be careful not to burn yourself. The engine
oil may be hot.
6. Clean and reinstall the drain plug and a new washer. Securely tighten the drain plug with
a wrench. Do not use excessive force.
Drain plug tightening torque: 22 - 29 ft-lb (29 - 39 N·m)
7. Refill engine with recommended oil through the oil filler opening, then install the oil filler
cap securely.
See “Recommended fluids/lubricants and
capacities” in the “Technical and consumer
information” section of this manual for drain
and refill capacity.
The drain and refill capacity depends on the
oil temperature and drain time. Use these
specifications for reference only. Always use
the dipstick to determine when the proper
amount of oil is in the engine.
8. Start the engine. Check for leakage around the drain plug and oil filter. Correct as re-
quired.
9. Turn the engine off and wait more than 10 minutes. Check the oil level with the
dipstick. Add engine oil if necessary.
LDI2338
8-10Maintenance and do-it-yourself
Page 371 of 442
CAUTION
●Use only Genuine NISSAN CVT Fluid
NS-3. Do not mix with other fluids.
● Using transmission fluid other than
Genuine NISSAN CVT Fluid NS-3 will
damage the CVT, which is not covered
by the warranty.
When checking or replacement of CVT fluid is
required, we recommend your NISSAN dealer for
servicing.
Check the brake fluid level in the reservoir. If the
brake warning light comes on, add Genuine
NISSAN Super Heavy Duty Brake Fluid or
equivalentDOT 3fluid up to the MAX line. If fluid
must be added frequently, the system should be
checked by a NISSAN dealer.
WINDSHIELD-WASHER FLUID
RESERVOIR
Fill the windshield-washer fluid reservoir periodi-
cally. Add windshield-washer fluid when the low
windshield-washer fluid warning light comes on.
To fill the windshield-washer fluid reservoir, lift
the cap off the reservoir and pour the windshield-
washer fluid into the reservoir opening.
Add a washer solvent to the washer for better
cleaning. In the winter season, add a windshield
washer antifreeze. Follow the manufacturer’s in-
structions for the mixture ratio.
LDI2346LDI0540
CONTINUOUSLY VARIABLE
TRANSMISSION (CVT) FLUID BRAKE FLUID
WINDSHIELD-WASHER FLUID
8-12Maintenance and do-it-yourself
Page 373 of 442
●Keep battery out of the reach of
children.
● Do not tip the battery. Keep the vent
caps tight and the battery level.
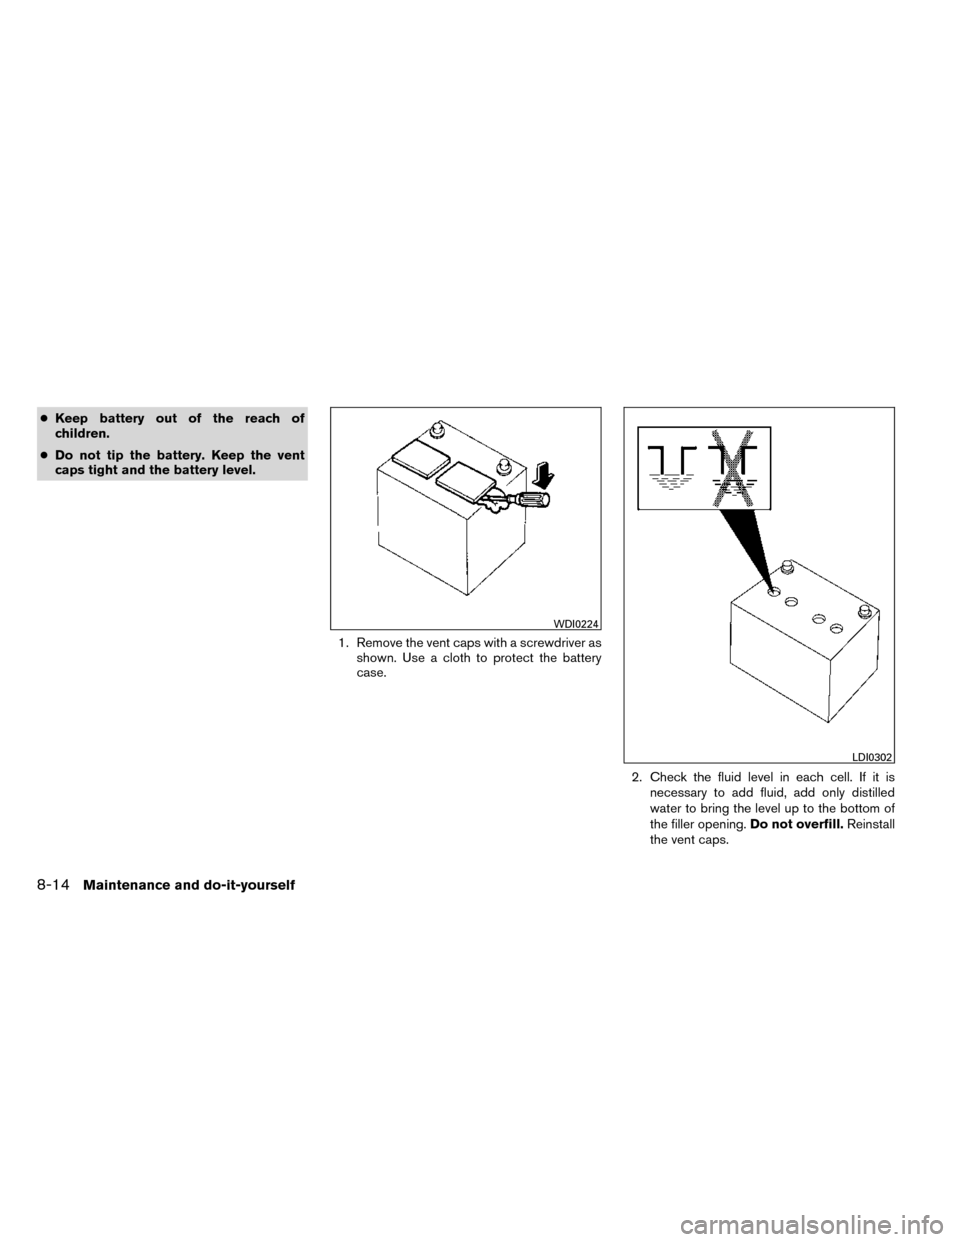
1. Remove the vent caps with a screwdriver asshown. Use a cloth to protect the battery
case.
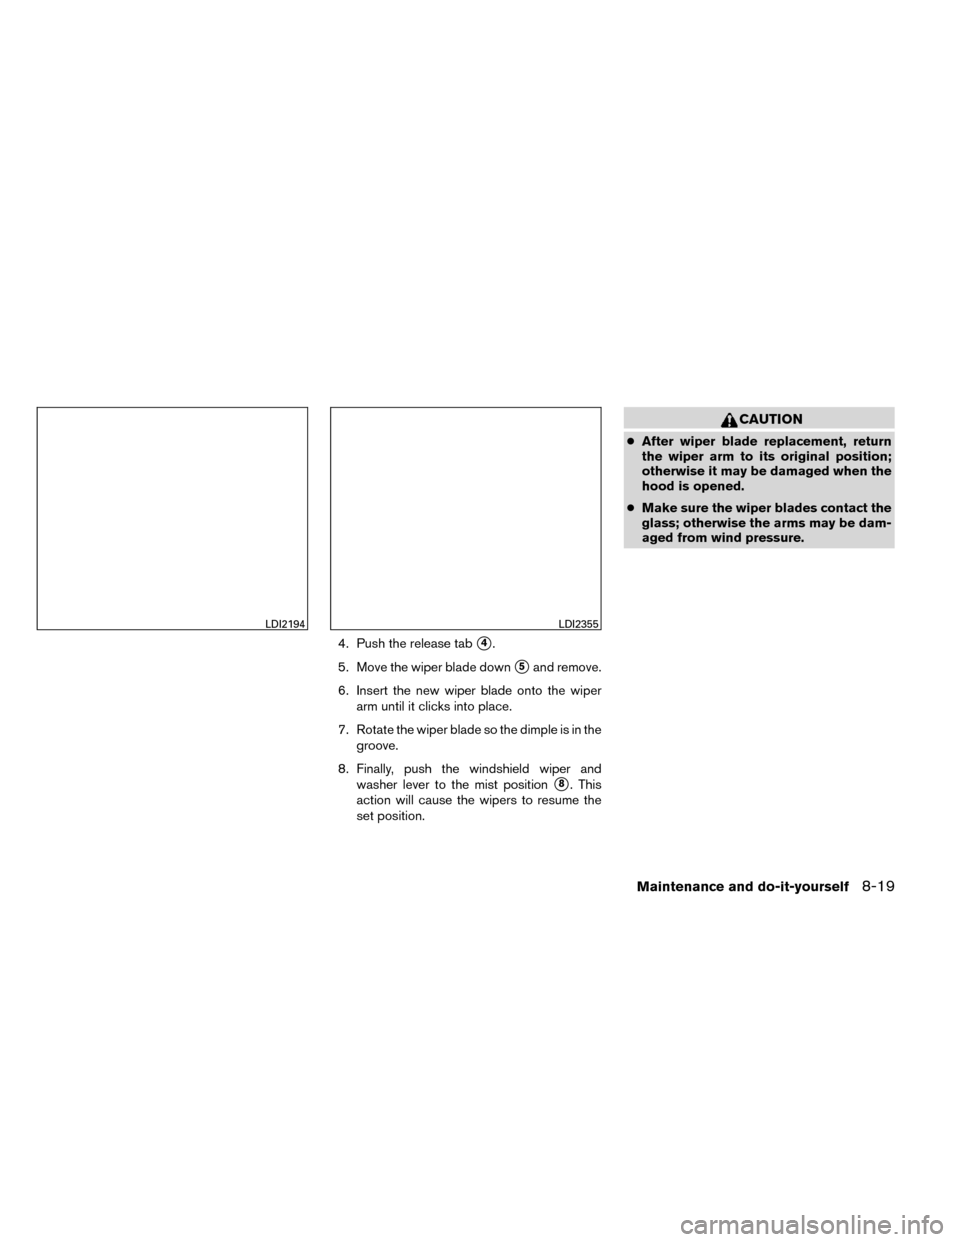
2. Check the fluid level in each cell. If it isnecessary to add fluid, add only distilled
water to bring the level up to the bottom of
the filler opening. Do not overfill.Reinstall
the vent caps.
WDI0224
LDI0302
8-14Maintenance and do-it-yourself
Page 378 of 442
4. Push the release tab�4.
5. Move the wiper blade down
�5and remove.
6. Insert the new wiper blade onto the wiper arm until it clicks into place.
7. Rotate the wiper blade so the dimple is in the groove.
8. Finally, push the windshield wiper and washer lever to the mist position
�8. This
action will cause the wipers to resume the
set position.
CAUTION
● After wiper blade replacement, return
the wiper arm to its original position;
otherwise it may be damaged when the
hood is opened.
● Make sure the wiper blades contact the
glass; otherwise the arms may be dam-
aged from wind pressure.
LDI2194LDI2355
Maintenance and do-it-yourself8-19
Page 382 of 442
PASSENGER COMPARTMENT
CAUTION
Never use a fuse of a higher or lower
amperage rating than specified on the
fuse box cover. This could damage the
electrical system or cause a fire.
If any electrical equipment does not operate,
check for an open fuse. NOTE:
The fuse box is located on the driver’s side
of the instrument panel.
1. Be sure the ignition switch and the headlight switch are OFF.
2. Remove the fuse box cover with a suitable tool. Use a cloth to avoid damaging the trim.
3. Locate the fuse that needs to be replaced.
4. Remove the fuse with the fuse puller
�2. 5. If the fuse is open
�A, replace it with an
equivalent good fuse
�B.
6. Push the fuse box cover to install.
If a new fuse also opens, have the electrical
system checked and repaired by a NISSAN
dealer.
LDI2347LDI0456
Maintenance and do-it-yourself8-23
Page 383 of 442
Extended storage switch
If any electrical equipment does not operate,
remove the extended storage switch and check
for an open fuse.
NOTE:
The extended storage switch is used for
long term vehicle storage. Even if the ex-
tended storage switch is broken it is not
necessary to replace it. Replace only the
open fuse in the switch with a new fuse.How to replace the extended storage switch:
1. To remove the extended storage switch, be sure the ignition switch is in the OFF or
LOCK position.
2. Be sure the headlight switch is in the OFF position.
3. Remove the fuse box cover.
4. Pinch the locking tabs
�1found on each
side of the storage switch.
5. Pull the storage switch straight out from the fuse box
�2.
CAUTION
Be careful not to allow children to swallow
the battery or removed parts.
LDI2350
BATTERY REPLACEMENT
8-24Maintenance and do-it-yourself
Page 386 of 442
Note: Changes or modifications not ex-
pressly approved by the party responsible
for compliance could void the user’s au-
thority to operate the equipment.
For Canada:
This device complies with RSS-210 of In-
dustry Canada. Operation is subject to the
following two conditions: (1) this device
may not cause interference, and (2) this
device must accept any interference, in-
cluding interference that may cause unde-
sired operation of the device.HEADLIGHTS
Replacing the halogen headlight bulb
(if so equipped)
The headlight is a semi-sealed beam type which
uses a replaceable headlight (halogen) bulb. Be-
cause the headlight assembly must be removed
from the vehicle for bulb replacement, see your
NISSAN dealer.
CAUTION
●Aiming is not necessary after replacing
the bulb. When aiming adjustment is
necessary, contact a NISSAN dealer.
● Do not leave the headlight assembly
open without a bulb installed for a long
period of time. Dust, moisture, smoke,
etc. entering the headlight body may
affect bulb performance. Remove the
bulb from the headlight assembly just
before a replacement bulb is installed.
● Only touch the base when handling the
bulb. Never touch the glass envelope.
Touching the glass could significantly
affect bulb life and/or headlight
performance. ●
High pressure halogen gas is sealed
inside the halogen bulb. The bulb may
break if the glass envelope is scratched
or the bulb is dropped.
Fog may temporarily form inside the lens of the
exterior lights in the rain or in a car wash. A
temperature difference between the inside and
the outside of the lens causes the fog. This is not
a malfunction. If large drops of water collect
inside the lens, contact a NISSAN dealer.Replacing the LED headlight bulb (if
so equipped)
If LED headlight bulb replacement is required,
see your NISSAN dealer.
LIGHTS
Maintenance and do-it-yourself8-27