Page 2 of 32

*See your Owner’s Manual for information.
01
03
04
02
20
2122
23
05
08
06
13
24
151807
1619
17
12
25
11
24
14
09
10
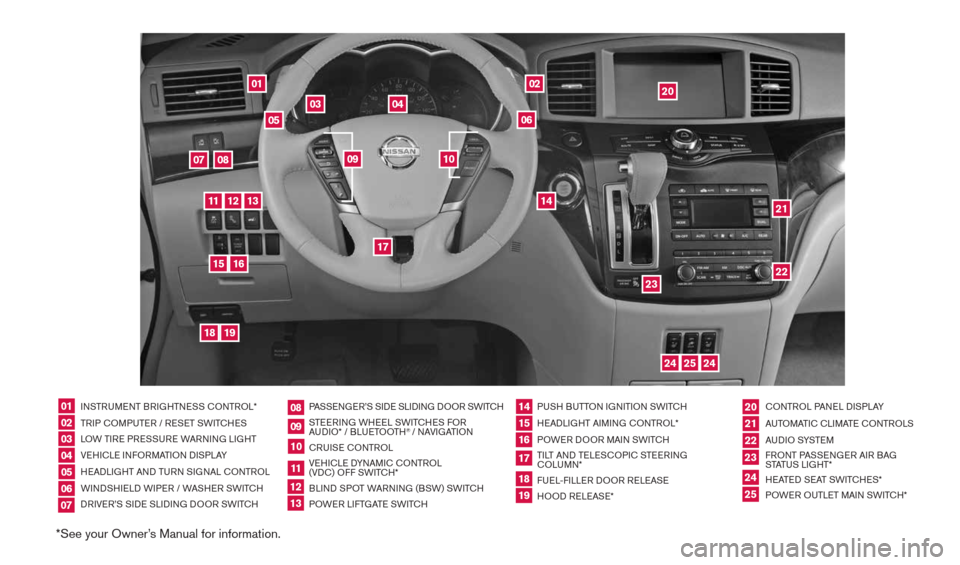
INSTRUMENT BRIGHTNESS cONTROL*
TRIP c OMPUTER / RESET SWIT cHES
LOW TIRE PRESSURE WARNING LIGHT
VEHIcLE INFORMATION DISPLAY
HEADLIGHT AND TURN SIGNAL c ONTROL
WINDSHIELD WIPER / WASHER SWIT cH
DRIVER’S SIDE SLIDING DOOR SWIT cH PASSENGER’S SIDE SLIDING DOOR SWIT
cH
STEERING WHEEL SWIT cHES FOR
AUDIO* / BLUETOOTH
® / NAVIGATION
cRUISE cONTROL
VEHI cLE DYNAMI c cONTROL
(VD c) OFF SWIT cH*
BLIND SPOT WARNING (BSW) SWIT cH
POWER LIFTGATE SWIT cH PUSH BUTTON IGNITION SWIT
cH
HEADLIGHT AIMING c ONTROL*
POWER DOOR MAIN SWIT cH
TILT AND TELES cOPI c STEERING
c OLUMN*
FUEL-FILLER DOOR RELEASE
HOOD RELEASE* cONTROL PANEL DISPLAY
AUTOMATI c cLIMATE c ONTROLS
AU D I O SYSTE M
FRONT PASSENGER AIR BAG
STATUS LIGHT*
HEATED SEAT SWIT cHES*
POWER OUTLET MAIN SWIT cH*
0102030405
0910
2124
18
06
11
2225
07
141916
08
15
2023
17
1213
1490690_14_Quest_QRG_072513.indd 47/25/13 9:23 AM
Page 5 of 32

3
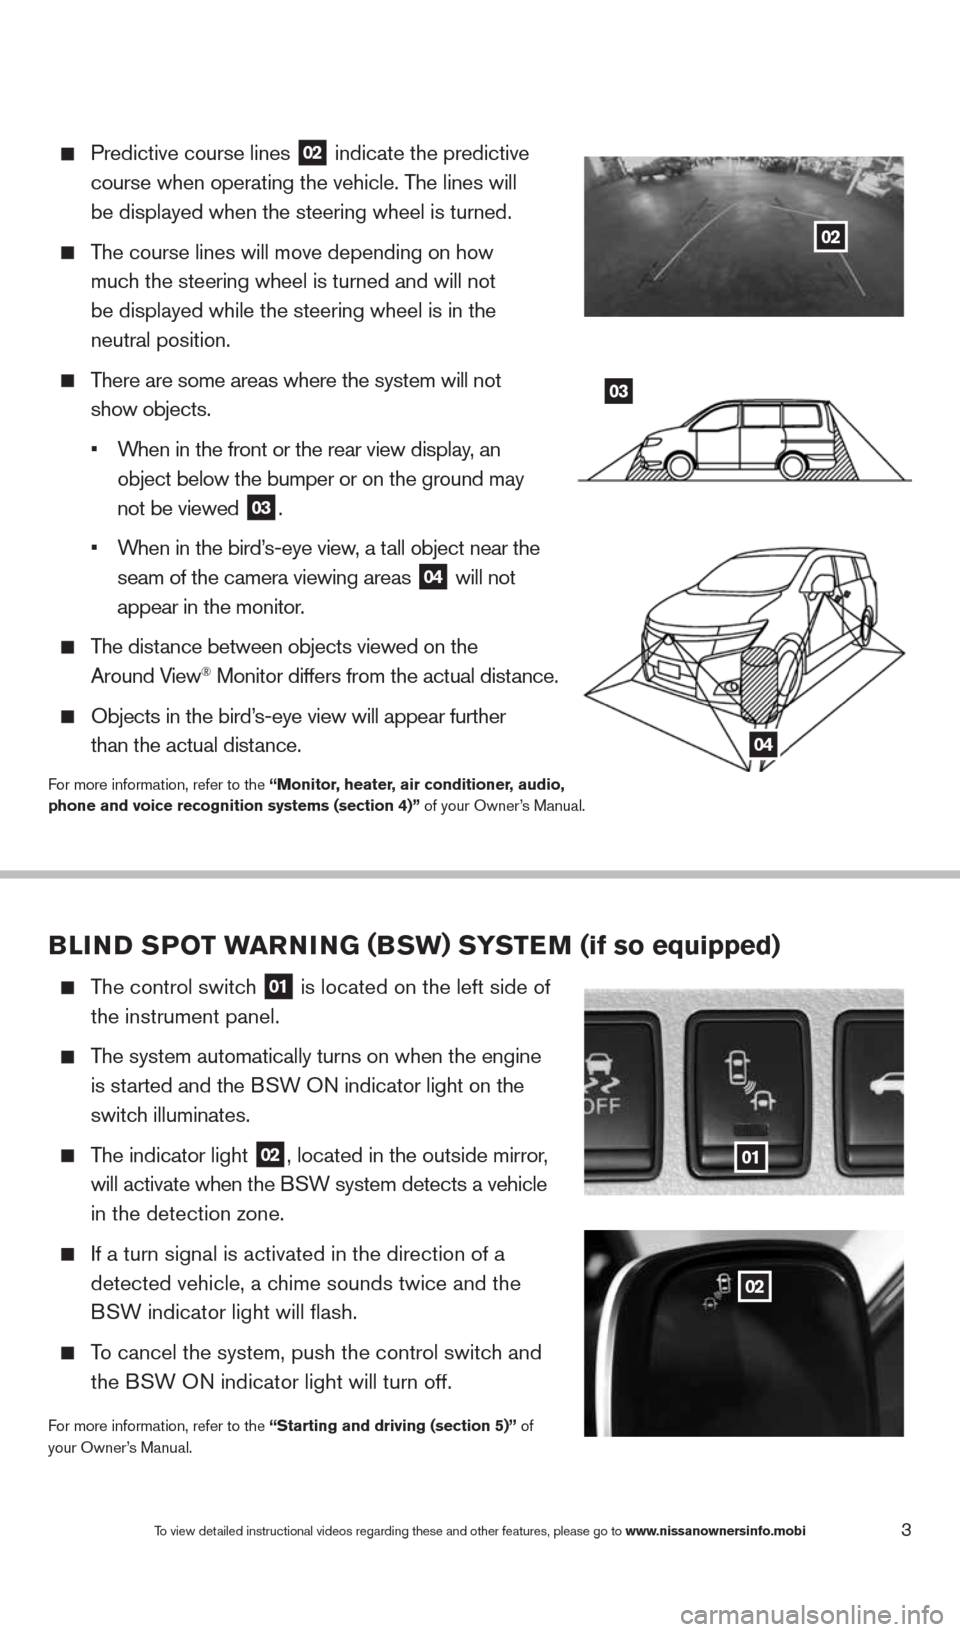
Predictive course lines
02 indicate the predictive
course when operating the vehicle. The lines will
be displayed when the steering wheel is turned.
The course lines will move depending on how
much the steering wheel is turned and will not
be displayed while the steering wheel is in the
neutral position.
There are some areas where the system will not
show objects.
•
When in the front or the rear view display, an
object below the bumper or on the ground may
not be viewed
03.
•
When in the bird’s-eye view, a tall object near the
seam of the camera viewing areas
04 will not
appear in the monitor.
The distance between objects viewed on the
Around View® Monitor differs from the actual distance.
Objects in the bird’s-eye view will appear further
than the actual distance.
For more information, refer to the “Monitor, heater, air conditioner, audio,
phone and voice recognition systems (section 4)” of your Owner’s Manual.
03
04
BLIND SPOT warNING (BSw) S YST eM (if so equipped)
The control switch
01 is located on the left side of
the instrument panel.
The system automatically turns on when the engine
is started and the BSW ON indicator light
on the
switch illuminates.
The indicator light
02, located in the outside mirror,
will activate when the BSW system detects a vehicle
in the detection zone.
If a turn signal is activated in the direction of a
detected vehicle, a chime sounds twice and the
BSW indicator light will flash.
To cancel the system, push the control switch and
the BSW ON indicator light will turn off.
For more information, refer to the “Starting and driving (section 5)” of
your Owner’s Manual.
01
02
To view detailed instructional videos regarding these and other features, please go\
to www.nissanownersinfo.mobi
02
1490690_14_Quest_QRG_072513.indd 37/25/13 9:23 AM
Page 15 of 32

13
HeaDLIGHT CONTr OL SwITCH
HEADLIGHT cONTROL
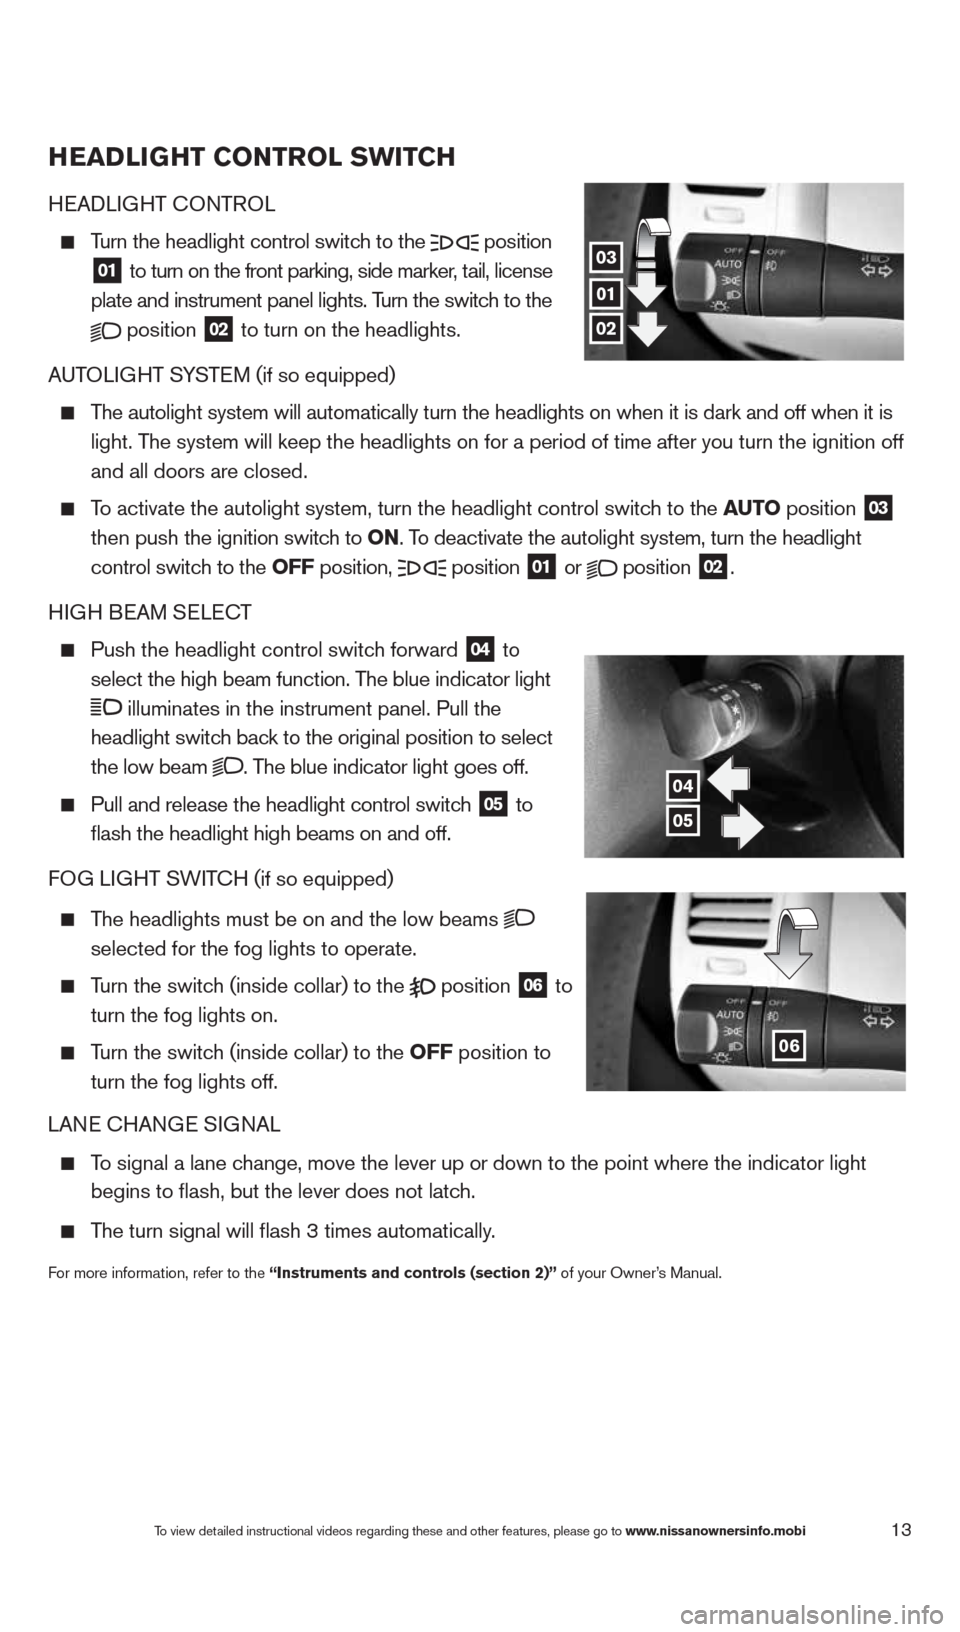
Turn the headlight control switch to the
position
01 to turn on the front parking, side marker, tail, license
plate and instrument panel lights. Turn the switch to the
position
02 to turn on the headlights.
AUTOLIGHT SYSTEM (if so equipped)
The autolight system will automatically turn the headlights on when it is\
dark and off when it is
light. The system will keep the headlights on for a period of time after you tur\
n the ignition off
and all doors are closed.
To activate the autolight system, turn the headlight control switch to the au TO position
03
then push the ignition switch to ON. To deactivate the autolight system, turn the headlight
control switch to the OFF position,
position 01 or
position
02.
HIGH BEAM SELE cT
Push the headlight control switch forward
04 to
select the high beam function. The blue indicator light
illuminates in the instrument panel. Pull the
headlight switch back to the original position to select
the low beam
. The blue indicator light goes off.
Pull and release the headlight control switch
05 to
flash the headlight high beams on and off.
FOG LIGHT SWIT cH (if so equipped)
The headlights must be on and the low beams
selected for the fog lights to operate.
Turn the switch (inside collar) to the position
06 to
turn the fog lights on.
Turn the switch (inside collar)
to the OFF position to
turn the fog lights off.
LANE c HANGE SIGNAL
To signal a lane change, move the lever up or down to the point where the indicator light
begins to flash, but the lever does not latch.
The turn signal will flash 3 times automatically.
For more information, refer to the “Instruments and controls (section 2)” of your Owner’s Manual.
01
04
03
02
05
06
To view detailed instructional videos regarding these and other features, please go\
to www.nissanownersinfo.mobi
1490690_14_Quest_QRG_072513.indd 137/25/13 9:24 AM