2014 NISSAN QUEST maintenance
[x] Cancel search: maintenancePage 6 of 482
Illustrated table of contents0
Safety — Seats, seat belts and supplemental
restraint system1
Instruments and controls
Pre-driving checks and adjustments
Monitor, heater, air conditioner, audio, phone and
voice recognition systems
Starting and driving
In case of emergency
Appearance and care
Maintenance and do-it-yourself
Technical and consumer information
Index
2
3
4
5
6
7
8
9
10
Table of
Contents
Page 18 of 482
1 Safety — Seats, seat belts and supplementalrestraint system
Seats ........................................................................\
.................... 1-2
Front seats ........................................................................\
.... 1-3
2nd row seats ...................................................................... 1-6
3rd row seats ....................................................................... 1-7
Armrests ........................................................................\
........ 1-7
Flexible seating .................................................................... 1-8
Head restraints/headrests .................................................... 1-10 Adjustable head restraint/headrest components ..... 1-11
Non-adjustable head
restraint/headrest components ..................................... 1-12
Remove ........................................................................\
....... 1-12
Install ........................................................................\
........... 1-12
Adjust ........................................................................\
.......... 1-13
Front-seat Active Head Restraint ................................. 1-14
Seat belts ........................................................................\
......... 1-15 Precautions on seat belt usage .................................... 1-15
Pregnant women .............................................................. 1-17
Injured persons ................................................................. 1-17
Three-point type seat belt .............................................. 1-17
Seat belt extenders .......................................................... 1-23
Seat belt maintenance .................................................... 1-24
Child safety ........................................................................\
...... 1-24 Infants ........................................................................\
.......... 1-25
Small children .................................................................... 1-25
Larger children .................................................................. 1-26 Child restraints ....................................................................... 1-26
Precautions on child restraints ................................... 1-27
Lower Anchors and Tethers for CHildren
System (LATCH) ............................................................ 1-28
Top tether strap child restraint ................................... 1-31
Rear-facing child restraint installation
using LATCH ................................................................... 1-32
Rear-facing child restraint installation using the
seat belts ........................................................................\
.. 1-34
Forward-facing child restraint installation
using LATCH ................................................................... 1-36
Forward-facing child restraint installation using the
seat belt ........................................................................\
.... 1-38
Installing top tether strap (2nd row seats) .............. 1-41
Installing top tether strap (3rd row seat) ................. 1-42
Booster seats .................................................................. 1-43
Supplemental restraint system ........................................... 1-46 Precautions on supplemental restraint system ....... 1-46
NISSAN advanced air bag system (front seats) ..... 1-52
Front seat-mounted side-impact supplemental
air bag and roof-mounted curtain side-impact
supplemental air bag systems .................................... 1-57
Seat belts with pretensioners (front seats) ............. 1-58
Supplemental air bag warning labels ....................... 1-59
Supplemental air bag warning light .......................... 1-59
Repair and replacement procedure .......................... 1-60
Page 41 of 482
1-24Safety — Seats, seat belts and supplemental restraint system
purchasing an extender if an extender is
required.
WARNING
.Only NISSAN seat belt extenders,
made by the same company which
made the original equipment seat
belts, should be used with the
NISSAN seat belts.
. Adults and children who can use the
standard seat belt should not use an
extender. Such unnecessary use
could result in serious personal
injury in the event of an accident.
. Never use seat belt extenders to
install child restraints. If the child
restraint is not secured properly, the
child could be seriously injured in a
collision or a sudden stop.
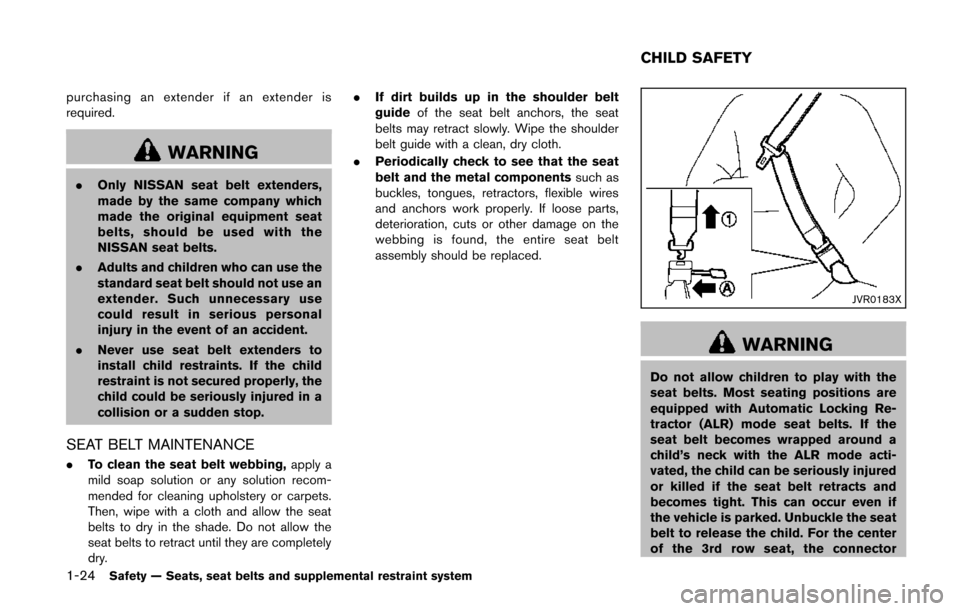
SEAT BELT MAINTENANCE
.To clean the seat belt webbing, apply a
mild soap solution or any solution recom-
mended for cleaning upholstery or carpets.
Then, wipe with a cloth and allow the seat
belts to dry in the shade. Do not allow the
seat belts to retract until they are completely
dry. .
If dirt builds up in the shoulder belt
guide of the seat belt anchors, the seat
belts may retract slowly. Wipe the shoulder
belt guide with a clean, dry cloth.
. Periodically check to see that the seat
belt and the metal components such as
buckles, tongues, retractors, flexible wires
and anchors work properly. If loose parts,
deterioration, cuts or other damage on the
webbing is found, the entire seat belt
assembly should be replaced.
JVR0183X
WARNING
Do not allow children to play with the
seat belts. Most seating positions are
equipped with Automatic Locking Re-
tractor (ALR) mode seat belts. If the
seat belt becomes wrapped around a
child’s neck with the ALR mode acti-
vated, the child can be seriously injured
or killed if the seat belt retracts and
becomes tight. This can occur even if
the vehicle is parked. Unbuckle the seat
belt to release the child. For the center
of the 3rd row seat, the connector
CHILD SAFETY
Page 77 of 482
1-60Safety — Seats, seat belts and supplemental restraint system
.The supplemental air bag warning light
remains on approximately 7 seconds after
the ignition switch is pushed to the ON
position.
. The supplemental air bag warning light
flashes intermittently.
. The supplemental air bag warning light does
not come on at all.
Under these conditions, the air bag and/or
pretensioner systems may not operate properly.
They must be checked and repaired. Take your
vehicle to the nearest NISSAN dealer.
WARNING
If the supplemental air bag warning
light is on, it could mean that the front
air bag, side air bag and curtain air bag
and/or pretensioner systems will not
operate in an accident. To help avoid
injury to yourself or others, have your
vehicle checked by a NISSAN dealer as
soon as possible.
REPAIR AND REPLACEMENT PRO-
CEDURE
The front air bags, side air bags and curtain air
bags and pretensioners are designed to activate
on a one-time-only basis. As a reminder, unless
it is damaged, the supplemental air bag warning
light will remain illuminated after inflation has
occurred. Repair and replacement of these
systems should be done only by a NISSAN
dealer.
When maintenance work is required on the
vehicle, the front air bags, side air bags and
curtain air bags, pretensioners and related parts
should be pointed out to the person conducting
the maintenance. The ignition switch should
always be in the LOCK position when working
under the hood or inside the vehicle.
WARNING
. Once a front air bag, side air bag or
curtain air bag has inflated, the air
bag module will not function again
and must be replaced. Additionally,
the activated pretensioner must
also be replaced. The air bag mod-
ule and pretensioner should be
replaced by a NISSAN dealer. The
air bag module and pretensioner system cannot be repaired.
. The front air bag, side air bag,
curtain air bag and the pretensioner
should be inspected by a NISSAN
dealer if there is any damage to the
front end or side portion of the
vehicle.
. If you need to dispose of a supple-
mental air bag or pretensioner or
scrap the vehicle, contact a NISSAN
dealer. Correct supplemental air
bag and pretensioner system dis-
posal procedures are set forth in the
appropriate NISSAN Service Man-
ual. Incorrect disposal procedures
could cause personal injury.
Page 80 of 482
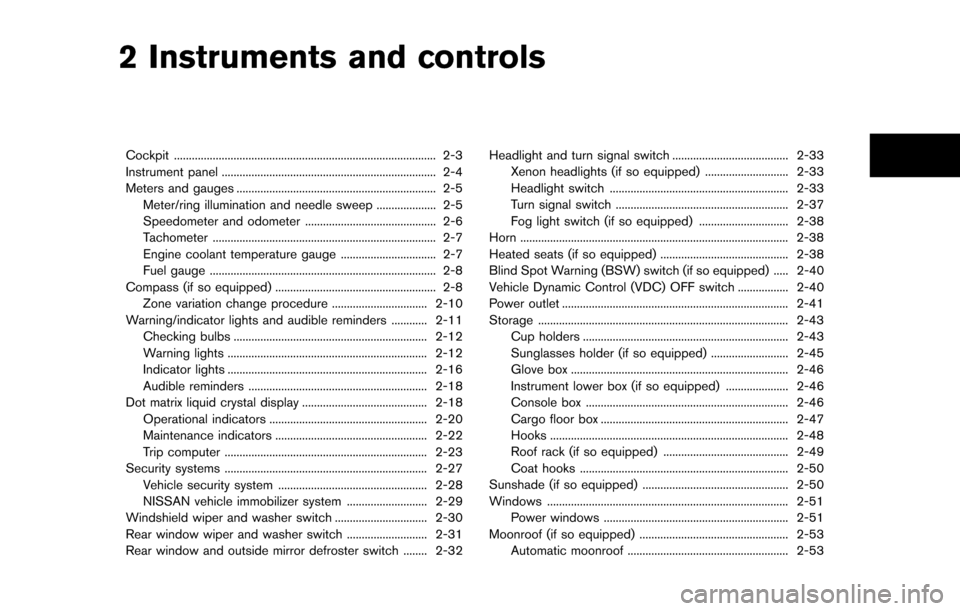
2 Instruments and controls
Cockpit ........................................................................\
................ 2-3
Instrument panel ........................................................................\
2-4
Meters and gauges ................................................................... 2-5Meter/ring illumination and needle sweep .................... 2-5
Speedometer and odometer ............................................ 2-6
Tachometer ........................................................................\
... 2-7
Engine coolant temperature gauge ................................ 2-7
Fuel gauge ........................................................................\
.... 2-8
Compass (if so equipped) ...................................................... 2-8 Zone variation change procedure ................................ 2-10
Warning/indicator lights and audible reminders ............ 2-11 Checking bulbs ................................................................. 2-12
Warning lights ................................................................... 2-12
Indicator lights ................................................................... 2-16
Audible reminders ............................................................ 2-18
Dot matrix liquid crystal display .......................................... 2-18
Operational indicators ..................................................... 2-20
Maintenance indicators ................................................... 2-22
Trip computer .................................................................... 2-23
Security systems .................................................................... 2-27
Vehicle security system .................................................. 2-28
NISSAN vehicle immobilizer system ........................... 2-29
Windshield wiper and washer switch ............................... 2-30
Rear window wiper and washer switch ........................... 2-31
Rear window and outside mirror defroster switch ........ 2-32 Headlight and turn signal switch ....................................... 2-33
Xenon headlights (if so equipped) ............................ 2-33
Headlight switch ............................................................ 2-33
Turn signal switch .......................................................... 2-37
Fog light switch (if so equipped) .............................. 2-38
Horn ........................................................................\
.................. 2-38
Heated seats (if so equipped) ........................................... 2-38
Blind Spot Warning (BSW) switch (if so equipped) ..... 2-40
Vehicle Dynamic Control (VDC) OFF switch ................. 2-40
Power outlet ........................................................................\
.... 2-41
Storage ........................................................................\
............ 2-43 Cup holders ..................................................................... 2-43
Sunglasses holder (if so equipped) .......................... 2-45
Glove box ........................................................................\
. 2-46
Instrument lower box (if so equipped) ..................... 2-46
Console box .................................................................... 2-46
Cargo floor box ............................................................... 2-47
Hooks ........................................................................\
........ 2-48
Roof rack (if so equipped) .......................................... 2-49
Coat hooks ...................................................................... 2-50
Sunshade (if so equipped) ................................................. 2-50
Windows ........................................................................\
......... 2-51 Power windows .............................................................. 2-51
Moonroof (if so equipped) .................................................. 2-53 Automatic moonroof ...................................................... 2-53>
Page 96 of 482
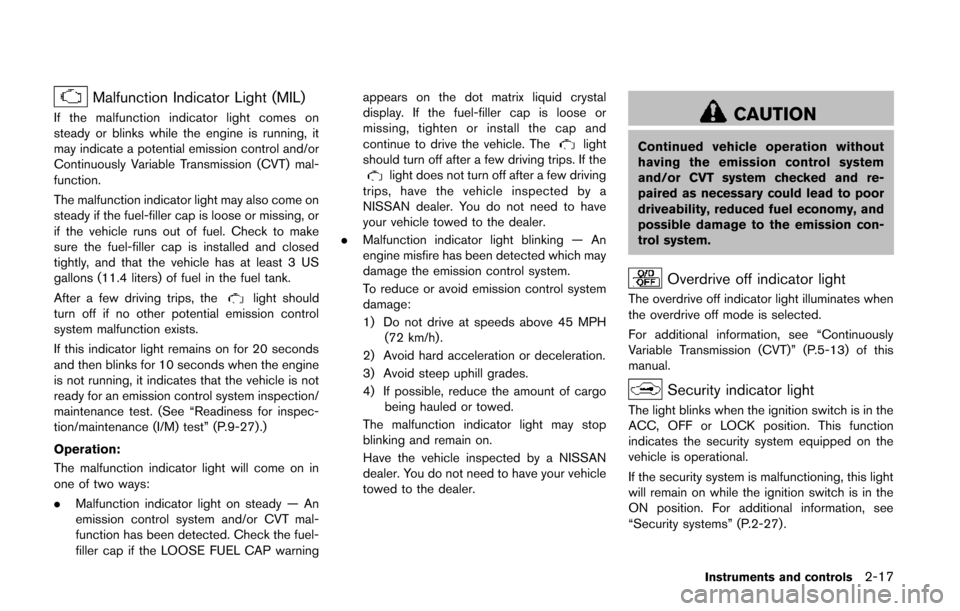
Malfunction Indicator Light (MIL)
If the malfunction indicator light comes on
steady or blinks while the engine is running, it
may indicate a potential emission control and/or
Continuously Variable Transmission (CVT) mal-
function.
The malfunction indicator light may also come on
steady if the fuel-filler cap is loose or missing, or
if the vehicle runs out of fuel. Check to make
sure the fuel-filler cap is installed and closed
tightly, and that the vehicle has at least 3 US
gallons (11.4 liters) of fuel in the fuel tank.
After a few driving trips, the
light should
turn off if no other potential emission control
system malfunction exists.
If this indicator light remains on for 20 seconds
and then blinks for 10 seconds when the engine
is not running, it indicates that the vehicle is not
ready for an emission control system inspection/
maintenance test. (See “Readiness for inspec-
tion/maintenance (I/M) test” (P.9-27).)
Operation:
The malfunction indicator light will come on in
one of two ways:
. Malfunction indicator light on steady — An
emission control system and/or CVT mal-
function has been detected. Check the fuel-
filler cap if the LOOSE FUEL CAP warning appears on the dot matrix liquid crystal
display. If the fuel-filler cap is loose or
missing, tighten or install the cap and
continue to drive the vehicle. The
light
should turn off after a few driving trips. If the
light does not turn off after a few driving
trips, have the vehicle inspected by a
NISSAN dealer. You do not need to have
your vehicle towed to the dealer.
. Malfunction indicator light blinking — An
engine misfire has been detected which may
damage the emission control system.
To reduce or avoid emission control system
damage:
1) Do not drive at speeds above 45 MPH
(72 km/h).
2) Avoid hard acceleration or deceleration.
3) Avoid steep uphill grades.
4) If possible, reduce the amount of cargo being hauled or towed.
The malfunction indicator light may stop
blinking and remain on.
Have the vehicle inspected by a NISSAN
dealer. You do not need to have your vehicle
towed to the dealer.
CAUTION
Continued vehicle operation without
having the emission control system
and/or CVT system checked and re-
paired as necessary could lead to poor
driveability, reduced fuel economy, and
possible damage to the emission con-
trol system.
Overdrive off indicator light
The overdrive off indicator light illuminates when
the overdrive off mode is selected.
For additional information, see “Continuously
Variable Transmission (CVT)” (P.5-13) of this
manual.
Security indicator light
The light blinks when the ignition switch is in the
ACC, OFF or LOCK position. This function
indicates the security system equipped on the
vehicle is operational.
If the security system is malfunctioning, this light
will remain on while the ignition switch is in the
ON position. For additional information, see
“Security systems” (P.2-27) .
Instruments and controls2-17
Page 101 of 482
2-22Instruments and controls
SIC4237
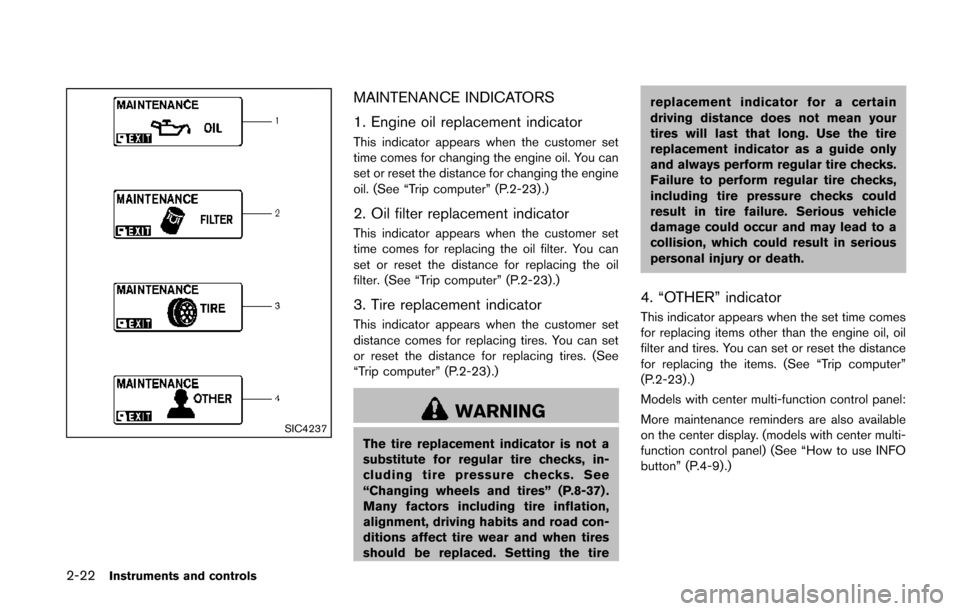
MAINTENANCE INDICATORS
1. Engine oil replacement indicator
This indicator appears when the customer set
time comes for changing the engine oil. You can
set or reset the distance for changing the engine
oil. (See “Trip computer” (P.2-23) .)
2. Oil filter replacement indicator
This indicator appears when the customer set
time comes for replacing the oil filter. You can
set or reset the distance for replacing the oil
filter. (See “Trip computer” (P.2-23).)
3. Tire replacement indicator
This indicator appears when the customer set
distance comes for replacing tires. You can set
or reset the distance for replacing tires. (See
“Trip computer” (P.2-23) .)
WARNING
The tire replacement indicator is not a
substitute for regular tire checks, in-
cluding tire pressure checks. See
“Changing wheels and tires” (P.8-37) .
Many factors including tire inflation,
alignment, driving habits and road con-
ditions affect tire wear and when tires
should be replaced. Setting the tirereplacement indicator for a certain
driving distance does not mean your
tires will last that long. Use the tire
replacement indicator as a guide only
and always perform regular tire checks.
Failure to perform regular tire checks,
including tire pressure checks could
result in tire failure. Serious vehicle
damage could occur and may lead to a
collision, which could result in serious
personal injury or death.
4. “OTHER” indicator
This indicator appears when the set time comes
for replacing items other than the engine oil, oil
filter and tires. You can set or reset the distance
for replacing the items. (See “Trip computer”
(P.2-23) .)
Models with center multi-function control panel:
More maintenance reminders are also available
on the center display. (models with center multi-
function control panel) (See “How to use INFO
button” (P.4-9).)
Page 105 of 482
2-26Instruments and controls
SIC3678
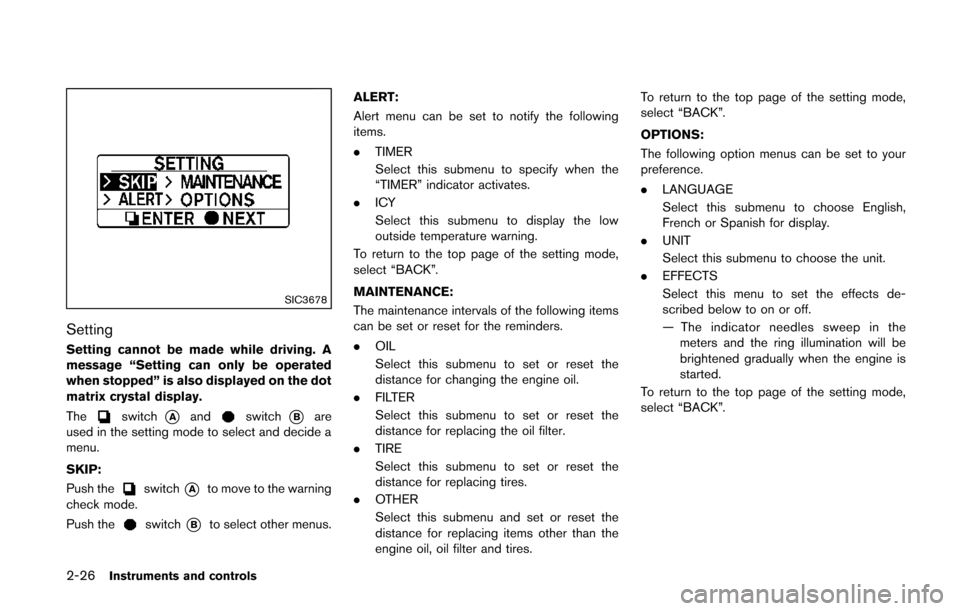
Setting
Setting cannot be made while driving. A
message “Setting can only be operated
when stopped” is also displayed on the dot
matrix crystal display.
The
switch*Aandswitch*Bare
used in the setting mode to select and decide a
menu.
SKIP:
Push the
switch*Ato move to the warning
check mode.
Push the
switch*Bto select other menus. ALERT:
Alert menu can be set to notify the following
items.
.
TIMER
Select this submenu to specify when the
“TIMER” indicator activates.
. ICY
Select this submenu to display the low
outside temperature warning.
To return to the top page of the setting mode,
select “BACK”.
MAINTENANCE:
The maintenance intervals of the following items
can be set or reset for the reminders.
. OIL
Select this submenu to set or reset the
distance for changing the engine oil.
. FILTER
Select this submenu to set or reset the
distance for replacing the oil filter.
. TIRE
Select this submenu to set or reset the
distance for replacing tires.
. OTHER
Select this submenu and set or reset the
distance for replacing items other than the
engine oil, oil filter and tires. To return to the top page of the setting mode,
select “BACK”.
OPTIONS:
The following option menus can be set to your
preference.
. LANGUAGE
Select this submenu to choose English,
French or Spanish for display.
. UNIT
Select this submenu to choose the unit.
. EFFECTS
Select this menu to set the effects de-
scribed below to on or off.
— The indicator needles sweep in the
meters and the ring illumination will be
brightened gradually when the engine is
started.
To return to the top page of the setting mode,
select “BACK”.