2014 NISSAN QUEST buttons
[x] Cancel search: buttonsPage 228 of 482
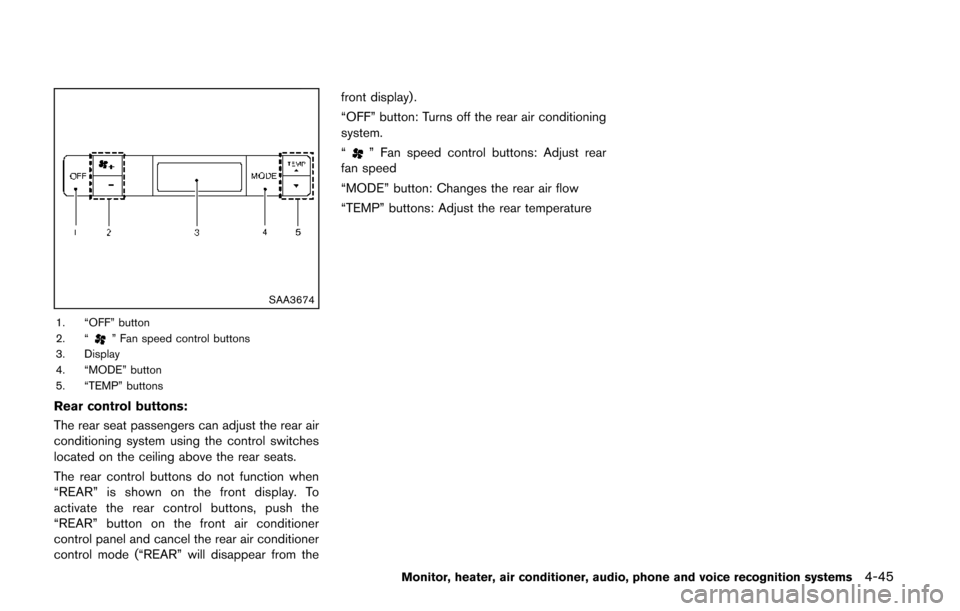
SAA3674
1. “OFF” button
2. “” Fan speed control buttons
3. Display
4. “MODE” button
5. “TEMP” buttons
Rear control buttons:
The rear seat passengers can adjust the rear air
conditioning system using the control switches
located on the ceiling above the rear seats.
The rear control buttons do not function when
“REAR” is shown on the front display. To
activate the rear control buttons, push the
“REAR” button on the front air conditioner
control panel and cancel the rear air conditioner
control mode (“REAR” will disappear from the front display) .
“OFF” button: Turns off the rear air conditioning
system.
“
” Fan speed control buttons: Adjust rear
fan speed
“MODE” button: Changes the rear air flow
“TEMP” buttons: Adjust the rear temperature
Monitor, heater, air conditioner, audio, phone and voice recognition systems4-45
Page 229 of 482
4-46Monitor, heater, air conditioner, audio, phone and voice recognition systems
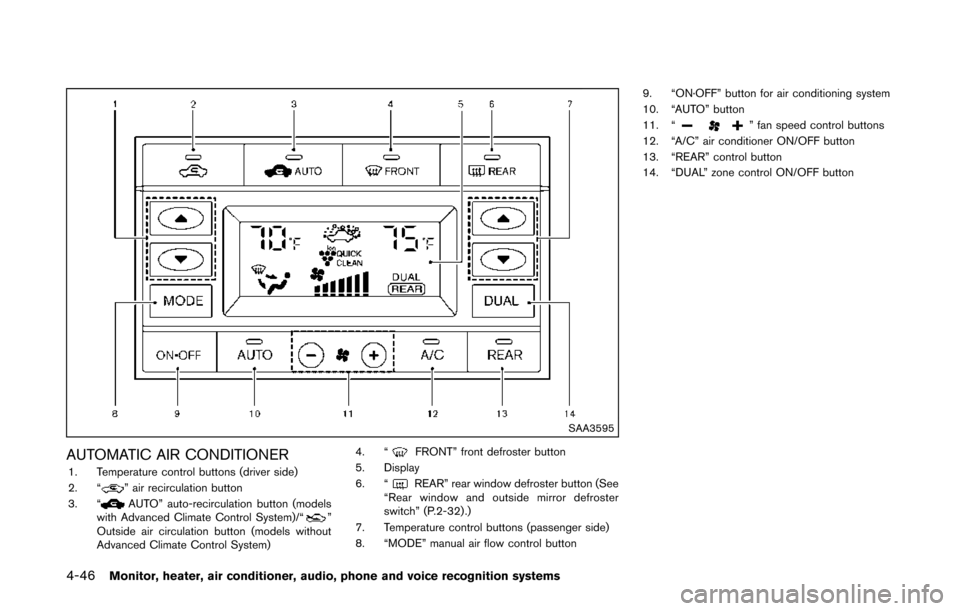
SAA3595
AUTOMATIC AIR CONDITIONER1. Temperature control buttons (driver side)
2. “” air recirculation button
3. “AUTO” auto-recirculation button (models
with Advanced Climate Control System)/“”
Outside air circulation button (models without
Advanced Climate Control System) 4. “
FRONT” front defroster button
5. Display
6. “
REAR” rear window defroster button (See
“Rear window and outside mirror defroster
switch” (P.2-32) .)
7. Temperature control buttons (passenger side)
8. “MODE” manual air flow control button 9. “ON·OFF” button for air conditioning system
10. “AUTO” button
11. “
” fan speed control buttons
12. “A/C” air conditioner ON/OFF button
13. “REAR” control button
14. “DUAL” zone control ON/OFF button
Page 230 of 482
Automatic operation (AUTO)
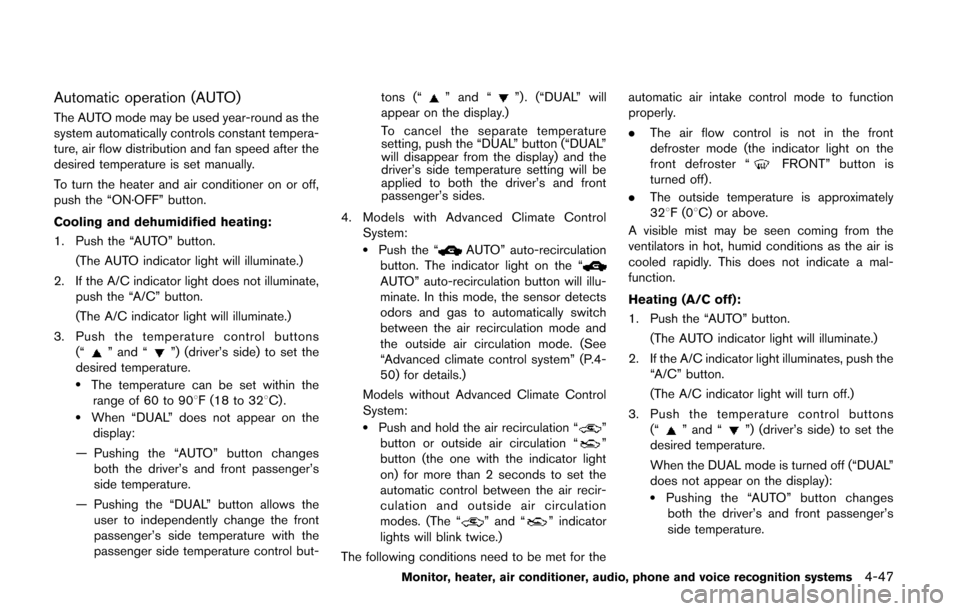
The AUTO mode may be used year-round as the
system automatically controls constant tempera-
ture, air flow distribution and fan speed after the
desired temperature is set manually.
To turn the heater and air conditioner on or off,
push the “ON·OFF” button.
Cooling and dehumidified heating:
1. Push the “AUTO” button.(The AUTO indicator light will illuminate.)
2. If the A/C indicator light does not illuminate, push the “A/C” button.
(The A/C indicator light will illuminate.)
3. Push the temperature control buttons (“
” and “”) (driver’s side) to set the
desired temperature.
.The temperature can be set within the range of 60 to 908F (18 to 328C) .
.When “DUAL” does not appear on thedisplay:
— Pushing the “AUTO” button changes both the driver’s and front passenger’s
side temperature.
— Pushing the “DUAL” button allows the user to independently change the front
passenger’s side temperature with the
passenger side temperature control but- tons (“
” and “”) . (“DUAL” will
appear on the display.)
To cancel the separate temperature
setting, push the “DUAL” button (“DUAL”
will disappear from the display) and the
driver’s side temperature setting will be
applied to both the driver’s and front
passenger’s sides.
4. Models with Advanced Climate Control System:
.Push the “AUTO” auto-recirculation
button. The indicator light on the “
AUTO” auto-recirculation button will illu-
minate. In this mode, the sensor detects
odors and gas to automatically switch
between the air recirculation mode and
the outside air circulation mode. (See
“Advanced climate control system” (P.4-
50) for details.)
Models without Advanced Climate Control
System:
.Push and hold the air recirculation “”
button or outside air circulation “”
button (the one with the indicator light
on) for more than 2 seconds to set the
automatic control between the air recir-
culation and outside air circulation
modes. (The “
” and “” indicator
lights will blink twice.)
The following conditions need to be met for the automatic air intake control mode to function
properly.
.
The air flow control is not in the front
defroster mode (the indicator light on the
front defroster “
FRONT” button is
turned off).
. The outside temperature is approximately
328F(0 8C) or above.
A visible mist may be seen coming from the
ventilators in hot, humid conditions as the air is
cooled rapidly. This does not indicate a mal-
function.
Heating (A/C off):
1. Push the “AUTO” button.
(The AUTO indicator light will illuminate.)
2. If the A/C indicator light illuminates, push the “A/C” button.
(The A/C indicator light will turn off.)
3. Push the temperature control buttons (“
” and “”) (driver’s side) to set the
desired temperature.
When the DUAL mode is turned off (“DUAL”
does not appear on the display):
.Pushing the “AUTO” button changes both the driver’s and front passenger’s
side temperature.
Monitor, heater, air conditioner, audio, phone and voice recognition systems4-47
Page 231 of 482
4-48Monitor, heater, air conditioner, audio, phone and voice recognition systems
.Pushing the “DUAL” button allows theuser to independently change the front
passenger’s side temperature with the
passenger side temperature control but-
tons (“
”or“”) . (“DUAL” will
appear on the display.)
To cancel the separate temperature
setting, push the “DUAL” button (“DUAL”
will disappear from the display) and the
driver’s side temperature setting will be
applied to both the driver’s and front
passenger’s sides.
4. Models with Advanced Climate Control System:
.Push the “AUTO” auto-recirculation
button. The indicator light on the “
AUTO” auto-recirculation button will illu-
minate. In this mode, the sensor detects
odors and gas to automatically switch
between the air recirculation mode and
the outside air circulation mode. (See
“Advanced climate control system” (P.4-
50) for details.)
Models without Advanced Climate Control
System:
.Push and hold the air recirculation “”
button or outside air circulation “”
button (the one with the indicator light
on) for more than 2 seconds to set the
automatic control between the air recir- culation and outside air circulation
modes. (The “
”or“” indicator
light will blink twice.)
The following conditions need to be met for the
automatic air intake control mode to function
properly.
. The air flow control is not in the front
defroster mode (the indicator light on the
front defroster “
FRONT” button is
turned off).
. The outside temperature is approximately
328F(0 8C) or above.
NOTE:
. Do not set the temperature lower than
the outside air temperature. Doing so
may prevent the temperature from
being controlled properly.
. To dehumidify the air, push the “A/C”
button before turning on the heater.
Dehumidified defrosting/defogging:
1. Push the front defroster “
FRONT”
button. (The indicator light will illuminate.)
2. Push the temperature control buttons (“
” and “”) to set the desired
temperature.
.To remove frost from the outside surface
of the windshield quickly, set the tem-
perature control and fan speed control to their maximum position.
.After the windshield is cleared, push the
“AUTO” button to set to the automatic
mode.
.When the front defroster “FRONT”
button is pushed, the air conditioner will
automatically turn on sensing the outside
air temperature to defog the windshield.
Do not select the air recirculation mode
for the best defogging performance.
NOTE:
Do not set the temperature too low when
the front defroster mode is on (the indi-
cator on the front defroster “
FRONT”
button is illuminated) . Doing so may fog
up the windshield.
Manual operation
The manual mode can be used to control the
heater and air conditioner to your desired
settings.
Fan speed control:
Push the fan speed control button “
”to
increase the fan speed.
Push the fan speed control button “
”to
decrease the fan speed.
Push the “AUTO” button to change the fan
speed to the automatic mode.
Page 232 of 482
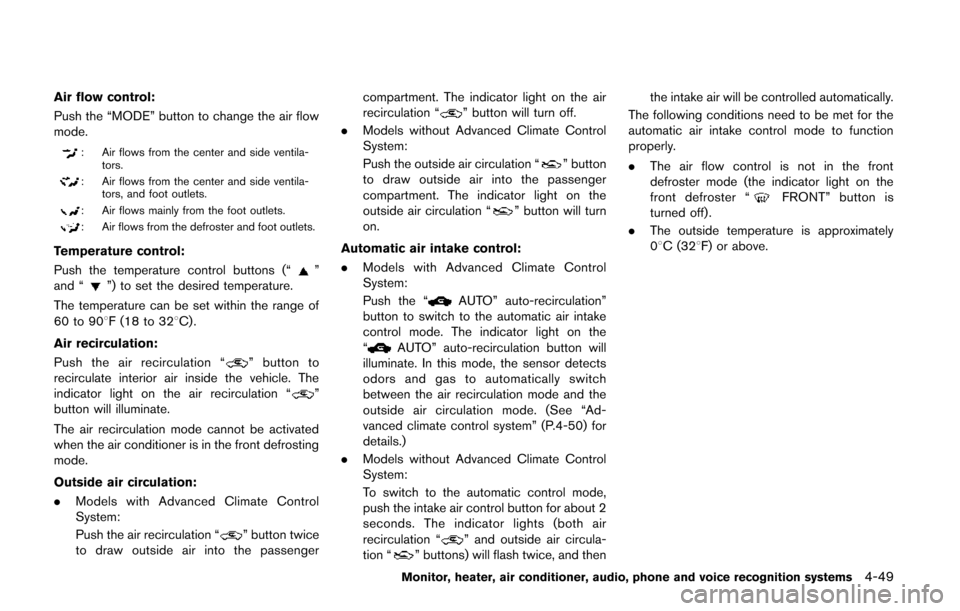
Air flow control:
Push the “MODE” button to change the air flow
mode.
: Air flows from the center and side ventila-tors.
: Air flows from the center and side ventila-tors, and foot outlets.
: Air flows mainly from the foot outlets.
: Air flows from the defroster and foot outlets.
Temperature control:
Push the temperature control buttons (“
”
and “”) to set the desired temperature.
The temperature can be set within the range of
60 to 908F (18 to 328C) .
Air recirculation:
Push the air recirculation “
” button to
recirculate interior air inside the vehicle. The
indicator light on the air recirculation “
”
button will illuminate.
The air recirculation mode cannot be activated
when the air conditioner is in the front defrosting
mode.
Outside air circulation:
. Models with Advanced Climate Control
System:
Push the air recirculation “
” button twice
to draw outside air into the passenger compartment. The indicator light on the air
recirculation “
” button will turn off.
. Models without Advanced Climate Control
System:
Push the outside air circulation “
” button
to draw outside air into the passenger
compartment. The indicator light on the
outside air circulation “
” button will turn
on.
Automatic air intake control:
. Models with Advanced Climate Control
System:
Push the “
AUTO” auto-recirculation”
button to switch to the automatic air intake
control mode. The indicator light on the
“
AUTO” auto-recirculation button will
illuminate. In this mode, the sensor detects
odors and gas to automatically switch
between the air recirculation mode and the
outside air circulation mode. (See “Ad-
vanced climate control system” (P.4-50) for
details.)
. Models without Advanced Climate Control
System:
To switch to the automatic control mode,
push the intake air control button for about 2
seconds. The indicator lights (both air
recirculation “
” and outside air circula-
tion “” buttons) will flash twice, and then the intake air will be controlled automatically.
The following conditions need to be met for the
automatic air intake control mode to function
properly.
. The air flow control is not in the front
defroster mode (the indicator light on the
front defroster “
FRONT” button is
turned off).
. The outside temperature is approximately
08C (328F) or above.
Monitor, heater, air conditioner, audio, phone and voice recognition systems4-49
Page 234 of 482
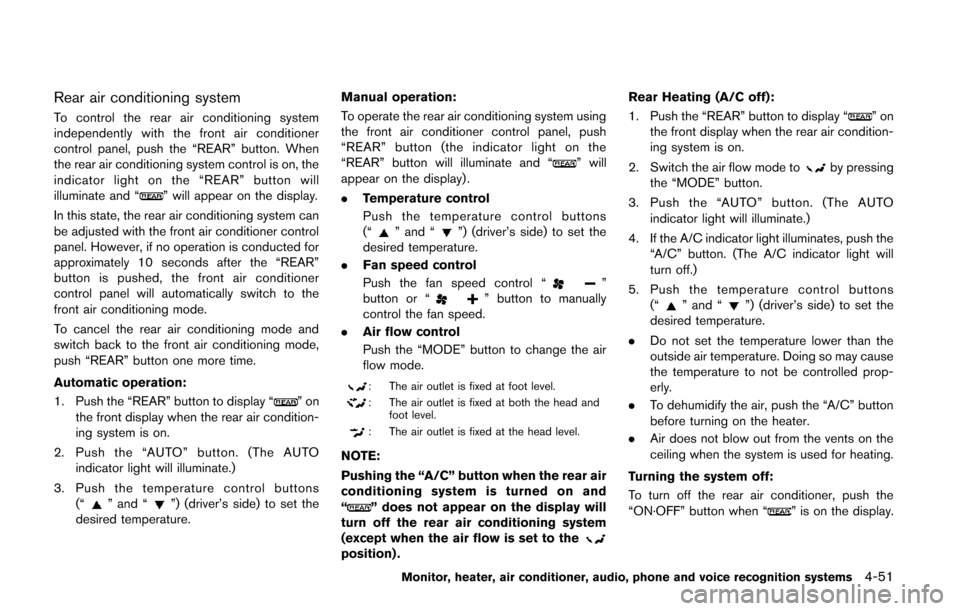
Rear air conditioning system
To control the rear air conditioning system
independently with the front air conditioner
control panel, push the “REAR” button. When
the rear air conditioning system control is on, the
indicator light on the “REAR” button will
illuminate and “
” will appear on the display.
In this state, the rear air conditioning system can
be adjusted with the front air conditioner control
panel. However, if no operation is conducted for
approximately 10 seconds after the “REAR”
button is pushed, the front air conditioner
control panel will automatically switch to the
front air conditioning mode.
To cancel the rear air conditioning mode and
switch back to the front air conditioning mode,
push “REAR” button one more time.
Automatic operation:
1. Push the “REAR” button to display “
”on
the front display when the rear air condition-
ing system is on.
2. Push the “AUTO” button. (The AUTO indicator light will illuminate.)
3. Push the temperature control buttons (“
” and “”) (driver’s side) to set the
desired temperature. Manual operation:
To operate the rear air conditioning system using
the front air conditioner control panel, push
“REAR” button (the indicator light on the
“REAR” button will illuminate and “
” will
appear on the display) .
. Temperature control
Push the temperature control buttons
(“
” and “”) (driver’s side) to set the
desired temperature.
. Fan speed control
Push the fan speed control “
”
button or “” button to manually
control the fan speed.
. Air flow control
Push the “MODE” button to change the air
flow mode.
: The air outlet is fixed at foot level.
: The air outlet is fixed at both the head and
foot level.
: The air outlet is fixed at the head level.
NOTE:
Pushing the “A/C” button when the rear air
conditioning system is turned on and
“
” does not appear on the display will
turn off the rear air conditioning system
(except when the air flow is set to the
position) . Rear Heating (A/C off):
1. Push the “REAR” button to display “
”on
the front display when the rear air condition-
ing system is on.
2. Switch the air flow mode to
by pressing
the “MODE” button.
3. Push the “AUTO” button. (The AUTO indicator light will illuminate.)
4. If the A/C indicator light illuminates, push the “A/C” button. (The A/C indicator light will
turn off.)
5. Push the temperature control buttons (“
” and “”) (driver’s side) to set the
desired temperature.
. Do not set the temperature lower than the
outside air temperature. Doing so may cause
the temperature to not be controlled prop-
erly.
. To dehumidify the air, push the “A/C” button
before turning on the heater.
. Air does not blow out from the vents on the
ceiling when the system is used for heating.
Turning the system off:
To turn off the rear air conditioner, push the
“ON·OFF” button when “
” is on the display.
Monitor, heater, air conditioner, audio, phone and voice recognition systems4-51
Page 235 of 482
4-52Monitor, heater, air conditioner, audio, phone and voice recognition systems
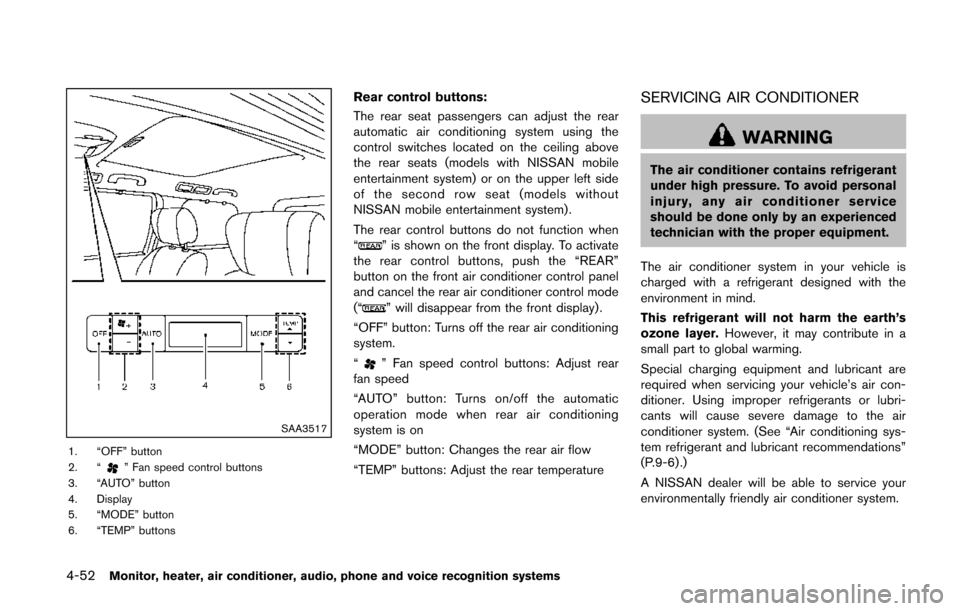
SAA3517
1. “OFF” button
2. “” Fan speed control buttons
3. “AUTO” button
4. Display
5. “MODE” button
6. “TEMP” buttons
Rear control buttons:
The rear seat passengers can adjust the rear
automatic air conditioning system using the
control switches located on the ceiling above
the rear seats (models with NISSAN mobile
entertainment system) or on the upper left side
of the second row seat (models without
NISSAN mobile entertainment system) .
The rear control buttons do not function when
“
” is shown on the front display. To activate
the rear control buttons, push the “REAR”
button on the front air conditioner control panel
and cancel the rear air conditioner control mode
(“
” will disappear from the front display) .
“OFF” button: Turns off the rear air conditioning
system.
“
” Fan speed control buttons: Adjust rear
fan speed
“AUTO” button: Turns on/off the automatic
operation mode when rear air conditioning
system is on
“MODE” button: Changes the rear air flow
“TEMP” buttons: Adjust the rear temperature
SERVICING AIR CONDITIONER
WARNING
The air conditioner contains refrigerant
under high pressure. To avoid personal
injury, any air conditioner service
should be done only by an experienced
technician with the proper equipment.
The air conditioner system in your vehicle is
charged with a refrigerant designed with the
environment in mind.
This refrigerant will not harm the earth’s
ozone layer. However, it may contribute in a
small part to global warming.
Special charging equipment and lubricant are
required when servicing your vehicle’s air con-
ditioner. Using improper refrigerants or lubri-
cants will cause severe damage to the air
conditioner system. (See “Air conditioning sys-
tem refrigerant and lubricant recommendations”
(P.9-6) .)
A NISSAN dealer will be able to service your
environmentally friendly air conditioner system.
Page 250 of 482
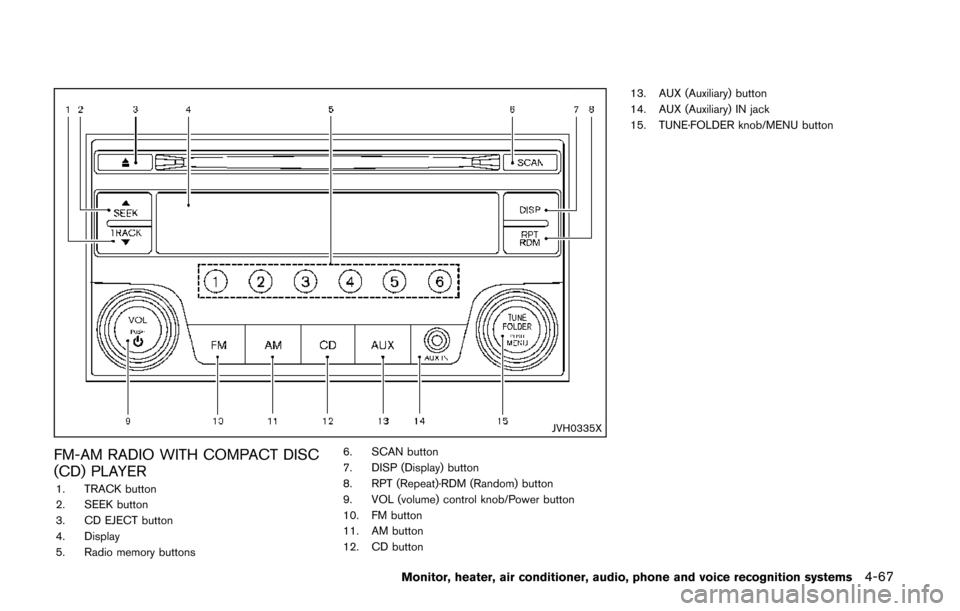
JVH0335X
FM-AM RADIO WITH COMPACT DISC
(CD) PLAYER
1. TRACK button
2. SEEK button
3. CD EJECT button
4. Display
5. Radio memory buttons6. SCAN button
7. DISP (Display) button
8. RPT (Repeat)·RDM (Random) button
9. VOL (volume) control knob/Power button
10. FM button
11. AM button
12. CD button13. AUX (Auxiliary) button
14. AUX (Auxiliary) IN jack
15. TUNE·FOLDER knob/MENU button
Monitor, heater, air conditioner, audio, phone and voice recognition systems4-67