2014 NISSAN QUEST AUX
[x] Cancel search: AUXPage 271 of 482
4-88Monitor, heater, air conditioner, audio, phone and voice recognition systems
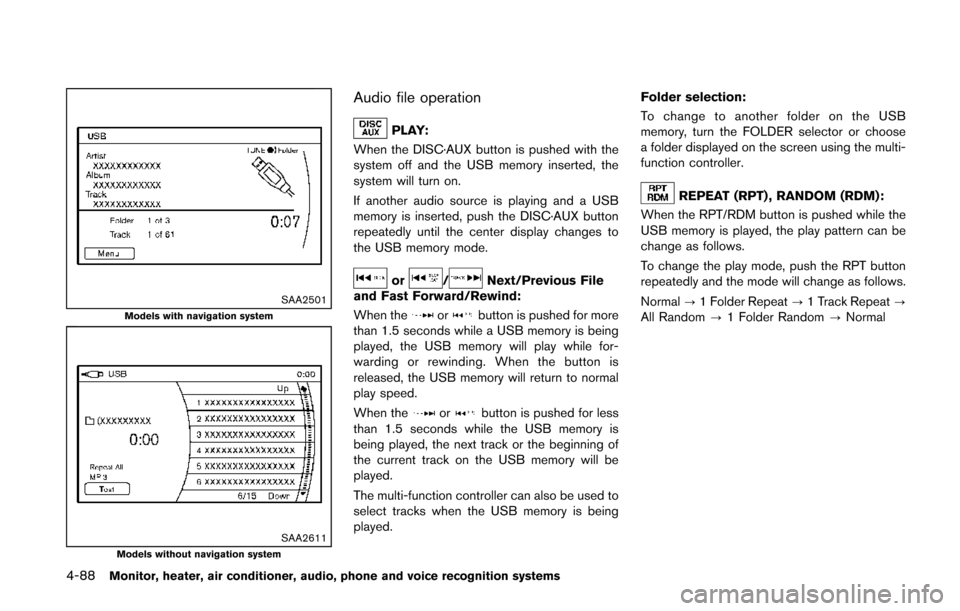
SAA2501Models with navigation system
SAA2611Models without navigation system
Audio file operation
PLAY:
When the DISC·AUX button is pushed with the
system off and the USB memory inserted, the
system will turn on.
If another audio source is playing and a USB
memory is inserted, push the DISC·AUX button
repeatedly until the center display changes to
the USB memory mode.
or/Next/Previous File
and Fast Forward/Rewind:
When the
orbutton is pushed for more
than 1.5 seconds while a USB memory is being
played, the USB memory will play while for-
warding or rewinding. When the button is
released, the USB memory will return to normal
play speed.
When the
orbutton is pushed for less
than 1.5 seconds while the USB memory is
being played, the next track or the beginning of
the current track on the USB memory will be
played.
The multi-function controller can also be used to
select tracks when the USB memory is being
played. Folder selection:
To change to another folder on the USB
memory, turn the FOLDER selector or choose
a folder displayed on the screen using the multi-
function controller.
REPEAT (RPT) , RANDOM (RDM):
When the RPT/RDM button is pushed while the
USB memory is played, the play pattern can be
change as follows.
To change the play mode, push the RPT button
repeatedly and the mode will change as follows.
Normal ?1 Folder Repeat ?1 Track Repeat ?
All Random ?1 Folder Random ?Normal
Page 272 of 482
SAA2502
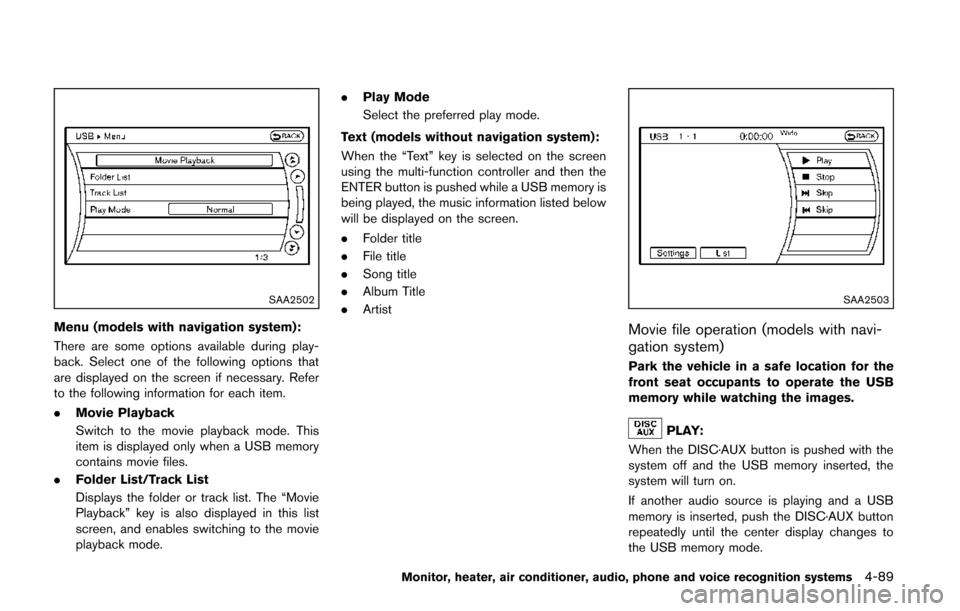
Menu (models with navigation system):
There are some options available during play-
back. Select one of the following options that
are displayed on the screen if necessary. Refer
to the following information for each item.
.Movie Playback
Switch to the movie playback mode. This
item is displayed only when a USB memory
contains movie files.
. Folder List/Track List
Displays the folder or track list. The “Movie
Playback” key is also displayed in this list
screen, and enables switching to the movie
playback mode. .
Play Mode
Select the preferred play mode.
Text (models without navigation system):
When the “Text” key is selected on the screen
using the multi-function controller and then the
ENTER button is pushed while a USB memory is
being played, the music information listed below
will be displayed on the screen.
. Folder title
. File title
. Song title
. Album Title
. Artist
SAA2503
Movie file operation (models with navi-
gation system)
Park the vehicle in a safe location for the
front seat occupants to operate the USB
memory while watching the images.
PLAY:
When the DISC·AUX button is pushed with the
system off and the USB memory inserted, the
system will turn on.
If another audio source is playing and a USB
memory is inserted, push the DISC·AUX button
repeatedly until the center display changes to
the USB memory mode.
Monitor, heater, air conditioner, audio, phone and voice recognition systems4-89
Page 277 of 482
4-94Monitor, heater, air conditioner, audio, phone and voice recognition systems
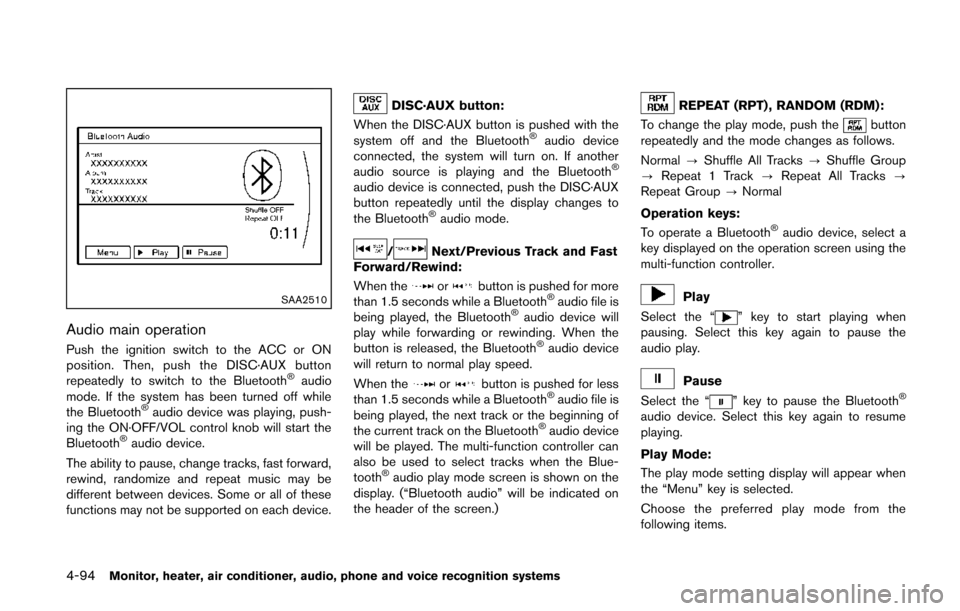
SAA2510
Audio main operation
Push the ignition switch to the ACC or ON
position. Then, push the DISC·AUX button
repeatedly to switch to the Bluetooth
®audio
mode. If the system has been turned off while
the Bluetooth
®audio device was playing, push-
ing the ON·OFF/VOL control knob will start the
Bluetooth
®audio device.
The ability to pause, change tracks, fast forward,
rewind, randomize and repeat music may be
different between devices. Some or all of these
functions may not be supported on each device.
DISC·AUX button:
When the DISC·AUX button is pushed with the
system off and the Bluetooth
®audio device
connected, the system will turn on. If another
audio source is playing and the Bluetooth
®
audio device is connected, push the DISC·AUX
button repeatedly until the display changes to
the Bluetooth
®audio mode.
/Next/Previous Track and Fast
Forward/Rewind:
When the
orbutton is pushed for more
than 1.5 seconds while a Bluetooth®audio file is
being played, the Bluetooth®audio device will
play while forwarding or rewinding. When the
button is released, the Bluetooth
®audio device
will return to normal play speed.
When the
orbutton is pushed for less
than 1.5 seconds while a Bluetooth®audio file is
being played, the next track or the beginning of
the current track on the Bluetooth
®audio device
will be played. The multi-function controller can
also be used to select tracks when the Blue-
tooth
®audio play mode screen is shown on the
display. (“Bluetooth audio” will be indicated on
the header of the screen.)
REPEAT (RPT) , RANDOM (RDM):
To change the play mode, push the
button
repeatedly and the mode changes as follows.
Normal ?Shuffle All Tracks ?Shuffle Group
? Repeat 1 Track ?Repeat All Tracks ?
Repeat Group ?Normal
Operation keys:
To operate a Bluetooth
®audio device, select a
key displayed on the operation screen using the
multi-function controller.
Play
Select the “
” key to start playing when
pausing. Select this key again to pause the
audio play.
Pause
Select the “
” key to pause the Bluetooth®
audio device. Select this key again to resume
playing.
Play Mode:
The play mode setting display will appear when
the “Menu” key is selected.
Choose the preferred play mode from the
following items.
Page 280 of 482
.Second generation iPod Classic®(firmware
version 2.0 PC)
. First generation iPod touch
®(firmware ver-
sion 2.1)
. Second generation iPod touch
®(firmware
version 2.1.1)
. First generation iPod nano
®(firmware ver-
sion 1.3.1)
. Second generation iPod nano
®(firmware
version 1.1.3)
. Third generation iPod nano
®(firmware ver-
sion 1.1 PC)
. Third generation iPhone
®(firmware version
2.1)
Make sure that the iPod
®version is updated.
Audio main operation
Push the ignition switch to the ACC or ON
position. Then, push the DISC·AUX button
repeatedly to switch to the iPod
®mode.
If the system has been turned off while the iPod®
was playing, pushing the ON·OFF button will
start the iPod®.
play:
When the DISC·AUX button is pushed with the
system off and the iPod
®connected, the system
will turn on. If another audio source is playing
and the iPod
®is connected, push the DISC·AUX button repeatedly until the center display
changes to the iPod
®mode.
Interface:
The interface for iPod
®operation shown on the
vehicle center display is similar to the iPod®
interface. Use the multi-function controller and
the ENTER or BACK button to play the iPod®
with your favorite settings.
The following items can be chosen from the
menu list screen. For further information about
each item, see the iPod
®Owner’s Manual.
. Now Playing
. Playlists
. Artists
. Albums
. Songs
. Podcasts
. Genres
. Composers
. Audiobooks
. Shuffle Songs
. Play mode
The following touch-panel buttons shown on the
screen are also available:
.
: returns to the previous screen.
.
: plays/pauses the music selected.
Next/Previous Track and Fast
Forward/Rewind:
When the
orbutton is pushed for more
than 1.5 seconds while the iPod®is playing, the
iPod®will play while fast forwarding or rewind-
ing. When the button is released, the iPod®will
return to the normal play speed.
When the
orbutton is pushed for less
than 1.5 seconds while the iPod®is playing, the
next track or the beginning of the current track
on the iPod
®will be played.
The multi-function controller can also be used to
select tracks when the iPod
®is playing.
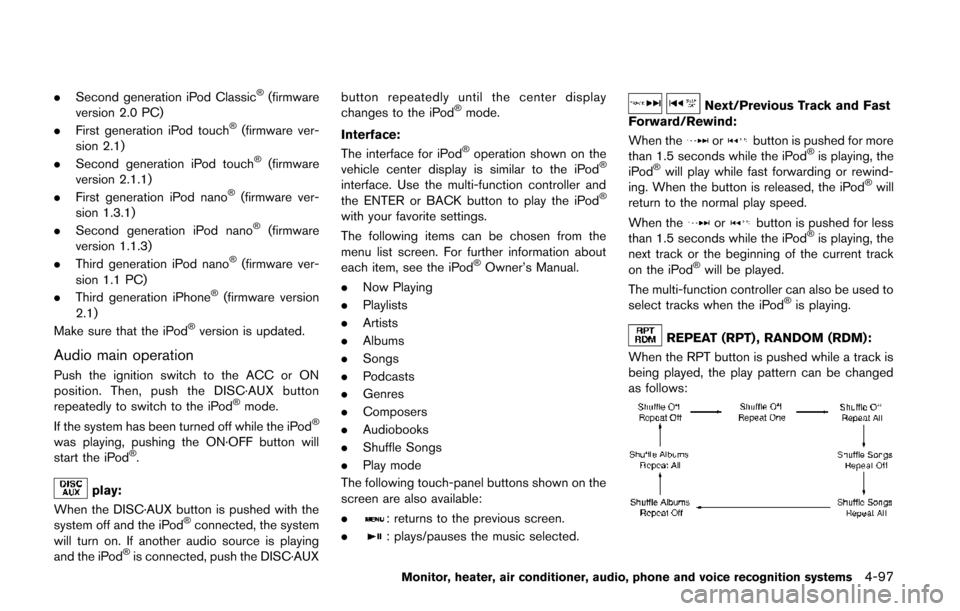
REPEAT (RPT) , RANDOM (RDM):
When the RPT button is pushed while a track is
being played, the play pattern can be changed
as follows:
Monitor, heater, air conditioner, audio, phone and voice recognition systems4-97
Page 281 of 482
4-98Monitor, heater, air conditioner, audio, phone and voice recognition systems
SAA3601
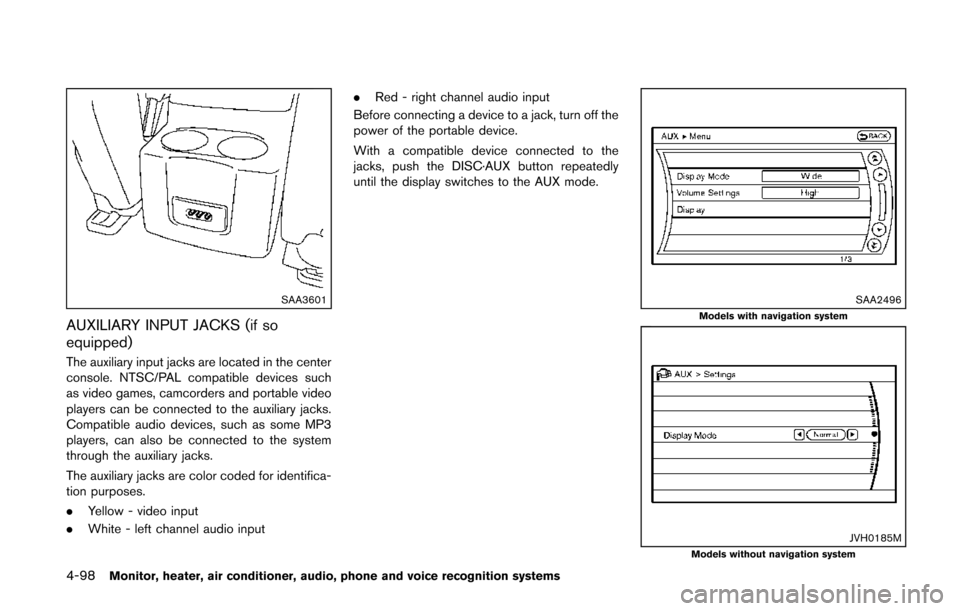
AUXILIARY INPUT JACKS (if so
equipped)
The auxiliary input jacks are located in the center
console. NTSC/PAL compatible devices such
as video games, camcorders and portable video
players can be connected to the auxiliary jacks.
Compatible audio devices, such as some MP3
players, can also be connected to the system
through the auxiliary jacks.
The auxiliary jacks are color coded for identifica-
tion purposes.
.Yellow - video input
. White - left channel audio input .
Red - right channel audio input
Before connecting a device to a jack, turn off the
power of the portable device.
With a compatible device connected to the
jacks, push the DISC·AUX button repeatedly
until the display switches to the AUX mode.
SAA2496Models with navigation system
JVH0185MModels without navigation system
Page 282 of 482
AUX Menu
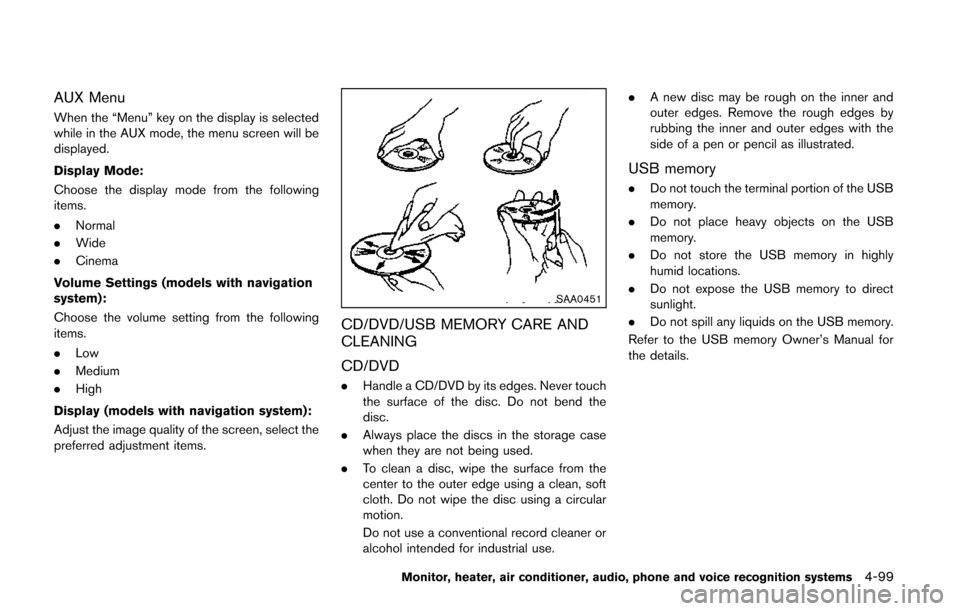
When the “Menu” key on the display is selected
while in the AUX mode, the menu screen will be
displayed.
Display Mode:
Choose the display mode from the following
items.
.Normal
. Wide
. Cinema
Volume Settings (models with navigation
system):
Choose the volume setting from the following
items.
. Low
. Medium
. High
Display (models with navigation system):
Adjust the image quality of the screen, select the
preferred adjustment items.
SAA0451
CD/DVD/USB MEMORY CARE AND
CLEANING
CD/DVD
. Handle a CD/DVD by its edges. Never touch
the surface of the disc. Do not bend the
disc.
. Always place the discs in the storage case
when they are not being used.
. To clean a disc, wipe the surface from the
center to the outer edge using a clean, soft
cloth. Do not wipe the disc using a circular
motion.
Do not use a conventional record cleaner or
alcohol intended for industrial use. .
A new disc may be rough on the inner and
outer edges. Remove the rough edges by
rubbing the inner and outer edges with the
side of a pen or pencil as illustrated.
USB memory
.Do not touch the terminal portion of the USB
memory.
. Do not place heavy objects on the USB
memory.
. Do not store the USB memory in highly
humid locations.
. Do not expose the USB memory to direct
sunlight.
. Do not spill any liquids on the USB memory.
Refer to the USB memory Owner’s Manual for
the details.
Monitor, heater, air conditioner, audio, phone and voice recognition systems4-99
Page 286 of 482
SAA3607
DIGITAL VERSATILE DISC (DVD) SYS-
TEM COMPONENTS
DVD drive
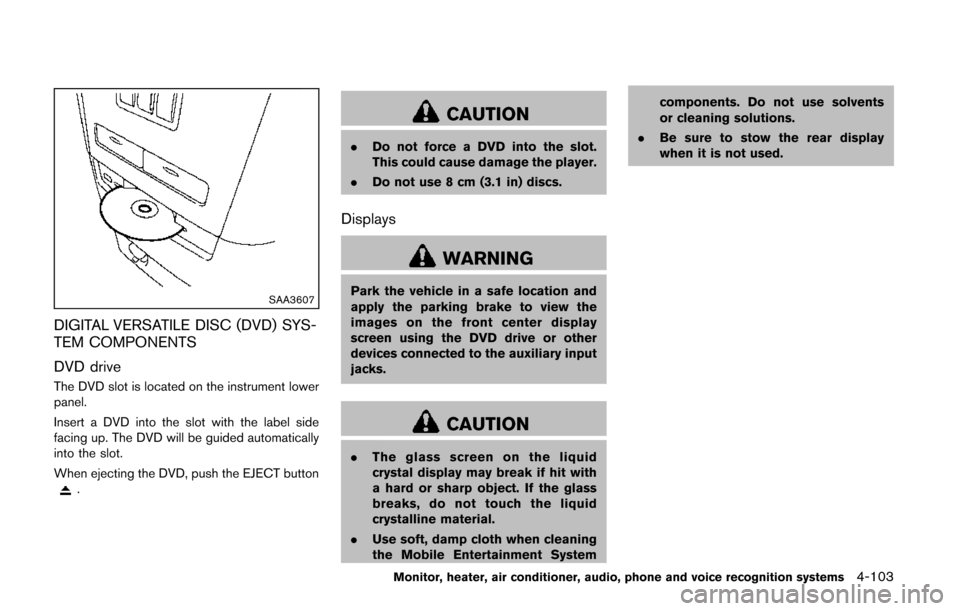
The DVD slot is located on the instrument lower
panel.
Insert a DVD into the slot with the label side
facing up. The DVD will be guided automatically
into the slot.
When ejecting the DVD, push the EJECT button
.
CAUTION
.Do not force a DVD into the slot.
This could cause damage the player.
. Do not use 8 cm (3.1 in) discs.
Displays
WARNING
Park the vehicle in a safe location and
apply the parking brake to view the
images on the front center display
screen using the DVD drive or other
devices connected to the auxiliary input
jacks.
CAUTION
.The glass screen on the liquid
crystal display may break if hit with
a hard or sharp object. If the glass
breaks, do not touch the liquid
crystalline material.
. Use soft, damp cloth when cleaning
the Mobile Entertainment System components. Do not use solvents
or cleaning solutions.
. Be sure to stow the rear display
when it is not used.
Monitor, heater, air conditioner, audio, phone and voice recognition systems4-103
Page 287 of 482
4-104Monitor, heater, air conditioner, audio, phone and voice recognition systems
SAA3655Flip-down screen
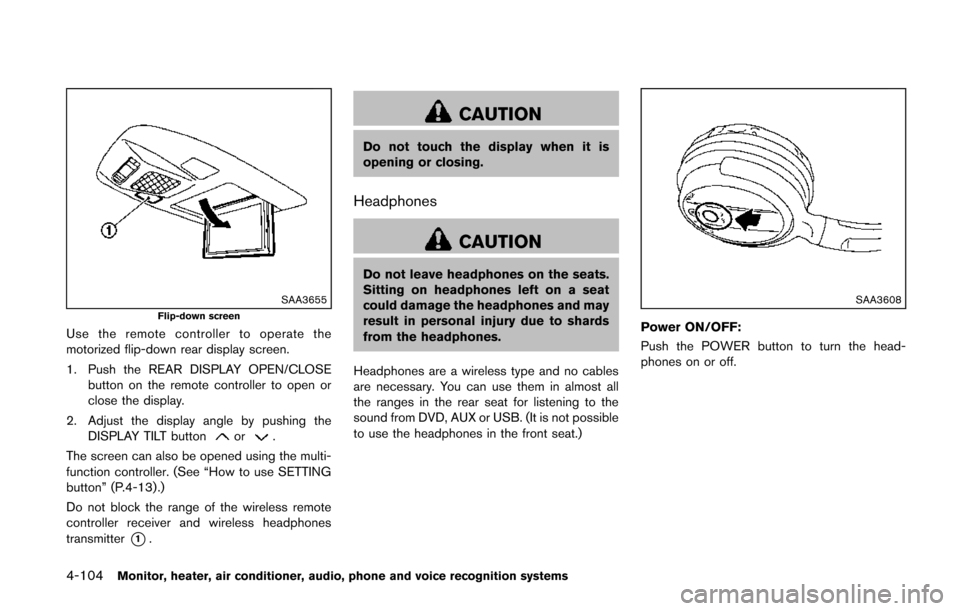
Use the remote controller to operate the
motorized flip-down rear display screen.
1. Push the REAR DISPLAY OPEN/CLOSEbutton on the remote controller to open or
close the display.
2. Adjust the display angle by pushing the DISPLAY TILT button
or.
The screen can also be opened using the multi-
function controller. (See “How to use SETTING
button” (P.4-13).)
Do not block the range of the wireless remote
controller receiver and wireless headphones
transmitter
*1.
CAUTION
Do not touch the display when it is
opening or closing.
Headphones
CAUTION
Do not leave headphones on the seats.
Sitting on headphones left on a seat
could damage the headphones and may
result in personal injury due to shards
from the headphones.
Headphones are a wireless type and no cables
are necessary. You can use them in almost all
the ranges in the rear seat for listening to the
sound from DVD, AUX or USB. (It is not possible
to use the headphones in the front seat.)
SAA3608
Power ON/OFF:
Push the POWER button to turn the head-
phones on or off.