2014 NISSAN QASHQAI glove box
[x] Cancel search: glove boxPage 14 of 338

LEFT HAND DRIVE
1.Left and right side vents (P. 4-14)
2.Front passenger’s supplemental front-impact
air bag (P. 1-30)
3.Centre vents (P. 4-14)
4.Hazard warning flasher switch (P. 6-2)5.Audio system* (P. 4-23)
— NissanConnect* *1(P. 4-38)
— without navigation* (P. 4-24)
6.Ignition switch (behind steering wheel)
(P. 5-11)
— Push Button ignition switch* (P. 5-12)
7.Steering wheel switches
— Cruise control* (P. 5-36)— Speed limiter* (P. 5-38)
— Mobile phone integration for FM-AM radio
with CD player without navigation* (P. 4-39)
— Mobile phone integration for
NissanConnect* *
1(P. 4-38)
8.Meters, gauges, warning/indicator lights,
vehicle information display (P. 2-2, P. 2-4,
P. 2-13)
9.Steering wheel switches
— Vehicle information display switches
(P. 2-13)
— Audio control* (P. 4-38)
10.Heater and air conditioner (P. 4-15)
11.Glove box (P. 2-42)
* where fitted
*
1Refer to the separately provided NissanConnect
Owner’s Manual.
NPA1269
INSTRUMENT AND CONTROL LAYOUT
0-8Illustrated table of contents
Page 15 of 338

RIGHT HAND DRIVE
1.Left and right side vents (P. 4-14)
2.Front passenger’s supplemental front-impact
air bag (P. 1-30)
3.Centre vents (P. 4-14)
4.Hazard warning flasher switch (P. 6-2)5.Audio system* (P. 4-23)
— NissanConnect* *1(P. 4-38)
— without navigation* (P. 4-24)
6.Ignition switch (behind steering wheel)
(P. 5-11)
— Push Button ignition switch* (P. 5-12)
7.Steering wheel switches
— Vehicle information display switches(P. 2-13)
— Audio control* (P. 4-38)
8.Meters, gauges, warning/indicator lights,
vehicle information display (P. 2-2, P. 2-4,
P. 2-13)
9.Steering wheel switches*
— Cruise control* (P. 5-36)
— Speed limiter* (P. 5-38)
— Mobile phone integration for FM-AM radio
with CD player without navigation* (P. 4-39)
— Mobile phone integration for
NissanConnect* *
1(P. 4-38)
10.Heater and air conditioner (P. 4-15)
11.Glove box (P. 2-42)
* where fitted
*
1Refer to the separately provided NissanConnect
Owner’s Manual.
NPA1249
Illustrated table of contents0-9
Page 54 of 338

•Work around and on the supplemental air bag
systems should be done by a NISSAN dealer
or qualified workshop. The SRS wiring should
not be modified or disconnected. Unautho-
rised electrical test equipment and probing
devices should not be used on the supple-
mental air bag systems.
•The SRS wiring harness connectors are yel-
low and/or orange for easy identification.
•Never install a rear-facing child restraint sys-
tem on the front passenger seat without first
deactivating the passenger air bag with the
front passenger air bag switch (where fitted),
see “Front passenger air bag switch (where
fitted)” later in this section. In a frontal colli-
sion, supplemental front-impact air bags in-
flate with great force. An inflating supplemen-
tal front-impact air bag could seriously injure
or kill your child.
When the air bags inflate, a fairly loud noise may be
heard, followed by the release of smoke. This smoke
is not harmful and does not indicate a fire. However,
care should be taken not to inhale it, as it may cause
irritation and choking. Occupants with a history of
breathing difficulties, such as asthma, should get
fresh air promptly.
Supplemental air bags, along with the use of seat
belts, help to cushion the impact force on the chest
of the front occupants. Curtain air bags help to cush-
ion the impact force to the head of occupants in the
front and rear outer seating positions. They can help
save lives and reduce serious injuries. However, aninflating side air bag and curtain air bag may cause
abrasions or other injuries. Supplemental side air
bags and curtain air bags do not provide restraint to
the lower body.
Supplemental front-impact air bag
system
The driver’s supplemental front-impact air bag is
located at the centre of the steering wheel. The pas-
senger’s supplemental front-impact air bag is lo-
cated at the instrument panel above the glove box.
The supplemental front-impact air bag system is de-
signed to inflate in higher severity frontal collisions,
although it may inflate if the forces in another type of
collision are similar to those of a higher severity fron-
tal impact. It may not inflate in certain frontal colli-
sions. Vehicle damage (or lack of it) is not always an
indication of proper supplemental front-impact air
bag system operation.
WARNING
Never install a rear-facing child restraint system
on the front passenger seat without first deacti-
vating the passenger air bag with the front pas-
senger air bag switch (where fitted), see “Front
passenger air bag switch (where fitted)” later in
this section. In a frontal collision, supplemental
front-impact air bags inflate with great force. An
inflating supplemental front-impact air bag could
seriously injure or kill your child.For models with front passenger air bag switch:
The front passenger air bag is designed to be turned
off using the front passenger air bag switch, only if
absolutely necessary.
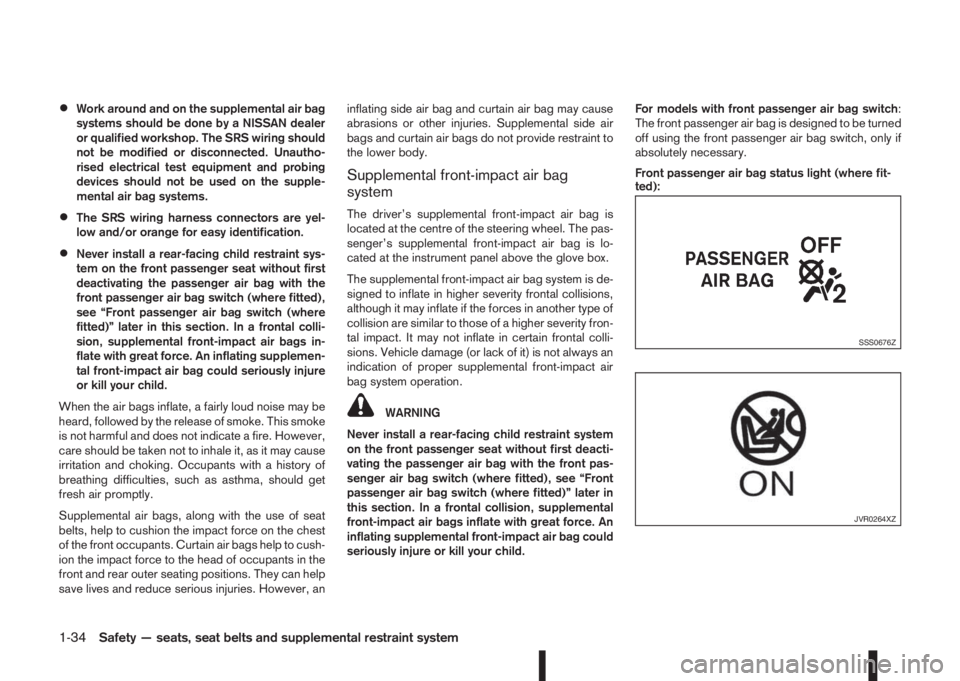
Front passenger air bag status light (where fit-
ted):
SSS0676Z
JVR0264XZ
1-34Safety — seats, seat belts and supplemental restraint system
Page 55 of 338

WARNING
•Since your vehicle is equipped with a front
passenger air bag, it is not permitted to install
a rearward facing child restraint on the front
passenger seat unless the front passenger air
bag has been deactivated first.
•Do not fit a rearward facing child seat on the
front passenger seat if the air bag activation/
deactivation system (where fitted) is malfunc-
tioning. Your vehicle must immediately be
taken to a NISSAN dealer or qualified work-
shop in such a situation.
The front passenger air bag status lights
andare located on the instrument panel above the
shift lever.
When the ignition switch is placed in the ON posi-
tion, the front passenger air bag status ON and
OFF lights illuminate and then turn off or remain on
depending on the front passenger air bag status.
•When the ignition switch is placed in the ON
position and the front passenger air bag is ac-
tive, both the front passenger air bag status OFF
light
, and the Supplemental Restraint Sys-
tem (SRS) air bag warning lightin the com-
bination meterj1 will turn off after about 7 sec-
onds.
The front passenger air bag status ON light
will illuminate and then turn off after a period of
time when the front passenger air bag switch is
in the ON position.
•When the ignition switch is placed in the ON
position and the front passenger air bag is inac-
tive, both the front passenger air bag status ON
light
, and the Supplemental Restraint Sys-
tem (SRS) air bag warning lightin the com-
bination meterj1 will turn on after about 7 sec-
onds.
The front passenger air bag status OFF light
will illuminate and remain on as long as the
front passenger air bag switch is in the OFF
position.
If the front passenger air bag status light operates in
a way other than described above, the front passen-
ger air bag may not function properly. Have the sys-
tem checked, and if necessary repaired, by a
NISSAN dealer or qualified workshop promptly.
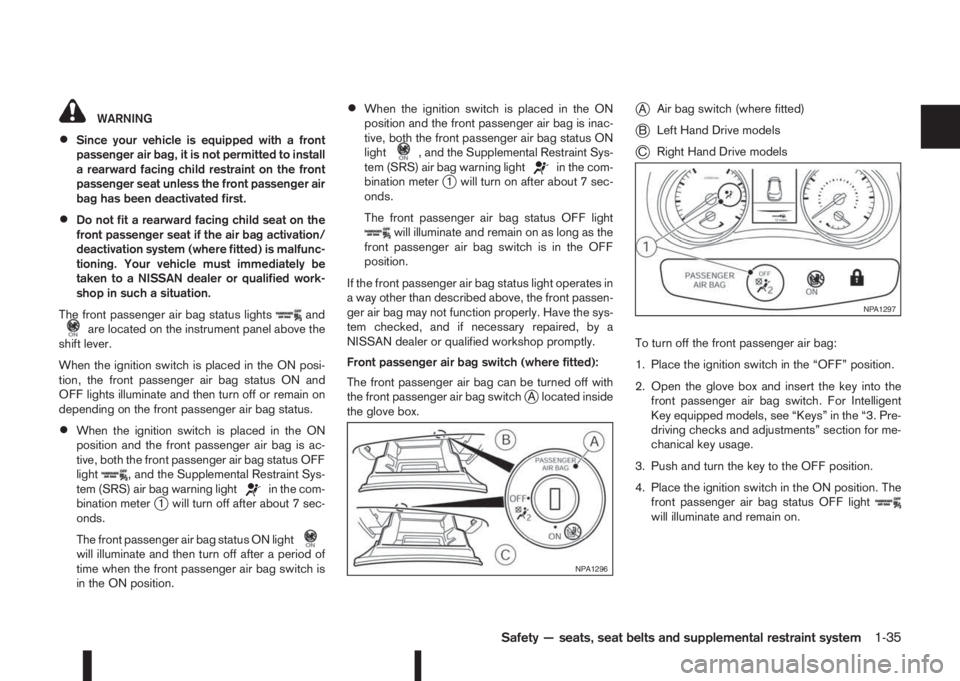
Front passenger air bag switch (where fitted):
The front passenger air bag can be turned off with
the front passenger air bag switch
jA located inside
the glove box.
jAAir bag switch (where fitted)
jBLeft Hand Drive models
jCRight Hand Drive models
To turn off the front passenger air bag:
1. Place the ignition switch in the “OFF” position.
2. Open the glove box and insert the key into the
front passenger air bag switch. For Intelligent
Key equipped models, see “Keys” in the “3. Pre-
driving checks and adjustments” section for me-
chanical key usage.
3. Push and turn the key to the OFF position.
4. Place the ignition switch in the ON position. The
front passenger air bag status OFF light
will illuminate and remain on.
NPA1296
NPA1297
Safety — seats, seat belts and supplemental restraint system1-35
Page 56 of 338

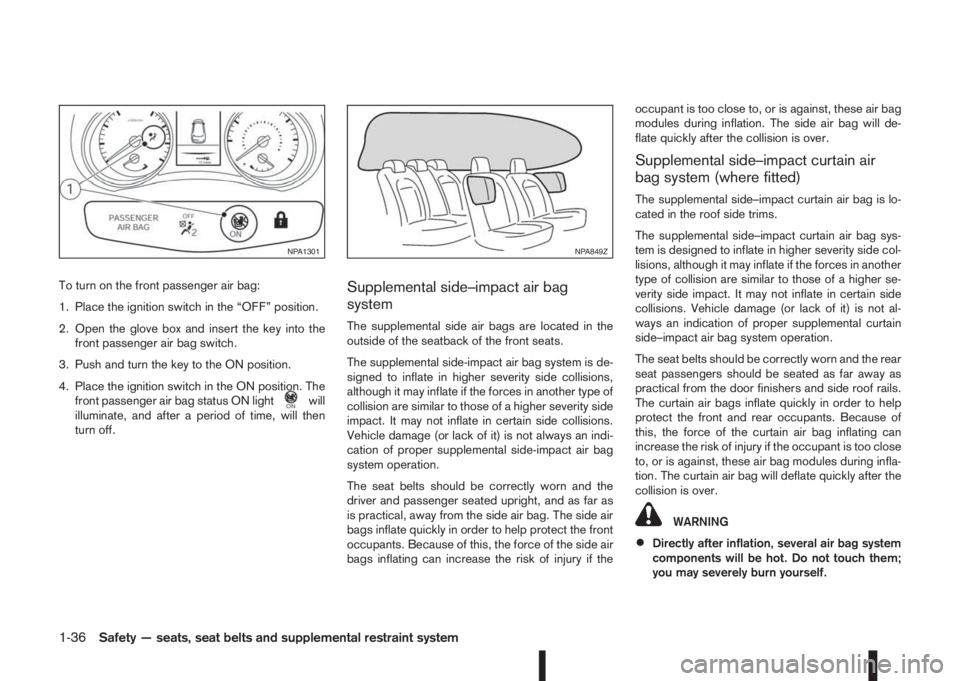
To turn on the front passenger air bag:
1. Place the ignition switch in the “OFF” position.
2. Open the glove box and insert the key into the
front passenger air bag switch.
3. Push and turn the key to the ON position.
4. Place the ignition switch in the ON position. The
front passenger air bag status ON light
will
illuminate, and after a period of time, will then
turn off.
Supplemental side–impact air bag
system
The supplemental side air bags are located in the
outside of the seatback of the front seats.
The supplemental side-impact air bag system is de-
signed to inflate in higher severity side collisions,
although it may inflate if the forces in another type of
collision are similar to those of a higher severity side
impact. It may not inflate in certain side collisions.
Vehicle damage (or lack of it) is not always an indi-
cation of proper supplemental side-impact air bag
system operation.
The seat belts should be correctly worn and the
driver and passenger seated upright, and as far as
is practical, away from the side air bag. The side air
bags inflate quickly in order to help protect the front
occupants. Because of this, the force of the side air
bags inflating can increase the risk of injury if theoccupant is too close to, or is against, these air bag
modules during inflation. The side air bag will de-
flate quickly after the collision is over.
Supplemental side–impact curtain air
bag system (where fitted)
The supplemental side–impact curtain air bag is lo-
cated in the roof side trims.
The supplemental side–impact curtain air bag sys-
tem is designed to inflate in higher severity side col-
lisions, although it may inflate if the forces in another
type of collision are similar to those of a higher se-
verity side impact. It may not inflate in certain side
collisions. Vehicle damage (or lack of it) is not al-
ways an indication of proper supplemental curtain
side–impact air bag system operation.
The seat belts should be correctly worn and the rear
seat passengers should be seated as far away as
practical from the door finishers and side roof rails.
The curtain air bags inflate quickly in order to help
protect the front and rear occupants. Because of
this, the force of the curtain air bag inflating can
increase the risk of injury if the occupant is too close
to, or is against, these air bag modules during infla-
tion. The curtain air bag will deflate quickly after the
collision is over.
WARNING
•Directly after inflation, several air bag system
components will be hot. Do not touch them;
you may severely burn yourself.
NPA1301NPA849Z
1-36Safety — seats, seat belts and supplemental restraint system
Page 58 of 338

2Instruments and controlsInstruments and controls
Meters and gauges .................................................. 2-2
Speedometer...................................................... 2-2
Fuel gauge ......................................................... 2-2
Tachometer ........................................................ 2-2
Engine coolant temperature gauge ...................... 2-3
Instrument panel brightness control..................... 2-3
Warning/indicator lights and audible reminders ........ 2-4
Checking bulbs .................................................. 2-4
Warning lights .................................................... 2-5
Indicator lights .................................................... 2-10
Audible reminders............................................... 2-12
Vehicle information display ....................................... 2-13
How to use the Vehicle Information Display ......... 2-14
Startup display.................................................... 2-14
Settings .............................................................. 2-14
Vehicle information display warnings and
indicators............................................................ 2-21
Trip computer ..................................................... 2-27
[Clock] and [outside air temperature] .................. 2-29
Traffic sign recognition (where fitted) .................. 2-30
Wiper and washer switch ........................................ 2-32
Windscreen ........................................................ 2-32
Rear window ...................................................... 2-33
ThermaClear Heated Windscreen button ................. 2-34
ThermaClear Heated Windscreen (where
fitted).................................................................. 2-34
Defogger switch ...................................................... 2-35
Rear window defogger ....................................... 2-35
Outside mirror defogger (where fitted) ................ 2-35
Headlight and turn signal switch............................... 2-36Headlight switch ................................................. 2-36
Turn signal switch ............................................... 2-38
Fog light switch ....................................................... 2-38
Front fog light (where fitted)................................ 2-38
Rear fog light (where fitted)................................. 2-39
Headlight aiming control .......................................... 2-39
Headlight aiming control switch (where fitted) ..... 2-39
Automatic aiming control (LED headlights) .......... 2-40
Headlight cleaner (where fitted) ............................... 2-40
Headlight cleaner switch (where fitted) ............... 2-40
Horn ........................................................................ 2-41
Seat heating (where fitted) ....................................... 2-41
Power outlet ............................................................ 2-42
Storage ................................................................... 2-42
Storage trays ...................................................... 2-42
Glove box ........................................................... 2-42
Console box ....................................................... 2-43
Cup holders ....................................................... 2-44
Bottle holder ....................................................... 2-44
Coat hooks ......................................................... 2-44
Map pocket (where fitted) ................................... 2-44
Seat pocket (where fitted)................................... 2-44
Roof rail (where fitted) ........................................ 2-45
Parcel shelf ........................................................ 2-45
Luggage compartment/boot floor (where
fitted).................................................................. 2-47
Luggage hooks ................................................... 2-47
Windows ................................................................. 2-48
Power windows .................................................. 2-48
Fixed glass roof (where fitted) .................................. 2-49
Page 100 of 338

WARNING
Take care as the power outlet and plug may be
hot during or immediately after use.
CAUTION
•This power outlet is not designed for use with
a cigarette lighter unit.
•Do not use with accessories that exceed a 12
volt, 120 W (10 A) power draw. Do not use
double adaptors or more than one electrical
accessory.
•Use this power outlet with the engine running
(do not use for extended periods of time with
the engine stopped or idling).
•Avoid using when the air conditioner, head-
lights or rear window defogger are on.
•When not in use, be sure that the cap is
closed. Do not allow water to come into con-
tact with the outlet.
•Before inserting or disconnecting a plug, be
sure to turn off the power switch of the elec-
trical accessory being used or remove the key
from the ignition to turn the Acc power of the
vehicle off.
•Fully push the plug in sufficiently. If sufficient
contact is not made, the plug may overheat or
the internal temperature fuse may blow.
STORAGE TRAYS
WARNING
To help prevent injury in an accident or sudden
stop, do not place sharp objects in the trays.
GLOVE BOX
WARNING
Keep the glove box lid closed while driving to
help prevent injury in an accident or a sudden
stop.
To open the glove box, lift the latch and lower the lid.
Towards the rear of the glove box an elastic strap
can be used to hold the Owner’s Manual pack.
NIC2177Centre console
NIC2135Front armrest
NIC2136
POWER OUTLET STORAGE
2-42Instruments and controls
Page 101 of 338

Sunglasses holder (where fitted)
WARNING
The sunglasses holder should not be used while
driving so that full attention may be given to ve-
hicle operation.
The glove box contains a sunglasses storage area,
which is accessible when the glove box is open.
CONSOLE BOX
WARNING
The centre console box should not be used while
driving so that full attention may be given to ve-
hicle operation.
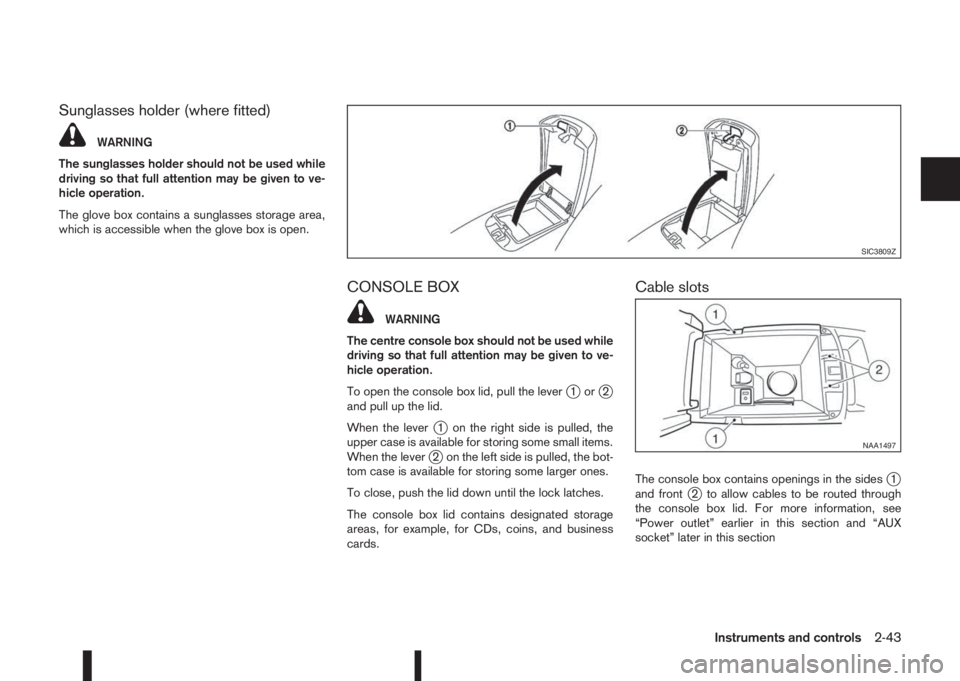
To open the console box lid, pull the lever
j1orj2
and pull up the lid.
When the lever
j1 on the right side is pulled, the
upper case is available for storing some small items.
When the lever
j2 on the left side is pulled, the bot-
tom case is available for storing some larger ones.
To close, push the lid down until the lock latches.
The console box lid contains designated storage
areas, for example, for CDs, coins, and business
cards.
Cable slots
The console box contains openings in the sidesj1
and frontj2 to allow cables to be routed through
the console box lid. For more information, see
“Power outlet” earlier in this section and “AUX
socket” later in this section
SIC3809Z
NAA1497
Instruments and controls2-43