2014 NISSAN QASHQAI battery
[x] Cancel search: batteryPage 273 of 338

•If you must run the engine in an enclosed
space such as a garage, be sure there is
proper ventilation for exhaust gases.
•DO NOT GET UNDER A VEHICLE THAT IS
SUPPORTED BY A JACK.
•Keep smoking materials, flame and sparks
away from fuel and battery.
•Never connect or disconnect either the bat-
tery or any transistorised component connec-
tor while the ignition switch is in the ON posi-
tion.
•Never leave the engine or transmission re-
lated component harness connector discon-
nected while the ignition switch is in the ON
position.
•On petrol engine models with the multiport
fuel injection (MFI) system, the fuel filter or
fuel lines should be serviced by a NISSAN
dealer or qualified workshop because the fuel
lines are under high pressure even when the
engine is off.
•Always wear eye protection whenever you
work on your vehicle.
•Failure to follow these or other common sense
guidelines may lead to serious injury or ve-
hicle damage.
NISSAN Blue Citizenship
Improperly disposed engine oil and/or other
vehicle fluids can pollute the environment. Al-
ways conform to local regulations for disposal
of vehicle fluid.
This section gives instructions regarding only those
items which are relatively easy for an owner to per-
form.
You should be aware that incomplete or improper
servicing may result in operating difficulties or ex-
cessive emissions, and could affect your warranty
coverage.If in doubt about any servicing, have it
done by your NISSAN dealer or qualified work-
shop.For an overview of the engine compartment, see
“Engine compartment” in the “0. Illustrated table
of contents” section.
ENGINE COMPARTMENT
Maintenance and do-it-yourself8-5
Page 284 of 338

VEHICLE BATTERY
WARNING
Do not operate the vehicle if the fluid in the bat-
tery is low. Low battery fluid can cause a higher
load on the battery which can generate heat, re-
duce battery life, and in some cases lead to an
explosion.
•Keep the battery surface clean and dry. Any cor-
rosion should be washed off with a solution of
baking soda and water.
•Make certain the terminal connections are clean
and securely tightened.
•If the vehicle is not used for 30 days or longer,
disconnect the “–” negative battery terminal
cable to prevent discharge.
•If battery replacement or check is required, con-
tact a NISSAN dealer or qualified workshop.
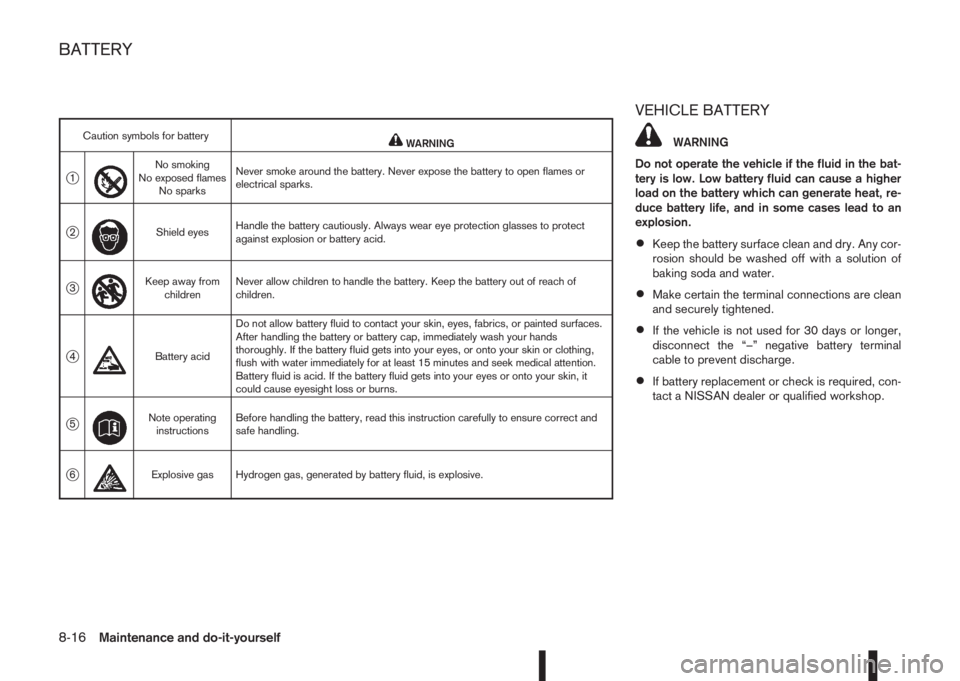
Caution symbols for batterymWARNING
j1
m
No smoking
No exposed flames
No sparksNever smoke around the battery. Never expose the battery to open flames or
electrical sparks.
j2
m
Shield eyesHandle the battery cautiously. Always wear eye protection glasses to protect
against explosion or battery acid.
j3
m
Keep away from
childrenNever allow children to handle the battery. Keep the battery out of reach of
children.
j4
m
Battery acidDo not allow battery fluid to contact your skin, eyes, fabrics, or painted surfaces.
After handling the battery or battery cap, immediately wash your hands
thoroughly. If the battery fluid gets into your eyes, or onto your skin or clothing,
flush with water immediately for at least 15 minutes and seek medical attention.
Battery fluid is acid. If the battery fluid gets into your eyes or onto your skin, it
could cause eyesight loss or burns.
j5
m
Note operating
instructionsBefore handling the battery, read this instruction carefully to ensure correct and
safe handling.
j6mExplosive gas Hydrogen gas, generated by battery fluid, is explosive.
BATTERY
8-16Maintenance and do-it-yourself
Page 285 of 338

Battery (Type A)
Check the fluid level in each cell. It should be be-
tween the UPPERj1 and LOWERj2 level lines.
If it is necessary to add fluid, add only distilled water
to bring the level to the indicator in each filler open-
ing.Do not overfill.
1. Remove the cell plugs
jA using a suitable tool.
j1OK
j2ADD
2. Add distilled water up to the UPPER level line
j1.
If the side of the battery is not clear, check the
electrolyte water level by looking directly above
the cell, as illustrated.
3. Tighten cell plugs.
CAUTION
Do not overfill battery cells. Excessive electrolyte
may leak out of the battery during charging, and
cause paint damage.
Maintenance free battery (Type B)
For a maintenance free battery it is not required to
check the fluid level. However, NISSAN recom-
mends to visually check the green indicator
jA sta-
tus periodically. If it is not visible, replace the battery
as soon as possible.
Reinitialisation procedure after battery
reconnection
If the battery has been reconnected, check the fol-
lowing items:
•Clock setting (where fitted). For details, see “Ve-
hicle information display” in the “2. Instruments
and controls” section, or the separately provided
NissanConnect Owner’s Manual, or the audio
device descriptions in “FM AM radio with CD
player (where fitted)” in the “4. Display screen,
heater and air conditioner, and audio system”
section.
•Reset the desired radio stations to the preset
station buttons. For details, see the audio device
descriptions in the “4. Heater and air conditioner,
and audio system”.
Models with Stop/Start System
•Ensure that the battery fitted is the special bat-
tery that is enhanced with regard to the charge-
discharge capacity and life performance. Avoid
using any other battery for the Stop/Start Sys-
tem, as this may cause early deterioration of the
battery or a malfunction of the Stop/Start Sys-
tem. It is recommended that a Genuine NISSAN
battery is fitted. For more information, contact a
NISSAN dealer or qualified workshop.
•If the battery terminal is disconnected (for bat-
tery replacement, etc.) and then reconnected,
there may be some delay before the Stop/Start
System reactivates.
DI0137MAZ
NDI688ZIndicator
NDI920Z
Maintenance and do-it-yourself8-17
Page 286 of 338

JUMP-STARTING
If jump-starting is necessary, see “Jump-starting” in
the “6. In case of emergency” section. If the engine
does not start by jump starting, the battery may have
to be replaced. Contact a NISSAN dealer or quali-
fied workshop.
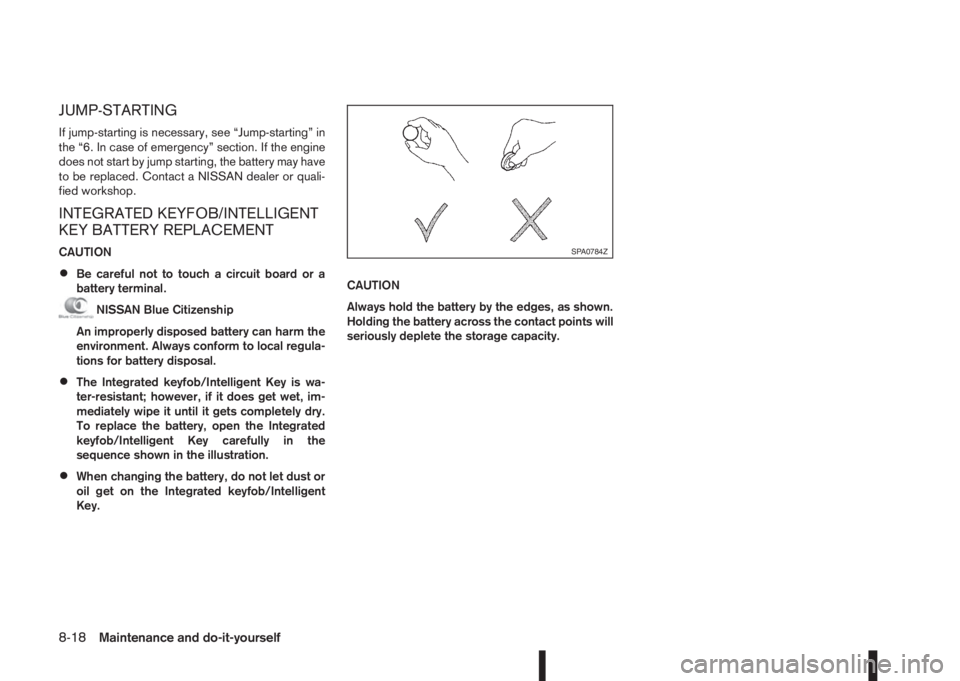
INTEGRATED KEYFOB/INTELLIGENT
KEY BATTERY REPLACEMENT
CAUTION
•Be careful not to touch a circuit board or a
battery terminal.
NISSAN Blue Citizenship
An improperly disposed battery can harm the
environment. Always conform to local regula-
tions for battery disposal.
•The Integrated keyfob/Intelligent Key is wa-
ter-resistant; however, if it does get wet, im-
mediately wipe it until it gets completely dry.
To replace the battery, open the Integrated
keyfob/Intelligent Key carefully in the
sequence shown in the illustration.
•When changing the battery, do not let dust or
oil get on the Integrated keyfob/Intelligent
Key.CAUTION
Always hold the battery by the edges, as shown.
Holding the battery across the contact points will
seriously deplete the storage capacity.
SPA0784Z
8-18Maintenance and do-it-yourself
Page 287 of 338

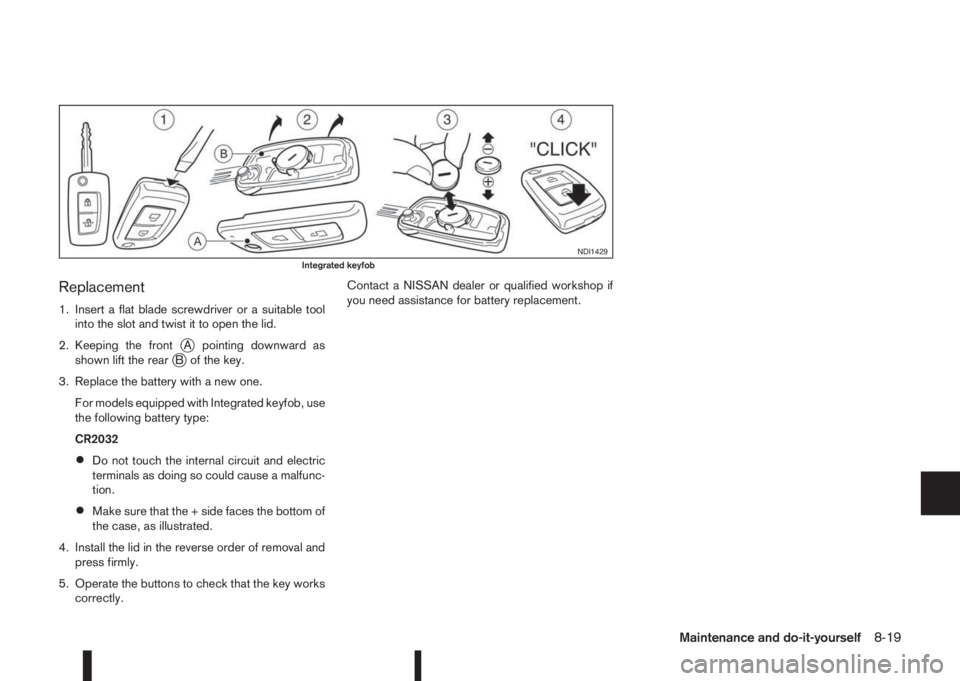
Replacement
1. Insert a flat blade screwdriver or a suitable tool
into the slot and twist it to open the lid.
2. Keeping the front
jA pointing downward as
shown lift the rearjB of the key.
3. Replace the battery with a new one.
For models equipped with Integrated keyfob, use
the following battery type:
CR2032
•Do not touch the internal circuit and electric
terminals as doing so could cause a malfunc-
tion.
•Make sure that the + side faces the bottom of
the case, as illustrated.
4. Install the lid in the reverse order of removal and
press firmly.
5. Operate the buttons to check that the key works
correctly.Contact a NISSAN dealer or qualified workshop if
you need assistance for battery replacement.
NDI1429Integrated keyfob
Maintenance and do-it-yourself8-19
Page 288 of 338

Replacement
1. Slide the locking pin to the unlock position.
2. Remove the key.
3. Insert a flat blade screwdriver or a suitable tool
into the slot and twist it to open the lid.
4. Replace the battery with a new one with the same
specifications.
For models equipped with Intelligent Key, use
the following battery type:
CR2032
•Do not touch the internal circuit and electric
terminals as doing so could cause a malfunc-
tion.
•Make sure that the + side faces the bottom of
the case, as illustrated.
5. Install the lid in the reverse order of removal.6. Operate the buttons to check that the key works
correctly.
Contact a NISSAN dealer or qualified workshop
if you need assistance for battery replacement.
WARNING
Be sure the ignition switch is in the “OFF” or
LOCK position. Otherwise the cooling fan or the
engine may start to operate suddenly.
1. Visually inspect each belt for signs of unusual
wear, cuts, fraying or looseness. If the belt is in
poor condition or loose, have it replaced or ad-
justed by a NISSAN dealer or qualified work-
shop.
2. Have the belts checked regularly for condition
and tension in accordance with the maintenance
schedule as shown in a separately provided War-
ranty Information and Maintenance booklet.
NDI1455Intelligent Key
DRIVE BELTS
8-20Maintenance and do-it-yourself
Page 294 of 338

•Be careful not to damage the connector sup-
port bracket when disconnecting the connec-
tor.
If any electrical equipment does not operate, check
for an open fuse.
The fuse box is located in the lower part of the
instrument panel at the driver’s side.
The affected circuits
j2 are shown on the inside of
the fuse box lid.
1. Make sure the ignition switch and the headlight
switch are in the “OFF” position.
2. Open the fuse box lid.
3. Locate and remove the fuse with the fuse puller
j1 (where fitted).
NOTE
The fuse puller is stored in the fuse box.
4. If the fuse is open
jA , replace it with a new fusejB.
5. Close the fuse box lid.
NOTE
If the new fuse opens again, after installing,
have the electrical system checked and re-
paired by a NISSAN dealer or qualified work-
shop.
Extended storage fuse switch
To reduce battery drain, the extended storage fuse
switchj3 comes from the factory switched off. Prior
to delivery of your vehicle, the switch is pushed in
(switched on) and should always remain on.
If any electrical equipment does not operate, re-
move the extended storage fuse switch and check
for an open fuse.
NOTE
If the extended storage fuse switch malfunctions
or if the fuse is open, it is not necessary to re-
place the switch. In this case, remove the ex-
tended storage fuse switch and replace it with a
new fuse of the same rating.
How to remove the extended storage fuse
switch:
1. To remove the extended storage fuse switch, be
sure the ignition switch is in the “OFF” or LOCK
position.
2. Be sure the headlight switch is in the “OFF”
position.
3. Remove the fuse box cover.
4. Pinch the locking tabs found on each side of the
extended storage fuse switch
j3.
5. Pull the extended storage fuse switch straight
out from the fuse box.
ENGINE COMPARTMENT
CAUTION
Never use a fuse of higher or lower amperage
rating than that specified on the fuse box cover.
If any electrical equipment does not operate, check
for an open fuse.
NDI1089
8-26Maintenance and do-it-yourself
Page 296 of 338

HEADLIGHTS
LED headlight (where fitted)
The LED headlight is a projector style which uses a
LED module without serviceable parts.
CAUTION
•To prevent an electric shock, never attempt to
modify or disassemble the LED headlights as-
sembly.
•If replacement is required, contact a NISSAN
dealer or qualified workshop.
Replacing the halogen headlight bulb
CAUTION
•High pressure halogen gas is sealed inside
the halogen bulb. The bulb may break if the
glass envelope is scratched or the bulb is
dropped.
•When handling the bulb, DO NOT TOUCH THE
GLASS ENVELOPE.
•Use the same number type and wattage as
originally installed.
•Aiming is usually not necessary after replac-
ing the bulb. When aiming adjustment is nec-
essary, contact a NISSAN dealer or qualified
workshop.
•Do not leave the bulb out of the headlight
reflector for a long period of time as dust,moisture or smoke may enter the headlight
body and affect the performance of the head-
light.
The headlight is a semi-sealed beam type which
uses a replaceable headlight (halogen) bulb. A bulb
can be replaced from inside the engine compart-
ment without removing the headlight assembly.
Contact a NISSAN dealer or qualified workshop, if
you need assistance for bulb replacement.
High beam bulb replacement:
1. Open the bonnet. For details, see “Bonnet
release” in the “3. Pre-driving checks and
adjustments” section.
2. Disconnect the negative (—) battery cable.
3. When the broken bulb is located in the headlight
assembly under the air duct, carefully remove the
air duct, see “Air duct removal” earlier in this
section.
4. Remove the connector from the back of the cover
assembly
j1.
5. Turn the cover assembly 1/4 of a turn in the anti
clockwise direction and remove the cover by dis-
connecting the internal connector
j2.
6. Push and turn the retaining pin to loosen it
j3.
7. Remove the headlight bulb. Do not shake or ro-
tate the bulb when removing it.
8. Install the new bulb in the reverse order of re-
moval.9. Re-install the covers internal connector on the
back of the bulb.
10. Re-install the cover by turning the cover assem-
bly 1/4 of a turn in the clockwise direction.
11. Re-install the connector on the back of the cover
assembly.
12. Where removed (step 3.), re-install the air duct,
bolt and clips in the reverse order of removal.
13. Reconnect the negative (—) battery cable and
close the bonnet.
Low beam bulb replacement:
1. Open the bonnet. For details, see “Bonnet
release” in the “3. Pre-driving checks and
adjustments” section.
2. Disconnect the negative (—) battery cable.
3. When the broken bulb is located in the headlight
assembly under the air duct, carefully remove the
air duct, see “Air duct removal” earlier in this
section.
4. Remove the connector from the back of the bulb
assembly
j4.
5. Turn the bulb assembly 1/8 of a turn in the anti
clockwise direction and remove the headlight
bulb
j5.
6. Install the new bulb in the headlight body by turn-
ing it clockwise until it is securely sealed within
the headlight body.
7. Re-install the connector on the back of the bulb
assembly.
8-28Maintenance and do-it-yourself