2014 NISSAN QASHQAI buttons
[x] Cancel search: buttonsPage 159 of 338

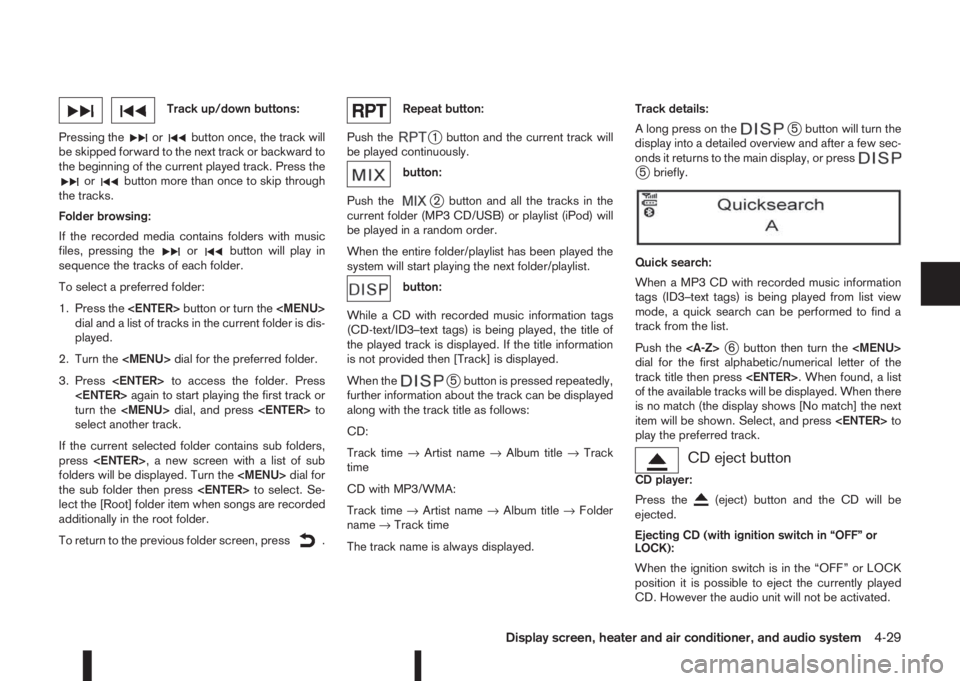
Track up/down buttons:
Pressing the
orbutton once, the track will
be skipped forward to the next track or backward to
the beginning of the current played track. Press the
orbutton more than once to skip through
the tracks.
Folder browsing:
If the recorded media contains folders with music
files, pressing the
orbutton will play in
sequence the tracks of each folder.
To select a preferred folder:
1. Press the
Page 164 of 338
![NISSAN QASHQAI 2014 Owner´s Manual 2) Select the audio unit shown as [My Car].
3) Follow the instructions in the owner’s manual
for the Bluetooth® enabled device to estab-
lish a connection with the audio unit.
4) Enter the PIN code NISSAN QASHQAI 2014 Owner´s Manual 2) Select the audio unit shown as [My Car].
3) Follow the instructions in the owner’s manual
for the Bluetooth® enabled device to estab-
lish a connection with the audio unit.
4) Enter the PIN code](/manual-img/5/40326/w960_40326-163.png)
2) Select the audio unit shown as [My Car].
3) Follow the instructions in the owner’s manual
for the Bluetooth® enabled device to estab-
lish a connection with the audio unit.
4) Enter the PIN code shown on the relevant
device with the device’s own keypad, and
press the confirmation key on the device it-
self.
Refer to the relevant Bluetooth® device own-
er’s manual for further details.
[Sel. device]:
The paired device list shows which Bluetooth® au-
dio or mobile phone devices have been paired or
registered with the Bluetooth® audio system. If the
list contains devices then select the appropriate de-
vice to connect to the Bluetooth® audio system.
The following symbols (where fitted) indicate the
capability of the registered device:
•: Mobile phone integration
•: Audio streaming (A2DP – Advanced Audio
Distribution Profile)
[Del. device]:
A registered device can be removed from the Blue-
tooth audio system. Select a registered device then
press
[Bluetooth]:
If Bluetooth® has been switched off a notification
message [ON/OFF] appears when you select [Blue-
tooth] from the phone menu (press
). To switchthe Bluetooth® signal on, press
follow up screen will appear. Then select [ON] and
press
menu screen.
Bluetooth®audio streaming main
operation
Turn the ignition switch to the Acc or ON position.
If the audio system was turned off while the Blue-
tooth® audio was playing, pressing the<
> but-
ton will start the Bluetooth® audio streaming.
MEDIA button:
To operate the Bluetooth® audio streaming use the
following method:
•Press
shown.
The type of display,
jAorjB , shown on the audio
system can vary depending on the Bluetooth® ver-
sion of the device.
Fast Forward (Cue), Fast
Reverse (Review) buttons:
When the
(Cue) or(Review) button is
pressed continuously, the track will be played at
high speed. When the button is released, the track
will be played at normal playing speed.
Track up/down buttons:
Pressing the
orbutton once, the track will
be skipped forward to the next track or backward to
the beginning of the current played track. Press the
orbutton more than once to skip through
the tracks.
mbutton
If the song contains music information tags (ID3–
tags), the title of the played song will be displayed.
If tags are not provided then the display will not
show any messages.
When the
button is pressed repeatedly fur-
ther information about the song can be displayed
along with the song title.
A long press on
will turn the display into a
detailed overview which after a few seconds returns
to the main display; or press
briefly.
NAA1203
4-34Display screen, heater and air conditioner, and audio system
Page 168 of 338

For details, see the separately provided NissanCon-
nect Owner’s Manual.
MAIN OPERATION
The audio unit can be operated by using the con-
trols on the steering wheel.
jASeek up/Seek down buttons
jBVolume control buttons
To use the steering wheel audio switch, push the
power “ON” button of the audio unit with the ignition
switch in either the Acc or ON position.
mormSeek up/Seek down
button
– Preset station change (radio mode)
Push the
orbutton to select one of the
preset radio stations.
– Seek tuning (radio mode)
Push and hold the
orbutton to start the
tuning mode. The radio tuner seeks from low to
high or high to low frequencies and stops at the
next broadcasting station.– Track up/down (in CD/USB/iPod/BT Audio
modes)
Push the
orbutton to select the next
track or to return to the beginning of the present
track. Push several times to skip forward or skip
back through the tracks.
mVolume control buttons
Push the—or+ button to adjust the volume
level.LNV2389Z
NAA1383
NISSANCONNECT (where fitted) STEERING WHEEL SWITCH FOR AUDIO CONTROL (where fitted)
4-38Display screen, heater and air conditioner, and audio system
Page 285 of 338

Battery (Type A)
Check the fluid level in each cell. It should be be-
tween the UPPERj1 and LOWERj2 level lines.
If it is necessary to add fluid, add only distilled water
to bring the level to the indicator in each filler open-
ing.Do not overfill.
1. Remove the cell plugs
jA using a suitable tool.
j1OK
j2ADD
2. Add distilled water up to the UPPER level line
j1.
If the side of the battery is not clear, check the
electrolyte water level by looking directly above
the cell, as illustrated.
3. Tighten cell plugs.
CAUTION
Do not overfill battery cells. Excessive electrolyte
may leak out of the battery during charging, and
cause paint damage.
Maintenance free battery (Type B)
For a maintenance free battery it is not required to
check the fluid level. However, NISSAN recom-
mends to visually check the green indicator
jA sta-
tus periodically. If it is not visible, replace the battery
as soon as possible.
Reinitialisation procedure after battery
reconnection
If the battery has been reconnected, check the fol-
lowing items:
•Clock setting (where fitted). For details, see “Ve-
hicle information display” in the “2. Instruments
and controls” section, or the separately provided
NissanConnect Owner’s Manual, or the audio
device descriptions in “FM AM radio with CD
player (where fitted)” in the “4. Display screen,
heater and air conditioner, and audio system”
section.
•Reset the desired radio stations to the preset
station buttons. For details, see the audio device
descriptions in the “4. Heater and air conditioner,
and audio system”.
Models with Stop/Start System
•Ensure that the battery fitted is the special bat-
tery that is enhanced with regard to the charge-
discharge capacity and life performance. Avoid
using any other battery for the Stop/Start Sys-
tem, as this may cause early deterioration of the
battery or a malfunction of the Stop/Start Sys-
tem. It is recommended that a Genuine NISSAN
battery is fitted. For more information, contact a
NISSAN dealer or qualified workshop.
•If the battery terminal is disconnected (for bat-
tery replacement, etc.) and then reconnected,
there may be some delay before the Stop/Start
System reactivates.
DI0137MAZ
NDI688ZIndicator
NDI920Z
Maintenance and do-it-yourself8-17
Page 287 of 338

Replacement
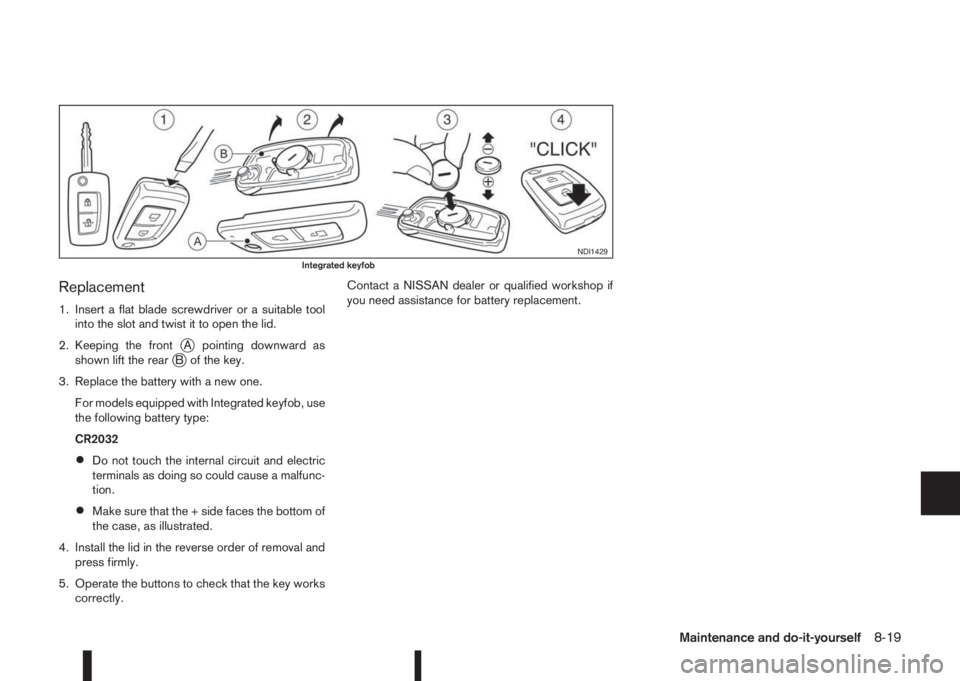
1. Insert a flat blade screwdriver or a suitable tool
into the slot and twist it to open the lid.
2. Keeping the front
jA pointing downward as
shown lift the rearjB of the key.
3. Replace the battery with a new one.
For models equipped with Integrated keyfob, use
the following battery type:
CR2032
•Do not touch the internal circuit and electric
terminals as doing so could cause a malfunc-
tion.
•Make sure that the + side faces the bottom of
the case, as illustrated.
4. Install the lid in the reverse order of removal and
press firmly.
5. Operate the buttons to check that the key works
correctly.Contact a NISSAN dealer or qualified workshop if
you need assistance for battery replacement.
NDI1429Integrated keyfob
Maintenance and do-it-yourself8-19
Page 288 of 338

Replacement
1. Slide the locking pin to the unlock position.
2. Remove the key.
3. Insert a flat blade screwdriver or a suitable tool
into the slot and twist it to open the lid.
4. Replace the battery with a new one with the same
specifications.
For models equipped with Intelligent Key, use
the following battery type:
CR2032
•Do not touch the internal circuit and electric
terminals as doing so could cause a malfunc-
tion.
•Make sure that the + side faces the bottom of
the case, as illustrated.
5. Install the lid in the reverse order of removal.6. Operate the buttons to check that the key works
correctly.
Contact a NISSAN dealer or qualified workshop
if you need assistance for battery replacement.
WARNING
Be sure the ignition switch is in the “OFF” or
LOCK position. Otherwise the cooling fan or the
engine may start to operate suddenly.
1. Visually inspect each belt for signs of unusual
wear, cuts, fraying or looseness. If the belt is in
poor condition or loose, have it replaced or ad-
justed by a NISSAN dealer or qualified work-
shop.
2. Have the belts checked regularly for condition
and tension in accordance with the maintenance
schedule as shown in a separately provided War-
ranty Information and Maintenance booklet.
NDI1455Intelligent Key
DRIVE BELTS
8-20Maintenance and do-it-yourself
Page 328 of 338

Spare tyre ............................................................................. 6-2
Spark plugs (Petrol engine models) ..................................... 8-21
Speed limiter ....................................................................... 5-38
Speed limiter operations ...................................................... 5-39
Speedometer ........................................................................ 2-2
Starting
– Before starting the engine ................................................ 5-2
– Jump-starting ........................................................ 6-11, 8-18
– Precautions when starting and driving .............................. 5-3
– Push-starting ................................................................. 6-13
– Starting engine .............................................................. 5-15
Steering
– Electric power steering system ...................................... 5-57
– Phone operating buttons ................................................ 4-44
– Steering lock ........................................................ 5-11, 5-14
– Steering wheel adjustment ............................................. 3-18
– Steering wheel switches for hands-free telephone
control ........................................................................... 4-44
– Steering-wheel switch for audio control ......................... 4-38
– Telephone button ........................................................... 4-39
Stop/Start System ............................................................... 5-22
Storage ............................................................................... 2-42
– Bottle holder .................................................................. 2-44
– Coat hooks ................................................................... 2-44
– Console box .................................................................. 2-43
– Cup holder .................................................................... 2-44
– Glove box ...................................................................... 2-42
– Luggage hooks ............................................................. 2-47
– Luggage/boot compartment ........................................... 2-47
– Map pockets ................................................................. 2-44
– Roof rail ........................................................................ 2-45
– Seat pockets ................................................................. 2-44
– Storage trays ................................................................. 2-42
– Sunglasses holder ......................................................... 2-43
Sun visors ........................................................................... 3-18
Sunshade
– Sunshade operation ...................................................... 2-50Super Lock system ............................................................... 3-8
– Emergency situations ....................................................... 3-9
– Power door lock switch ................................................. 3-11
Supplemental Restraint System ........................................... 1-29
Supplemental Restraint System (air bag system)
– Air bag system .............................................................. 1-29
Switch
– Defogger switch ............................................................ 2-35
– Fog light switch ............................................................. 2-38
– Front passenger air bag switch ...................................... 1-34
– Headlight and turn signal switch .................................... 2-36
– Headlight cleaner switch ................................................ 2-40
– Ignition switch positions ................................................. 5-13
– Ignition switch push button ............................................ 5-12
– Power door lock switch ................................................. 3-10
– Precautions on push-button ignition switch operation ..... 5-12
– Push-button ignition switch ............................................ 5-12
– Room light control switch .............................................. 2-50
– Wiper and washer switch .............................................. 2-32
Switch - Defogger switch
– ThermaClear ................................................................. 2-34
System operation ................................................................ 5-41
T
Tachometer ........................................................................... 2-2
Temporary-use spare tyre ...................................................... 6-2
ThermaClear Heated Windscreen
– ThermaClear Heated Windscreen button ....................... 2-34
Three-point type seat belts .................................................. 1-11
Three-way catalyst (Petrol engine models) ............................. 5-9
Tilting steering wheel ........................................................... 3-18
Towing
– Recommended towing for four-wheel drive (4WD)
models .......................................................................... 6-15
10-8Index